
Have you ever wanted to accomplish a complex photo manipulation like changing someone’s eye color realistically and professionally? Well, thankfully Photoshop has all the tools we need to accomplish this task without much fuss!
My name is Skyler, and I’ve been using Photoshop on a personal and professional level for well over a decade – and today I’ll be showing you how to change a person’s eye color in Photoshop.
If you’ve ever attempted to manipulate a photo in this way, I’m sure you understand how difficult it can be to accomplish this edit believably. So how can we manage an edit on this level without hiring a professional?
All we’ll need is a few key Photoshop tools – the Quick Selection tool and the Hue and Saturation Layer function in particular! If this sounds like a manipulation you’d like to be capable of accomplishing, you’ll want to follow along below and learn how to utilize this tool for yourself!
Table of Contents
Step 1: Make a Selection
The first step in accomplishing this manipulation is to select the area you’d like to edit. This means using one of Photoshop’s many Selection Tools, like the Magic Wand Tool, Lasso Tool, or Quick Selection Tool.
I’ll be using Photoshop’s Quick Selection Tool, but you’re free to use any of the Selection tools the program offers.

The Quick Selection Tool in particular allows you to use the selection feature like a brush, so all you have to do is paint over your subject or desired area.
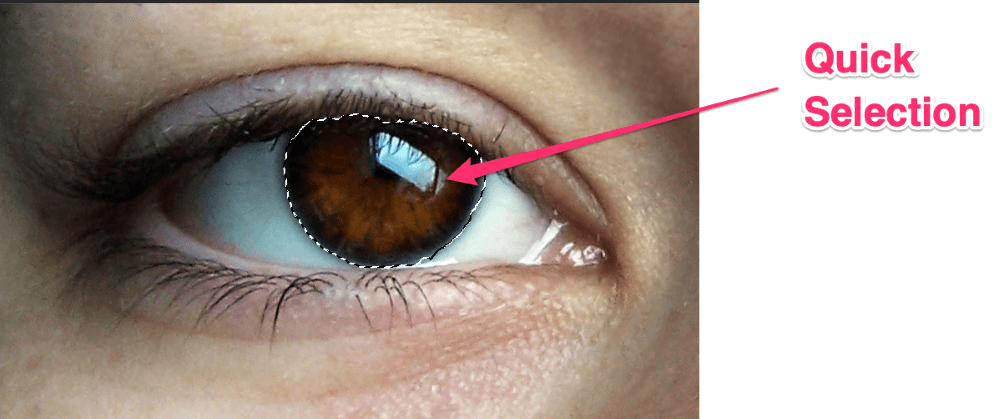
Once you’ve selected your eye(s), you can move on to adding a Hue/Saturation Layer.
Step 2: Hue & Saturation Layer
There are a few ways we can bring up the Hue & Saturation Layer.
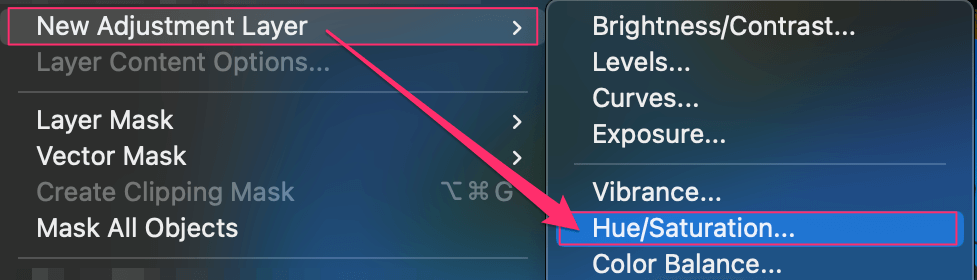
We can find this function by navigating to Layer > New Adjustment Layer > Hue/Saturation, or we can click the New Fill Layer button, which is available at the bottom of your Layers Panel.

After clicking the New Fill Layer Menu button, you’ll be asked to choose a selection from a drop-down. From here all you have to do is choose Hue/Saturation from this menu, and a new layer will appear in your Layers Panel.
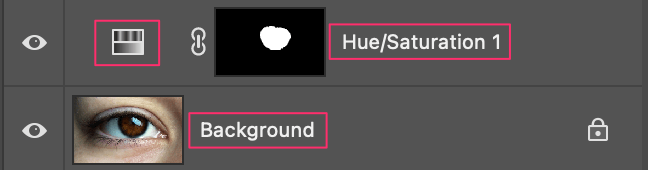
Once your Layers Panel looks something like this, you’re set to move on to adjusting the settings of the Properties panel for your hue/saturation layer.
Step 3: Adjusting the Properties Panel
Great! Once you’ve added the Hue/Saturation layer, its Properties Panel should become available to you.
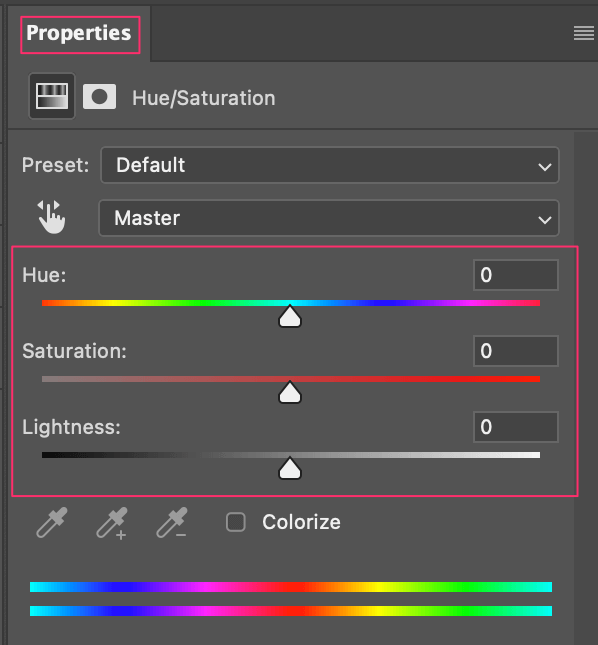
In the Properties Panel, you’ll see the Hue, Saturation, and Lightness Sliders.
- Hue: This slider will adjust the color of all the objects in your image to your selection.
- Saturation: On the other hand, this slider will either add to or deplete the level of color intensity in your image.
- Lightness: This will then manipulate the Contrast Levels in your image.
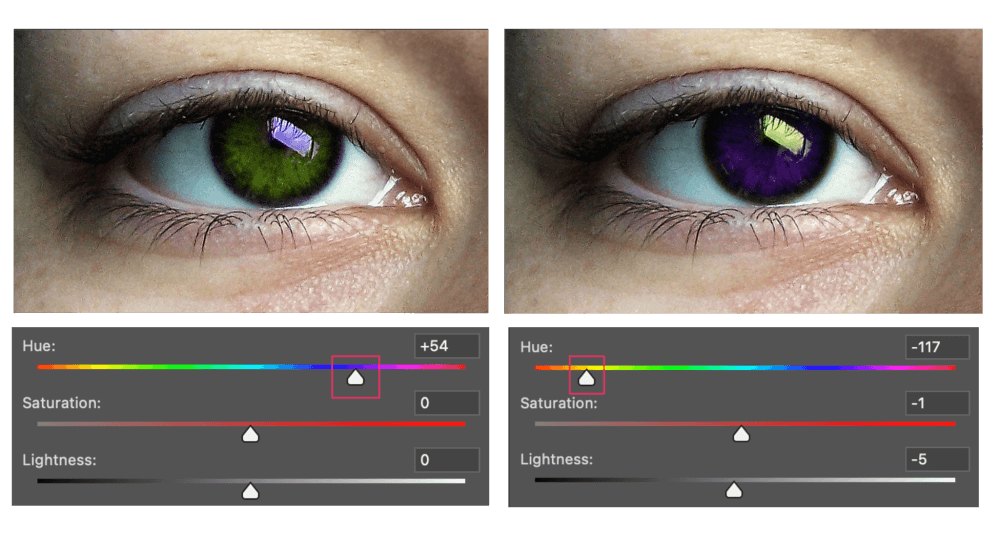
For example – from the original brown eyes in the image, I was able to manipulate the hue slider until achieving a beautiful green, and otherworldly purple! For the green, I set my hue to +54, and the purple is -117.
You can further manipulate or use any, even all of these sliders to manipulate your eye color until you’re satisfied!
Conclusion
So now that you’ve managed an edit on this level without hiring a professional, how do you feel?
Hopefully, you’re more confident in your stellar Photoshop skills – and don’t forget that you did it all with only the need of a few key Photoshop tools – the Quick Selection tool and the Hue and Saturation Layer! Truly a job well done!