
There are multiple ways to change the Opacity in Photoshop. The quickest way is to adjust the slider beside Opacity in the Layer’s Panel.
Greetings to you, internet reader. I’m glad you found this tutorial to aid you in your Photoshop quest.
I’m Jayde, and I’ve been creating in Photoshop since 2009. In this article, I’ll show you how to change the Opacity of a layer, including how to work with blending modes, fill, and text as well.
Table of Contents
Key Takeaways
- The Opacity can be adjusted in the Layers panel or the fx box.
- Blending Modes are like glass lenses that affect how the layer below is seen.
- Fill might seem to do the same thing as Opacity at first, but fill only affects the opacity of the fill of a layer.
- Gradients can also be used within a Layer Mask to adjust the Opacity/Transparency of a layer.
- Working with the Fill of Text, we can adjust just the Opacity of the text’s fill.
- Use the shortcut Ctrl/Command + Z to Undo any mistakes.
- Use the shortcut Ctrl/Command + I to Invert your layer mask.
Note: The screenshots from this tutorial are taken from the Adobe Photoshop Windows version. Mac or other versions can look different.
Check out this YouTube Video covering Photoshop Opacity.
4 Ways to Change Opacity in Photoshop
Let’s go over four different methods for changing the Opacity of a layer.
Method 1: Opacity Slider
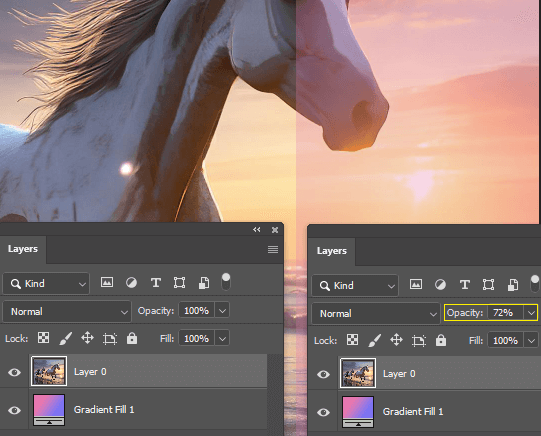
Step 1: You can change the Opacity of a layer here. Doing this will affect the whole layer/image.
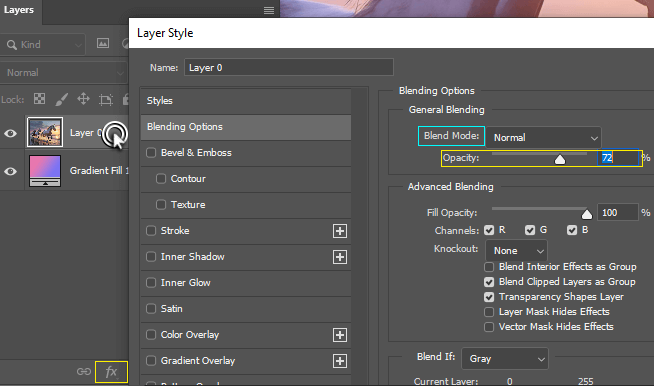
Step 2: Alternatively, double-click on the layer in the layer’s panel. A box will open, and you’ll see the long Opacity slider here.
Another way to open the Layer Style box is to click on the fx symbol.
Let’s talk about Blending Modes, which are, yet another way to adjust the Opacity of a layer.
Method 2: Blending Modes
Each Blending Mode is like that of a glass lens, affecting the way the layer below it appears.
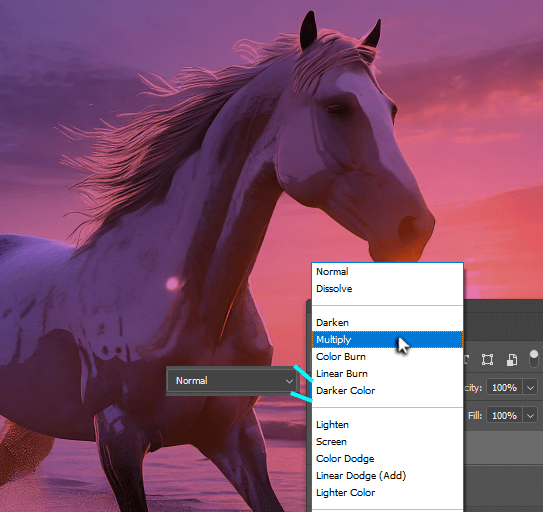
Example 1: Blending Modes that darken make dark pixels even darker, while making white pixels transparent.
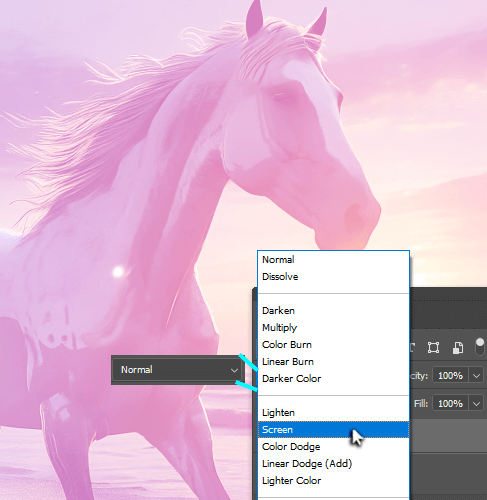
Example 2: Blending Modes that lighten make light pixels even lighter, while making black pixels transparent.
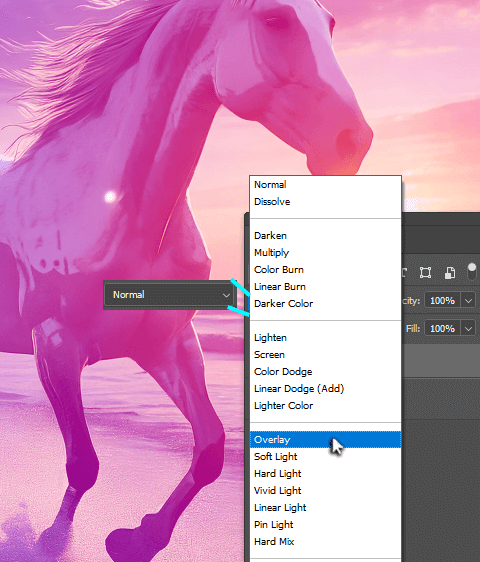
Example 3: Blending modes that contrast make pixels that are specifically 50% gray become transparent, while lightening light pixels and darkening dark pixels.
Method 3: Fill
Fill might appear to do the same thing as Opacity, but fill is specifically changing the opacity of what’s filling it, and this works independently of Opacity.
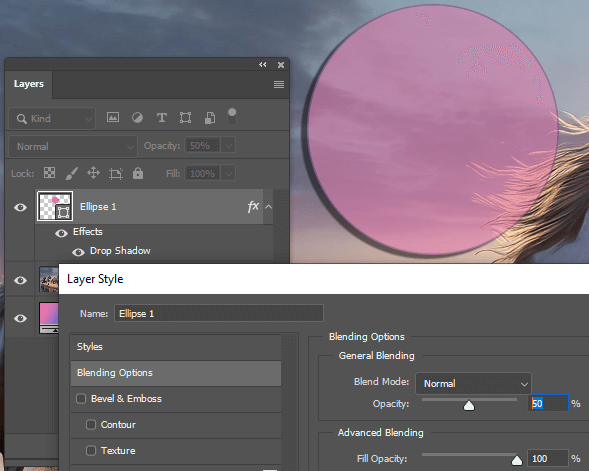
Example: If you have a layer with a drop shadow or any other effect, Opacity will affect the whole thing.
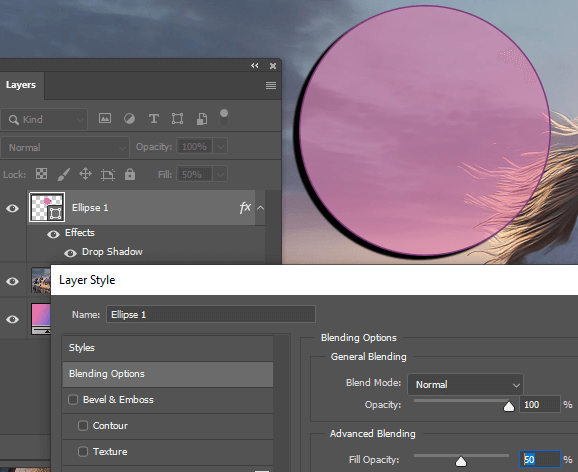
If you adjust the Fill, the other effects remain the same.
Method 4: Gradient
Gradients can also adjust the Opacity of a layer, in different fading patterns, in or out of a Layer Mask.
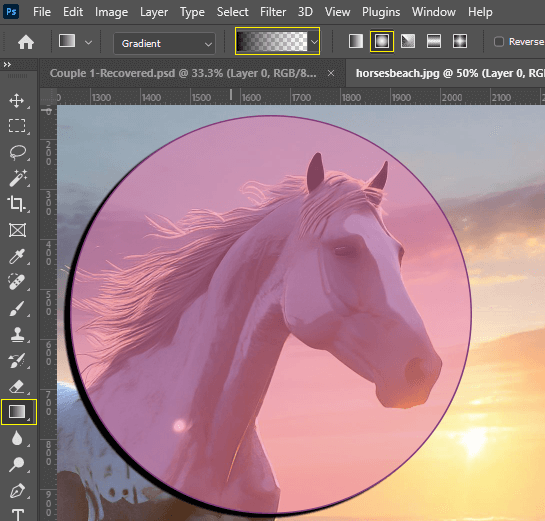
Step 1: Select the Gradient Tool and click on the dropdown in the action bar to select the Foreground to Transparent option.
Make sure your Foreground/Background colors are set to default, with the foreground as black and the background as white.
I have the small square in the action bar selected for Radial Gradient.
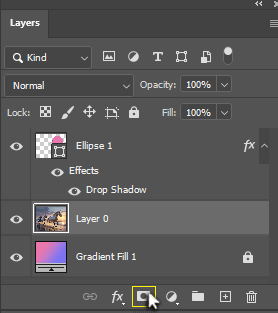
Step 2: Select the layer that you’d like to adjust the opacity for, then click on the Layer Mask symbol.
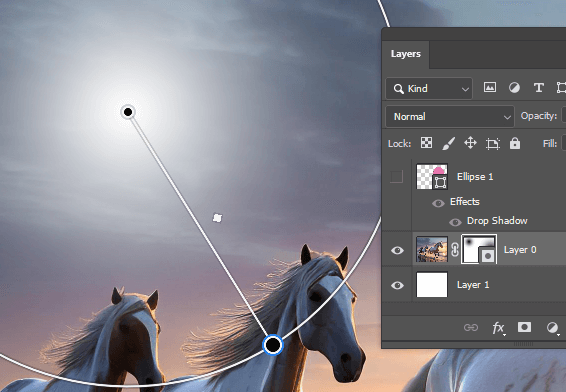
Step 3: With the Gradient Tool, on the Layer Mask, click and drag a line. This will apply the Opacity fade to transparency in any gradient pattern you select.
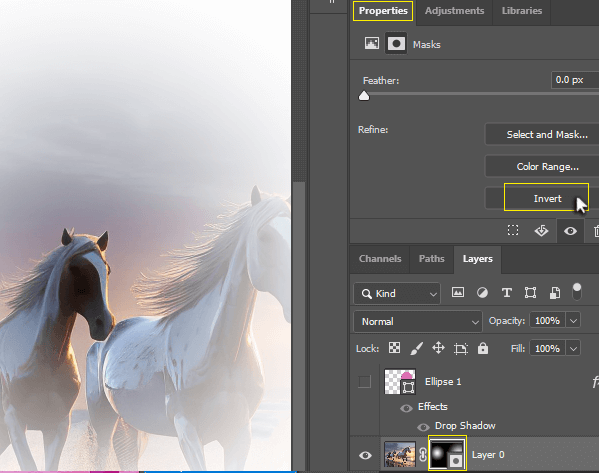
When it comes to layer masks, black conceals and white reveals. If it gets confusing, you can always Invert your mask in the Properties panel, or by using the shortcut Ctrl/Command + I.
Final Thoughts
And just like that, I covered all the ways by which you can adjust the Opacity of a layer. My personal favorite is by using a gradient on a layer mask.
What is your favorite method mentioned here? Did you know you can also apply a Blending Mode to a Group of layers? Let me know in the comments below.
Be sure to check out some of my other Photoshop tutorials, like How to Add Brushes to Photoshop and How to Add/Insert an Image into Photoshop.