
Have you ever wanted to create a more impactful graphic or typeface, but don’t know how to change the color in Photoshop? Choosing the right color can make or break your designs, so you’ll want to understand all the options available for choosing the correct ones!
My name is Skyler. In this tutorial, I’ll show you how to create text and change its colors in Adobe Photoshop.
If this sounds like an ability you’d like to learn, you’ll want to follow the two quick steps below to understand how to utilize color with typeface for your edits and manipulations in the future!
Table of Contents
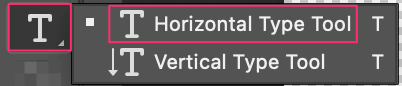
Step 1: Horizontal Type Tool
You can begin by choosing the Horizontal Type Tool in the Photoshop toolbar. Once you’ve selected your Horizontal Type Tool, you can apply it in two ways.
You can either click on your canvas for a Single Line element, or you can drag and create a text box to your liking for Multiple Lines.
For example, here’s what a text box looks like when you click and drag across your canvas.
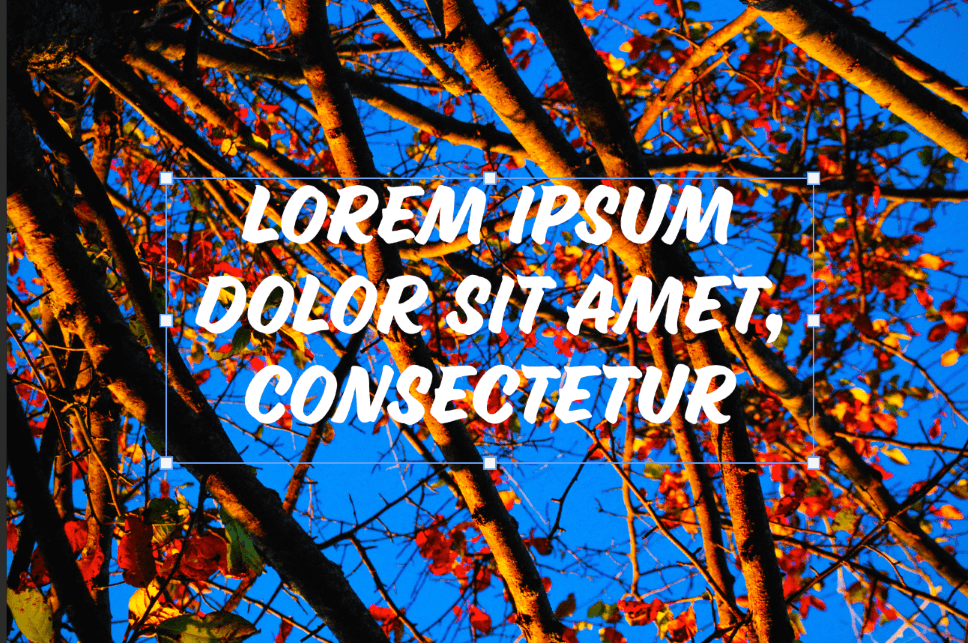
As you can see, the text provided is a placeholder and randomly generated, so you’ll have to edit it to suit your preferences.
Once you’ve highlighted the desired text area, you can get rid of any unwanted text simply by deleting it as you would in any other program. (ie. Word, Google Docs)
Step 2: Adjusting the Character Panel
Open the Character Panel from the overhead menu Type > Panels > Character Panel.

This panel can be intimidating at first as it allows you to edit multiple properties like size, font, color, and more – but don’t worry.
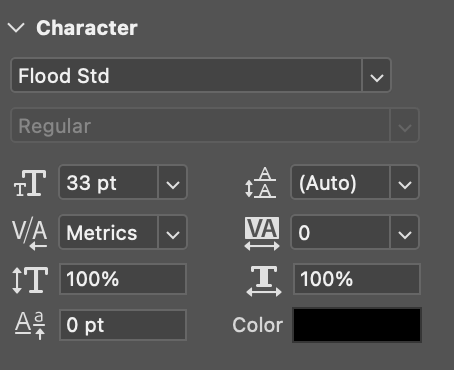
To change the color of your text you’ll only need to select the color box and choose appropriately! Once you’ve found your desired color, all you have to do is click OK and you’re golden.
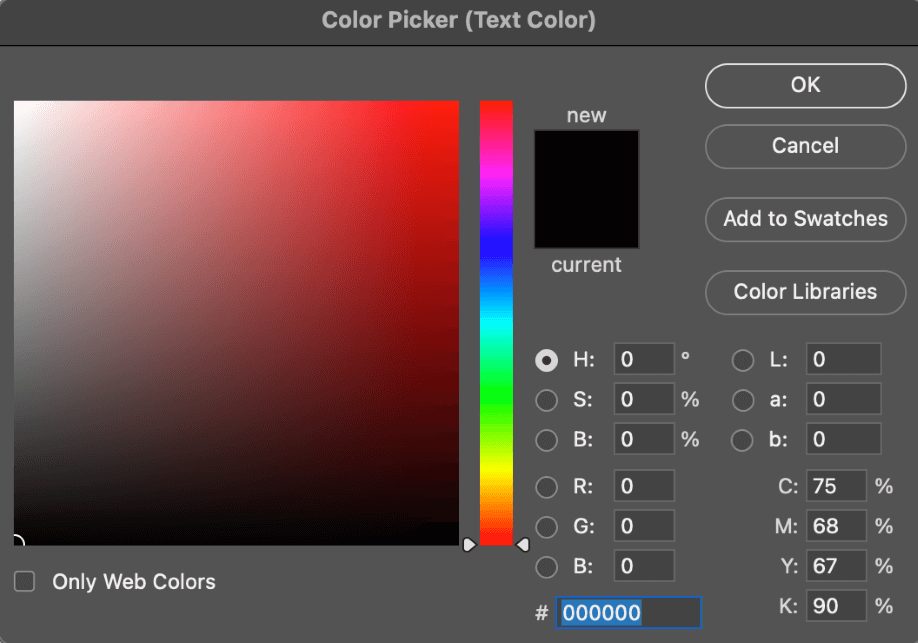
If you’re a perfectionist then you may also want to understand the Color Models available in Photoshop, as they allow for extremely accurate selections.
The most commonly used ones are HSB, RGB, and the Hexadecimal Number.
HSB
HSB stands for Hue, Saturation, and Brightness. Hue is calculated using degrees, from 0 to 360. This is relative to the position on the color wheel. Saturation is how saturated, or vivid the colors appear in an image.
RGB
RGB stands for Red, Green, and Blue. If you’re at all familiar with the color wheel, you know this is the standard for how color is combined and portrayed on our screens every day. Each RGB input can be scaled from 0 to 255.
Hexadecimal
The Hexadecimal number input is the least known, as it’s simply a box in blue on our color picker window. It’s based on a number system used to accurately define and translate colors digitally.
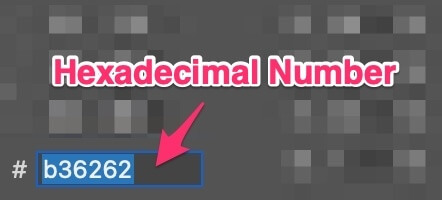
This box is used to input Hexadecimal colors – and is typically taken from a list or source code online.
If you want a specific color and don’t know how to achieve it, try looking up and inputting the hexadecimal number for it!

I went ahead with a more complimentary color scheme choice, so my text really popped, but still, well, complimented the background choice!
Final Thoughts
So now that you’ve learned how to create more impactful graphics or typefaces by changing the color in Photoshop, what will you create?
Remember, choosing the right color can make or break your designs, it’s worth understanding all the options available for choosing the correct ones!