
Facing pen pressure issues in Clip Studio Paint can be a common yet fixable hurdle. There are several easy steps you can take to quickly resolve this problem and resume your creative work.
Hi, I’m Zoe, an illustrator who uses Clip Studio Paint. I’ve had my fair share of pen pressure issues. Recently, my usual fix of updating tablet drivers didn’t work. After some frustration, I realized the problem was surprisingly simple – the brand-new nib of my pen wasn’t screwed on properly. This small hardware issue was causing all the trouble!
In this guide, we’ll explore the various pen pressure problems that can occur in Clip Studio Paint, guide you through troubleshooting solutions to fix them, and provide links to additional support if you can’t resolve the issue on your own.
Let’s dive in!
Table of Contents
- Key Takeaways
- 3 Common Pen Pressure Problems in Clip Studio Paint
- Solution 1: Updating Clip Studio Paint
- Solution 2: Updating Drivers
- Solution 3: Adjusting Settings in Clip Studio Paint
- Solution 4: Resetting Clip Studio Paint Preferences
- Solution 5.1: Troubleshooting pen pressure issues on Windows
- Solution 5.2: Troubleshooting pen pressure issues on Mac
- Solution 6: Reinstalling Clip Studio Paint
- Other tips and tricks to fix pen pressure issues
- Resources for further help and support
- Final Thoughts
Key Takeaways
- Keeping the software and tablet drivers updated can resolve many pen pressure problems.
- Configuring pen pressure settings and resetting tool settings to default within Clip Studio Paint can help.
- On Windows, adjusting tablet settings and disabling Windows Ink can be effective, while on Mac, updating macOS and resetting SMC and NVRAM might help.
- Check for conflicting software, test the pen on another application, and inspect your hardware.
Read on to learn the best tips for fixing pen pressure issues in Clip Studio Paint.
3 Common Pen Pressure Problems in Clip Studio Paint
Clip Studio Paint’s realistic pen pressure simulation is a major draw for artists, but users may encounter pen pressure problems. Before exploring solutions, let’s identify typical pen pressure issues in Clip Studio Paint:
- No Response to Pressure: The pen does not respond to pressure changes at all. This might indicate a driver issue or a problem with the tablet’s hardware.
- Inconsistent Pressure: Variability in pen pressure during a stroke, leading to irregular line thickness or opacity. This could be caused by incorrect settings in Clip Studio Paint, an outdated or corrupted driver, or a hardware issue with the tablet.
- Over-Sensitivity or Under-Sensitivity: The pen reacts too much or little to pressure changes, making control difficult. These issues often relate to the pressure sensitivity settings within the software or the tablet’s configuration.
These are general guidelines, and the exact cause can vary depending on the individual setup and circumstances.
Solution 1: Updating Clip Studio Paint
When facing pen pressure issues in Clip Studio Paint, the first recommended step is to ensure the software is up to date. Here’s how:
Step 1: Open the program, and go to Help > Version Information (Windows) or Clip Studio Paint > Version Information (Mac). This will display your current version.

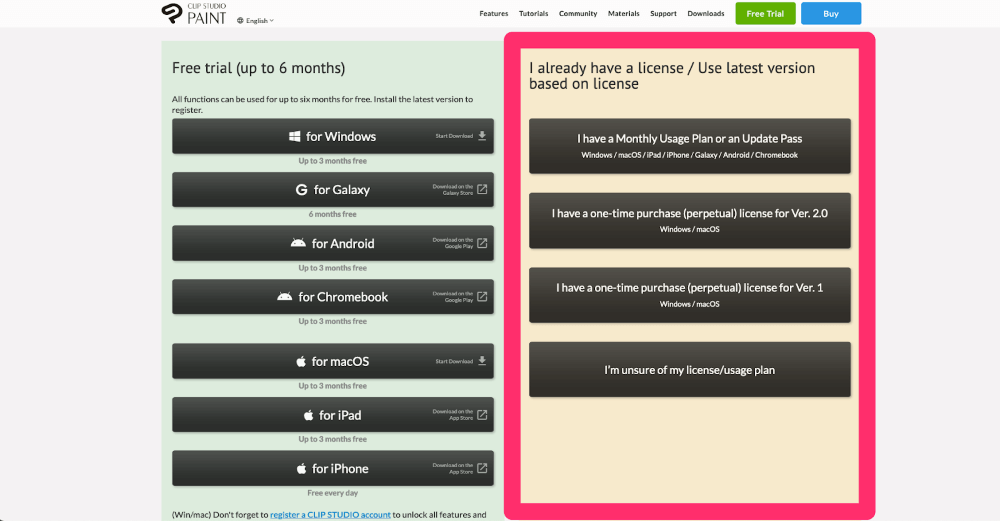
Step 2: Visit the Clip Studio Paint update page to see the latest version available. If your version is older, proceed to update if possible.
Note: If you have a one-time purchase of Version 1 or 2, or if you’re a monthly subscriber, you may have different update privileges. Users with an annual update pass generally receive all updates.
Step 3: Follow the instructions on the Clip Studio Paint website to download and install the latest version. This can resolve various compatibility and bug-related issues that might be affecting pen pressure functionality.
Solution 2: Updating Drivers
Another common cause of pen pressure problems in Clip Studio Paint is outdated or incompatible tablet drivers. To ensure that your tablet is fully supported and compatible with Clip Studio Paint, it’s important to regularly update the drivers.
Here are links to download the latest drivers for popular tablet brands:
- Download Wacom Drivers
- Download Huion Drivers
- Download XP-Pen Drivers
- Download Gaomon Drivers
- Download Ugee Drivers
After downloading and installing the latest drivers, restart your computer and then open Clip Studio Paint to check if the pen pressure issue has been resolved.
Solution 3: Adjusting Settings in Clip Studio Paint
Clip Studio Paint offers a variety of pen pressure settings that can be adjusted to suit your preferences. If you’re experiencing issues, it may be worth exploring these settings to see if they can help resolve the problem.
Configure Pen Pressure Settings:
If the pen pressure isn’t working correctly in Clip Studio Paint, you can follow these steps to adjust it:
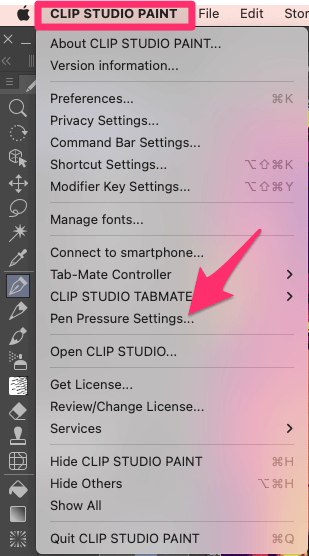
Step 1: Go to Clip Studio Paint > Preferences > Pen Pressure Settings.
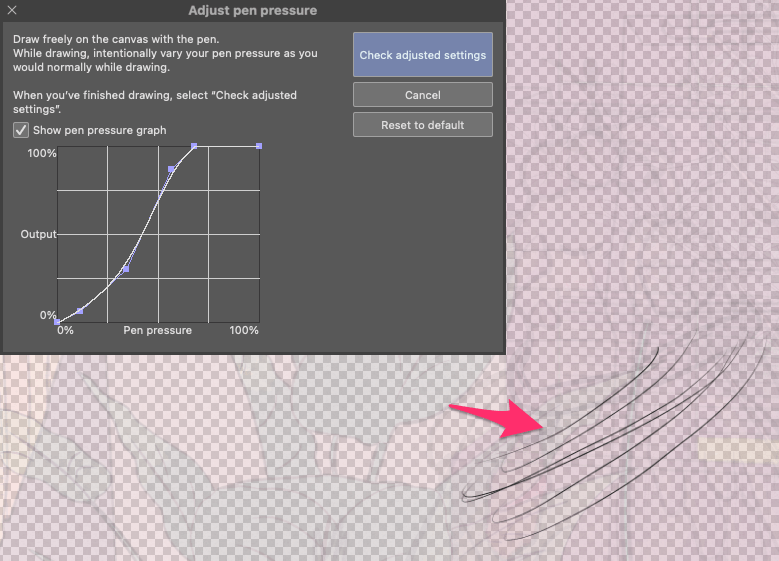
Step 2: In the Adjust Pen Pressure dialog, draw on the canvas with your stylus, intentionally varying your pen pressure. This helps the software calibrate to your specific pressure style.
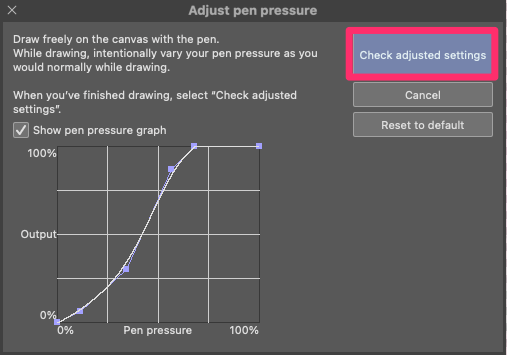
Step 3: After drawing, click on Check adjusted settings. This allows you to test the adjusted pen pressure sensitivity by drawing on the canvas again.
Step 4: You can further adjust the pen pressure sensitivity using the Stronger and Lighter buttons to fine-tune the settings to your preference.
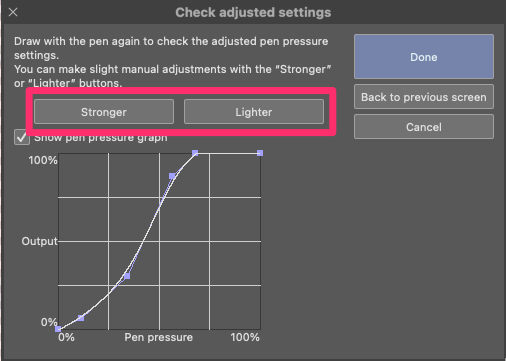
Step 5: For more precise control, you can manually adjust the pen pressure sensitivity using the Pen pressure settings graph in the dialog.
Step 6: Once you’re satisfied with the adjustments, click Done to exit the dialog box. This will apply your pen pressure settings to all tools within Clip Studio Paint.
Reset Tool Settings:
Resetting tools to their default settings can often resolve conflicts or settings changes that may have unintentionally affected the pen pressure sensitivity. Here’s how to do it:
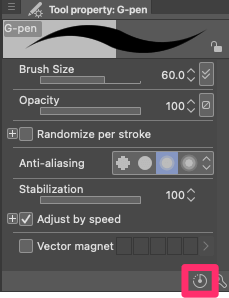
Step 1: Select the tool that isn’t responding as expected.
Step 2: Click on the Reset Selected Sub Tool to Default Settings icon in the Tool Property panel.
Solution 4: Resetting Clip Studio Paint Preferences
This process will revert the software to its default settings, potentially resolving any underlying configuration issues that might be causing the pen pressure problems. Here’s how to reset the preferences:
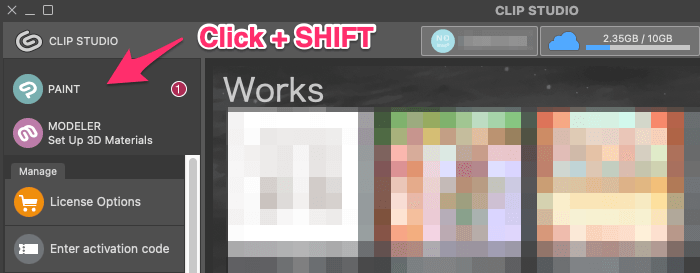
Step 1: Before resetting to defaults, make sure to exit Clip Studio Paint.
Step 2: Launch Clip Studio and then click on Paint while holding down the Shift key.
Step 3: In the Reset to initial defaults dialog, select the following options:
- Tool
- Brush Shape
- Brush Size
- Shortcut Settings
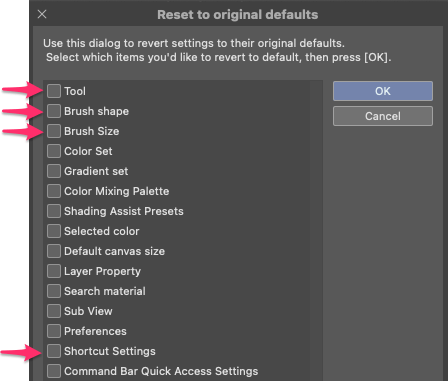
Step 4: Tap OK to erase the settings of the selected items and return them to their default settings.
Resetting settings to default in Clip Studio Paint erases previous configurations, so it’s a good idea to note down any custom settings for reapplication after the reset.
Solution 5.1: Troubleshooting pen pressure issues on Windows
Pen pressure issues in Clip Studio Paint on Windows often stem from clashes between native features, such as Windows Ink, Wintab, or Tablet PC, and the software. Here are some troubleshooting steps you can take to fix them:
Configure Tablet Settings:
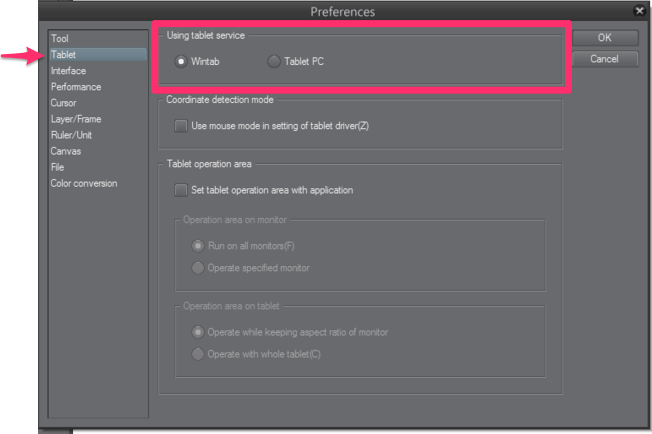
Step 1: Open the Preferences menu in Clip Studio Paint and navigate to the Tablet settings section.
Step 2: You’ll find two options here: Wintab and Tablet PC. Toggle between them to determine which one aligns better with your hardware for optimal performance.
Switch to Mouse Mode:
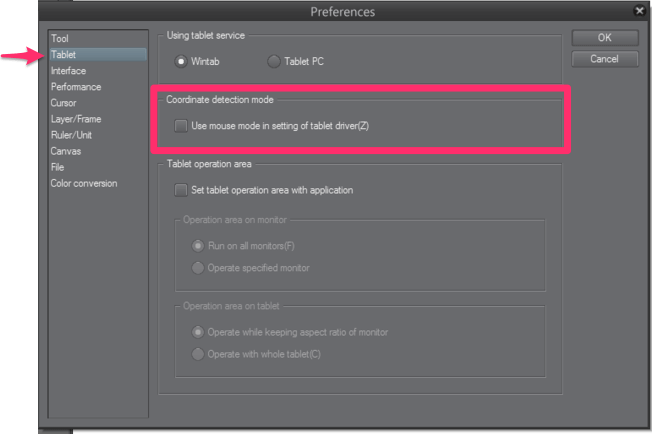
Step 1: In Clip Studio Paint, navigate to Preferences > Tablet and look for an option labeled Use mouse mode.
Step 2: Try activating this option to improve brush responsiveness by simulating mouse movements instead of pen input.
Disable Windows Ink:
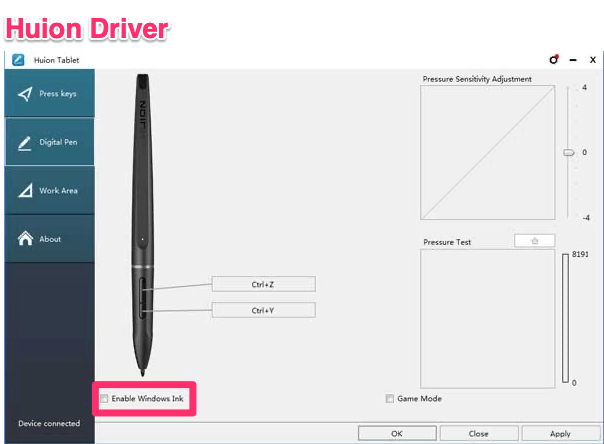
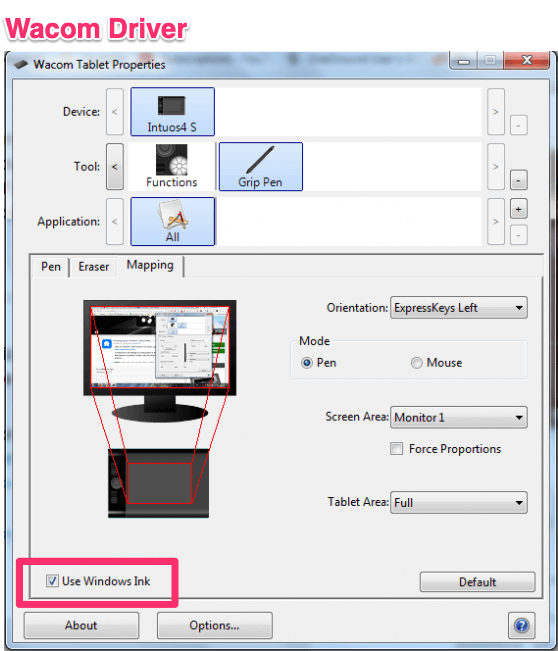
Step 1: Access your tablet’s driver settings through the control panel or the driver’s dedicated utility software.
Step 2: Locate the Pen or Mapping settings tab where the Windows Ink option is present. Uncheck or disable Windows Ink to see if this resolves the pen pressure issue.
Solution 5.2: Troubleshooting pen pressure issues on Mac
If you’re using Clip Studio Paint on a Mac and experiencing pen pressure issues, here are some troubleshooting steps you can take to fix them:
Update your Mac OS:
Make sure that your Mac is running the latest version of the operating system. This can often resolve compatibility issues between Clip Studio Paint and the Mac OS.
To update:
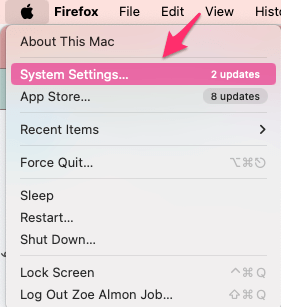
Step 1: Click on the Apple icon in the top left corner of your screen and select System Settings.
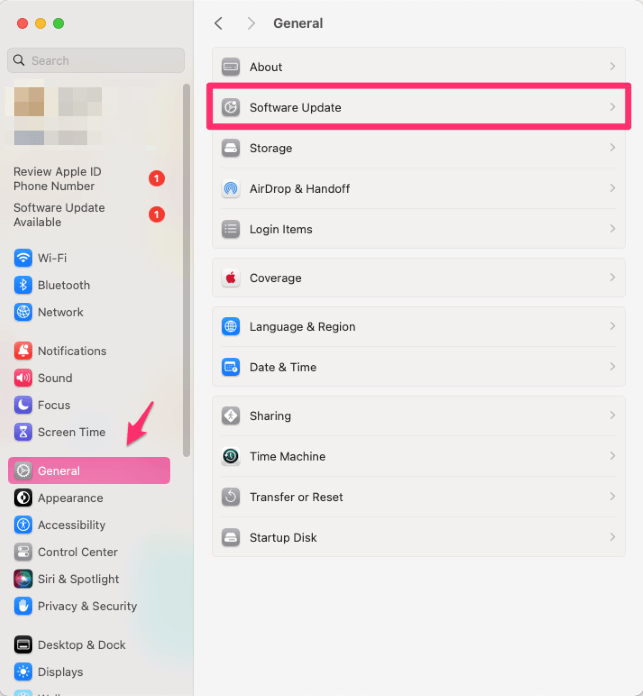
Step 2: Navigate to General > Software Update.
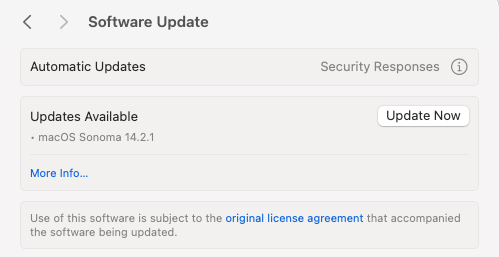
Step 3: Your Mac will check for any available updates. If an update is available, you will have the option to download and install it.
Reset SMC and NVRAM:
Resetting the System Management Controller (SMC) and Non-Volatile Random-Access Memory (NVRAM) can help resolve various hardware-related issues, including pen pressure problems.
To reset the SMC:
- Step 1: Shut down your Mac.
- Step 2: Unplug the power cord.
- Step 3: Wait 15 seconds.
- Step 4: Reconnect the power cord.
- Step 5: Wait 5 seconds, then press the power button to turn on your Mac.
To reset the NVRAM:
- Step 1: Shut down your Mac.
- Step 2: Turn it on and immediately press and hold these keys: Option, Command, P, and R.
- Step 3: Hold these keys for about 20 seconds. Your Mac might appear to restart.
- Step 4: Release the keys.
Note: These instructions may not apply to certain models, and you should refer to the specific guide for your model.
Solution 6: Reinstalling Clip Studio Paint
Reinstalling Clip Studio Paint can resolve persistent pen pressure issues by eliminating corrupted files and settings, ensuring a fresh start with the latest, glitch-free version of the software.
This approach is often the last resort when other troubleshooting methods have failed.
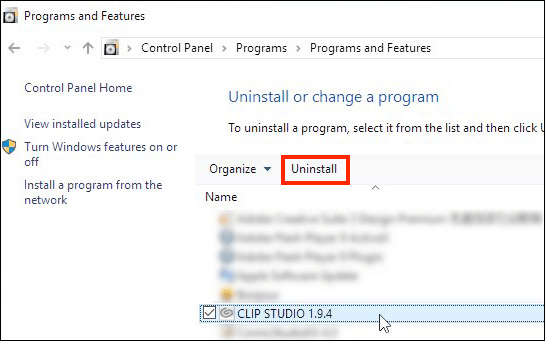
Uninstalling CSP on Windows:
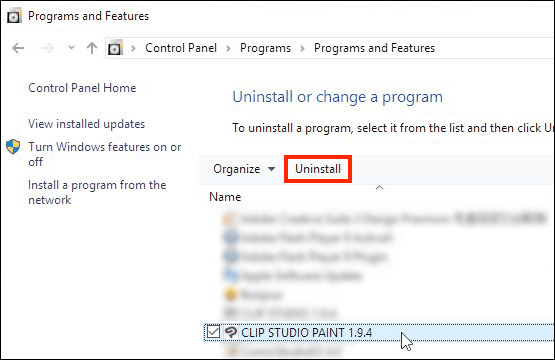
Step 1: Navigate to the Windows Control Panel.
Step 2: Go to Uninstall a Program and remove Clip Studio Paint.
Step 3: Next, uninstall Clip Studio as well.
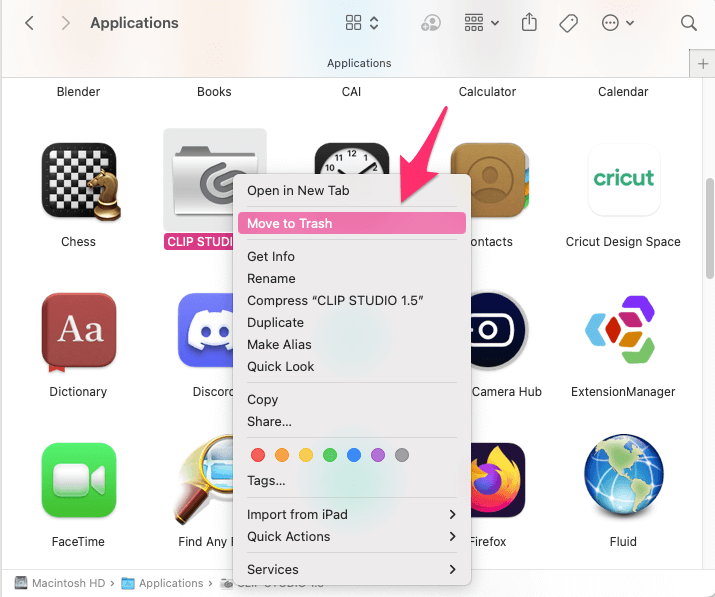
Uninstalling CSP on Mac
Step 1: Open your Applications folder.
Step 2: Right-click on the Clip Studio folder and select Move to Trash.
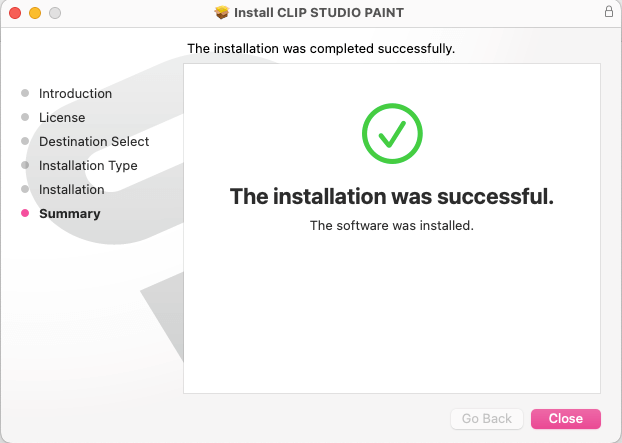
Then, download the latest version of the software and go through the installation process. This process can eliminate glitches that have crept into the system over time, including those affecting pen pressure sensitivity.
Other tips and tricks to fix pen pressure issues
If you’re still experiencing pen pressure problems in Clip Studio Paint, here are some additional tips and tricks that may help:
- Check for conflicting software: Certain software applications, such as antivirus programs or screen recording tools, can interfere with the pen pressure in Clip Studio Paint. Temporarily disable or uninstall any such software to see if it resolves the issue.
- Test Pen on Another Application: To determine if the issue is with Clip Studio Paint or the tablet itself, try using the pen in another drawing application, such as Krita or Gimp.
- Check the Pen Nib: Worn-out pen nibs can cause inconsistent pressure sensitivity. Replace the nib if it looks worn or damaged.
- Try a Different USB Port: If you’re using a USB tablet, try plugging it into a different USB port. This can sometimes resolve issues caused by port malfunctions.
Resources for further help and support
If you’re still struggling with pen pressure problems in Clip Studio Paint, here are some additional resources for further help:
- Contact Support: Reach out to Clip Studio Paint’s support team for assistance.
- Online Resources: Visit Clip Studio Ask and Clip Studio Tips on Clip Studio Paint’s official website for community advice and expert tips.
- Tablet Manufacturer Support: Consult your tablet’s manufacturer support website for device-specific troubleshooting or contact their customer service.
Final Thoughts
Pen-pressure problems can be frustrating, but with the right troubleshooting steps and solutions, these issues can often be resolved. By following the tips and techniques outlined in this guide, you should be able to tackle pen pressure problems on both Windows and Mac systems.
Remember to keep your tablet drivers updated, adjust the pen pressure settings in Clip Studio Paint, and explore additional troubleshooting options if needed.
Have you faced pen pressure issues in Clip Studio Paint? What worked for you? Share your experiences and tips in the comments below to help fellow artists!