
The Clone Stamp tool is one of my favorite tools to use in Photoshop. To use the Clone Stamp Tool, select it from the toolbar, hold Alt/Option, and click on the area you want the brush to use as its source. You can change settings for the stamp on the bar across the top. Go to Window > Clone Source for more tool settings.
In this article, I’ll show you how to use the Clone Stamp tool in Photoshop. This tool is excellent for filling in the less picturesque sections of an image with areas that look good.
Table of Contents
Key Takeaways
- The Clone Stamp tool is located on the toolbar, on the left-hand side of the program window by default.
- The Clone Stamp Tool clones a part of your image to stamp elsewhere.
- You can use the Clone Stamp Tool to remove part of an image that you don’t want.
Without further ado, let’s get started on this tutorial.
Clone Stamp Settings and Use
Note: The screenshots from this tutorial are taken from the Photoshop Windows version. Other versions can look different.
Step 1: Add a new layer on top of your image, so that you can use the Clone Stamp tool non-destructively.
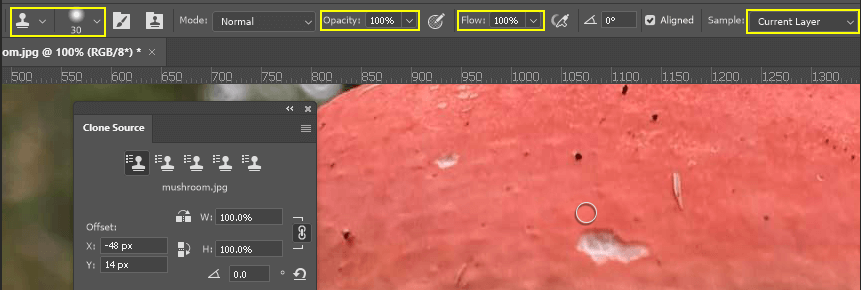
Step 2: With the Clone Stamp tool selected, note the yellow boxes across the top. The first one is for size and feathering options. Then there’s Opacity, Flow, and the Sample dropdown. You can sample from the current layer, current and below, or all layers.
Change the Sample to Current and Below and use the Clone Stamp on your new layer. Window the Clone Source box for even more setting options by going to Window > Clone Source.
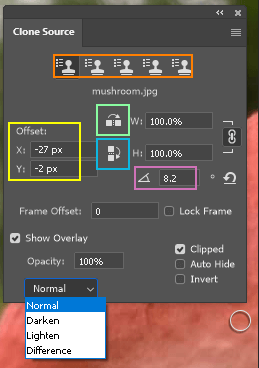
Step 3: The Clone Source panel gives lots of options and information. The orange box shows different slots for clone sources. The yellow box shows how far away you’re painting from your source (and in what direction).
The green box gives you the option to flip the stamp horizontally. The blue box gives you the option to flip the stamp vertically.
The pink box shows by what degree the stamp is rotated. The dropdown shows different blending mode options.
Let’s highlight some of the best features to use with the Clone Stamp.
Rotating the Stamp
Rotating the stamp changes the angle of the image for the source.
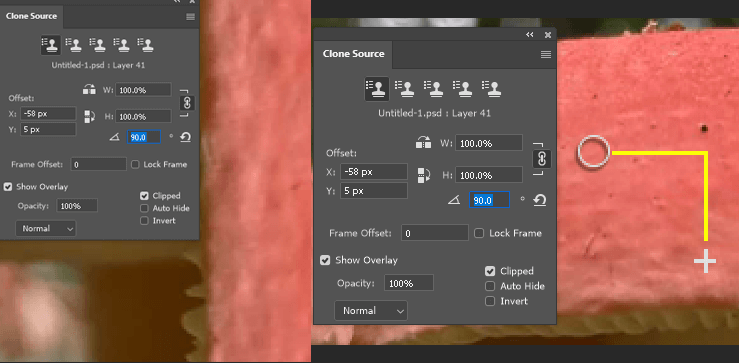
Step 4: I changed the angle of the source to 90 degrees. When I used the clone stamp tool horizontally to the left, the source of the brush went straight down. The clone source is always marked with a + symbol.
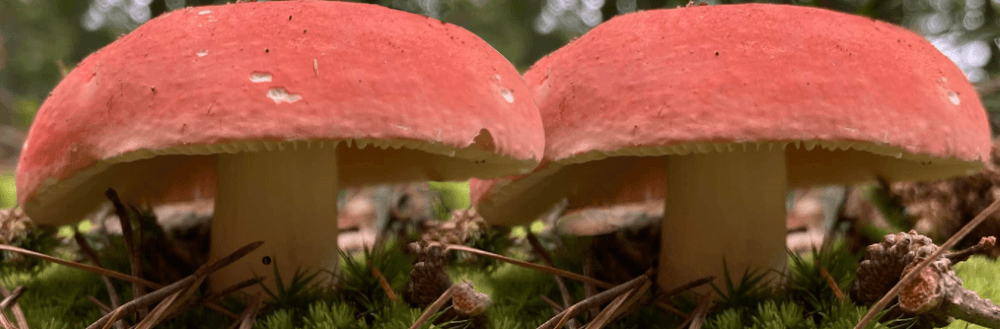
Clone Stamp Horizontal Flip
Step 5: With Flip Horizontal selected, I was able to copy the edge of the mushroom cap in the opposite direction.
Additional Tips
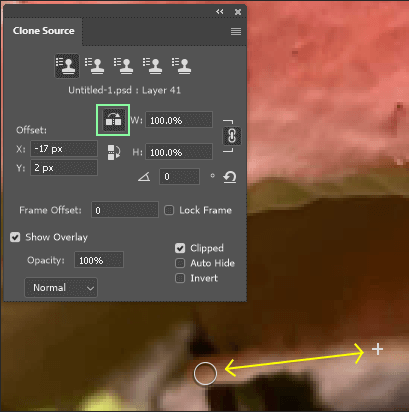
It is possible to select a clone source in a different file or image open in Photoshop, and then use the source in the file of your choosing. Simply click on one of the clone source slots, click on the file’s tab, and use Alt/Option to click where you want to source from.
Change the dropdown at the bottom for different blending modes. Some may be better suited to your image than others.
Here is the final comparison:
Final Thoughts
Can you spot all the differences? I hope you enjoyed this tutorial. Adobe makes it easy to create convincing alternate realities. Feel free to play around with the settings and make something new!
Have you ever used Photoshop to edit your own photographs? Do you use Photoshop for business or pleasure? Let me know in the comments below.