
WMV files are a native format for Windows computers, but playing them on a Mac can be a little tricky. Oftentimes, converting them to MP4 is your best bet. Since macOS does not have a built-in WMV converter, how can you convert WMV to MP4?
You can use an open-source tool like Handbrake, or you can opt for more powerful options like Permute. Of course, you can always try out free online conversion tools, but make sure to check your system for malware after you do.
My name is Tyler, and I’ve helped customers with similar requests plenty of times in my long career as a computer repair tech. So today, I’m going to guide you through some of the best ways to convert a WMV to MP4 on a Mac.
Let’s get into it!
Table of Contents
Key Takeaways
- macOS does not have a direct way to convert WMV to MP4, so you’ll need to use a third-party application to do the job.
- Research different tools to find out if they will watermark your video or lower the quality too much.
- Permute is a great option for converting WMV files to MP4.
- You can also download Handbrake, a free app for converting WMV to MP4.
- Online WMV to MP4 video converters are available but may require uploading personal information and files to the internet, so you should ensure your Mac stays clean with a good malware scanner, such as CleanMyMac X.
3 Different Ways to Convert WMV to MP4 on Mac
WMV or “Windows Media Video,” is a video format that, as you likely know or can tell, is popular on Windows machines. Luckily, Macs also support WMV to an extent. However, iPhones and other mobile devices do not.
So, if you want to watch the video on anything other than a Windows computer or a Mac, then you likely would want to convert it to MP4 as this is a more universal video format.
Method 1: Free Downloadable Conversion Tools
There are many applications that are free to download which would allow you to convert your media from WMV to MP4. When looking at these options, be sure to research the level of quality that you will get out of the conversion tool to ensure that it is up to your standards.
Some video conversion tools also stamp your video with a watermark as well, so if that is something that you don’t like, be sure to do that research.
Some of the popular options that may be worth looking into for a free downloadable conversion tool are VLC, VideoSolo, Wondershare UniConverter, or Handbrake. Out of all the free tools available, Handbrake is my personal favorite, since you don’t have to deal with any watermarks or upsells during the process.
These applications are all different, but will primarily work in the same way. You will open the application, open your video within the application, and choose to convert to MP4.
If you opt for a tool like Handbrake, for instance, the process will look something like this:
Step 1: Open the application from your Dock or Applications folder.

Step 2: Locate your WMV file by clicking Open Source in the upper left corner of the window. The file will open in a preview on the right. Here, you can change things like format, video quality, and compression.
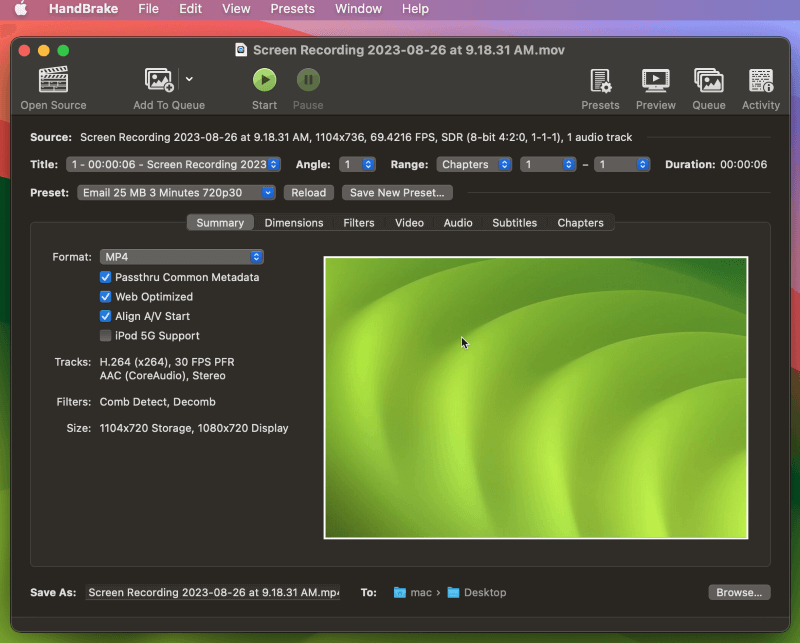
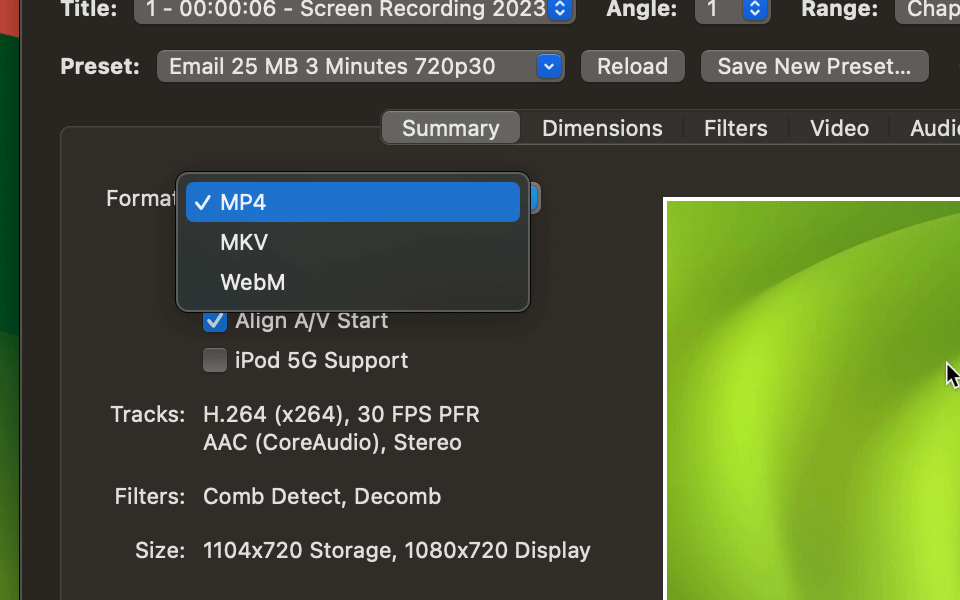
Step 3: To turn your video into an MP4, select the option from the Format dropdown menu.
Method 2: Convert WMV to MP4 using Permute
For our readers who require a more high-quality video and/or audio than the free converters or the websites can offer, there are also other options that may better suit your needs. One of these is the Permute application that you can get from Setapp.
Permute offers many different kinds of video and audio conversions, WMV to MP4 included.
Similar to the other downloadable tools, you will open your video with this application, choose that you would like to convert it to MP4, and then save the final video. The process looks like this:
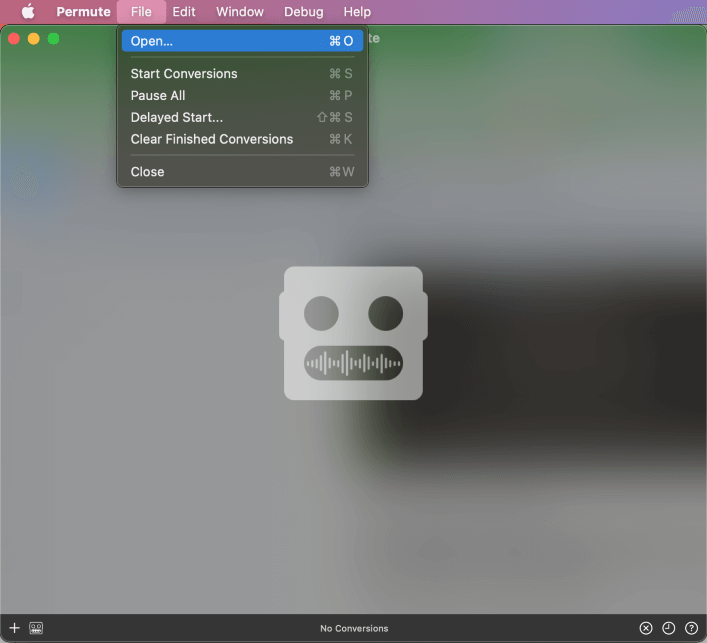
Step 1: Find your file by clicking File from the top of your screen and selecting Open from the dropdown.
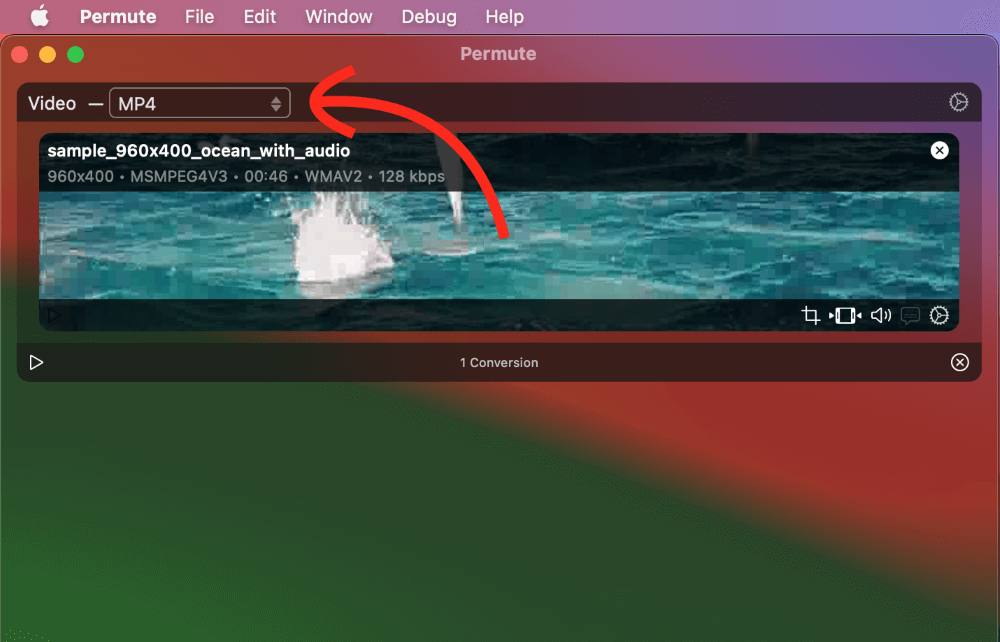
Step 2: Once you find your file, select your video preset option in the upper left corner.
Step 3: Hit the Play button to start the conversion process. It should only take a few seconds for a small file. But it could take up to a few minutes for larger files.

Method 3: Use an Online Conversion Tool
There are also reliable options for conversion tools available online that do not require a download. Personally, I would be very careful uploading any videos that may contain personal information, show personal things such as the outside of your house, etc. to a website that you are unfamiliar with.
Also, if you do not want a watermark, be sure to research or test to see if the website that you choose to use uses one. Some popular options for online-only conversion tools are Zamzar, CloudConvert, or FreeConvert.
Similar to the downloadable video converter software, these online conversion tools will work in a very similar manner. You will upload your video to the website, choose that you would like to convert the video to MP4, and then download the converted video.
Be sure to do your research on the website and verify that they are legitimate prior to uploading your video. Similar to the downloadable conversion tools, you want to make sure that you are not exposing your Mac to malware.
It’s a good idea to install a malware scanner like CleanMyMac X before you go any further down this route.
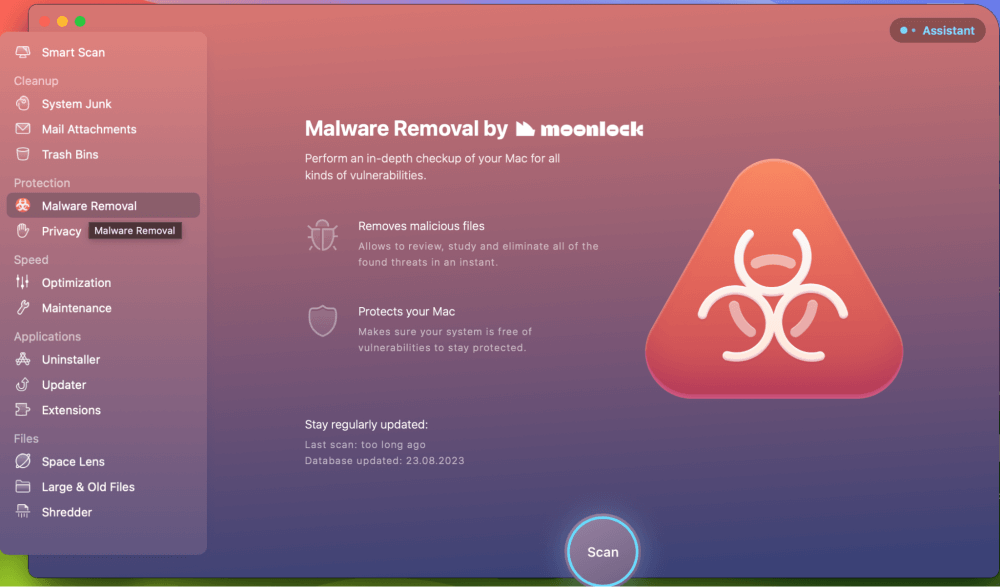
While not entirely free, CleanMyMac X is a great line of defense if you plan on visiting unfamiliar websites online. Download and install the app, and select Malware Removal from the left sidebar. After that, just hit Scan and let it check your computer for malware.
Run this scan anytime you download an app from an unfamiliar website to make sure your Mac stays safe from malware.
Final Thoughts
This article provided you with several options to convert your WMV media file to MP4. MP4 is a much more widely accepted media type that you will be able to do much more with. There are plenty of options, such as downloadable applications and online tools, that will allow you to convert your media file.
When using free applications or online tools, be sure to research the quality of the converted video and whether or not they put a watermark on your video during conversion. You want to be sure that you have the video quality that you want and need when you are completed with the conversions. Additionally, make sure you keep your Mac safe throughout the process by using a reputable malware removal tool.
What did you think of these items? Did any of these conversion tools work for you? Let us know in the comments!