
You can create a clipping mask from the Layers panel, with the top layer of two selected, you can also go to Layer > Create Clipping Mask or use the keyboard shortcut Ctrl + Alt + G (Command + Option + G for Mac users).
Hello! I’m Jayde, and my dad started teaching me Photoshop in 2009 when I could use it to make fantasy horse photos called “Pro Pics” for an online game called Horseland. The game has since retired, but I have not. I create art in Photoshop every day.
In this article, I’ll show you how to create and use clipping masks in Photoshop, including how to fill text with an image using a clipping mask.
Table of Contents
Key Takeaways
- When you want to clip one layer to another, the one to be clipped must be on top of the other.
- You can have an adjustment layer clipped to a group containing many layers.
- The shortcut for clipping the selected layer to the one below it is Ctrl + Alt + G or Command + Option + G.
- A clipping mask can be done to any layer that you only want to see within the bounds of another layer or layers.
Note: The screenshots from this tutorial are taken from the Adobe Photoshop Windows version. Mac or other versions can look different.
What is a Clipping Mask?
Clipping masks are used to keep effect and adjustment layers within the bounds of the layer below it.
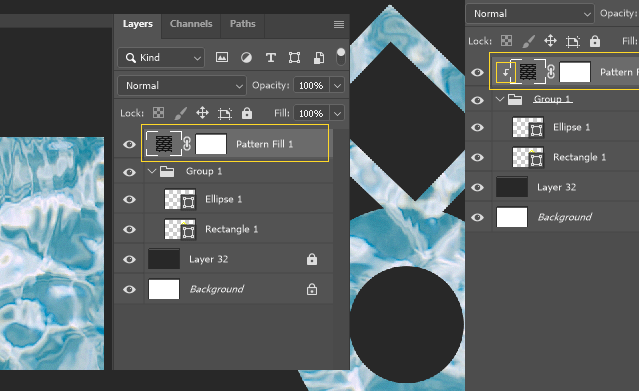
For example, here I have an adjustment layer (Pattern) on top of a group that contains several shapes. If you want to make a clipping mask, hold Alt or Option, and hover your mouse on the line between two layers. When your cursor changes into a different symbol, click.
Now the Pattern adjustment layer is clipped to the group below, affecting any layers within the group.
How to Fill a Shape with Image Using Clipping Mask
Let’s see how to crop an image into a shape using a Clipping Mask in Photoshop.
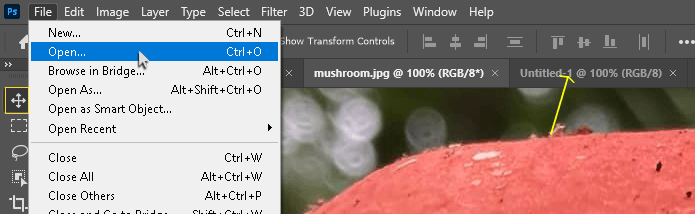
Step 1: Go to File > Open to bring the image you want to use into Photoshop. Click and drag the image into your working file with the Move tool.

Step 2: Click on the layer below the new image layer so that the shape you create is added underneath it. Use the Shape tool to create any shape you want your image to be clipped to.
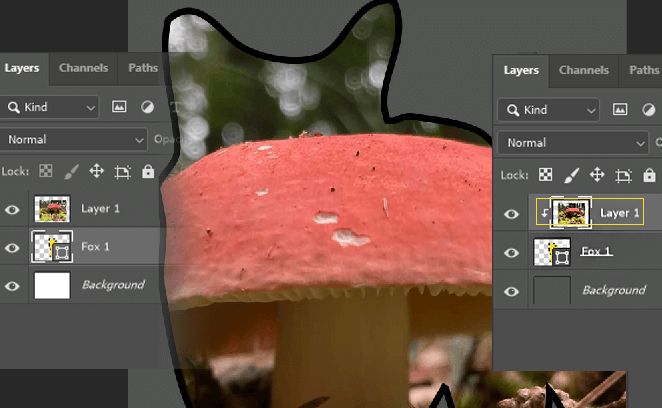
Step 3: Hold Alt or Option and put the mouse in between Layer 1 and the Fox shape. When the cursor changes, click. Now our image is clipped to the Fox with the clipping mask. You can still move and edit the image layer.
How to Fill Text with an Image Using Clipping Mask
Now let’s clip an image to text.
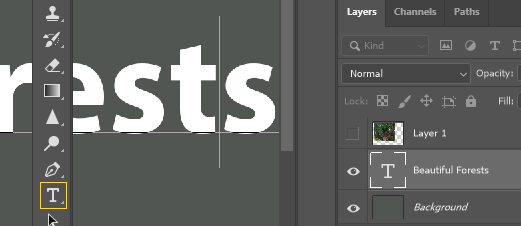
Step 1: Create your desired text with the Text tool. Then, bring your image into the file the same way we did before. Whichever layer is to be clipped is always the one to go on top.
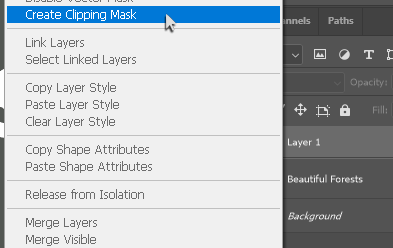
Step 2: With the image layer selected, right-click and choose Create Clipping Mask or use the keyboard shortcut Ctrl + Alt + G (Command + Option + G for Mac users).
Here is our final result:

Final Thoughts
The clipping mask is an excellent tool that can be used to take your projects to the next level. You can have any layer or image clipped to any shape or text.
How long have you been building your Photoshop skills? What else do you use a clipping mask to create? Let me know in the comments below.