
Why create a collage in Photoshop when there are so many apps and websites that will do it for you? Well, for one thing, you have total creative control over placement, layering, color scheme, theme, etc!
So, if you’re looking to create a one-of-a-kind collage that stunningly frames images of your choosing – look no further.
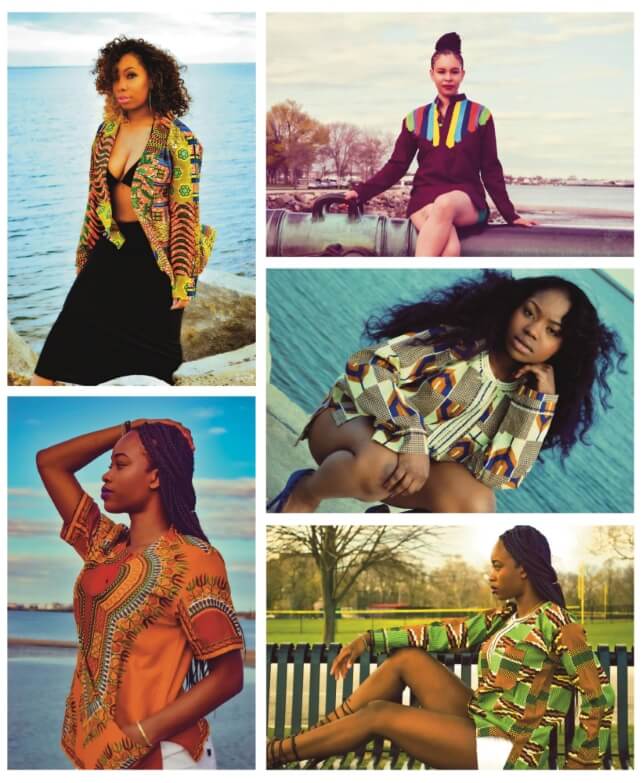
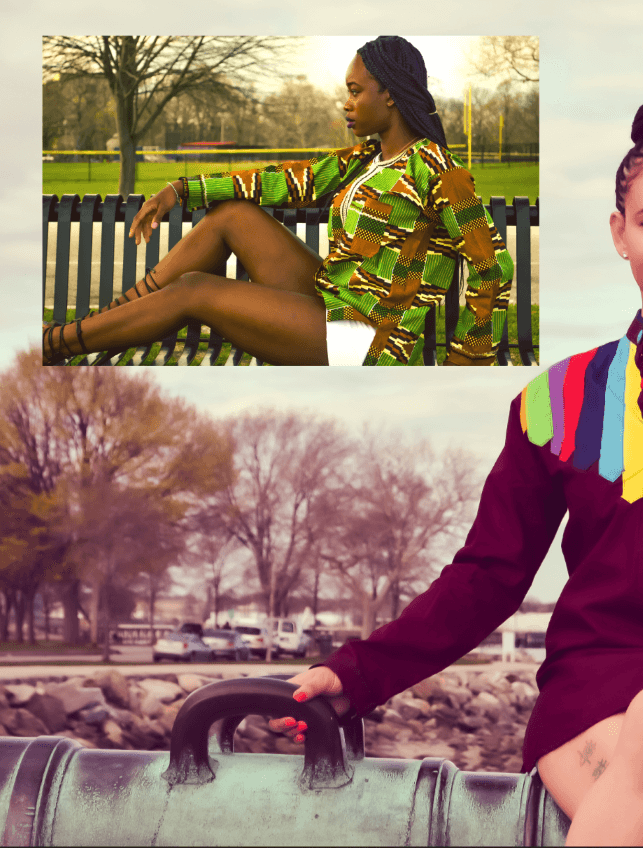
I’m Skyler, and I’ve been using Photoshop on a personal and professional level for well over a decade! The collage I’ll be making today is sourced from original photographs I’d taken for a local clothing brand. By creating this collage, it can then be used in advertisements, fliers, or simply be framed!
In this article, I’ll be discussing how to properly choose your images as well as how many you should incorporate into your collage so as to not overwhelm the viewer. Then we’ll go through transforming, framing, and layering appropriately to achieve a polished, professional-looking final product.
Table of Contents
Step 1: Importing Your Images
This seems like the easiest step, but before importing, you need to identify what images you are using and how many. You can do this by selecting a theme, or color palette. Perhaps you’d like to tell a story using your images and convey a concept or narrative.
I suggest brainstorming or searching for this inspiration prior to import. This will make it much easier to accomplish if you have a goal or picture in your mind’s eye before we begin editing.
I’m going to choose five images based on a green yellow and light blue color scheme that is already present throughout each shot. My goal is to create a polished, professional representation of their branding that draws the eye with a bold complementary palette.
Note: Try not to choose less than 4, or more than 8. It will severely limit your options stylistically if you go above or below that threshold, and can distract the viewer.
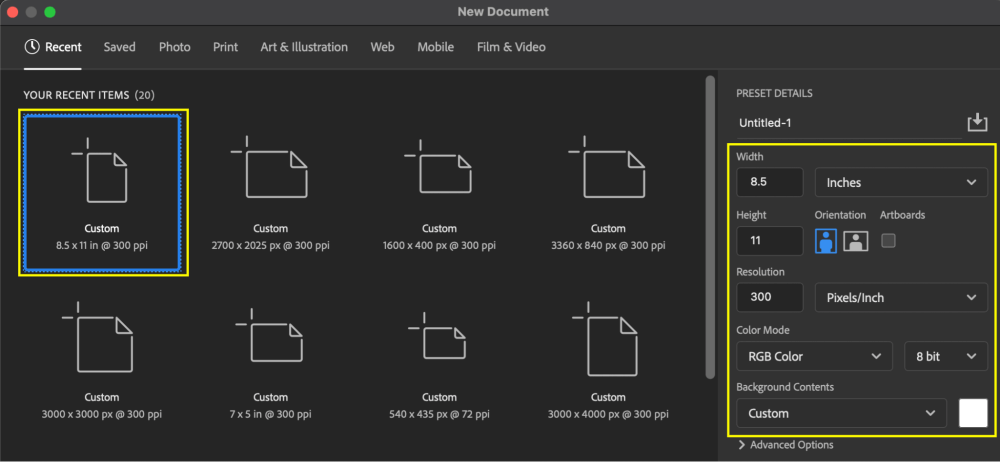
First, Create a canvas to accommodate the images. For example, I want mine to look like a promotional flier, where I can use empty space for extra designs, logos, text, or decoration afterward.
Go to File > New and you’ll see the popup window with preset canvases or custom. I set mine to 8.5 x 11 inches and 300 DPI.
Pro tip: If you want to physically print your files and not just circulate them online, choose CMYK in color mode instead of RGB. This will translate colors and contrast more accurately in print.
Now that we’ve made our selection and input the presets, click OK and open the canvas.
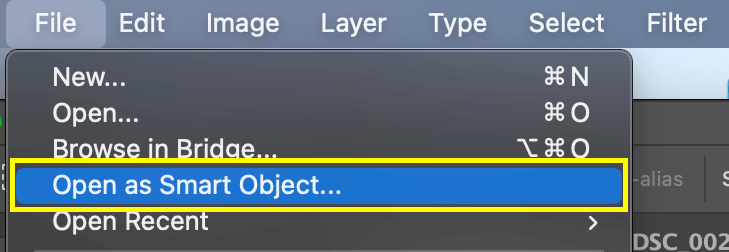
We’re still missing our images though – and we’ll likely be transforming them to edit our collage. So, instead of inputting them normally, we can work smarter, not harder, and open them as Smart Objects.
If you aren’t familiar, this feature allows you to retain resolution while scaling your images up and down.
This means you can shrink or expand the imports without worrying about quality loss.

For example, I navigated directly to my folder of chosen imagery and clicked the ones I wanted to import while holding down on Command/Ctrl. Once you have all your photos selected, click Open.

Great! So now we can see all of our images have been imported into Photoshop through the overhead bar tabs.
Navigate to each by clicking on the tabs.
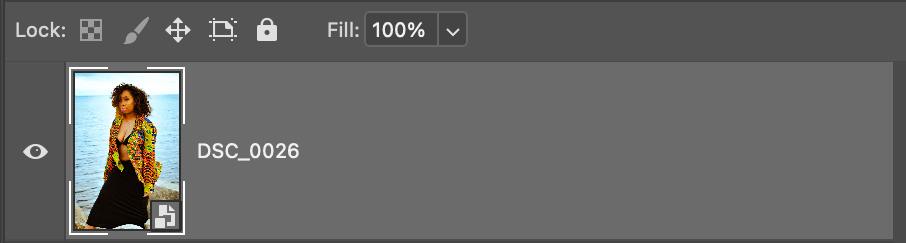
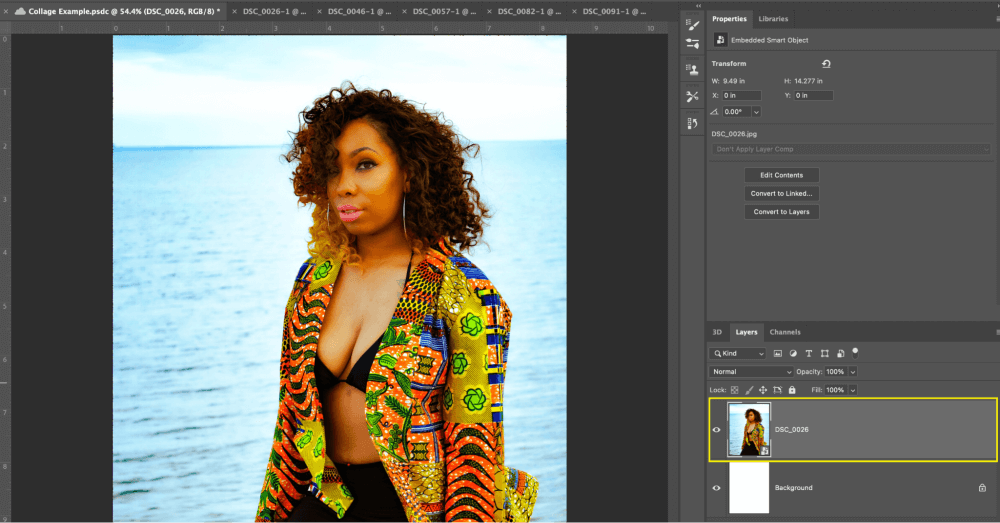
So how to get each photo onto the canvas? Well, we’ve already made them Smart Objects (as you can check from the icon in the bottom left corner of our thumbnail in the layers panel.)
So now all you have to do is right-click on the layer and Copy.
Now go back to the first canvas and paste the smart object you copied. You’ll see it appear on the canvas itself and as a new layer. Don’t worry about resizing them now if they go off the page, they’re not lost and you can transform them to fit a bit later!
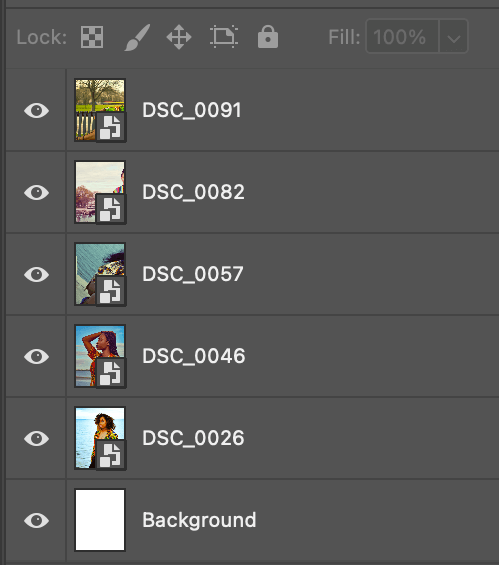
Once you have each Smart Object pasted into your original canvas, you can shut the other tabs. You should have everything you need in one project now. All that’s left to do is transform and begin arranging the collage!
Step 2: Transforming Your Images
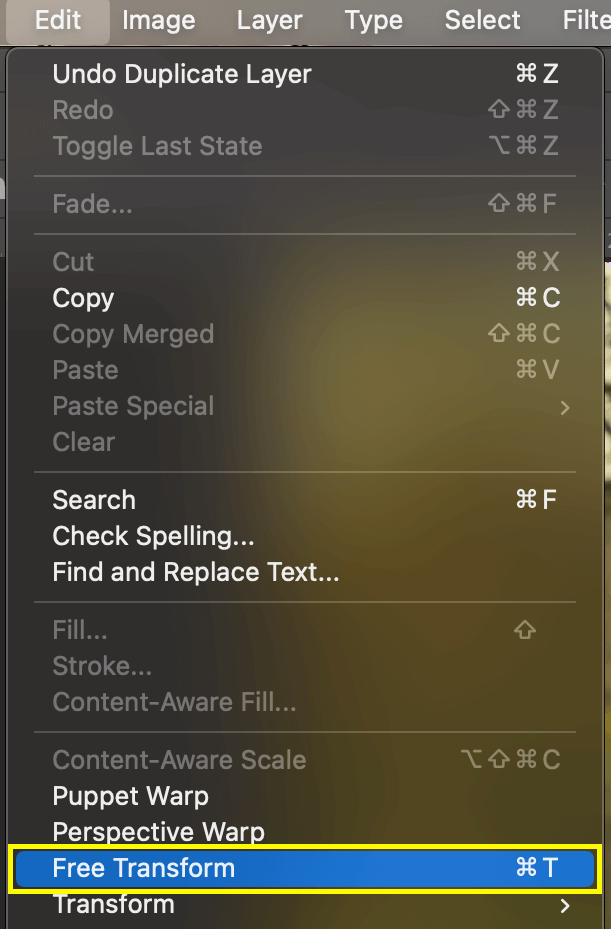
Now you have to transform the Smart Object Layers one by one to fit inside the canvas. So select your first layer, and go to Edit > Free Transform. This can also be accomplished by pressing Command/Ctrl + T.
Once that’s been done, you can see the border that appears around our selected layer/image. Notice the square handles that surround the image as well. Those will allow you to click and drag to resize the image.
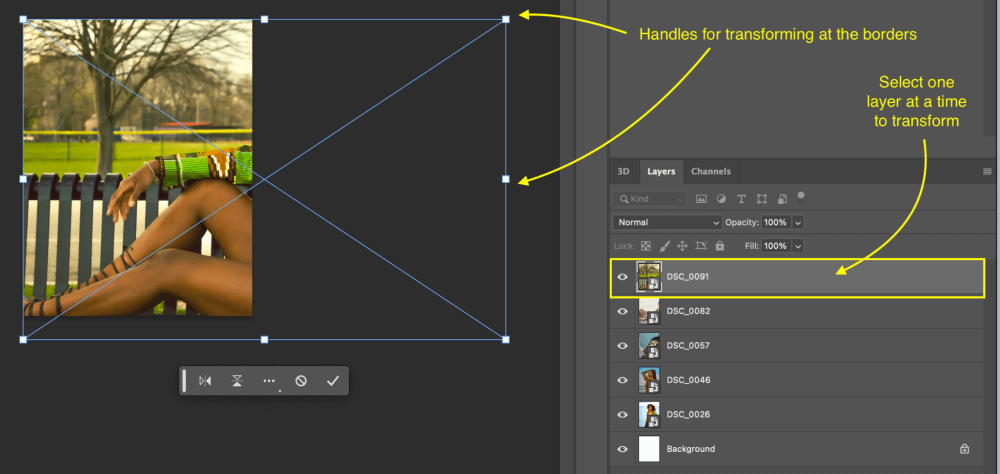
First things first though, you have to make sure your original aspect ratio is not disrupted. This will ensure we don’t distort the dimensions of your image. So, look at our overhead panel and find the Width and Height percentages. Click the chain link between the two, and the ratio will be locked in.

Now you can click a handle, and drag it to be larger or smaller until it fits within your canvas. Do this one at a time until they all fit. There is sure to be some overlap, but don’t worry about that quite yet either.
For example, now I’ve transformed them all to fit within my canvas, and I can drag them around using the same transform tool to be arranged in whatever order I please.
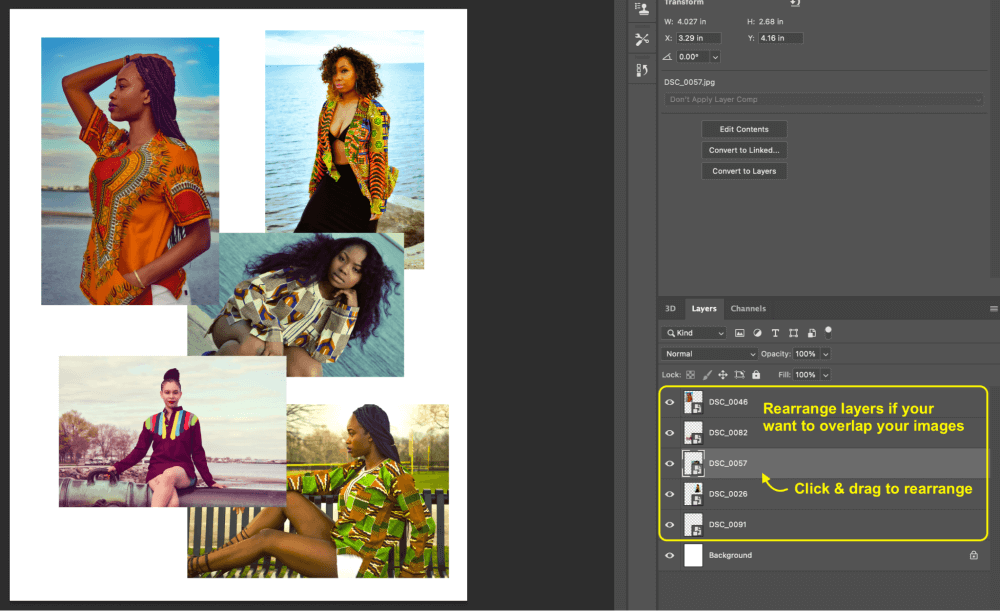
Once you settled on a balanced arrangement, you can make any final edits to the layering.
For example, I wanted to make sure there wasn’t any wasted space, so I overlapped the left-hand photos above the right-hand ones. I did this by dragging one layer above another in the layers panel until I was satisfied.
Great! Finally, we can get started on framing or bordering and messing around with our color palettes or designs.
Step 3: Creating Borders
Similar to before, right-click on one of the layers. At the top of the menu, you’ll then see Blending Options. Click on that and a new menu will pop up.
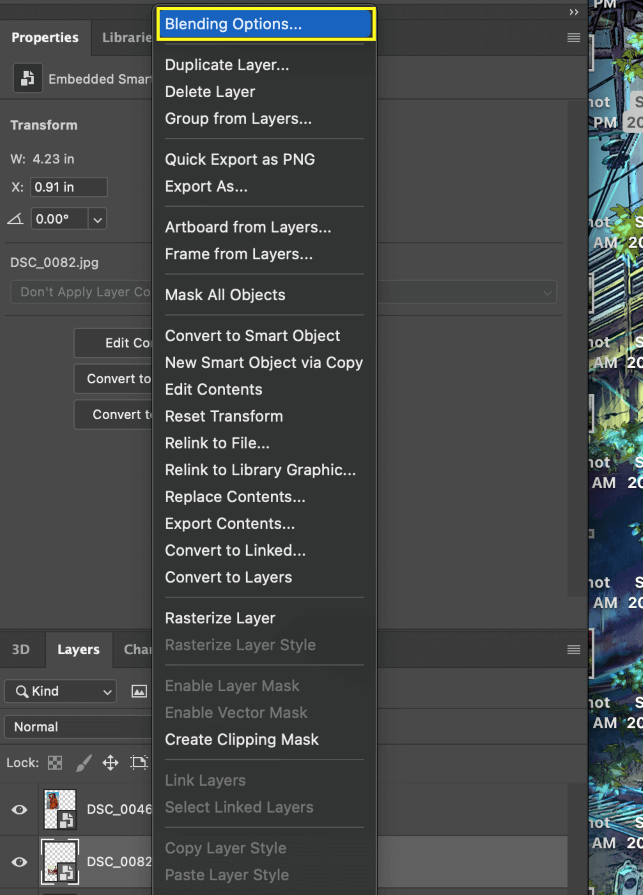
Don’t get overwhelmed by the amount of options here – we’re going to ignore this part, and instead find Stroke in the left-hand menu screen.
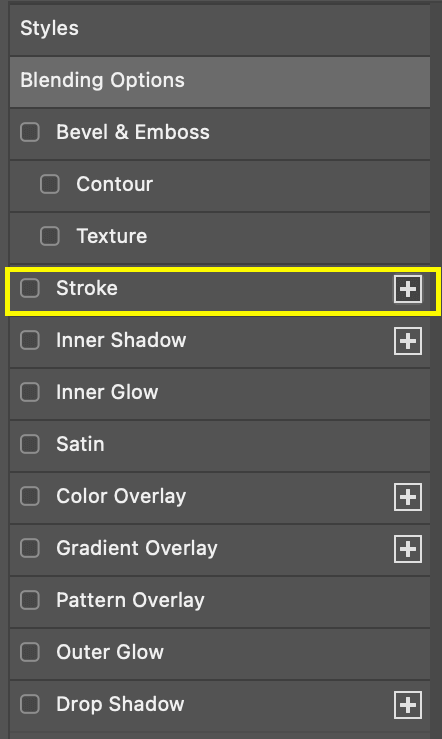
Check off the Stroke checkbox and enter that menu. Here you’ll see options to change the thickness, color, opacity, etc.
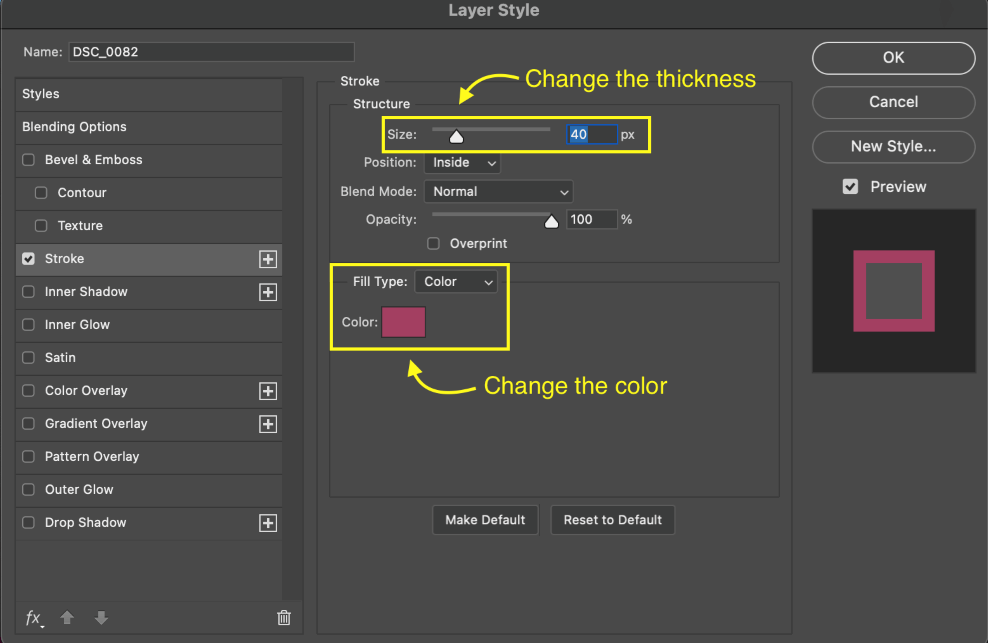
You can choose your desired colors by clicking inside the box and using the eyedropper or color menu. From there you can change the thickness of our border.
For example, I wanted to go bolder, but I also wanted it to compliment the images so I used the dropper to select a tone similar to each image. When you’re satisfied click OK.
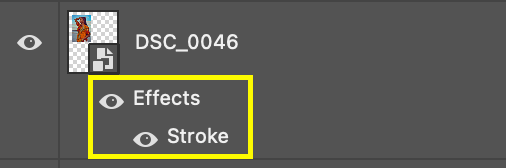
Great! Your border has been created and you can toggle that view by clicking the eye icon below the layer you created.
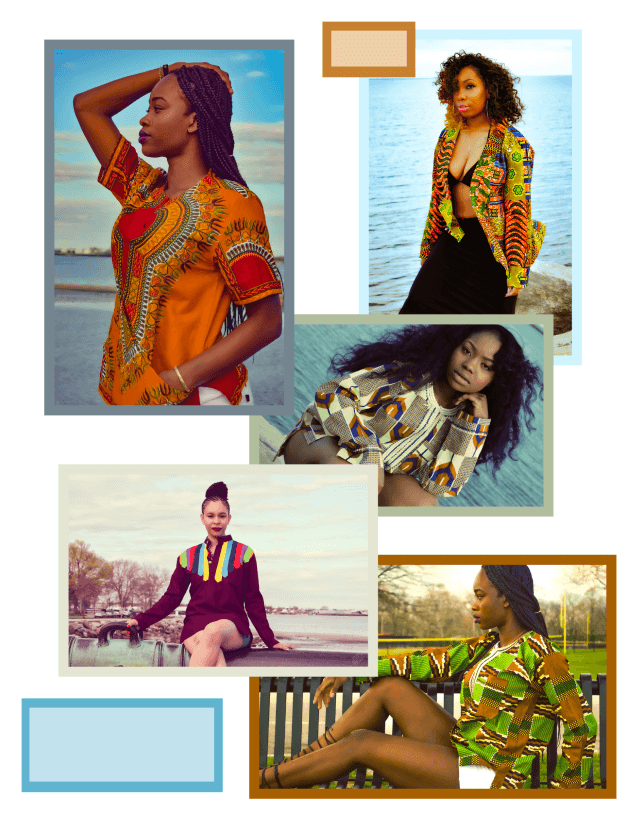
Now you can apply your desired borders and colors to the rest of the layers.
As you can see, I also added some extra complimentary colors and cube designs using the selection and fill tool on a new layer. Don’t be afraid to mess around and draw inspiration from your images.
Conclusion
Well, there we go! There is so much we can do in Photoshop, and creating this type of art is highly satisfying. It allows us to lay out a theme, present a narrative or story, and showcase something we care about all in one.
Next time you’re looking to make a collage, keep these tips in mind or revisit this for a refresher!