
In Clip Studio Paint, you can design a brush tip and register it as a material to create custom brushes. Once registered, assign this tip to a brush and adjust its settings to fit your needs.
Hello, I’m Zoe, a digital artist. When I first delved into Clip Studio Paint, I immediately fell in love with all the brushes available, both built-in and those available from Clip Studio Assets. The real thrill, however, kicked in when I started creating my own brushes, allowing me to add my personal touch to my art.
If you’d love to design your own brushes as well, look no further. In this step-by-step guide, I’ll walk you through the process of creating custom brushes in Clip Studio Paint.
Ready to dive in?
Key Takeaways
- Start by designing a brush tip on a new layer to define your custom brush’s shape and texture.
- Register your brush tip as a material, then apply it to a duplicated brush for further customization of settings.
- Test your custom brush, making adjustments to the design and settings for optimal performance and desired effects.
Note: All screenshots from this tutorial are taken from the CSP Mac version.
This article provides a step-by-step guide on how to create and customize brushes in Clip Studio Paint.
Creating a Custom Brush in Clip Studio Paint
Creating a custom brush in Clip Studio Paint is a rewarding experience. Here’s a step-by-step guide to get you started:
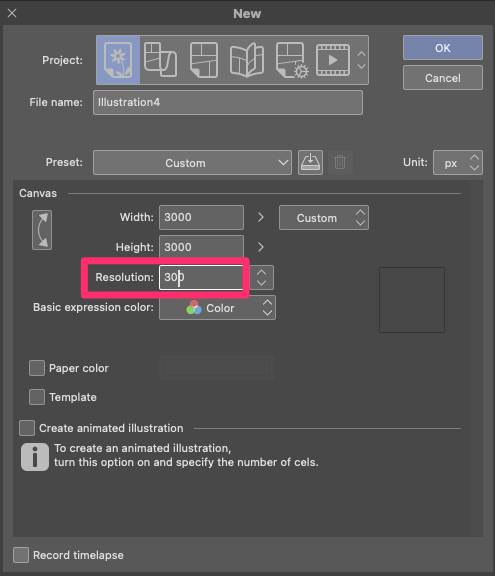
Step 1: Click on File and then New to create a new canvas.
Keep in mind that a larger canvas size will allow for more detail in your brush strokes. Set the resolution to 300 dpi for optimal quality.
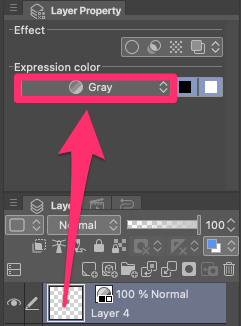
Step 2: Now that your canvas is set up, create a new layer to start designing your brush tip. The brush tip is the shape that your brush will make when you use it.
If you want your brush to be used with any color later on, head to the Layer Property Panel and choose Gray for the Expression Color of your layer.
Step 3: To create your brush tip, use the existing brushes in Clip Studio Paint. Think of this as a normal painting process – draw whatever shape or texture you want your brush to have.
You might want to create a brush that looks like real paint, a fun stamp, or a brush that repeats a pattern. Here are some tips for each type:
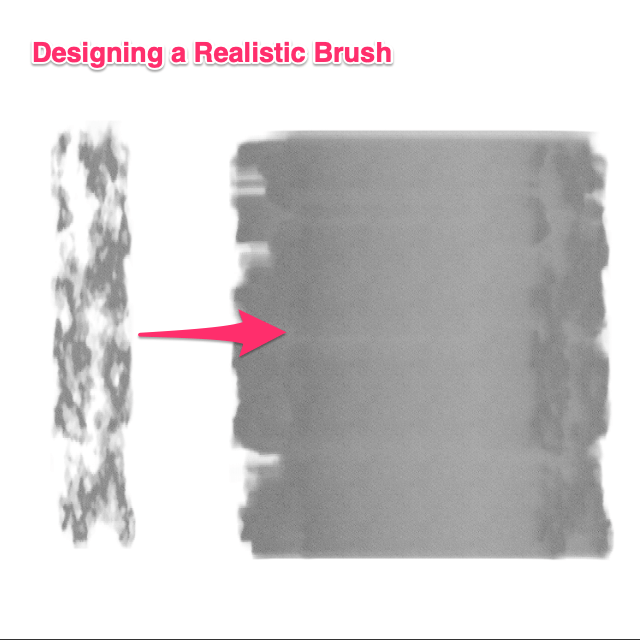
Realistic Texture Brush:
- Layering Textures: Use multiple layers to build up different textures. Lightly layer strokes, allowing for some transparency and overlap. This creates depth and mimics the inconsistency of real-life textures.
- Blending: Use the blending tools to soften hard edges. This ensures that when you use the brush, the strokes blend seamlessly with each other, just like real paint would.
- Variation: Introduce slight variations within the brush tip. This can be achieved by using a gradient or by manually adding subtle hue changes (or brightness changes if you’re working in grayscale). This ensures that when the brush is used, it doesn’t look monotonously uniform.
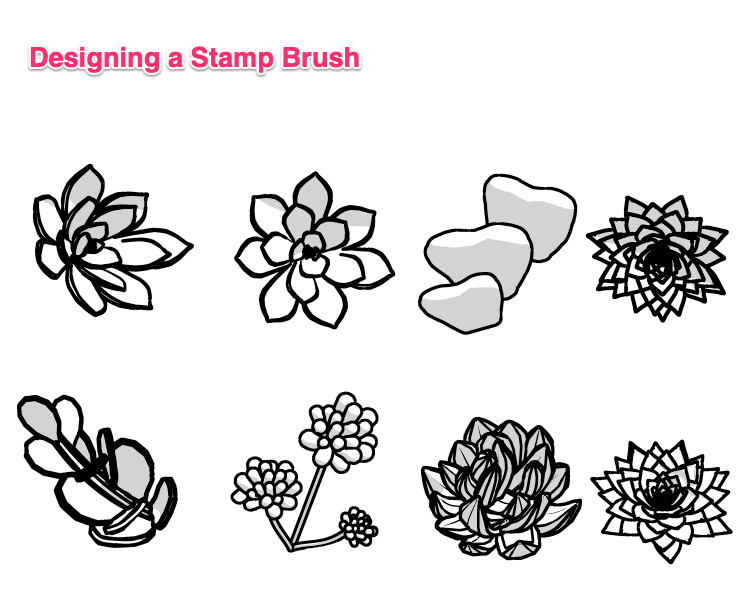
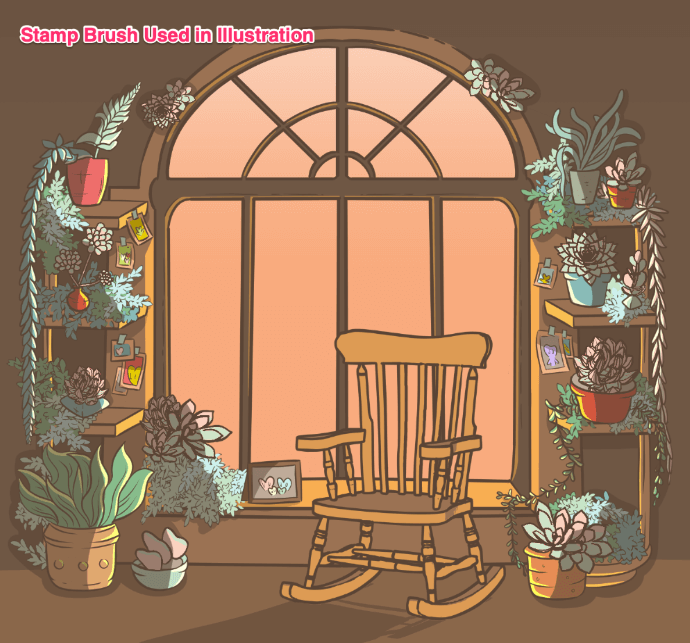
Decorative Stamp Brush:
- Unique Designs: Instead of creating just one design for your sticker brush, craft multiple variations.
For instance, if you’re making a leaf sticker brush, design 5-8 different leaf shapes or orientations. This ensures that when the brush is used repeatedly, it gives the impression of variety and doesn’t look like the same sticker stamped over and over.
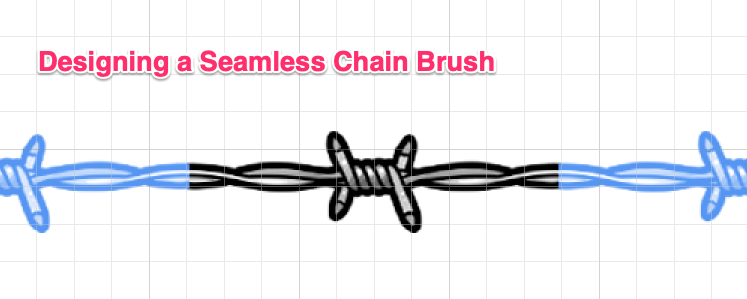
Repeating Chain Brush:
- Alignment: To ensure the ends of your chain design align perfectly, use the grid feature in Clip Studio Paint. Turn on the grid (View > Grid) and design your chain segment ensuring the start and end points align with the grid lines. This way, when you draw a line with your brush, the chain links will connect seamlessly.
- Use Symmetry: If your design is symmetrical, you can draw half of it, then duplicate and flip it to ensure perfect symmetry.
- Testing: After registering your brush tip, test it out by drawing a continuous line. If there are any misalignments, you can go back and adjust your original design.
Step 4: Once you’re satisfied with your design, it’s time to set up your brush tip to register it.
If your design has more than one layer, hold Shift while selecting your layers, then right-click and choose Merge Selected Layers. Brush tips can only be created from single layers.
If you’re creating a brush with variable colors, double-check that Gray is set as the Expression Color.
Step 5: To save your brush tip as a material, click on Edit > Register Material followed by Image.

Give your brush tip a recognizable name, and choose the folder you want as the location to save your brush shape.
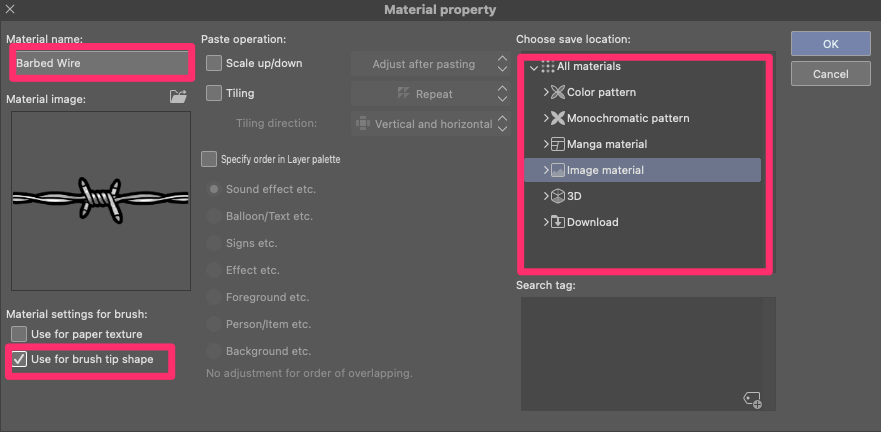
Make sure to select Use for Brush Tip Shape in the options.
Step 6: For beginners, the easiest way to create a custom brush is to duplicate an existing brush.
Pick a brush that already has settings similar to what you want to achieve with your custom brush. For instance, if you like the way a particular stamp brush behaves, use it as a base for yours. Don’t worry, you can edit any of the settings later on.
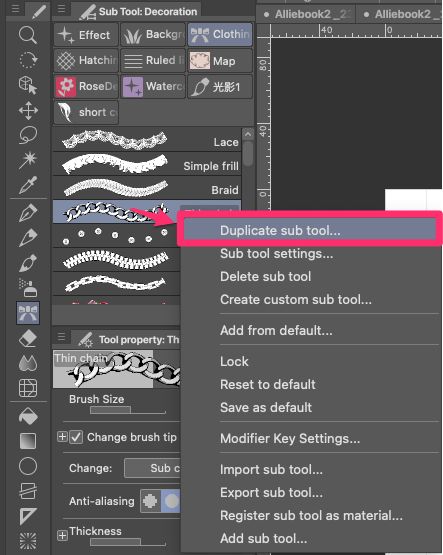
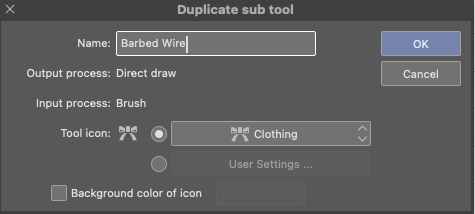
Right-click on the brush you want to duplicate, and select Duplicate Sub Tool. Give your duplicated brush a name that reflects its purpose.
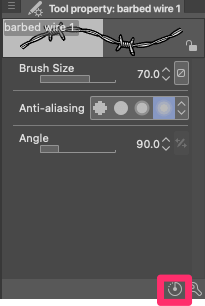
Step 7: Now that you have your duplicated brush, it’s time to assign your custom brush tip to it. Select the duplicated brush and click on the wrench icon at the bottom of the Tool Property tab to open the settings window.
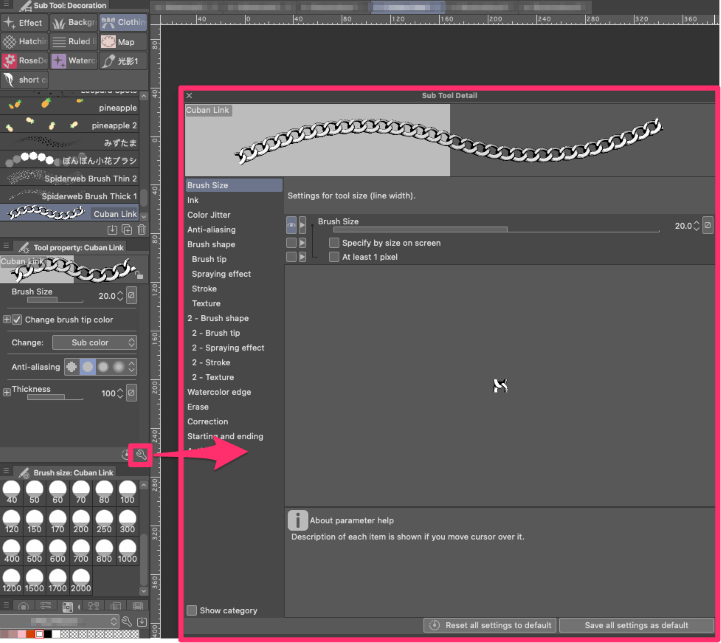
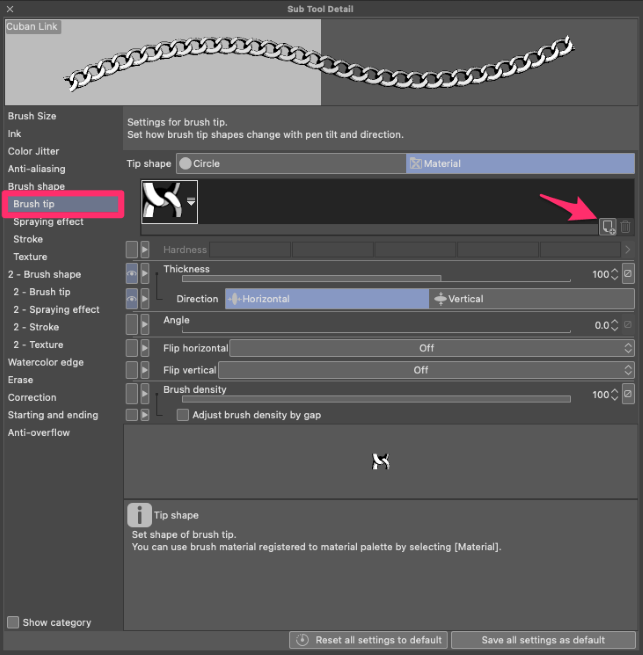
Step 8: Under the Brush tip section, click on Material, then on the Add Brush Tip Shape icon.
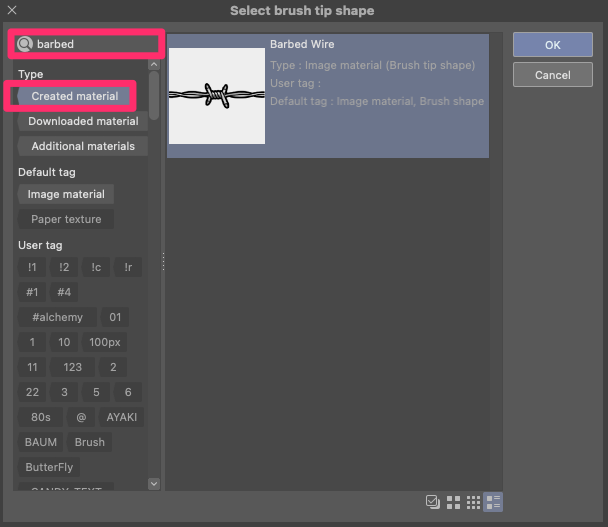
Select your custom brush tip from the list of materials. To find the material you designed, you can search for its name or use the Created Material tag to show only your creations.
This will apply your custom brush tip to the duplicated brush. You can add one or multiple tips.
Step 8: Once you’ve assigned your custom brush tip to the duplicated brush, you can customize its settings to achieve the desired effect.
If you see an icon resembling a crossed-out square next to a setting, click on it. This allows you to choose what influences that particular setting, be it pen tilt, velocity, randomness, or other factors.
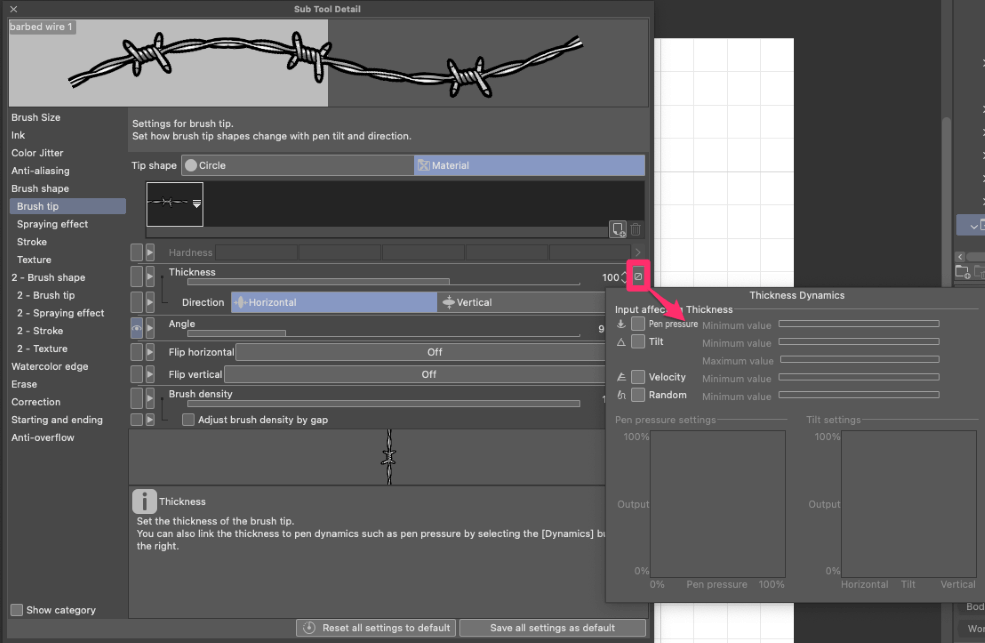
There are plenty of settings to play around with, but here are a few parameters that may come in handy:
- Color Jitter: If your brush is grayscale, this section can introduce randomness to the brush color, adding a dynamic touch to each stroke.
- Brush Tip: You can tweak the Angle, or enable the Flip Horizontal or Vertical options (useful if you’re creating a stamp brush). This section also features the Brush Density slider. A denser setting results in a solid stroke, whereas a lower density offers a softer, feathered appearance.
- Spraying Effect: For brushes that need a scattered or dispersed look, like splatters or foliage, this section is your go-to. Adjust the settings to achieve the desired spread and randomness.
- Stroke: This section is crucial for determining the spacing and repetition of brush tips within a stroke. It’s particularly useful for stamp or chain brushes.
- Correction: For those seeking precision, especially in inking or detailed artwork, navigate to this section. By ramping up the stabilization, you can reduce hand tremors, ensuring a smoother line.
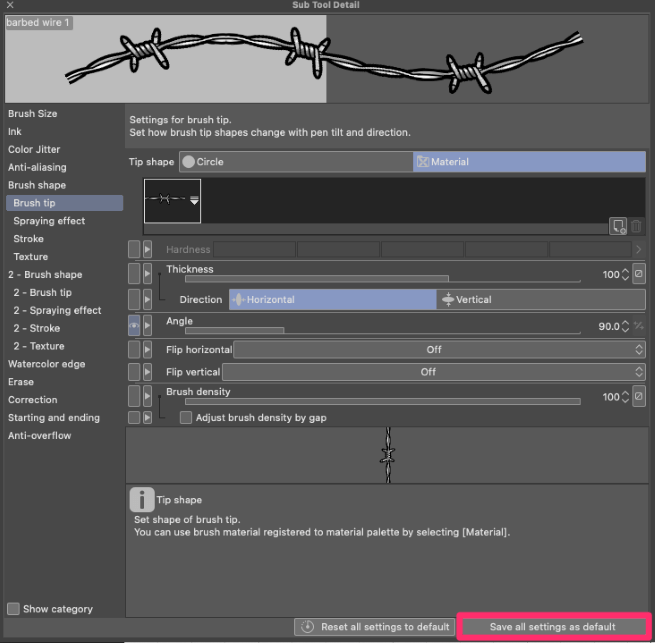
Step 9: After customizing your brush settings, it’s a good idea to save them as the default settings by clicking on Save all settings as default in the brush settings window.
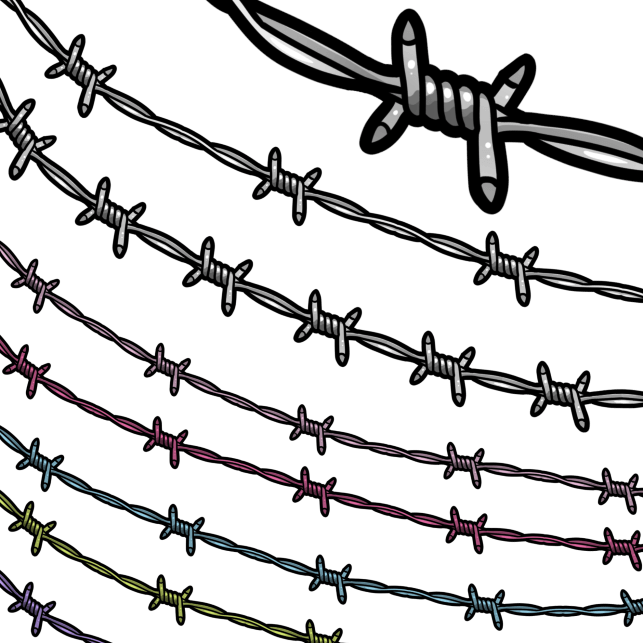
Step 10: Go ahead and try out your new brush! Feel its dynamics and see if it meets your expectations. If something feels off, don’t hesitate to revisit the settings or even the initial brush tip design. Perfecting a brush often involves some tweaking.
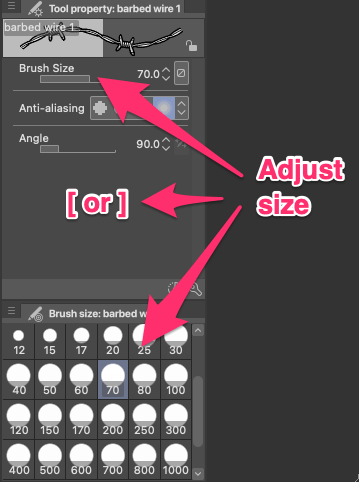
Your custom brush is now as versatile as any default brush in Clip Studio Paint. To adjust its size, you can either adjust the slider from the Tool Property Panel, pick a size from the Brush Size Palett, or use the [ and ] keys for quick adjustments on the fly.
Feel free to modify other brush properties, like density or opacity. If you ever want to revert to the original settings of your custom brush, simply click on the Reset Selected Sub Tool to Default Settings option located at the bottom of the Tool Property Panel.
Final Thoughts
Creating custom brushes in Clip Studio Paint is a rewarding experience for digital artists. By following this step-by-step guide, you can craft your unique brushes, tailoring them to specific needs and artistic styles.
Whether you’re aiming for a realistic texture, a decorative stamp, or a repeating pattern, the process is straightforward yet allows for deep customization.
Share your insights, tips, and questions about your custom brush creations and experiences in Clip Studio Paint in the comments below!