
You may be wondering how to create rounded corners in Photoshop, given it’s not the most obvious option available. The good news is though, it’s super easy to do! Making it especially nice for all those designers out there who prefer to round out those rough edges for one reason or another.
My name is Skyler, and I’ve been using Photoshop on a personal and professional level for well over a decade. So I can show you all the different ways to create rounded corners in Photoshop like a pro.
Thankfully Photoshop has the tools to make everyone’s lives easier! I’ll begin by introducing you to the Shape Tool and its Properties Menu, before giving an example of how to create those rounded corners.
Table of Contents
Step 1: Using the Shape Tool
Alright! To get things started, you’re going to find your Shape Tool. There are lots of options when you open up the shape tools submenu, from making a custom shape to just a standard rectangle.
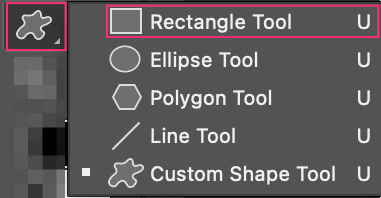
In this case, the Rectangle Tool will work perfectly well.
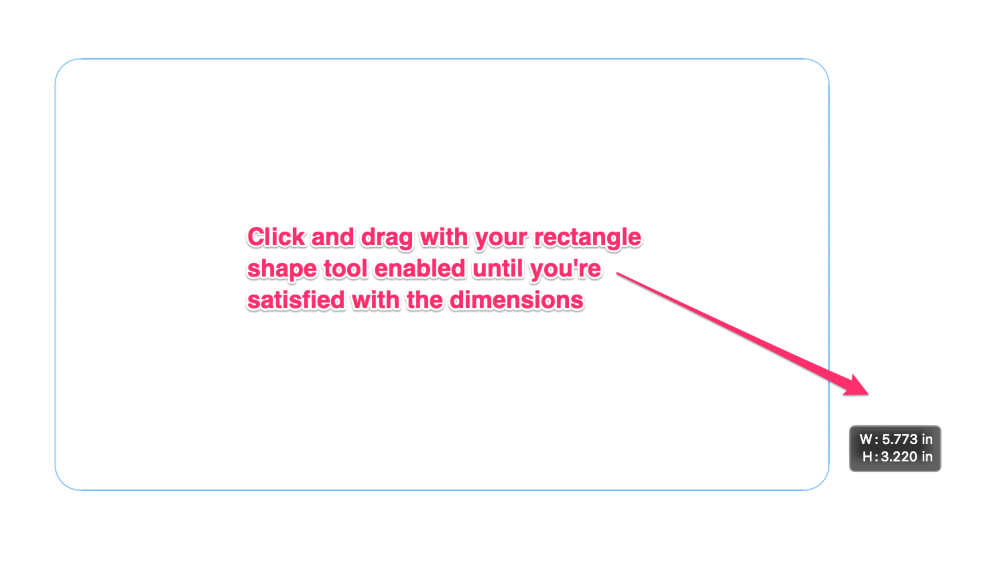
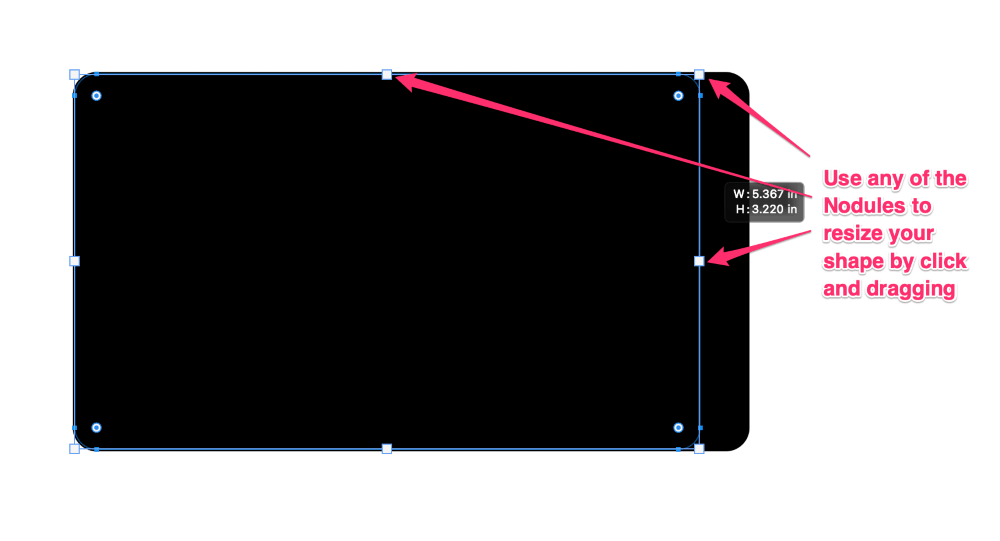
After selecting the Rectangle Tool, all you have to do is click and drag across your canvas until you’re satisfied with the width and length. There’s also a small rectangle in the bottom right-hand corner that lets you see your exact dimensions before letting go and creating your shape.
This can be edited afterward if necessary, so don’t worry too much about getting an exact dimension when you first create your shape.
Once your shape has been made, a new property menu will become available. There will be a Transformation and Appearance tab where you can edit further.
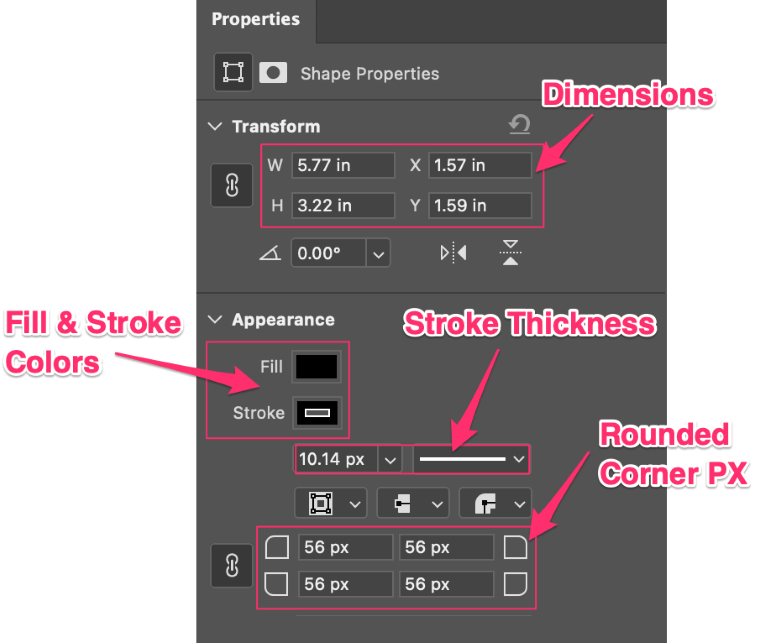
As you can see, we have a myriad of options to work with! The most important ones, I’ve highlighted are. You can start with those Rounded Corners towards the bottom of the menu, and skip the rest if it suits you, but we can also change the color, line thickness, and dimensions here.
When changing the px for your corners, the general rule is the higher the number, the more rounded the edges! I’m gonna stick with 56 px for this example.
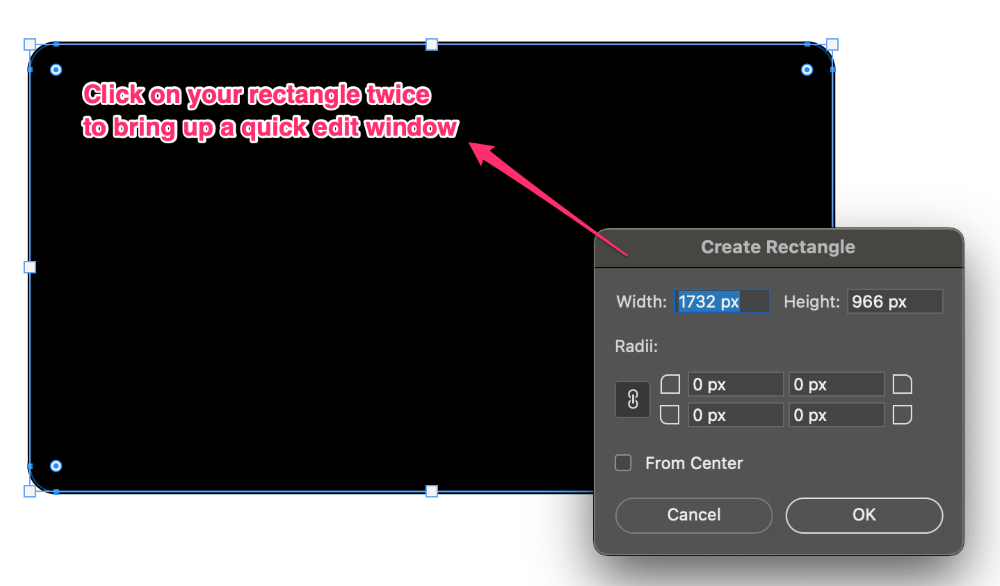
There are a few other ways we can change the dimensions as well. You can click twice on your rectangle to bring up a quick edit window, which will allow us to change both the corner px and dimensions without having to navigate to the properties panel.
you can also click and drag any of those nodules running along the corners and sides to resize your shape.
It’s always a good idea to know how to approach a problem in several ways, and Photoshop provides us with many options to consider. With all the different ways you can approach creating and editing rounded corners, I’m confident you’ll have all the tools you need to create your own.
How to Round Corner of an Image in Photoshop
Another option involves choosing or downloading a pre-existing image and creating a transparent overlay or mask with the Rectangle Tool to create transparent rounded corners.
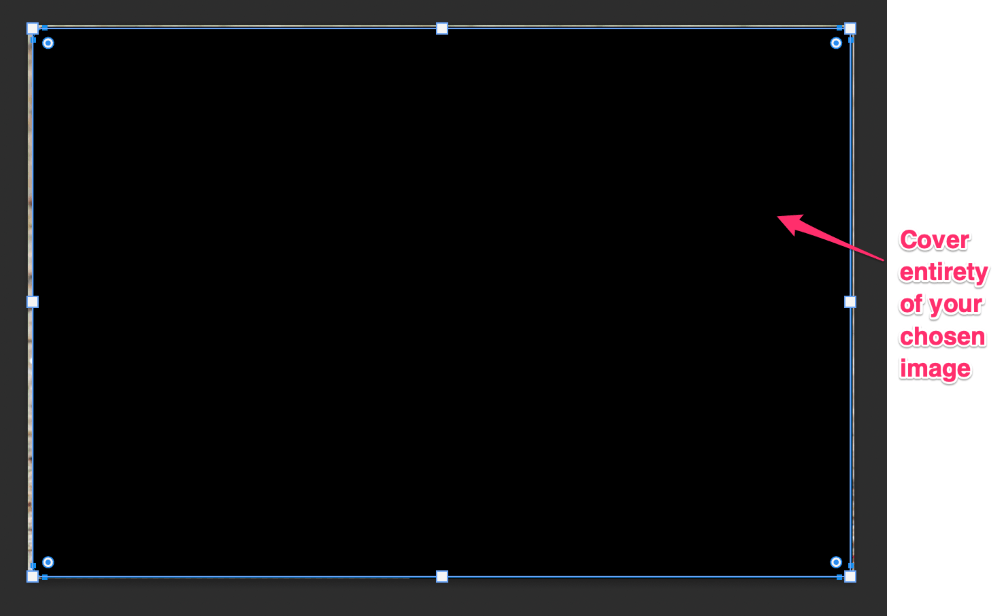
After loading your image into a new project, you’ll still need to utilize the Rectangle Tool to round the corners. All you’ll have to do is click and drag your rectangle across your image, covering it entirely as shown below.
Once you’ve accomplished this, you’ll need to hold down on the Alt/Option key while clicking the Rectangle Layer to create a Layer Mask.
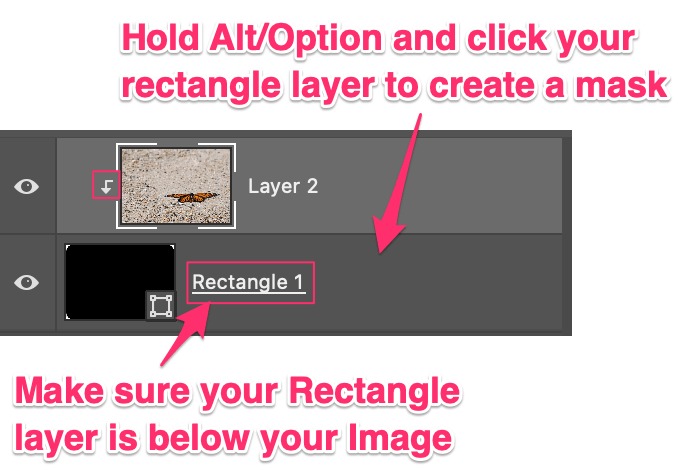
Don’t forget to make sure you’ve got your Rectangle Layer below your image, and not above or the Layer Mask won’t work properly.

Great! Your image should look similar to the one above. As you can see, you’ll have nice rounded corners and a transparent background with the layer mask enabled. All that’s left to do is Export your image accordingly.
Exporting Your Image with Round Corners
In order to export your image with the transparency intact, you’ll need to choose PNG from the export list. To find this, navigate to File > Export > Export as PNG.

This will bring up a window where you’ll be prompted to name your file and choose a location to save it on your computer. Once this is done, we can click OK and your image will be exported with the transparency intact and available for you to use!
Conclusion
Job well done! Rounding corners properly in Photoshop can be confusing to attempt without the right information or techniques, but using the Rectangle Tool and Layering Masks we can make quick work of it.
If you’ve got any other techniques, tricks, or tips regarding rounding corners in Photoshop feel free to share them in the comments. I look forward to seeing what you’ll create with this new skill in your creative toolbelt.