
You may be surprised to hear that among all the features Photoshop provides, there isn’t a dedicated tool for star shapes! There’s no need to worry though, we can use the Polygon Tool to workaround this quite easily.
My name is Skyler, and today I’ll be showing you how to make different types of stars in Photoshop.
It may seem like a small skill to learn, but being able to get creative with the tools Photoshop provides and create something entirely new is a genuinely impressive feat! Imagine what else you might be able to create once you understand how to use the Polygon Tool and customize your stars to perfection.
Table of Contents
Method 1: Set the Ratio
First, we’ll need to find the Polygon Tool. This is going to be the only tool we need to create stars of all kinds in Photoshop.
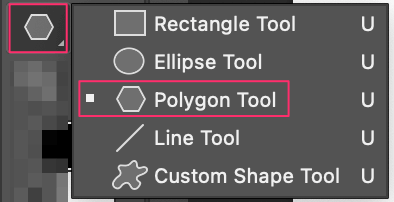
Step 1: Select the Polygon Tool, we can move on to adjusting your settings to create the elusive star shape.
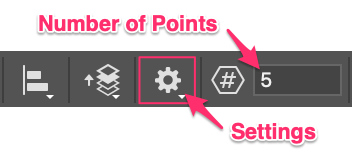
Step 2: Adjust your settings. Here is where we’ll be setting the Star Ratio and the Number of Points you’d like your star to have.
Open up the settings menu and you’ll see the Path Options and Star Ratio.
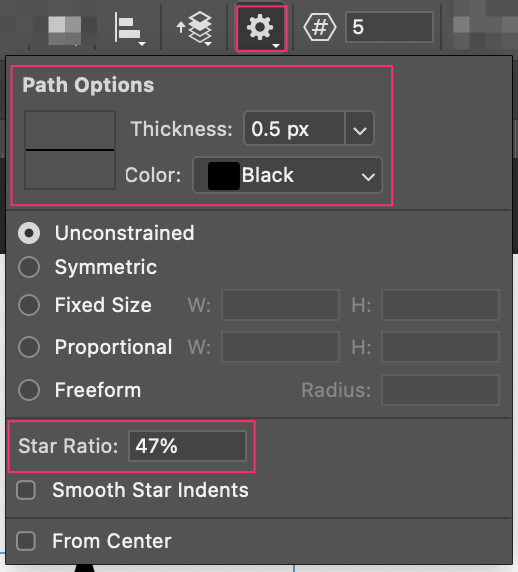
Path Options give you the ability to customize how thick you’d like the outline of your shape to be, and what color it’ll appear as initially. Don’t worry too much about the color though – you can continue editing this even after it’s created.
The Star Ratio changes the Width of your star points.
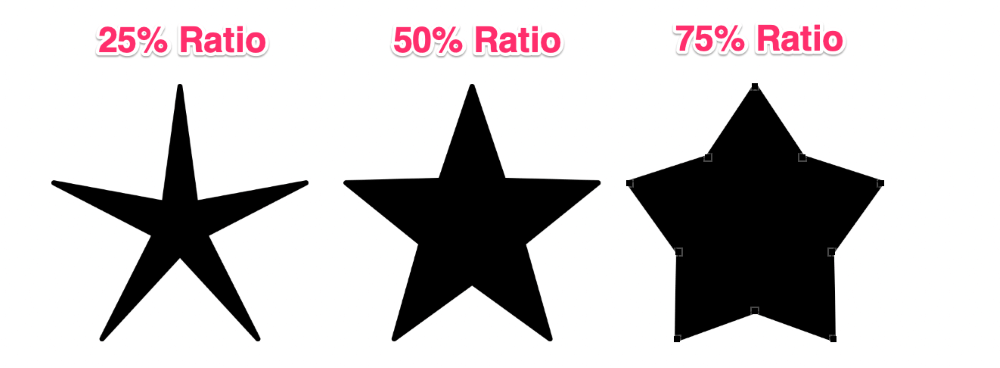
This means the smaller the ratio will give you a thinner star, and a larger ratio will give you a thicker star.
Step 3: Click and drag to draw a star. Once you’re satisfied with your Star Ratio and Path Options, click OK.
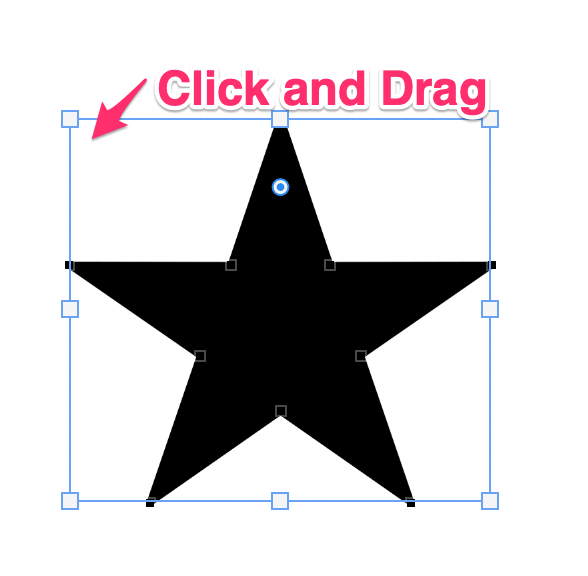
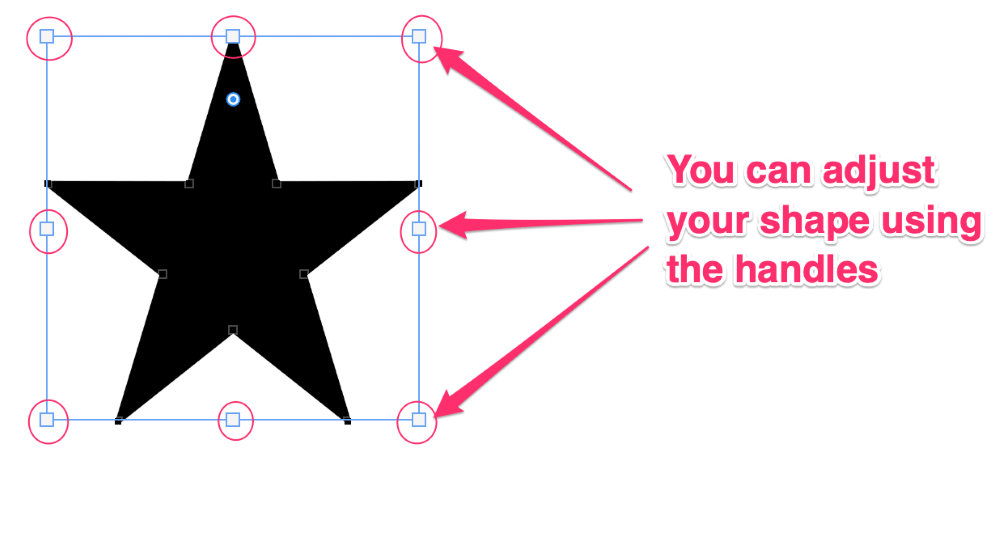
Now all that’s left to do is click and drag your cursor along the canvas until your star appears. Remember that if you’re not satisfied, you can still edit the star after the fact using the handles or Transform Tool.
Method 2: Change Polygon Sides
Make sure the Polygon Tool is enabled before you begin again.
After selecting your Polygon Tool, don’t worry about editing your star from the settings menu. You’re going to be using a different method.
All you have to do now is click a spot on your canvas and the Create Polygon window will be prompted to appear.
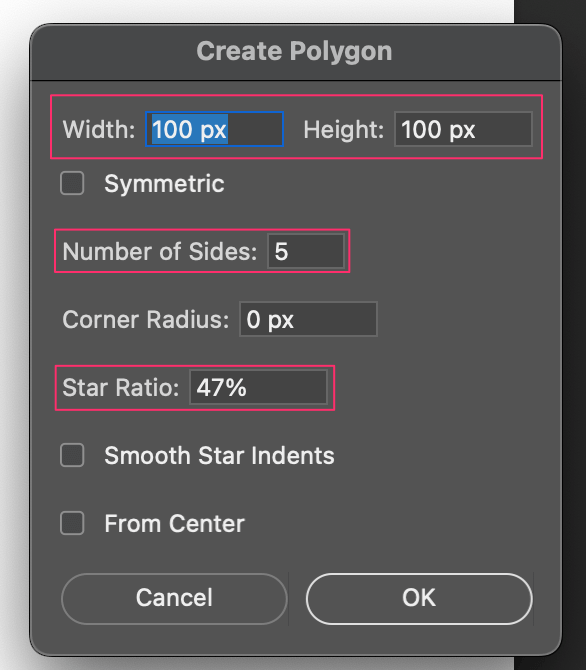
At first glance, it appears like the settings menu you used before, but with one difference. This menu has Width and Height options available! 100px is far too small for me, so I’m going to change it to 500px each and click OK.
Tada! Now every time you click on your canvas with this tool enabled, the window will pop up for editing – but you can just click Enter or OK and you’ve got your desired star duplicated quickly and easily.
Bonus Tip: Customizing your Stars
You can edit your star even further! This tutorial will walk you through all the different gradients, colors, patterns, and more that you can apply differently to your stars.
Conclusion
Wow! Imagine what else you might be able to create using the different Shape Tools in Photoshop. You wouldn’t think the polygon tool could create stars so easily, but it does, so what else can Photoshops other tools do that we haven’t discovered yet? Get creative and see what you can make, the possibilities are endless.