
Vector drawing enables high-quality, scalable artwork with endless editing possibilities. Clip Studio Paint simplifies vector drawing and offers powerful editing tools.
Hello, I’m Zoe, a professional illustrator. Despite having several years of experience in digital art, I used to find the idea of drawing in vector quite technical and intimidating.
However, with Clip Studio Paint, I discovered that it’s very much like drawing in raster, with the significant advantage of producing cleaner artwork and the ability to manipulate and scale your lines afterward.
In this guide, we’ll explore the vector drawing capabilities of Clip Studio Paint. We’ll explore its features, provide step-by-step instructions, look into the tools available for editing your vectors, and even learn how to convert a raster layer to a vector.
Let’s get started!
Table of Contents
Key Takeaways
- Vector layers are excellent for lineart, allowing easy editing, scaling, and distortion without pixelation.
- Separate layers are essential for coloring as vectors don’t support color fills.
- While great for clean work like logos, Clip Studio Paint offers tools to add artistic flair, making vectors suitable for various creative purposes.
Read on to learn everything about creating vector art in Clip Studio Paint.
Note: All screenshots from this tutorial are taken from the CSP Mac version.
Understanding Vector Layers in Clip Studio Paint
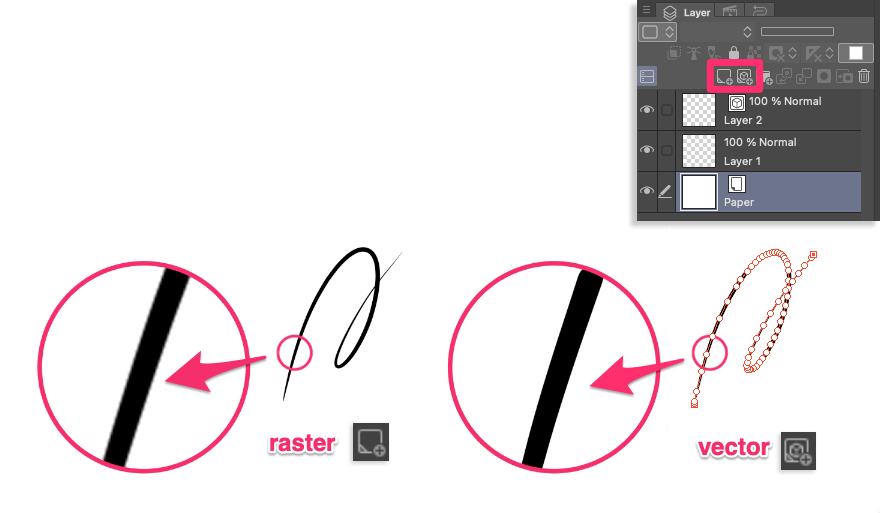
Vector layers in Clip Studio Paint are layers that contain content made with paths instead of pixels. Unlike raster layers, which are composed of individual pixels, vector layers store each line as data, allowing for infinite scalability without loss of quality.
Benefits of Vector Layers in Digital Art
The use of vector layers offers artists several advantages:
- Infinite Scalability: Vector drawings can be resized without any loss of quality, making them ideal for creating artwork that needs to be scaled up or down.
- Non-Destructive Editing: Each line in a vector layer can be easily edited by manipulating its individual points. This allows for precise modifications and adjustments to the artwork.
- Clean and Sharp Lines: Vector drawings maintain their sharpness and clarity, even when zoomed in or scaled up. This ensures that your artwork looks professional and polished.
- Efficient Workflow: Vector layers in Clip Studio Paint provide a streamlined workflow so that you can easily make changes, experiment with different styles, and create complex illustrations.
Why Use Clip Studio Paint for Vector Art?
While Photoshop primarily deals with raster images and Adobe Illustrator focuses on vectors, Clip Studio Paint offers a middle-ground approach. Here are some advantages of using Clip Studio Paint for vector drawing:
- Brush Tools for Vector Drawing: Clip Studio Paint allows all pen, brushes, or decorative brushes to be used as vectors. Artists can take advantage of vectors not just for line art but also for various other purposes.
- Enhanced Vector Layer Features: Clip Studio Paint provides a range of features and tools specifically designed for vector layers. These include the ability to adjust line width, change brush types, and easily edit vector lines by moving their points.
- Non-Destructive Editing: Non-destructive layers preserve the original artwork while making modifications. It allows you to experiment and iterate without the fear of losing your work.
Disadvantages of Vector Layers
While vector layers in Clip Studio Paint offer numerous benefits, there are a few limitations to be aware of:
- Inability to Fill with Color: Unlike raster layers, vector layers cannot be filled with color directly. To add color to a vector drawing, a separate raster layer needs to be created below the vector layer and filled with color.
- Less Suitable for Realistic Textures: Vector art is great for sharp and clean shapes, but it’s harder to achieve realistic textures and variations. However, Clip Studio Paint has tools to make vector lines look more organic.
- Exporting to Other Programs: When exporting a Clip Studio Paint file to other software, vector layers are converted to raster layers. This means that the scalability and editability of vector drawings may be lost when transferring files to different programs.
Creating Vector Layers in Clip Studio Paint
Creating vector layers in Clip Studio Paint is a simple process that can be done in a few easy steps. Here’s how to create a new vector layer:
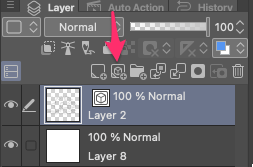
Step 1: In the Layers Palette, select the New Vector Layer icon (it resembles the New Raster Layer icon but has a small cube in the middle).
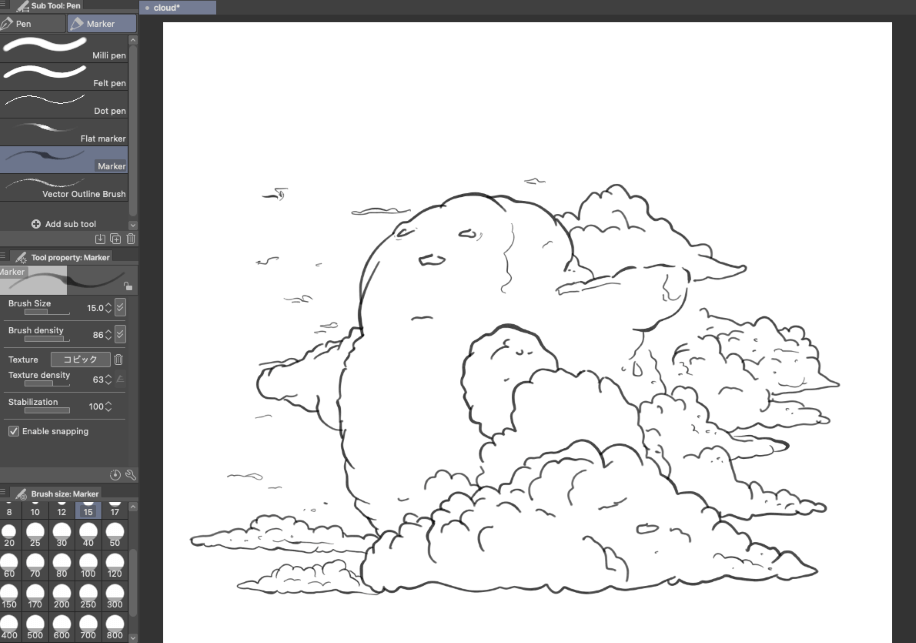
Step 2: You can begin drawing shapes and lines using the various tools available in Clip Studio Paint. These tools include the Pen, Pencil, Brush, Airbrush, Decorative Brush, and the Shape tool, which allows you to create basic shapes like rectangles and circles.

Step 3: When it comes time to erase, you may find that erasing content from vector layers with a regular eraser tool can be challenging, as it erases multiple points and lacks precision.
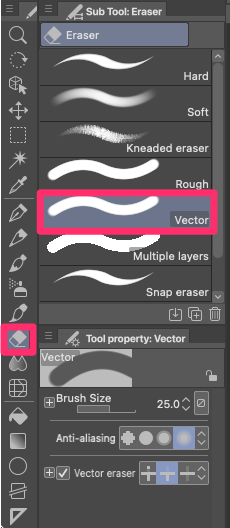
To simplify this process, Clip Studio Paint offers a dedicated Vector Eraser tool, located within the Eraser Sub Tool panel. It provides different options for erasing vector lines.
And that covers the basics of drawing in vectors! As you can see, apart from a few subtle differences, it’s much like drawing in raster.
However, the real power of vectors becomes evident in post-drawing. So, if you want to fully leverage the advantages of vectors, it’s worth exploring the advanced features and tools that Clip Studio Paint has to offer for vector drawing.
Advanced Features and Tools for Vector Drawing in Clip Studio Paint
One of the key advantages of vector layers in Clip Studio Paint is the ability to easily edit and modify your artwork. Here are some essential editing techniques for vector layers:
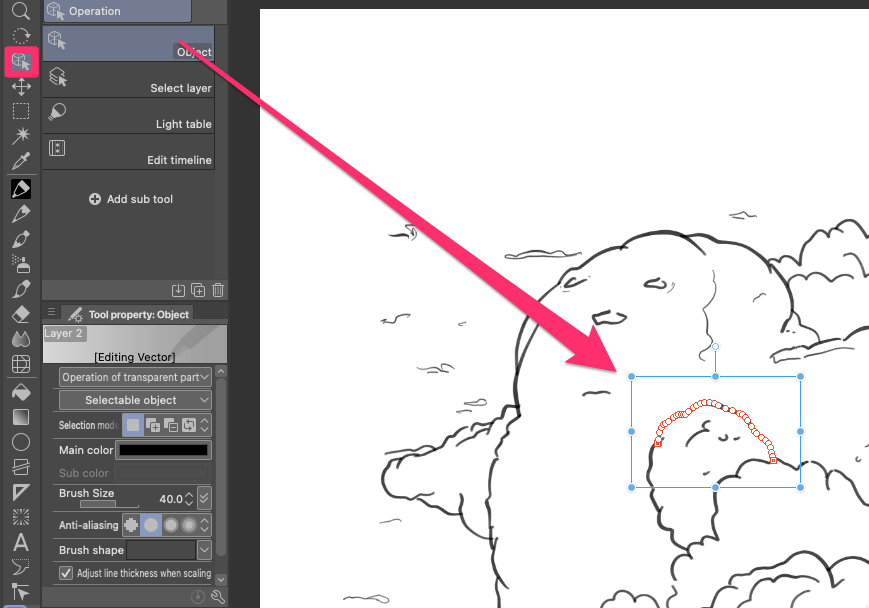
Object Tool:
Select the Object Tool by navigating to the Operations toolbar. This offers several options to manipulate your vector art.
- Moving Points to Edit Vector Lines: With the Object Tool selected, modify individual points on a vector line. Click once on a vector line to reveal its points, then select and drag these points to reshape and edit your drawing’s lines.
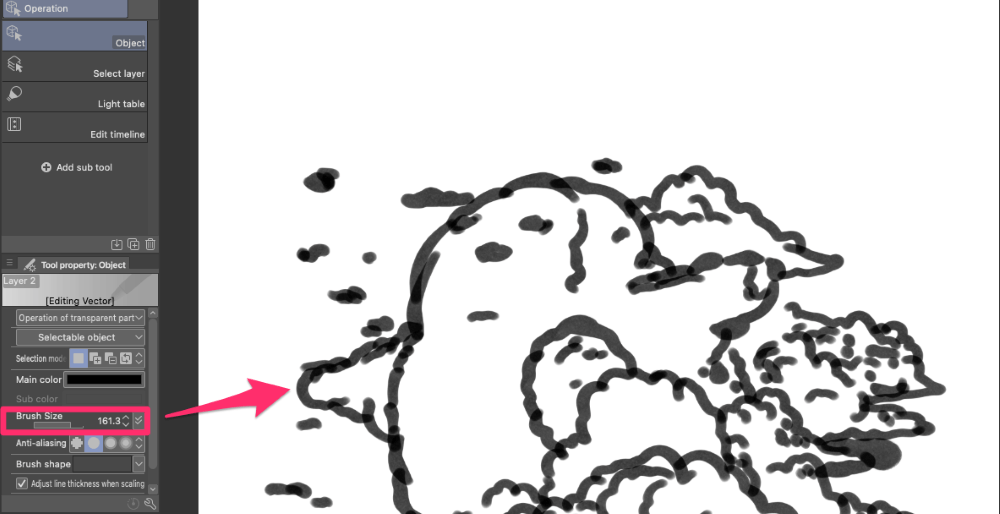
- Adjusting Line Width: To change the line width of a vector layer, adjust the slider under Brush Size in the Tool Property palette.
- Brush Shape: Change the brush type after completing your drawing without redrawing it. Select the layer and pick a different brush shape from the Tool property panel to experiment with various brush presets and styles.
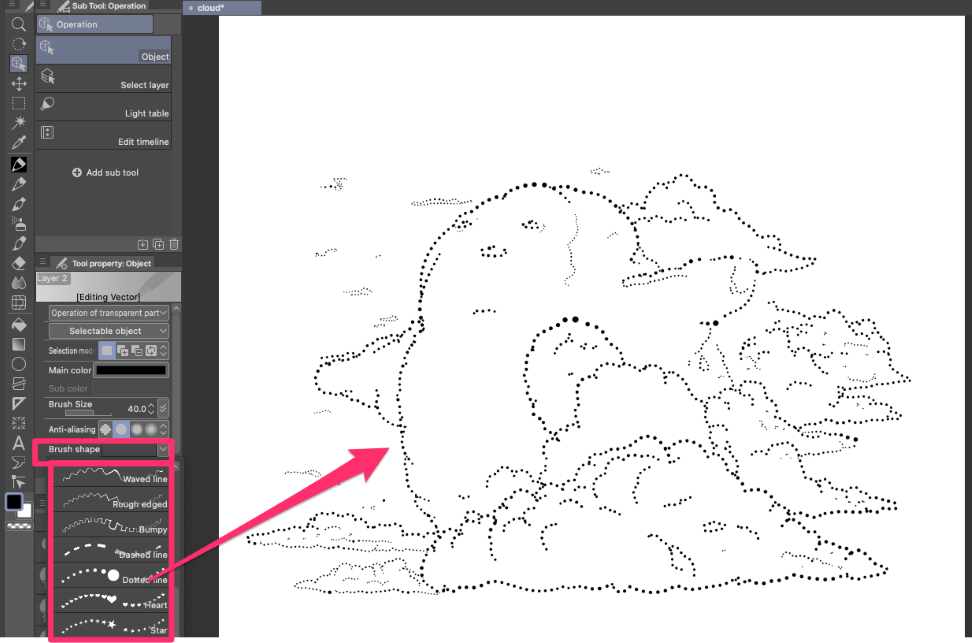
To create your own, select a brush or pen, click the wrench icon, navigate to Brush Shape in the Sub Tool Detail window, and click Add to Presets. Your new style will then be available from the dropdown menu.

Correct Line Tool:
The Correct Line Tool offers various editing functions for adjusting line shapes, and widths, and simplifying and connecting lines. Choose the right sub-tool in the Sub Tool palette for precise adjustments to your vector art.
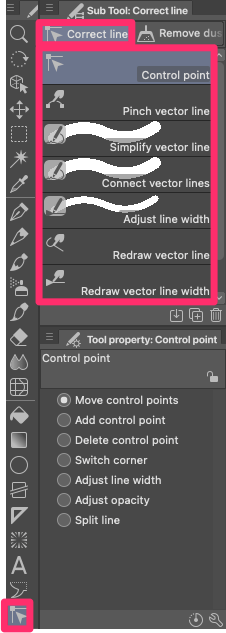
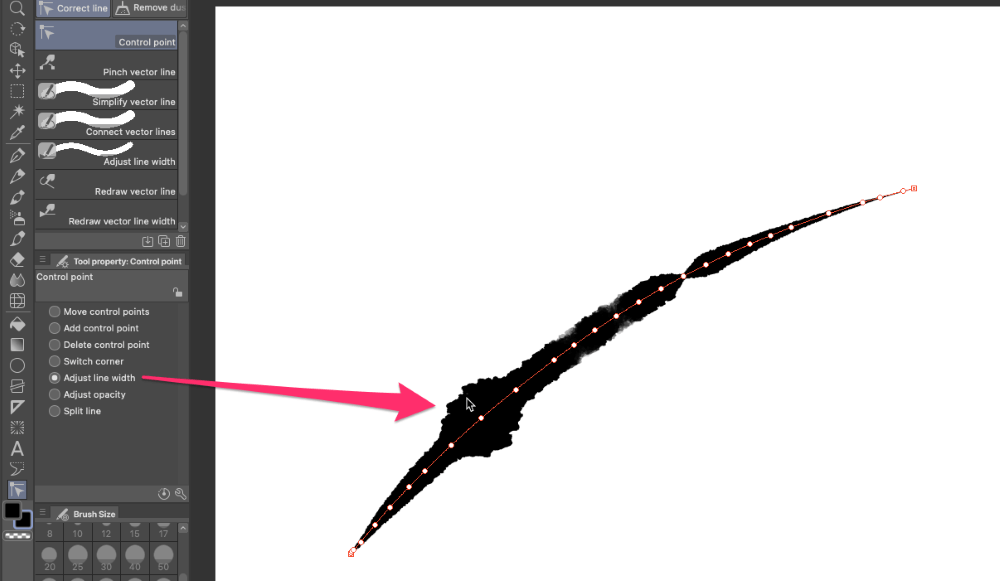
- Control Point: Edit control points with precision to customize your lines. To use these functions, choose the Control Point Subtool, then click any option.
To Move, Add, Delete, Switch Corner Types or Split a line simply click on a point with your chosen option.

Opt for Adjust Line Width or Opacity and drag a control point to modify line width or opacity nearby. This feature enables nuanced line quality adjustments and enhances depth in your artwork.
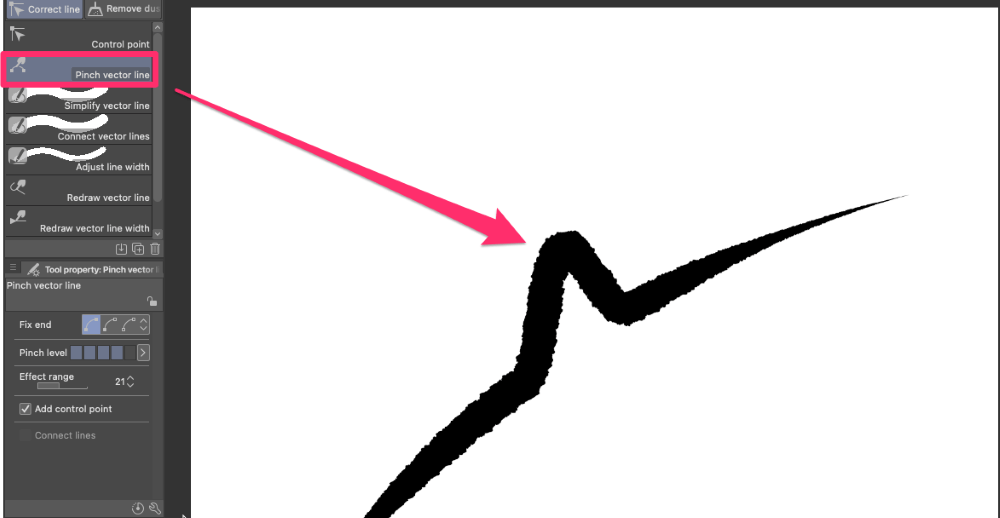
- Pinch Vector Line: This allows you to transform lines by dragging a portion of the line. With this tool, you can reshape and adjust the position of lines.
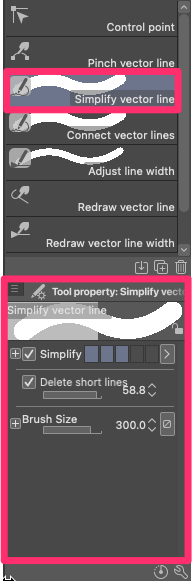
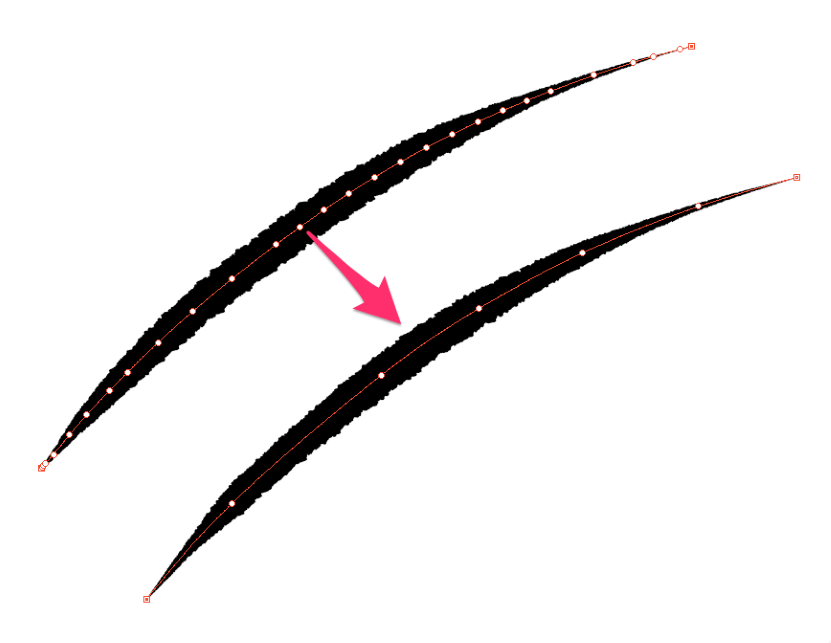
- Simplify Vector Line: Reduce control points in complex line art to streamline and enhance performance. Drag the Simplify Vector Line Tool over the line to simplify it, with controls to adjust the strength.
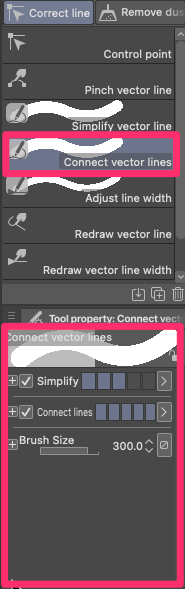
- Connect Vector Lines: Join separate lines into a continuous path by dragging from one line end to another, with controls to fine-tune the intensity of the tool’s effects.
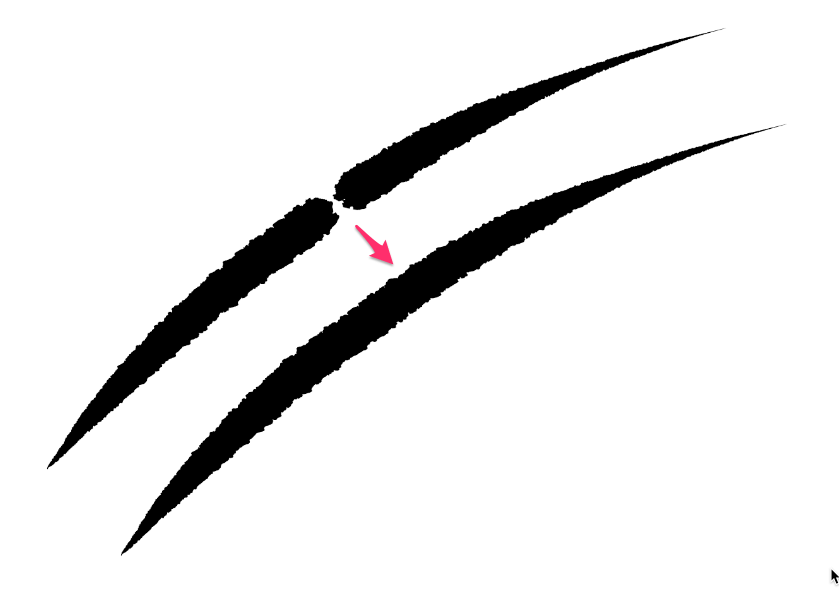
- Adjust Line Width: Modify line thickness or scale it by a specified percentage using this tool. Choose from options like Thicken, Narrow, Scale Up Width, Scale Down Width, and Fix Width to achieve the desired line weight.
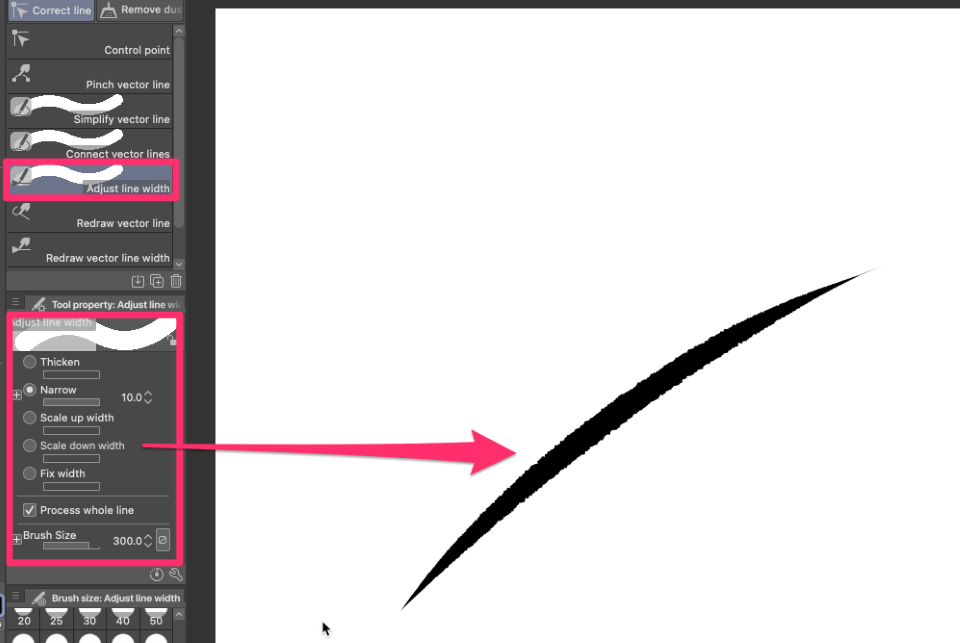
- Redraw vector Line: With this tool, you can redraw a portion of a vector line by dragging it.
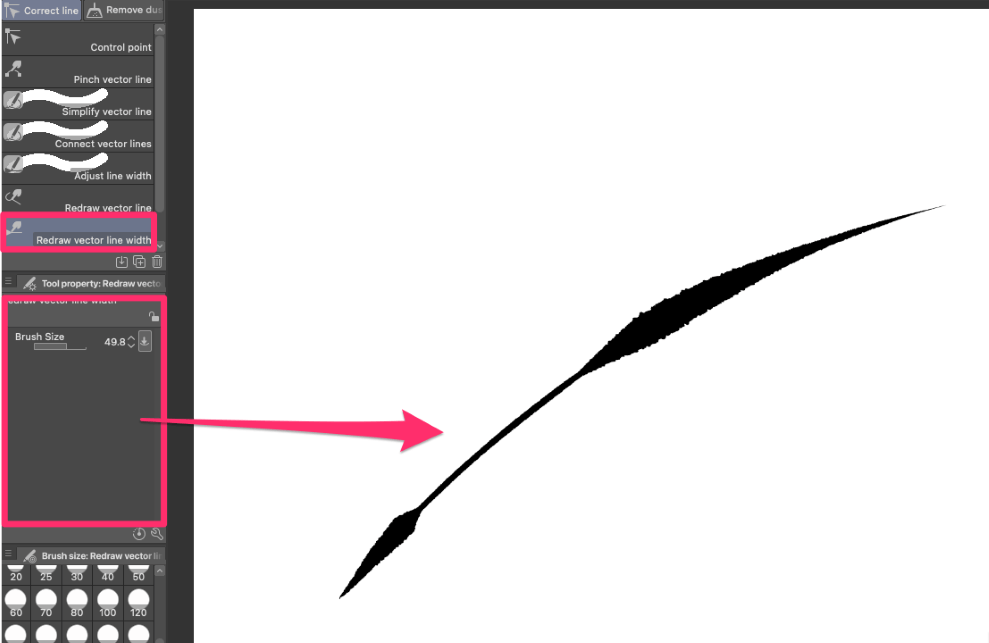
- Redraw Vector Line Width Tool: This allows you to change the line width of your vector lines by dragging over them.
Pro Tip: Converting Raster Layers to Vector Layers
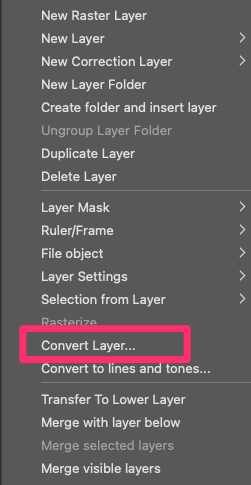
If you’ve begun drawing on a raster layer but want to switch to a vector layer, it’s possible. Right-click on the layer and choose Convert Layer.
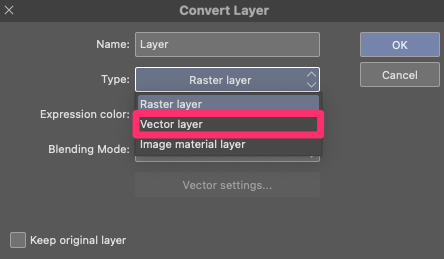
From the dropdown menu under Type, choose Vector Layer.
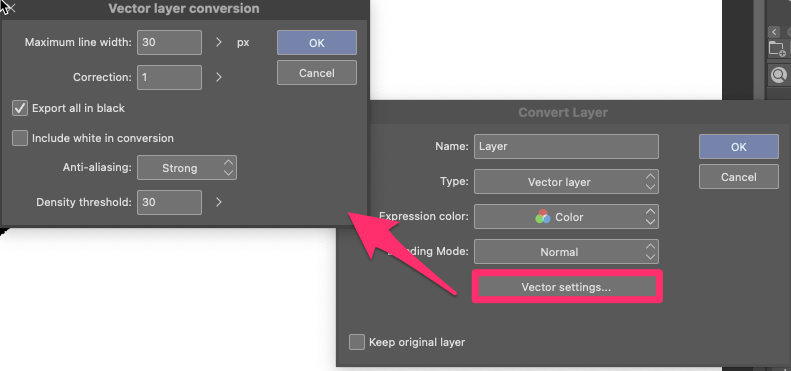
Experiment with the options under Vector Settings to get the best outcome. Your result might appear a bit messy initially, so use the techniques mentioned above to refine your converted artwork for a cleaner finish.
Final Thoughts
Clip Studio Paint provides a balanced blend of raster and vector capabilities, making it accessible to artists of all levels. You don’t need extensive technical knowledge to explore the flexibility of digital art through vector drawing. Drawing freehand in vectors follows the same intuitive process as raster art.
I’d love to hear your thoughts and experiences with vector drawing in Clip Studio Paint. Please share your feedback and questions in the comments section below!