
Whether you’re looking to focus on a specific area, change the aspect ratio, or just get creative with your video composition, knowing how to crop effectively can transform your video projects.
Hello! I’m Zoe, a graphic designer with a background in illustration. When I first ventured into After Effects, I was puzzled by the absence of a straightforward crop tool. I soon realized that’s because video dimensions are more standardized than static images. But don’t worry, there’s a way to crop freely in After Effects, and I’m here to guide you through it.
In this guide, we’ll cover cropping using Composition settings and the Region of Interest Tool, delve into creative masking techniques, and conclude with exporting your cropped video.
Let’s dive in!
Table of Contents
Key Takeaways
- Cropping can be done by adjusting composition settings or using the Region of Interest tool.
- The Region of Interest tool offers a more visual and flexible cropping method.
- Make use of the Info Panel while using the Region of Interest Tool to crop to precise dimensions.
- Masks allow for creative shapes but don’t change the video’s actual dimensions.
- Export settings are crucial, especially if you’re using masks and need a transparent background.
Note: All screenshots from this tutorial are taken from the After Effects Mac version.
This article provides a comprehensive guide on how to crop videos in After Effects using three different methods.
Cropping by Modifying the Composition Settings
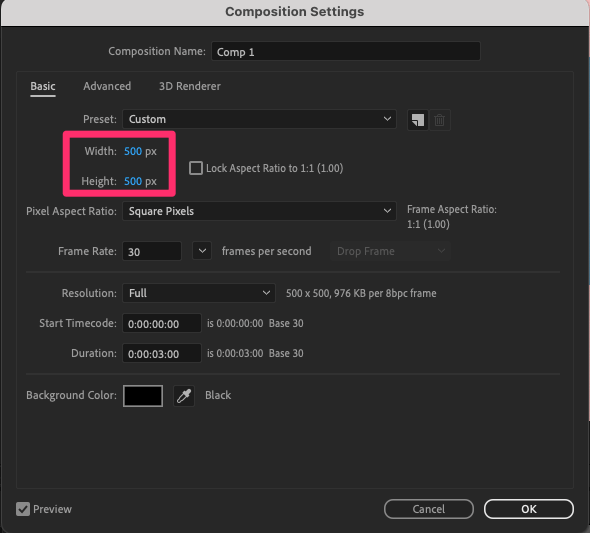
The most direct way to crop in After Effects is by adjusting the Composition settings. Let’s break it down:
Step 1: Ensure the composition you wish to crop is active. Navigate to Composition > Composition Settings.

Step 2: Input your desired width and height dimensions, then hit OK.
While this method is straightforward, it has its limitations:
- Lack of Visual Control: This method relies solely on inputting numerical values, which means you’re cropping “blindly” without a visual guide.
- Centered Reformatting: After Effects auto-centers content in the new dimensions. Adjusting layer positions within this frame can be cumbersome.
But fear not! There’s a more flexible approach.
Cropping Using the Region of Interest Tool
The Region of Interest Tool is your go-to for freeform cropping in After Effects.
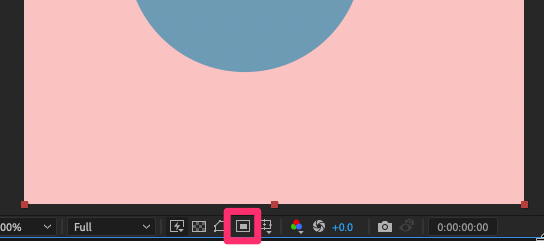
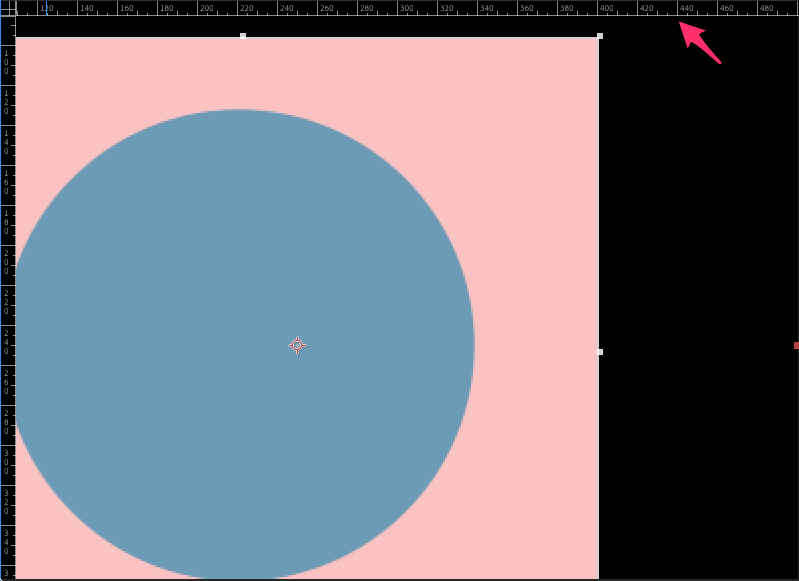
Step 1: Start by selecting the Region of Interest Tool, found above the composition panel.
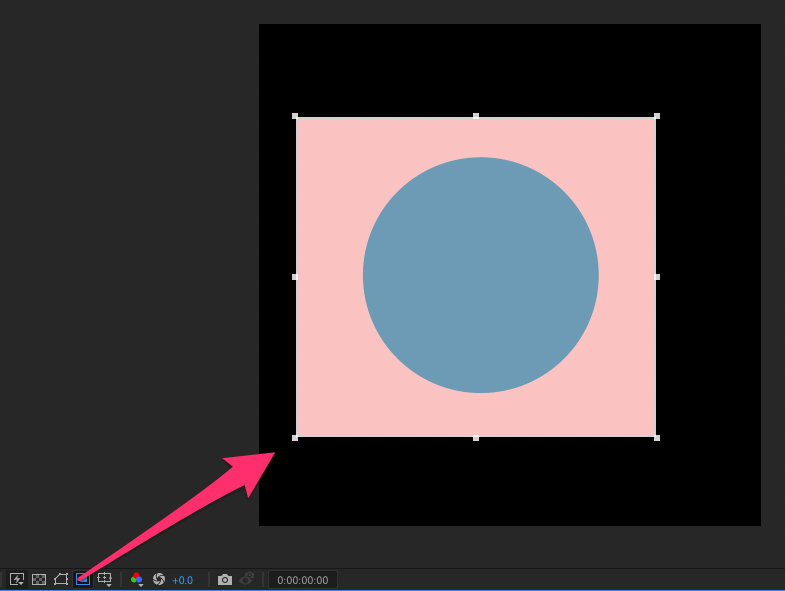
Step 2: With the tool activated, drag its handles to define your desired crop area. Remember, you can adjust your rectangle even after drawing, so refine it as needed.
Step 3: Once you’re satisfied, go to the menu bar. Under Composition, select Crop Comp to Region of Interest.

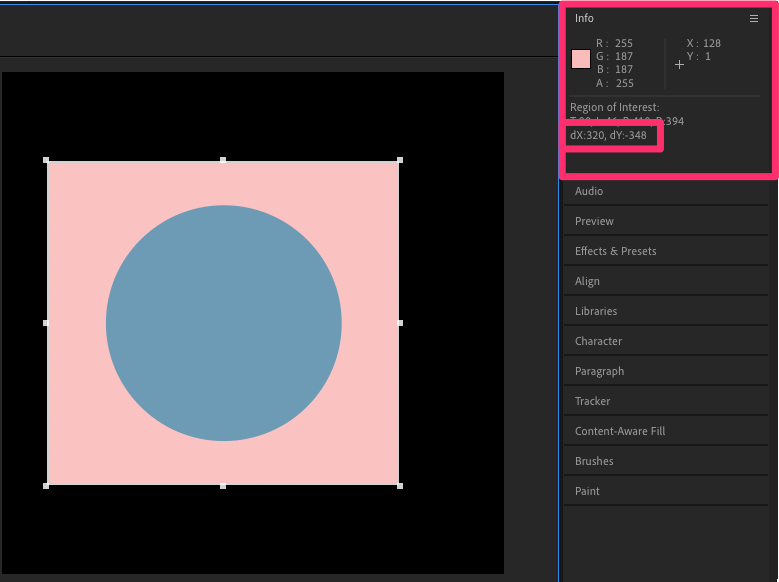
Voilà! Your composition is now cropped to your specifications. However, the Region of Interest tool, while visually intuitive, might not offer pixel-perfect precision. For those seeking exact measurements:
- Info Panel: As you draw your Region of Interest, the Info Panel displays precise dimensions. Locate the Info Panel on the right side of the After Effects interface. The dY (negative value) represents width, while dX (positive value) indicates height.
- Using the Ruler: For a visual guide, activate the ruler (View > Show Ruler). After defining your region and cropping, you can fine-tune the dimensions via the composition settings.
The Region of Interest tool gives you a quick and visual way to crop. Just remember to double-check for accuracy if you need exact measurements.
Cropping Using Masks
Want to think outside the box? Use the masking tool for unique shapes.
But remember, masking isn’t true cropping. It hides or reveals parts of a layer, but the video’s dimensions stay the same.
Masked areas will show as black or transparent based on your export settings. If you mask your video into a star shape, it will still export as a rectangle with a star surrounded by empty space.
That being said, here’s a quick guide to using mask tools to “crop” videos in After Effects:
Step 1: Select the layer you wish to mask.
Step 2: From the toolbar, choose the Pen tool or a shape tool, based on your needs.

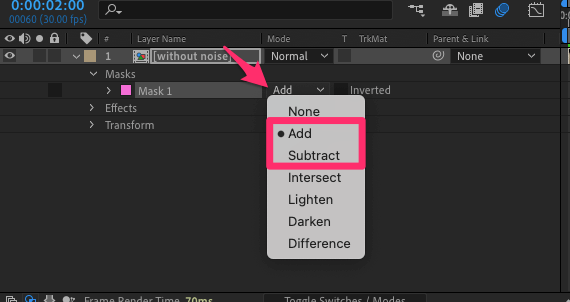
Step 3: Draw a mask around your desired area.
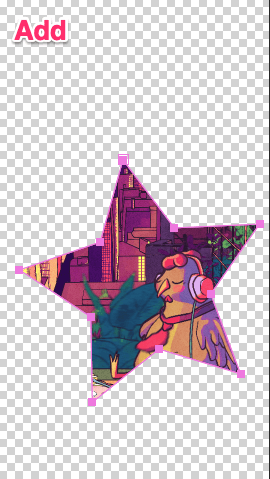
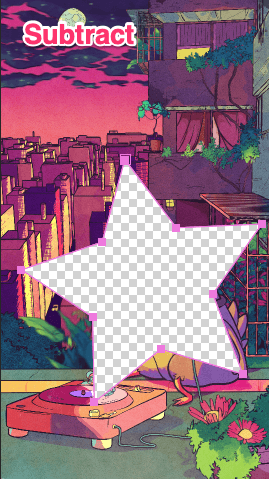
Step 4: A new Masks section appears under your layer. Depending on your desired effect, use the dropdown menu under Mode to choose Add (to reveal only the masked area) or Subtract (to reveal everything except the masked area).
Using masks lets you shape your video in unique ways. It’s not traditional cropping, but it adds a creative touch to your content.
Exporting Your Cropped Video
If you’ve followed the steps correctly, exporting your cropped video is a breeze.
Step 1: Once ready, go to Composition > Add to Render Queue.
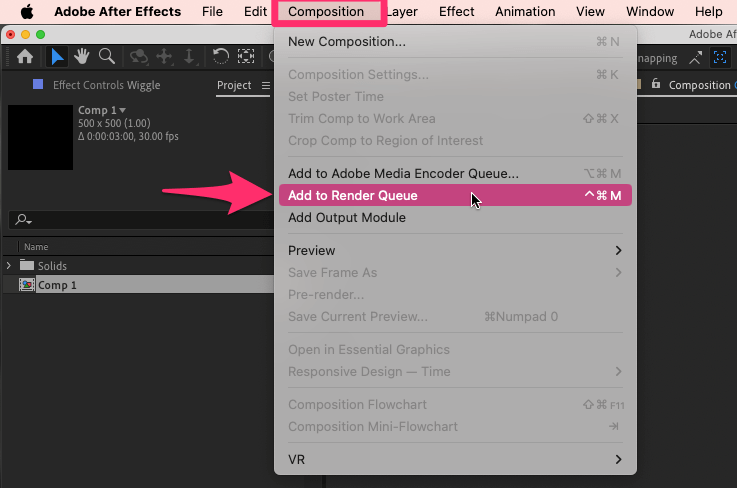
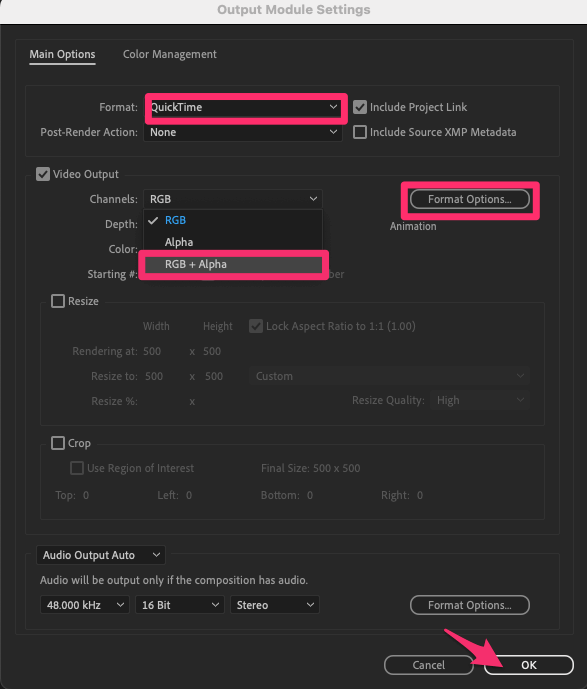
Step 2: Click the blue text next to Output Module. Verify your video’s output dimensions. If they match your cropped dimensions, you’re good to go!

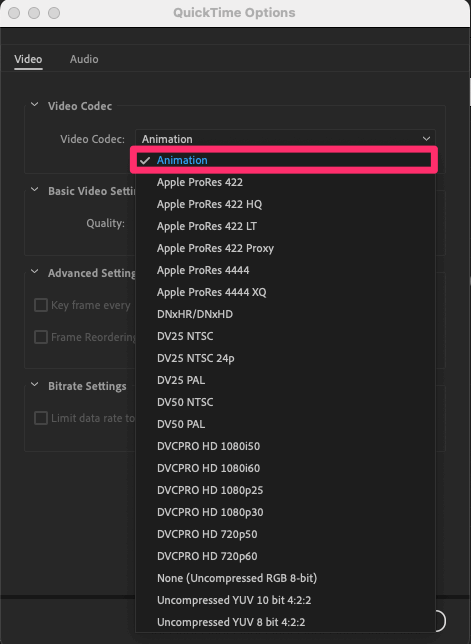
Step 3: If you’ve used the masking method and want a transparent background in your export, choose the QuickTime format. In the Format Options, select Animation. Then, in the Video Output section, opt for RGB + Alpha to maintain transparency.
Step 4: Confirm your settings, click OK, and hit Render!

Once you’ve cropped your video, exporting is the final step. Make sure your settings match what you want, and you’re good to go!
Conclusion
And there you have it! Cropping in After Effects might be more complex than in other video editing software, but with these methods, you can easily tailor your video to look exactly how you want. From cropping with the Region of Interest Tool to using masks for creative flair, you now have the tools to tailor your content.
Have any additional questions or insights about cropping in After Effects? Please share your thoughts in the comments below!