
Knowing how to split, trim, or cut a clip in After Effects allows for precise editing, enabling you to isolate specific segments and remove unwanted portions of your footage.
Hi, I’m Zoe, and as an illustrator who’s ventured into the realm of animation, I’ve faced my fair share of editing hurdles.
One challenge that initially stumped me was cutting out a specific section from the middle of a clip in After Effects. But by learning splitting, trimming, and duplicating techniques, I soon became capable of piecing together any vision in After Effects.
Today, I’ll guide you through manipulating clips in After Effects, covering splitting, trimming, cutting, and multi-clip editing. We’ll also demystify grayed-out sections and composition adjustments. Stay tuned for a quick recap of key shortcuts for efficient editing!
Let’s get going!
Table of Contents
- Key Takeaways
- Keyboard Shortcuts for Efficient Editing
- How to Split a Clip in After Effects
- How to Trim a Clip in After Effects
- How to Cut Out a Section of Your Clip in After Effects
- How to Edit Multiple Layers Simultaneously
- Understanding the Grayed-Out Sections in After Effects
- Trimming Your Composition to the Work Area
- Final Thoughts
Key Takeaways
- Splitting allows you to create two separate clips from one layer for diverse effects or transitions.
- Trimming involves cutting unwanted beginnings or ends, ensuring perfect length.
- You can cut out specific middle sections from a clip by duplicating, trimming, and pre-composing.
- Adjust your composition’s duration to match the content with the Trim Comp To Work Area function.
Keyboard Shortcuts for Efficient Editing
Keyboard shortcuts are essential for efficient editing in After Effects. They help you save time and streamline your workflow. Here are the shortcuts we used throughout this tutorial to split, trim, and cut clips in After Effects:
- Ctrl + Shift + D (Windows) or Command + Shift + D splits the selected layer into two segments from the playhead position.
- Alt + [ (Windows) or Option + [ (Mac) trims the selected layer from the start to the playhead position.
- Alt + ] (Windows) or Option + ] (Mac) trims the selected layer from the end to the playhead position.
- Ctrl + D (Windows) or Command + D (Mac) duplicates the selected layer.
- Page Up/Page Down (Windows) or Command + Right / Left arrows (Mac) moves the playhead one frame forward/backward.
How to Split a Clip in After Effects
When you split a layer, you’re essentially creating two separate clips from a single layer. This is especially useful when you want different segments of your footage to have varied effects or transitions.
Note: All screenshots from this tutorial are taken from the After Effects Mac version.
Step 1: Move the playhead to the exact point where you want to split the layer.

To achieve precision in your edits, you might want to move frame by frame. Use Page Up and Page Down (Windows) or Command + Right/Left arrows (Mac) to navigate between frames.
Step 2: In the timeline, click on the layer you want to split to ensure it’s selected.
Step 3: Choose Edit > Split Layer. Alternatively, you can use the keyboard shortcut Ctrl + Shift + D (Windows) or Command + Shift + D (Mac).
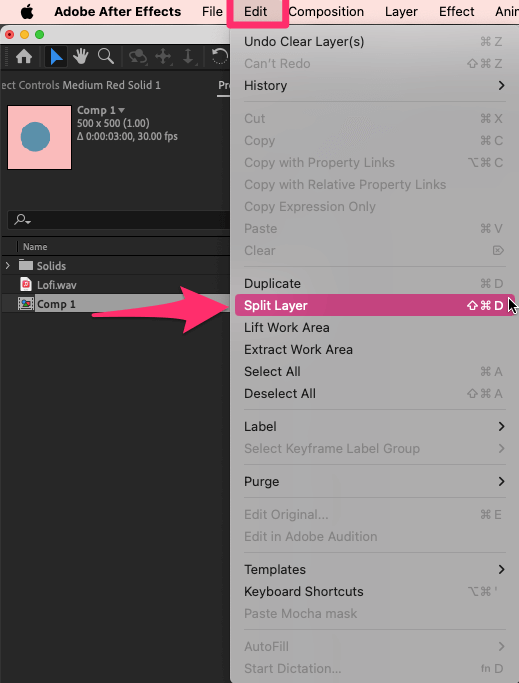
This will split the layer into two separate layers at the position of the playhead.
With this method, you can effectively split any layer in your composition and work on each segment independently.
How to Trim a Clip in After Effects
Trimming is about refining your clip by removing unwanted sections from its beginning or end. Here’s how you can trim layers in After Effects:
Step 1: Select the layer you want to trim.
Step 2: Position the playhead at the point where you want to start or end the trim.
Step 3: Use the keyboard shortcuts Alt/Option + [ to trim the start of the layer to the playhead position, or Alt/Option + ] to trim the end of the layer to the playhead position.
By using these keyboard shortcuts, you can quickly and precisely trim your layers in After Effects, ensuring that your clips are the perfect length for your project.
How to Cut Out a Section of Your Clip in After Effects
Cutting out a specific section from the middle of your clip in After Effects can be a bit more complex than simple trimming or splitting. However, with these steps, you can precisely isolate and remove any unwanted parts:
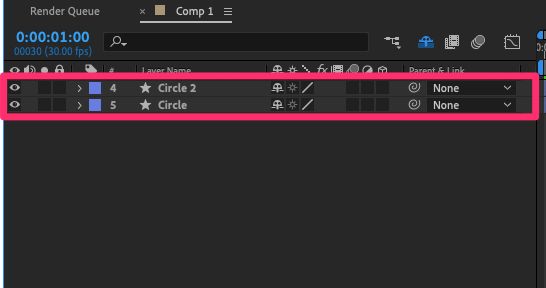
Step 1: Select your clip in the Layers panel.
Step 2: Duplicate the layer using Ctrl/d + D.
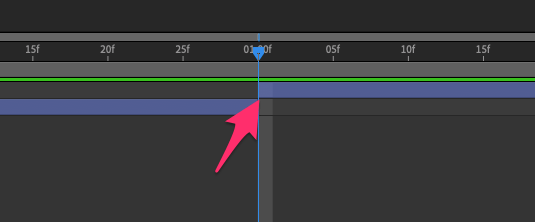
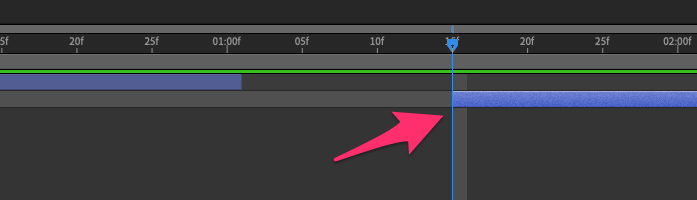
Step 3: Position the playhead at the beginning of the section you want to cut out. Then, select the top layer of the two and press Ctrl/Command + ].

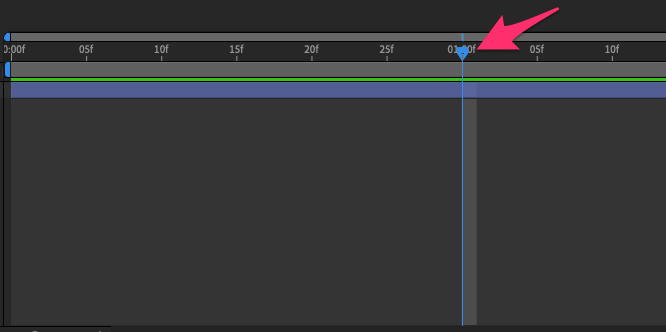
Step 4: Move the playhead to the end of the section you want to remove and select the bottom layer. Press Ctrl/Command + [.
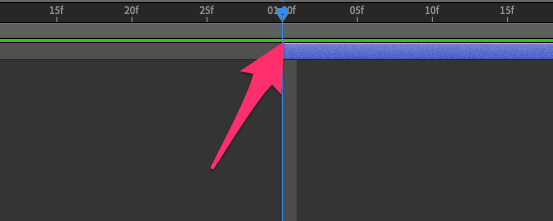
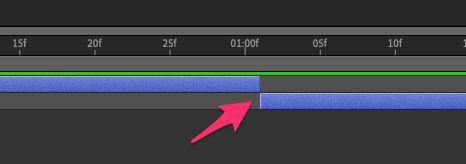
Step 5: Drag the top layer along the timeline until it aligns with the end of the bottom layer. Zooming in on the timeline can help ensure precision.
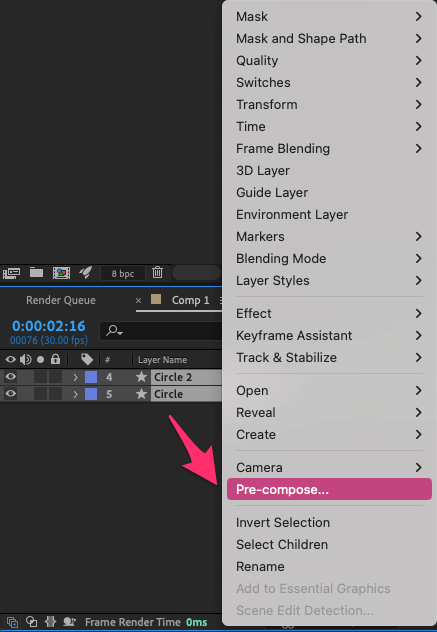
Step 6: To join the two layers on your timeline, hold Shift to select both layers, then right-click and choose Pre-compose.
By following these steps, you’ve successfully removed a section from your clip. This method allows you to maintain the continuity of your video while eliminating unwanted parts.
How to Edit Multiple Layers Simultaneously
You can trim and split several clips in your timeline at once. Here’s how:
Step 1: Add your clips to the timeline and arrange them as needed.
Step 2: For stacked layers, hold Shift and select the top and bottom layers. For separate layers, hold Ctrl (Windows) or Command (Mac) and pick the desired layers.
Step 3: With the layers selected, apply either the trimming or splitting methods to edit all chosen clips simultaneously.
Now you know how to edit multiple layers at once, making your editing faster all while ensuring consistency across your project.
Understanding the Grayed-Out Sections in After Effects
If you’re new to After Effects, the grayed-out bars on your timeline after splitting or trimming a layer might be puzzling.
These bars show where the original layer is now hidden, not deleted. This setup is quite handy because it lets you easily extend the hidden parts later if you change your mind.

To clean up your timeline and get rid of these grayed-out sections, just drag the layer’s endpoint to the start of the visible part. This will effectively shorten the layer and remove the grayed-out area.

Trimming Your Composition to the Work Area
After you’ve made edits to your layers, you might find that your composition’s duration doesn’t match your actual content. Here’s how you can easily adjust your composition’s duration to fit the length of your clip:
Step 1: Trim your clip. If there are multiple layers in your composition, keep in mind that the composition will be cut down to the length of your longest clip.
Step 2: Navigate to the top menu and select Composition. From the dropdown menu, choose Trim Comp to Work Area.
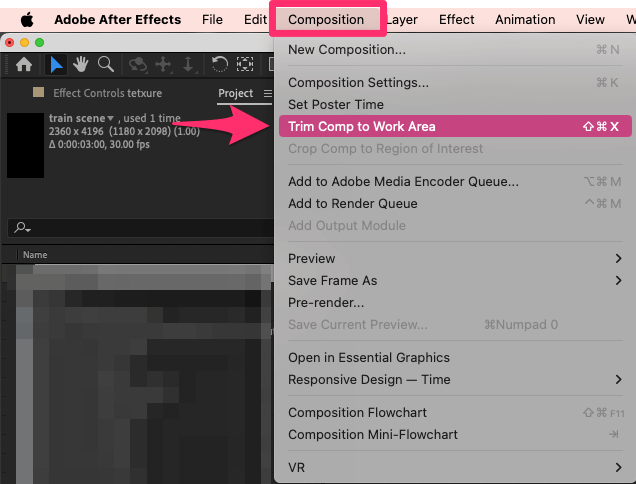
Your composition’s duration will now match your trimmed clip, making it easier to work with and ensuring that you’re only viewing the content you need.
Final Thoughts
Knowing how to split a clip is key in crafting animations in After Effects. With these skills, you can pick the best parts of your footage, get rid of what you don’t need, and put everything together smoothly. Remember, quick keyboard shortcuts further streamline the editing process.
Have any more questions or insights about cutting clips in After Effects? Drop them in the comments below!