
Photo enhancement is the editing process in which you make your good photographs great – often utilizing complex Photoshop tools or features to perfect and produce eye-catching imagery.
My name is Skyler, and I’ve been using Photoshop on a personal and professional level for well over a decade – and today I’ll be showing you how to enhance your images in Photoshop like a pro.
So what’s the first step in enhancing your images in Photoshop? You can begin with whatever you feel suits your image needs, but most often you’ll utilize the Smart Sharpen, Reduce Noise, and Hue/Saturation adjustment features to enhance your image quality in Photoshop.
If you’d like to learn how to enhance your images, you’ll want to follow along below to learn how to utilize these functions for yourself!
Table of Contents
Method 1: Smart Sharpen
You can further improve the clarity of your images by utilizing the Smart Sharpen feature in Photoshop.

To access the Smart Sharpen feature, navigate to Filter > Sharpen > Smart Sharpen. This will bring up a window where we can make adjustments to the Amount, Radius, and Noise before applying it.
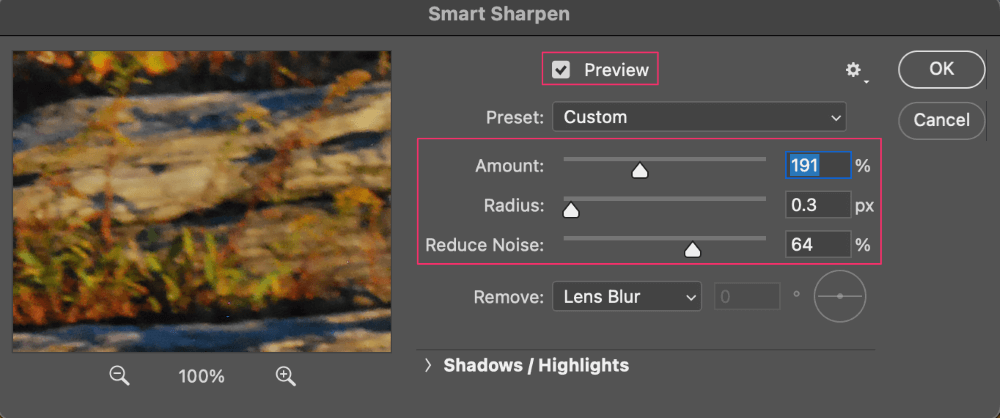
Make sure your preview is enabled so you can see the results of your adjustments in real time as you edit. You’ll want to experiment with these sliders to better understand them, and decide what values are best for your individual imagery.
Method 2: Reduce Noise
We can also reduce the overall grain of the image by using the Reduce Noise filter.
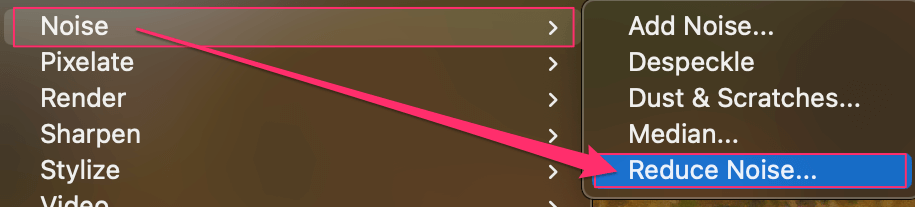
Once you’ve selected this option, another window will pop up where you can make adjustments before applying.
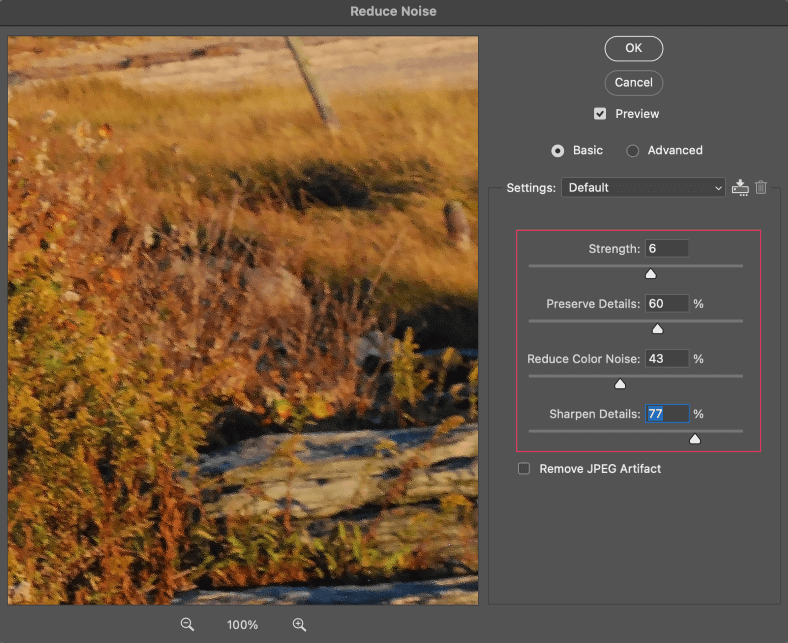
Here we can edit the Strength of the noise reduction, the percentage of Preservation of Details, Reduction of Color Noise, and overall Sharpening. You’ll want to be careful not to make too many reductions, or your images may begin to appear less so smooth, and more so blurry.
Method 3: Adjust Hue and Saturation
Last, but certainly not least – adjusting the Hue & Saturation by adding a New Fill Layer. This will allow us to manipulate the curves and functions of the color intensity.

We can find this either by navigating to Layer > New Adjustment Layer > Hue/Saturation, or simply choosing Hue/Saturation from the New Fill Layer button in the Layers Panel.
Once you’ve selected this, a new layer will appear in our Layers Panel. This will also summon the properties menu so you can make adjustments to our hue and saturation.
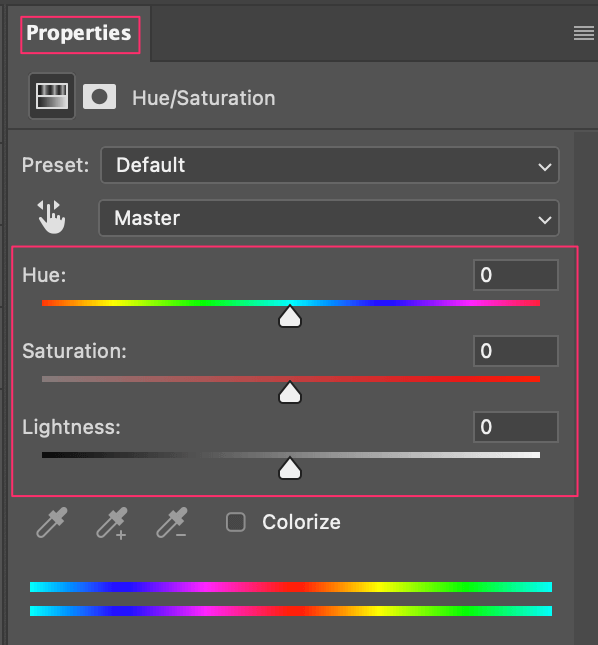
Great! Once you’ve got the Properties Panel within reach, you can see the Hue, Saturation, and Lightness Sliders are available. You can use these sliders to make the appropriate adjustments and really give your image quality a boost by bringing out the natural colors in your photo.
Once you’ve made the appropriate adjustments, you’re officially done!
Mastering Adobe Camera RAW
If you’re looking to get an even more professional, polished look and further enhance your image quality, you’ll also want to check on the Camera RAW Filter and all the crazy abilities it has!
You’ll need to understand how to bring out these qualities in your photos, so I’ve linked you to a tutorial that will show you how to master all aspects of the RAW filter.
Conclusion
Photo enhancement can be a complex process, especially when you’re still learning how the program works. Plus, photoshop often utilizes innovative, and creative tools or features to perfect and produce eye-catching imagery.
Thankfully though, we have lots of resources and materials available to learn how to produce professional quality enhancements quickly and easily!