
Are you struggling to fit all your content into the limited timeline in Adobe After Effects? You can extend the length of your timeline by going to Composition > Composition Settings and entering a new duration.
I’m Zoe, a graphic designer who has faced the same challenge. Countless times, I’ve underestimated the duration of a project and had to extend it. The good news is that it’s a straightforward process, and I’m here to guide you in handling longer and more intricate projects effectively.
In this article, we’ll delve into adjusting your composition’s timeline duration and explore techniques to align your clips with the new timeline.
Let’s jump in!
Table of Contents
Key Takeaways
- Extend your After Effects timeline for more complex and detailed projects by changing the Composition Settings.
- Use Time Stretch to match your clips with the extended timeline.
- Leave complex keyframes and effects intact by nesting them within compositions, then changing the composition’s duration.
Note: All screenshots from this tutorial are taken from the After Effects Mac version.
This post teaches how to extend the timeline in Adobe After Effects for longer and more complex projects.
How to Adjust Composition Duration in After Effects
When you initially set the duration of your composition, you may not have accurately estimated the time required. As your creative process unfolds, you might discover the need for more time to fully convey your ideas.
Fortunately, extending the timeline in After Effects is a straightforward process. To efficiently elongate your timeline, follow these simple steps:
Step 1: Launch After Effects and open the composition you wish to extend.
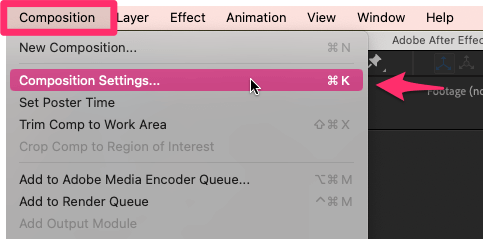
Step 2: Navigate to the menu bar, select Composition, and then click on Composition Settings.
Step 3: In the Composition Settings dialog box, you’ll find options to modify the duration of your timeline. Increase the duration by entering a new value in the Duration field.
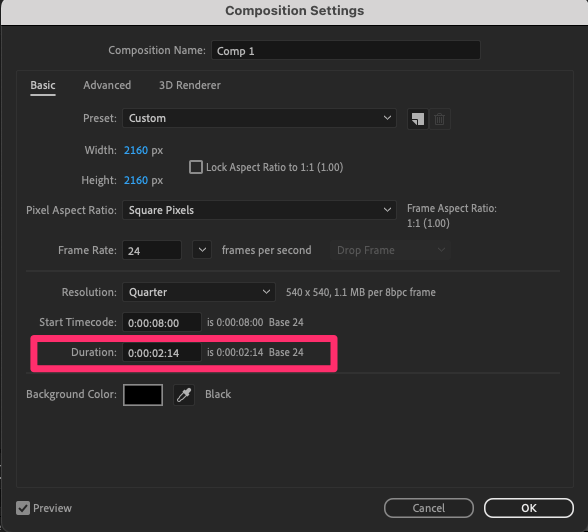
Step 4: Confirm the changes by clicking the OK button, and your timeline will be extended accordingly.
Voila! You will now notice that the length of your composition has been successfully extended. However, it’s important to note that extending the timeline solely affects the composition itself; your layers and keyframes remain unaffected.
Matching Clips to the Extended Timeline in After Effects
To ensure that your clips align seamlessly with the new timeline duration, you can apply Time Stretching to your layers. Here’s how it can be done:
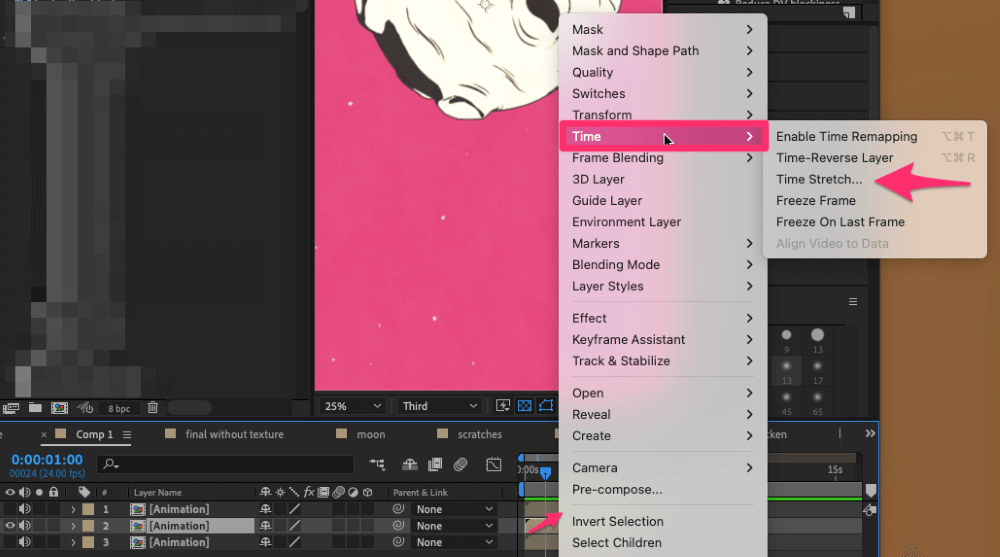
Step 1: Right-click on the layer you wish to extend, then select Time and choose Time Stretch.
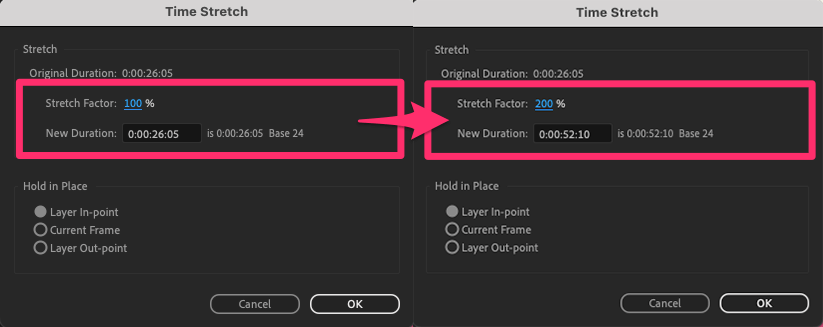
Step 2: In the Time Stretch dialog box, input a new value for the layer’s speed. You can specify a percentage (e.g., setting the speed to 200% will double the layer’s duration) or, now that you know the length of your new timeline, enter an exact duration.
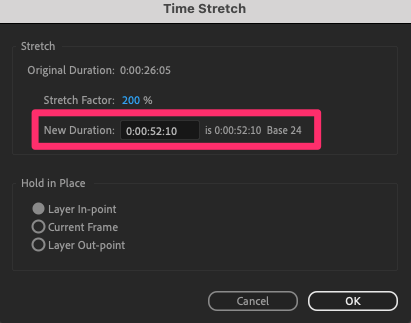
And there you go! Your content has now been modified to fit your new composition’s length perfectly.
Remember: After increasing the video’s length, existing keyframes may require adjustments. Double-check your keyframes and make any necessary modifications to ensure smooth transitions and animations.
Managing Complex Keyframes and Effects
If you have complex keyframes and effects that are affected by time stretching, consider nesting them within a composition. Then, apply time adjustments to the new composition. Here’s how:
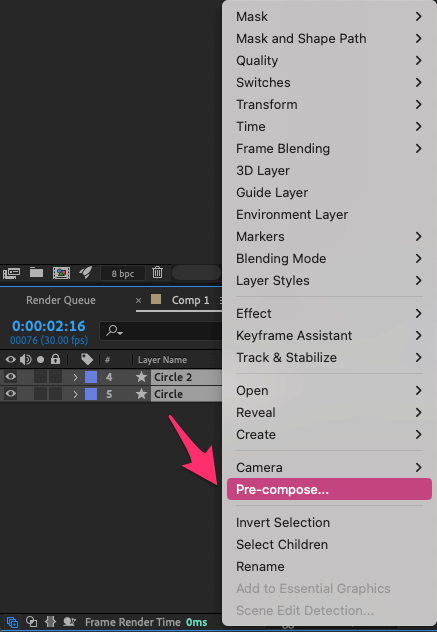
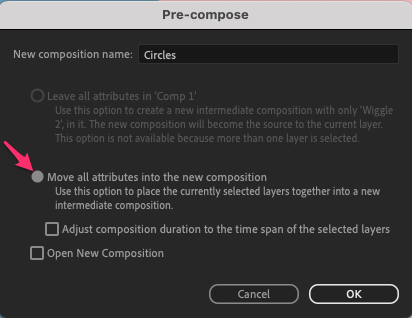
Step 1: Select the layers holding Shift, right-click, and choose Pre-compose from the menu. This action places them inside a new composition.
Step 2: You can now apply Time Stretch to change the timing of your new composition without needing to redo the keyframes and effects on the nested layers.
Step 3: Double-click on the newly created composition to open it.
By nesting your layers, you can maintain the integrity of your complex keyframes and effects while still having the flexibility to manipulate the timing of the overall composition.
Final Thoughts
Whether you need more time for intricate animations, elaborate effects, or simply to allow your project to breathe, extending the timeline provides the flexibility and freedom to fully express your creative ideas. With the knowledge and techniques shared in this article, you can confidently extend your After Effects timeline and bring your vision to life.
If you have any questions, comments, or suggestions, please feel free to share your feedback in the comments section below!