
Knowing how to fade audio in After Effects enhances the emotional impact and pacing of your visuals. It’s achieved by adjusting the Audio Levels using keyframes on the timeline.
Hey there! I’m Zoe, a graphic designer and enthusiast of all things related to visual storytelling. Just recently, I was working on an animation project where the abrupt audio transitions were jarring the overall flow. Learning to fade audio in After Effects was a game-changer, smoothing out those edges and giving the project a polished feel.
In this tutorial, we’ll cover the essentials of fading audio in and out in After Effects, guiding you through each step and sharing tips to enhance your audio editing skills.
Let’s get started!
Table of Contents
Key Takeaways
- Fading audio in After Effects is straightforward with the use of keyframes.
- The Audio Levels property is your primary tool for audio adjustments.
- Proper audio fading enhances the overall mood and pacing of your project.
Note: All screenshots from this tutorial are taken from the After Effects Mac version.
This article will provide a detailed guide on how to fade audio in and out in After Effects.
How to Fade Audio in After Effects:
While After Effects is mostly known for its visual effects, it’s got some pretty solid audio editing features too. A key parameter you’ll work with is Audio Levels which is essential for adjusting volume.
Ready to learn how to fade audio? Here’s a step-by-step guide:
Step 1: Start by importing your audio file into After Effects. Simply drag and drop it into the project panel.
Step 2: Drag your audio file to the timeline.
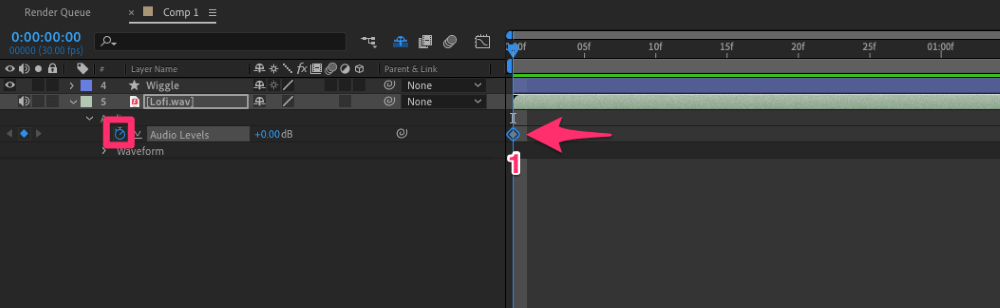
Step 3: Slide the playhead to where you want the audio to start creeping in. This is the beginning of our fade-in.
Step 4: Click on the stopwatch next to Audio Levels to drop a keyframe.
Step 5: Move the playhead to where you want the audio to be fully audible. Add a second keyframe.
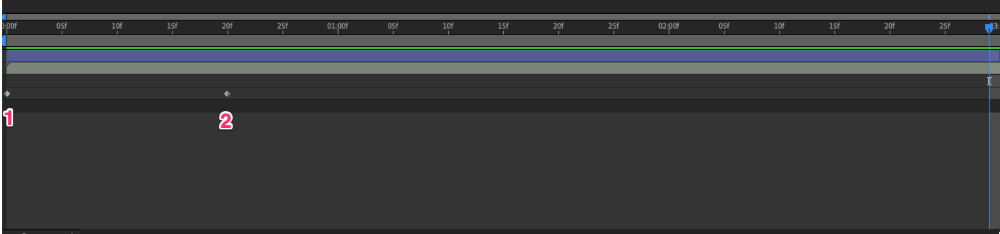
Step 6: For the fade-out, decide where you want the audio to start its descent into silence and drop a third keyframe.

Step 7: Now, slide to where you want the audio to go completely quiet. This creates your fourth and final keyframe.

Step 8: Click on Waveform to reveal a visualization of your audio. Now, lower the Audio Level values of your first and last keyframes until the visualizer shows the sound is no longer audible.

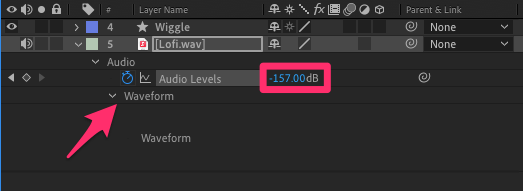
You can also increase the Audio Level values of your second and third keyframes up to +12.00dB.
Step 9: Hit play and listen. If it sounds off, you can always drag the keyframes around to adjust the fade duration.
Tips for Better Audio Manipulation
Before we wrap up, let’s dive into some pro tips to elevate your audio editing skills in After Effects:
- Different Fade Lengths: The length of your fade can change the feel of a scene. A quick fade might feel abrupt, perfect for sudden transitions or changes in mood. On the other hand, a slow, lingering fade can give a sense of closure or melancholy.
- Layering Sounds: Remember, audio is all about layering. Sometimes, fading one sound while introducing another can create a beautiful audio landscape.
- Ambient Sounds: Add background noises like birds or traffic. They fill gaps and make your audio feel real.
Final Thoughts
And that’s a wrap! We’ve covered everything from the basics of importing your audio into After Effects to the nitty-gritty of keyframe manipulation for perfect audio fades.
Remember, the key to great audio in After Effects isn’t just about the technical steps; it’s about feeling the rhythm of your project and using audio transitions to enhance that emotional impact. Whether you’re aiming for a subtle background fade or a dramatic audio drop, these skills will help you add that professional touch to your projects.
Have you tried fading audio in After Effects? Or perhaps you have some tips of your own? Share your experiences in the comments below!