
What happens when you take an image with the ISO cranked up unnecessarily high? Or when you underexpose an image too much and try to raise the shadows too far in Lightroom? That’s right, you get a grainy photo!
Hey there! I’m Cara and I understand there are some photographers out there who don’t mind grain in their images. Some even add grain during post-processing to create a gritty or vintage feel.
I personally despise grain. I seek to avoid it as much as possible in my images. And if I fail in the straight-out-of-the-camera version, I remove it as much as possible in Lightroom.
Curious how to smooth out your grainy photos in Lightroom? Here’s how!
Table of Contents
A Note About Limitations
Before we dive in, let’s have some real talk here. It is possible to reduce the appearance of grain in your images. Lightroom is quite a powerful tool and it’s incredible how much it can remove.
However, though it seems magical, Lightroom can’t work miracles. If your camera settings were way too far out of whack, you won’t be able to save the photo. Lightroom reduces grain at the expense of detail so pushing this correction too far will leave you with a soft image.
Let’s look at this in action. I’m going to break down the tutorial into four major steps with detailed instructions in each step.
Note: the screenshots below are taken from the Windows version of Lightroom Classic. If you are using the Mac version, they will look slightly different.
Step 1: Access the Detail Panel
The Lightroom settings that affect noise are pretty easy to find. In the Develop module, click to open the Detail panel from the list of editing panels.
Then, you’ll see these options plus a small zoomed-in preview of the image at the top.
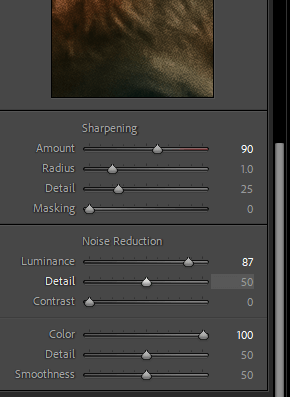
We’re going to be working with the Noise Reduction section. As you can see there are two options – Luminance and Color. From here, you need to figure out which type of noise you have.
Step 2: Determine Which Type of Noise You Have
Two types of noise can appear in photographs – luminance noise and color noise.
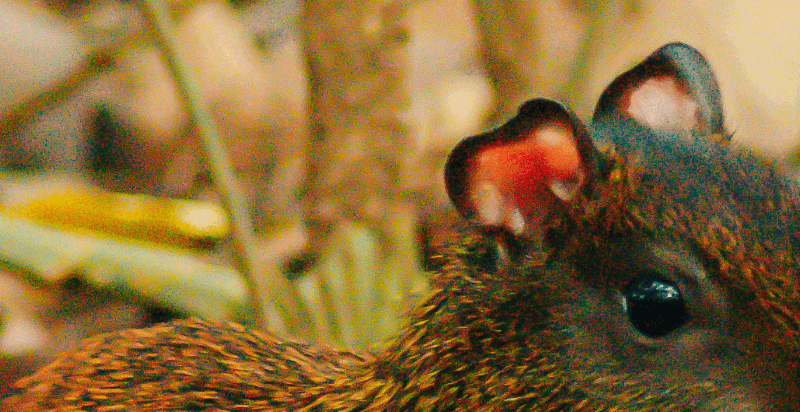
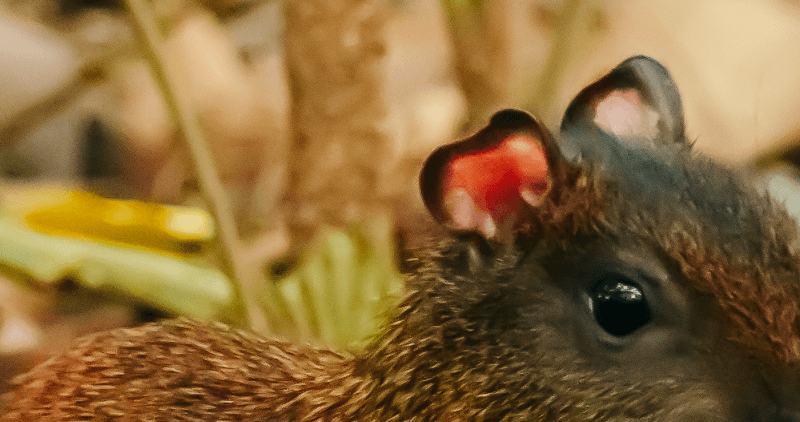
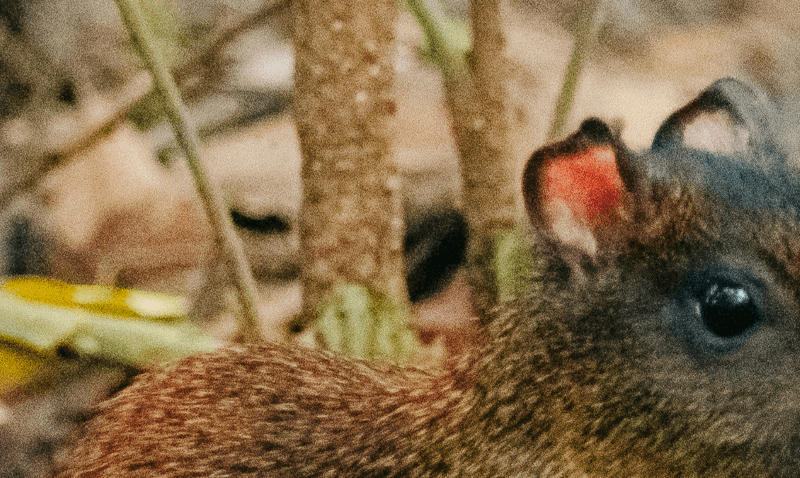
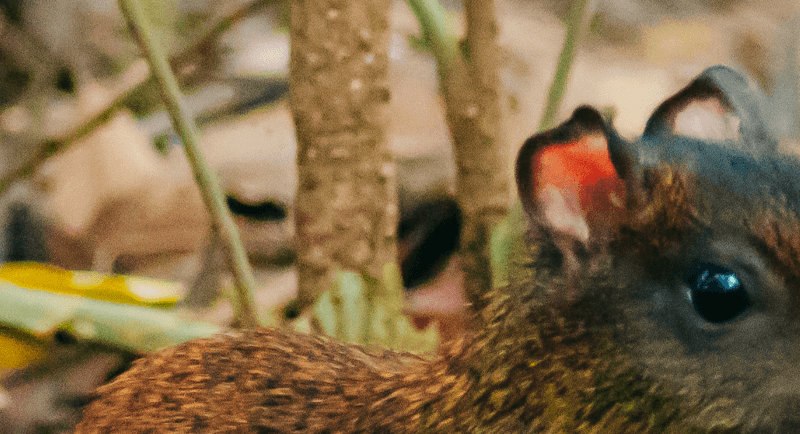
Luminance noise is monochromatic and just plain looks grainy. This underexposed image that I took of an agouti is a great example.
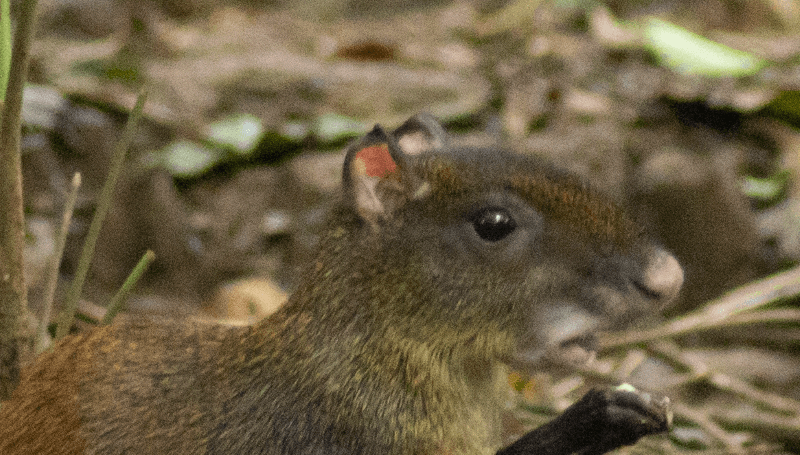
See all the rough, grainy quality? Now, look at what happens when I push the luminance slider up to 100.
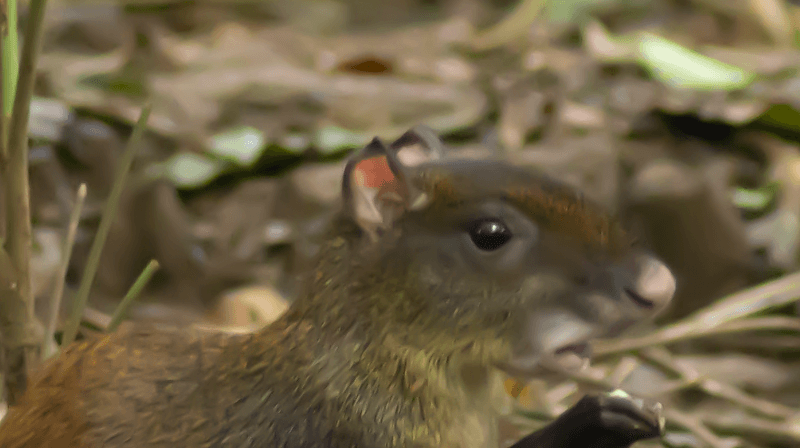
The grain disappears (although, unfortunately, the image goes pretty soft). With this test, you know you have luminance noise.
Color noise looks different. Instead of monochromatic grain, you’ll see a bunch of different colored bits. See all that splotchy red and green and other colors?
When we push the Color slider, those bits of color disappear.
Now that you know what type of grain you’re dealing with, it’s time to fix it.
Step 3: Reducing Luminance Noise
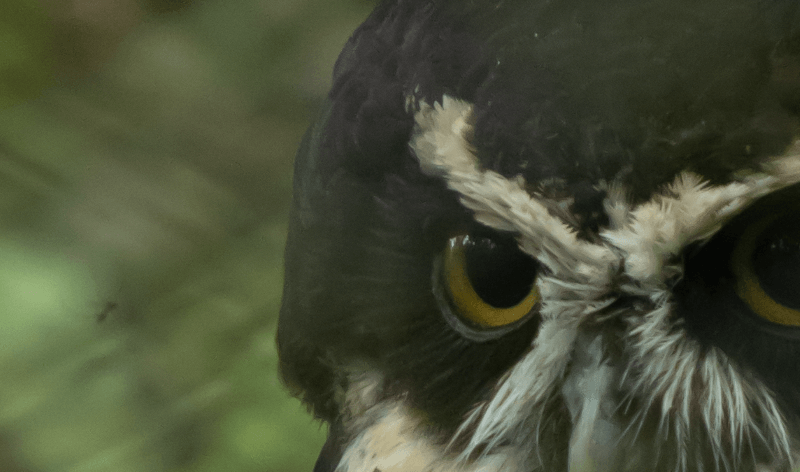
Remember the first example? When we pushed the noise slider up to 100, the grain disappeared, but too much detail also disappeared. Unfortunately, that image probably can’t be saved, but let’s look at this owl one.
I’m zoomed in to 100% here and you can see quite a bit of luminance grain. I do recommend you zoom in on the photo when you work on it so that you can see the details.

When I take the Luminance slider all the way to 100, the grain disappears but now the image is too soft.
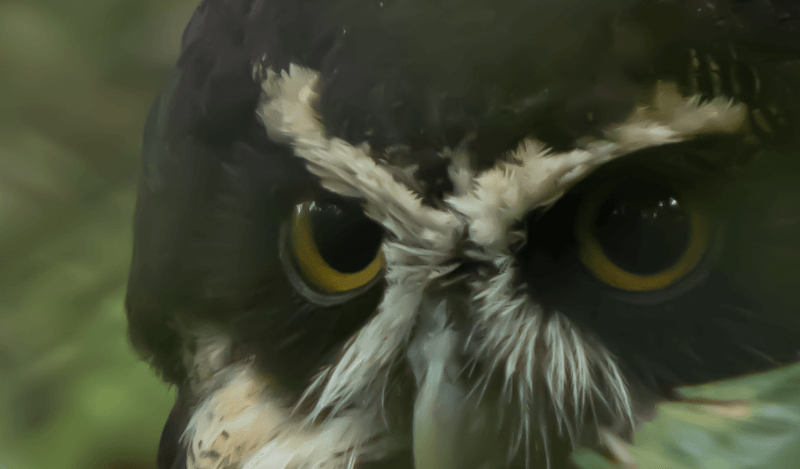
Play with the slider to find a happy medium. Here it is at 62. The image is not as soft, yet the presence of grain has still been significantly reduced.
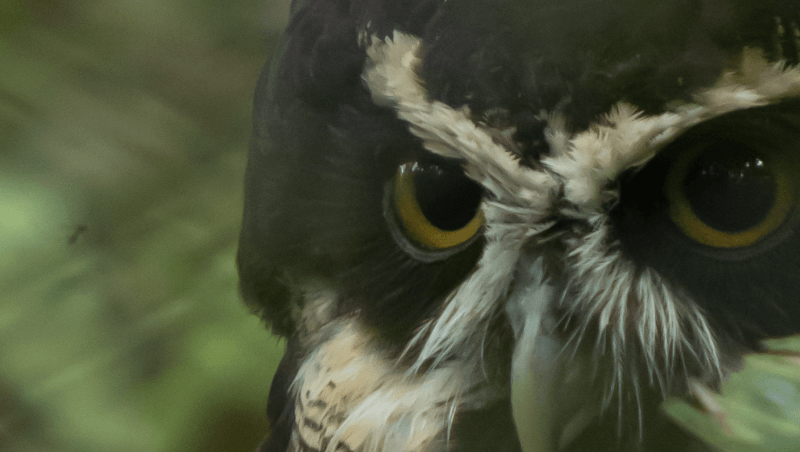
To fine-tune this further, we can play with the Detail and Contrast sliders right below the Luminance one.
A higher Detail value retains more detail in the image at the expense of removing the noise, of course. A lower value creates a smoother finished product, though the details may go soft.
A higher Contrast value will keep more contrast (and also noisy mottling) in the image. A lower value will bring down the contrast and produce a smoother result.
Here it is still at 62 on the Luminance slider but I’ve brought the Detail up to 75. There’s a bit more detail back in the feathers, yet the noise is still quite smooth.
Step 4: Reducing Color Noise
The Color noise slider is just beneath the Luminance one. Removing color noise doesn’t touch the detail as much so you can push this slider quite high if necessary. However, keep in mind that removing color noise may increase luminance noise, so you’ll need to balance that.
Here’s this image at 0 on the Color noise slider.

Here is the same image at 100.
Under the Color noise slider, you also have Detail and Smoothness options. A higher detail value helps preserve details while a lower one smooths the colors. Smoothness helps reduce color mottling artifacts.
You will often have both color and luminance noise in the same image. In that case, you must work with both sets of sliders to see how they affect one another.
For example, removing a lot of color noise typically leaves you with some luminance noise that you will also have to address. You can see this in the above image.
Here I brought the Color slider down to 25 so it would affect the luminance noise as little as possible, yet the color splotches are gone. I also brought up the Luminance slider to 68.
The image is still a bit soft, but it’s significantly better than it was. And remember, we’re still zoomed into 100%. Pull it back to the full-size image and it doesn’t look too bad.

Of course, it’s even better to understand how to use your camera – especially in manual mode. With the right ISO, shutter speed, and aperture values you’ll cut down on noise significantly. However, it’s always nice to have a post-processing backup for those difficult lighting conditions.
Curious what else Lightroom can help you do? Check out how to blur a background in Lightroom here.