
Using your Windows PC should be a painless experience, from browsing the web to working on Powerpoint to executing code. You’d expect that routine Windows updates would be as seamless.
Unfortunately, sometimes a bug can cause an issue where the Windows Update application is stuck checking for updates instead of installing them.
Table of Contents
The Issue: Windows Update Stuck Checking for Updates
This issue was most common in Windows 7 or Windows 8.1, but can also happen in Windows 10. It’s a result of an error where the Update mechanism can’t communicate with Microsoft servers.
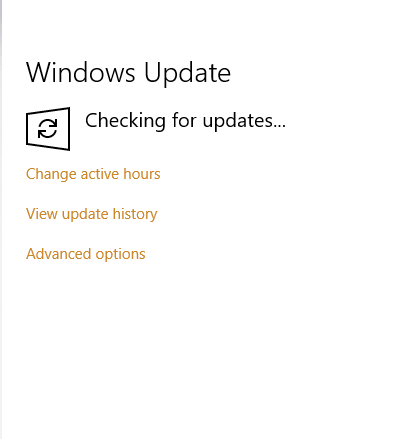
This problem can result in significant CPU usage and therefore is noticeable in the task manager. If your Windows Update never seems to actually start installing and instead says “searching” for long periods of time, then this issue affects you.
Here’s how to fix it in five different ways, with step by step guide.
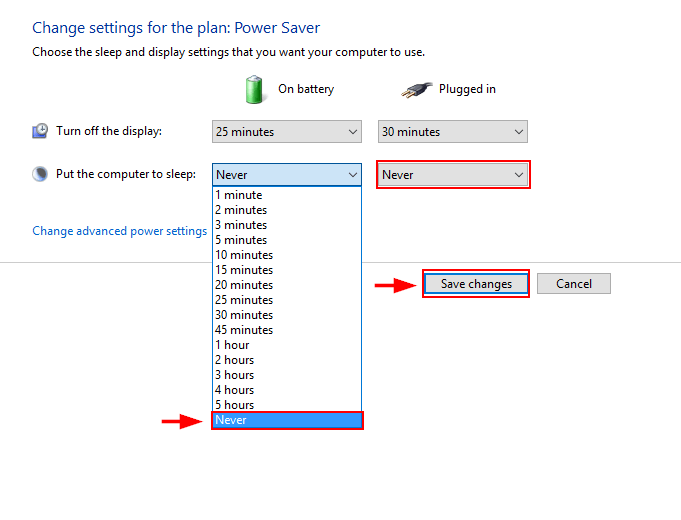
Method 1: Disable “Sleeping” under Power Settings
When your computer goes to sleep after a long period of inactivity, updates will pause; they won’t restart automatically after you wake your computer up. Disable the sleep feature before updating to avoid running into this issue.
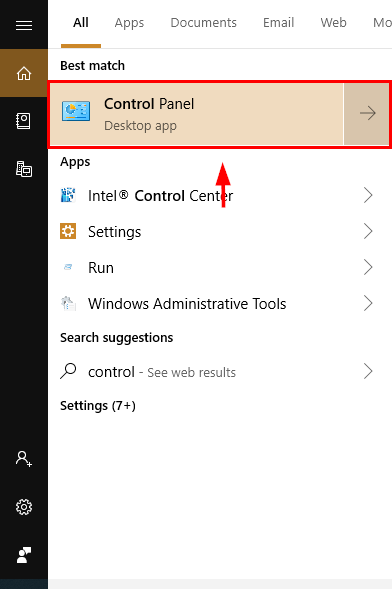
Step 1: Find the Control Panel in Windows Search and open it.
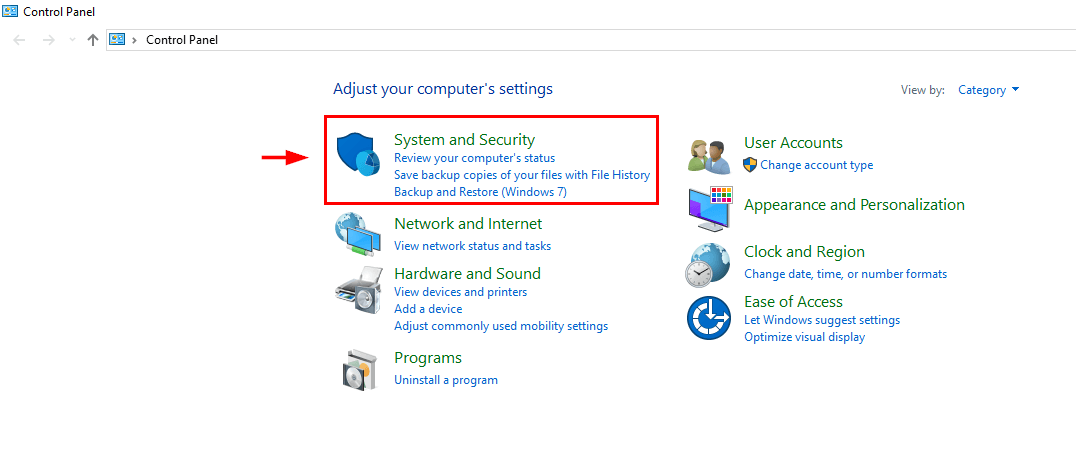
Step 2: Click on System and Security.
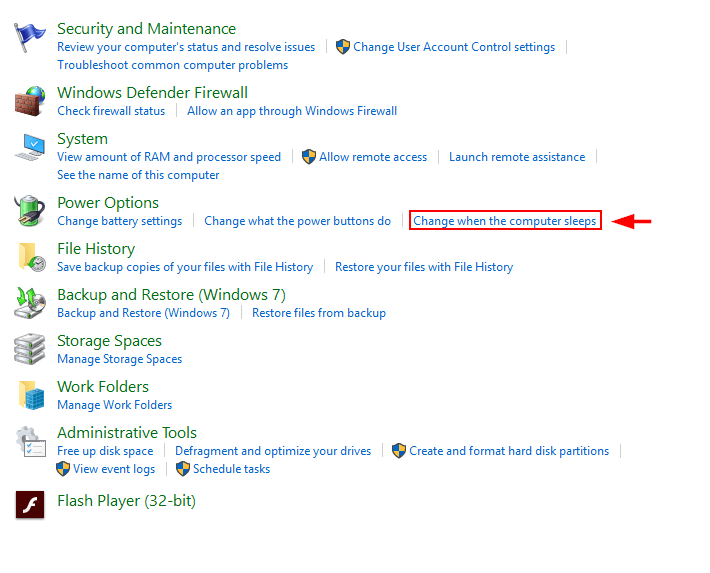
Step 3: Under Power Options, select “Change when the computer sleeps“
Step 4: Change the settings for “Put the computer to sleep” to “Never“. Then Save changes.
Method 2: Wait It Out
There’s a chance the installation package is very large, or that you have a bad internet connection. It may be worth it to wait a little while before taking any action, since time may allow the issue to resolve itself. Allow Windows Update to run for at least an hour before trying another solution.
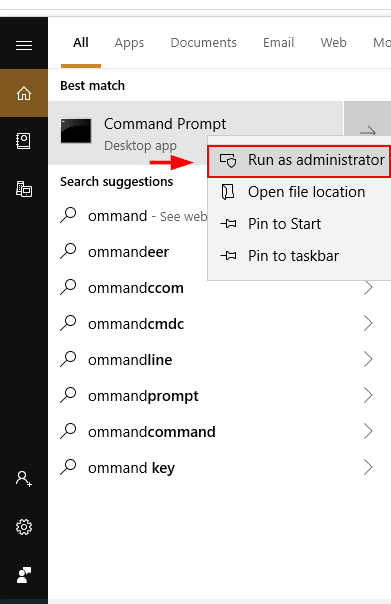
Method 3: Restart Windows Update from Command Prompt
You can try restarting the Windows Update from Command Prompt. This might resolve the issue.
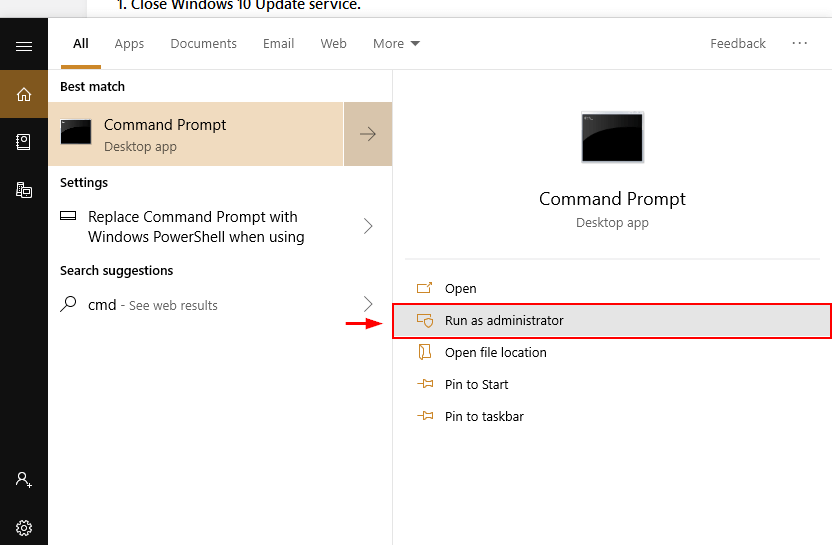
Step 1: Open Command Prompt from the Windows Search bar. Make sure to Run as Administrator.
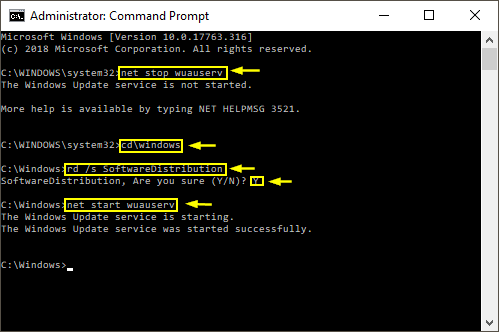
Step 2: Type net stop wuauserv. This will stop the Windows Update service. Then, run the command net start wuauserv. This will start the Windows Update service.
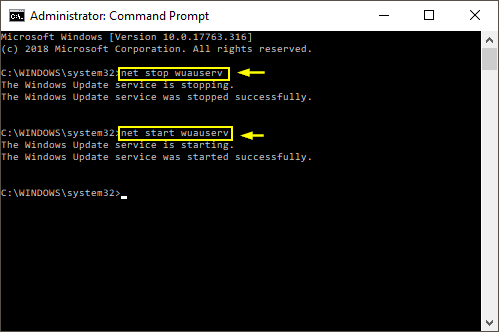
Force restarting the Windows Update like this often helps fix the “searching for updates” issue.
Method 4: Install the Official Microsoft Patch (Windows 7, 8)
For earlier versions of Windows, there are official Microsoft patches that deal with the update issue. You’ll need to install them yourself. Once you do, the issue should be resolved.
Windows 7
Step 1: First, install Service Pack 1 for Windows 7 and Windows Server 2008 R2 here. The first update makes your PC more reliable. The second is for enterprise-class virtualization. You can check this by right-clicking “computer” from the Windows search bar, then clicking properties. If SP1 is listed under Windows edition, it is installed.
Step 2: Download the package through this link. Download the file. Once the download is completed, run the file.
Step 3: Restart your PC.
Windows 8
Step 1: First, download the April 2018 update for Windows 8 here.
Step 2: Download the package through this link. Download the file. Once the download is completed, run it.
Step 3: Restart your PC.
Method 5: Solution for Windows 10
If you’re encountering this update issue on Windows 10, you can try clearing Windows Update Cache files and restarting the updater.
Step 1: Open Command Prompt from the Windows Search bar. Make sure to Run as Administrator.
Step 2:
- Run the command net stop wuauserv to stop the current updating service.
- Type cd\windows or cd /d %windir%.
- Type rd /s SoftwareDistribution.
- When prompted, type Y. This will clean Windows Update cache files.
- Run the command net start wuauserv.
Last, try running the Windows Update again.
Final Words
Being unable to update Windows can be annoying, especially if the updates are critical. Thankfully, there are some quick fixes. I hope the solutions mentioned above help you out. As always, feel free to comment on your experiences dealing with this problem below.
I have win 10 and it is stuck in checking for updates. I have tried stopping the services and cleaning out the software directory. No luck. Any thoughts?
David,
Instead open services.msc (can be done from the command prompt).
Find “Windows Update”, open then Disable it in the drop down. Apply then click Stop.
Instead of “net start wuauserv” at the end, set it back to Manual.
When I type net stop wuauserv to stop update I get the response update is starting or stopping try again later. When I try to delete the files in software distribution I get the response the files are open in windows update and this action can not be completed.