
FAT32 is a common format for SD cards because it has compatibility across many products including Mac Computers, Microsoft Computers, XBOX consoles, Playstation Consoles, and cameras. So how do you format your SD card to FAT32 on Mac?
As a computer repair tech, I’ve helped people with this problem more than a few times. The good news is that most new SD cards don’t need to be formatted for you to use them with your Mac. But if your SD card isn’t formatted correctly, I’ll show you a few tips to help.
Let’s get started!
Table of Contents
Key Takeaways
- FAT32 is a common format for SD Cards and USB Sticks because of its compatibility across many different platforms and uses.
- MS-DOS (FAT) is how Apple Refers to FAT32 on Disk Utility
- Reformat your SD Card with two easy ways on Mac: Disk Utility or Terminal
- Be aware that reformatting your SD Card WILL erase all the data on your card.
How to Format SD Card to FAT32 on Mac
While most devices automatically format the SD Card on its first use, it is good practice to use a computer to format the card to what you would prefer before its first use. Reformatting the card can also help to erase the contents or can help if you are experiencing problems when trying to use the card.
Please remember that formatting the SD Card will erase all the contents.
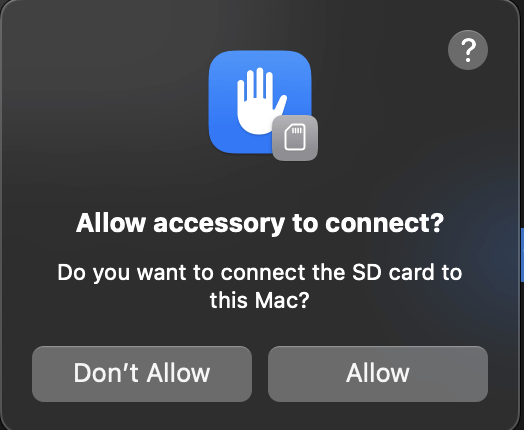
If this is your first time using the SD Card, insert it into the slot on your Mac and click Allow.
From here, you can use one of the following methods to format it. Keep in mind that FAT32 is shown as MS-DOS (FAT) on most Macs.
Method 1: Using Disk Utility
The first (and, in my opinion, easiest) way to reformat your SD Card is by using the built-in Disk Utility application on the Mac.
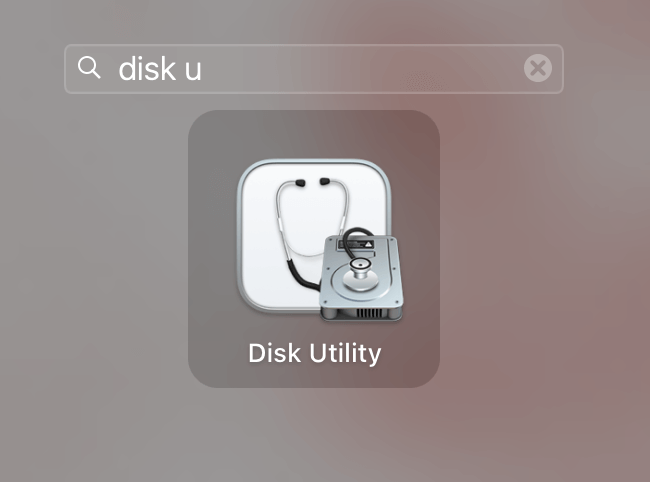
Step 1: Use Launchpad to open Disk Utility.
Step 2: Choose your SD Card on the left. Note that it may have a different name than you see on your desktop if you have not previously formatted it.
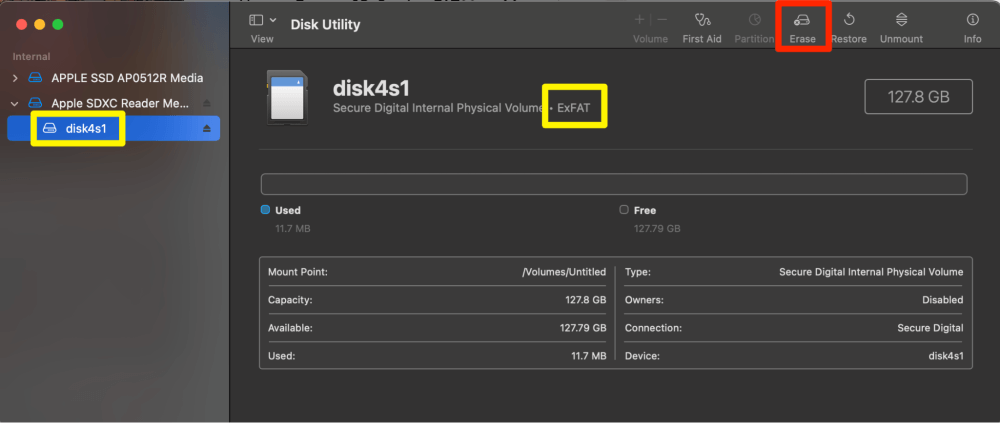
Step 3: Choose Erase at the top right corner. If desired, rename your SD Card. Under the Format tab, choose MS-DOS (FAT).
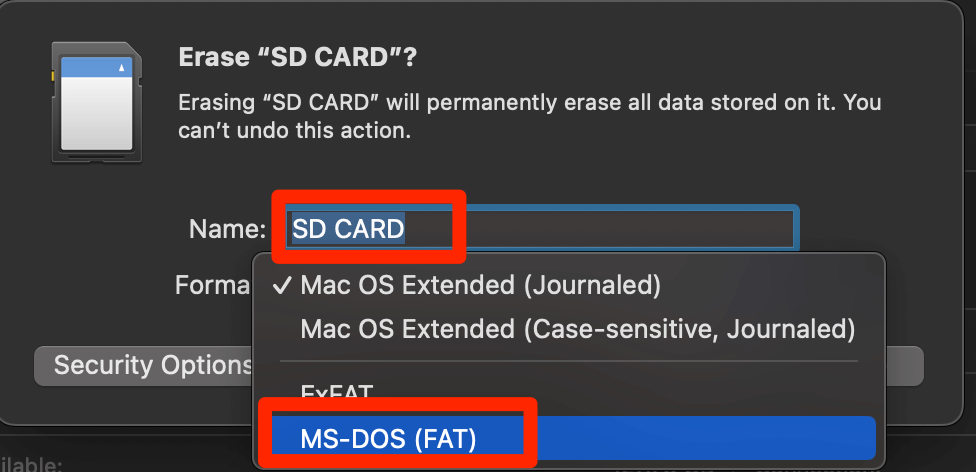
Note: MS-DOS (FAT) Mac’s name for FAT32 on the macOS Operating System.
Step 4: When it is completed with erasing and formatting your device, you will see the following. Click Done.

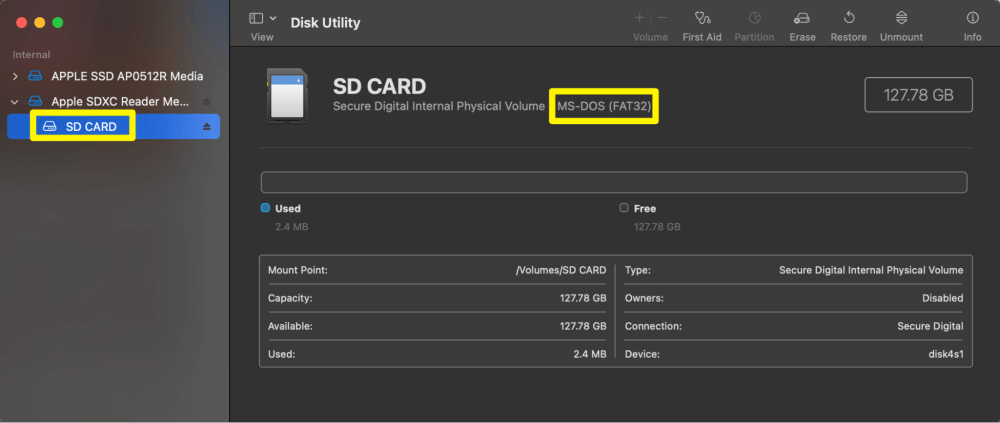
Step 5: In the Disk Utility Page, you will now see your new SD Card Name, and the format will show MS-DOS (FAT32)
Method 2: Using Terminal
Another option to format your SD Card to FAT-32 and change the name is by using Terminal Commands. Remember, this will still erase the contents of your SD card. Plus, it might be slightly more complicated if you are not familiar with the Terminal.
Take the following steps to format your SD card via the Terminal:
Step 1: Use Launchpad to open Terminal on your Mac.
Step 2: We need to see what disk your Mac lists your SD Card as. Type the command:
diskutil listAnd hit enter.
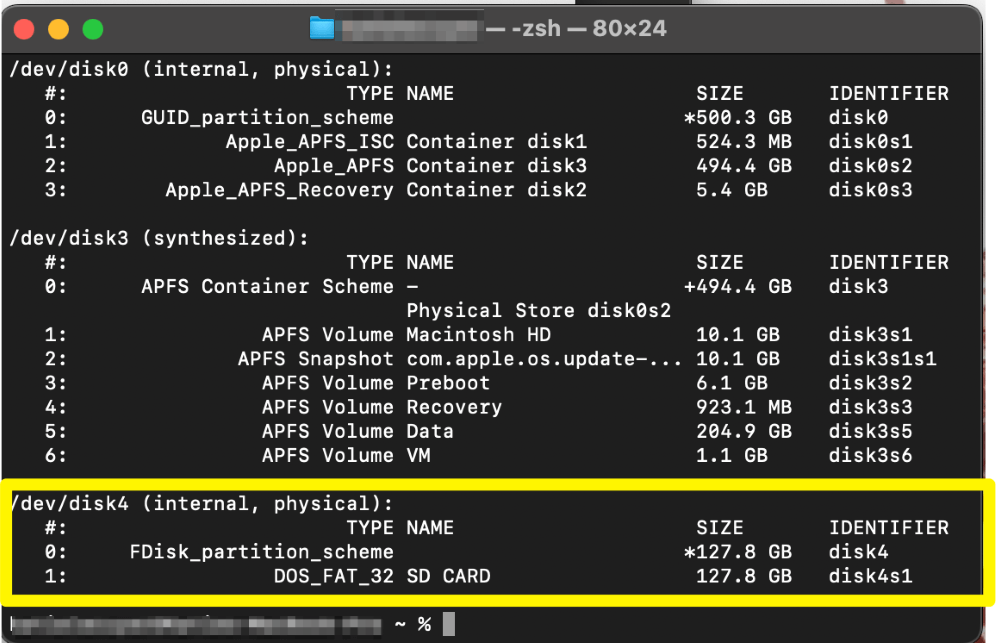
Step 3: Look for and find your SD Card, you can see in the image above my SD Card is a part of disk 4. And then use the following command to reformat your SD Card.
diskutil eraseDisk "MS-DOS FAT32" (choose any one-word name) (the disk number we found on the previous step)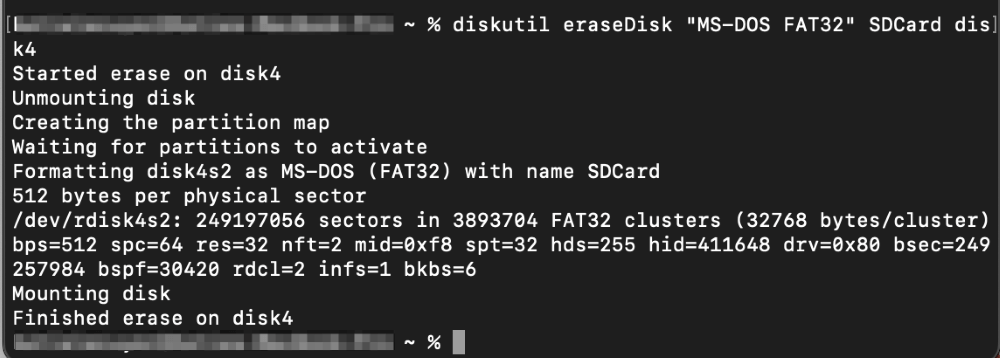
Note: My command was diskutil eraseDisk “MS-DOS FAT32” SDCard disk4 – meaning, I chose the name SDCard and my disk that was shown above was disk4.
Final Thoughts
When using an SD card, it can be very convenient to use the FAT32 format because of its easy compatibility with many different devices: Apple, Microsoft, and gaming consoles alike. Luckily, macOS provides us with two very simple ways to reformat our SD Card to use the format that we would like and to rename the device,
if desired. Most likely, your SD card shipped preformatted, but knowing these tips can be helpful with new SD cards, erasing SD cards, or fixing SD cards that may be experiencing issues.
Did this article help you? Which is your preferred method for formatting SD cards? Let us know in the comments below!