
With complex animation projects and multiple clips, organizing your workspace is crucial. While After Effects might not offer traditional layer grouping like some other software, it provides handy tools to keep your projects structured and manageable.
Hello again! I’m Zoe, a graphic designer who’s spent countless hours in After Effects. One of the challenges I initially faced was the absence of a direct ‘group’ function for layers. However, with time, I discovered several methods to effectively organize and manage my layers. Today, I’m excited to share these insights with you.
In this guide, we’ll explore several tricks for layer organization in After Effects. We’ll discuss the benefits of precomposing, the visual clarity of using color labels, and the advantages of shying layers to declutter your workspace.
Ready to get organized? Let’s dive in!
Table of Contents
Key Takeaways
- Precomposing is similar to creating a folder, bundling multiple layers into one.
- Color labels help in visually organizing and quickly selecting layers.
- Shying layers declutters your workspace without deleting essential elements.
Keep reading to learn how to group and organize your layers in After Effects.
Note: All screenshots from this tutorial are taken from the After Effects Mac version.
Precomposing Layers in After Effects
Precomposing is what comes closest to creating a folder in software like Photoshop. It bundles several layers into a single composition, simplifying your main timeline and making it more readable.
Step 1: Select the layers you wish to group.
To select layers that are stacked, press Shift and click the first and last layers. To choose unstacked layers, press Ctrl (Windows) or Command (Mac) and click the layers you want.
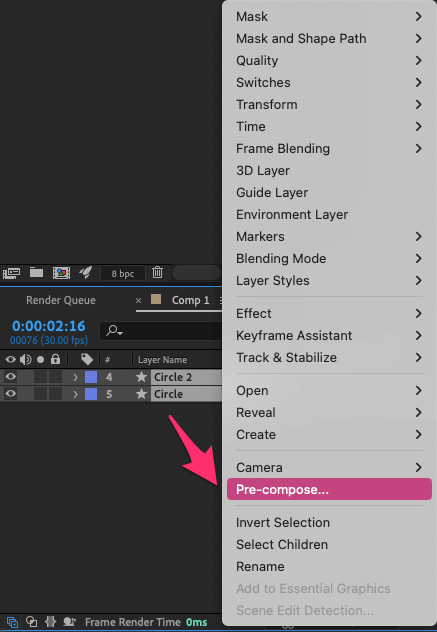
Step 2: Right-click and choose Pre-compose.
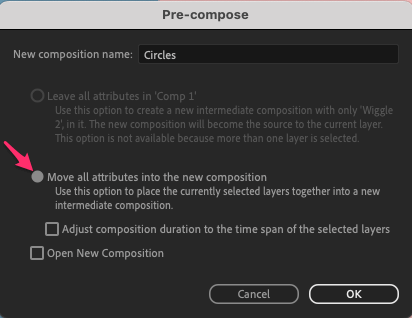
Step 3: Assign a name to your new composition and ensure Move all attributes into the new composition option is selected.
Your selected layers are now neatly tucked inside a new composition. But what if you need to tweak something inside this precomp? No worries!
You can follow the steps below to edit the contents of a precomposition:
Step 1: Double-click on the precomposed layer in your main timeline.
Step 2: This opens the precomposition in a new tab, allowing you to access and edit the individual layers.
Once done, simply return to your main composition tab to see the changes reflected.
Organizing with Color Labels in After Effects
Color coding isn’t just for aesthetics; it’s a practical way to visually group related layers and streamline your workflow.
Step 1: Select the layers you intend to group by color by holding Shift for stacked layers, or Ctrl (Windows) or Command (Mac) for individual layers.
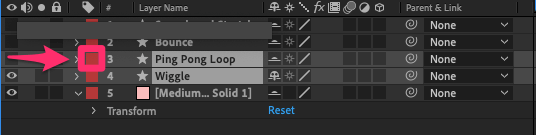
Step 2: Click on the color swatch next to a layer’s name.
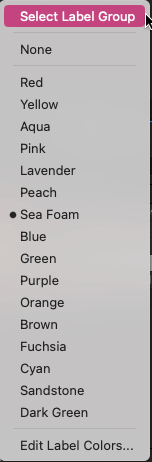
Step 3: Pick a color that represents your group.
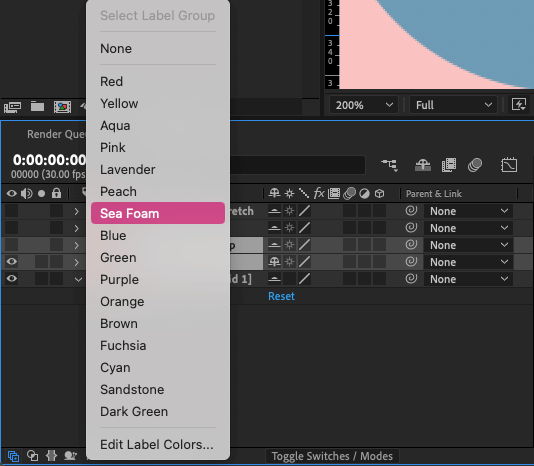

For quick layer selection, right-click on the color swatch and select Select Layer Group. This nifty trick ensures you can quickly grab all layers of a specific color, especially useful in complex projects.
Shying Layers in After Effects
In After Effects, when you have numerous layers in your timeline, it can become cluttered and harder to navigate. The Shy feature allows you to hide specific layers from the timeline without actually hiding their visual effects in the composition.
This is especially useful for keeping your workspace organized and focusing on specific layers. Here’s how to use the Shy feature:
Step 1: In your timeline, locate the layer you want to shy away.
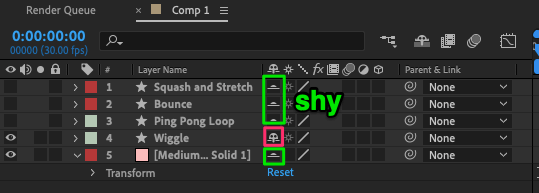
Step 2: Next to each layer’s name, there’s a small icon that looks like a face in profile (or a “shy guy”). Click on this icon for each layer you want to shy.
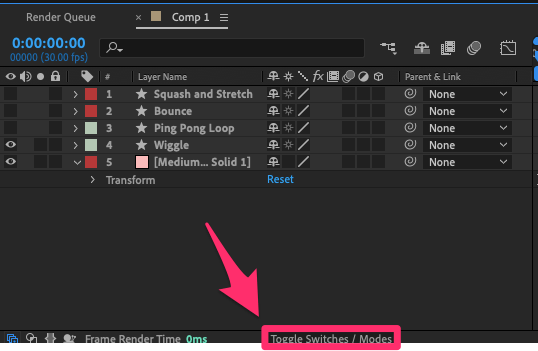
If you don’t see the shy icon next to a layer, you may need to click on Toggle Switches/Modes located at the bottom of the timeline panel. This will switch between different layer switches, revealing the shy icon for each layer.
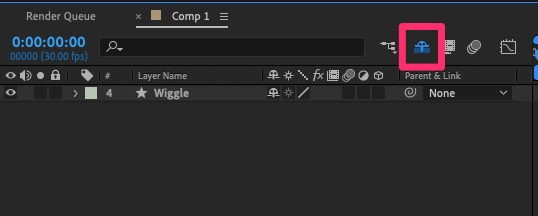
Step 3: At the top of the layer stack in the timeline, you’ll see a similar “shy guy” icon. Click on it. This will hide all the layers you’ve marked as shy, decluttering your timeline.
Step 4: If you need to edit or view the shy layers again, simply toggle off the shy mode by clicking the “shy guy” icon at the top of the timeline. This will reveal all the layers, including those you’ve marked as shy.
Remember, shying a layer only hides it from the timeline for easier navigation; it doesn’t affect the layer’s visibility or function in the composition. It’s a handy tool to keep your workspace organized, especially when working with complex projects.
Final Thoughts
Grouping layers in After Effects might require a different approach than what you’re used to, but with these techniques, you can maintain an organized and efficient workspace. Whether you’re precomposing, color-coding, or shying layers, you now have the tools to manage your projects effectively.
Got more tips or questions about layer organization in After Effects? Drop them in the comments below!