
The classic Lasso Tool is by far one of the most useful tools in Photoshop’s ever-expanding arsenal! Plus, it’s true to its namesake. It’s essentially a digital lasso that can round up and capture any images you’d like to isolate on your canvas.
My name is Skyler. In this tutorial, I’ll be showing you how to make selections with the Lasso Tool and then refine it to your liking in Adobe Photoshop.
There are three separate Lasso Tools – the original, the Polygonal, and the Magnetic. They’re each extremely useful in their own right, so it’s worth understanding their individual uses. If this sounds like something you’d like to expand your knowledge on, be sure to read below!
Table of Contents
Making a Selection with the Lasso Tool
The Lasso Tool is extremely useful for freehand selection, meaning you can get extremely accurate, and curated results exactly to your liking.
To find the Lasso Tool, you’ll first navigate to your Toolbar, or you can use the keyboard shortcut L to activate it.
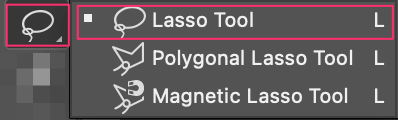
Once you’ve chosen the original Lasso Tool, you can move on to making your first selection!

All you have to do is click and drag across your screen, circling your selection until you’re satisfied. To edit your selection, you can press Shift to continue adding, and Option/Alt to delete unwanted selections.
You’ll know you’ve done this when you see the + and – signs added to your cursor’s lasso icon.
Alright! So you’ve made your first selection, and it’s not quite perfect yet – now what? Well, the good news is that the feathering tool is perfect for getting rid of those pesky imperfections.
Feathering your Selection
You can feather your selections by changing the PX value in Photoshop’s overhead panel.
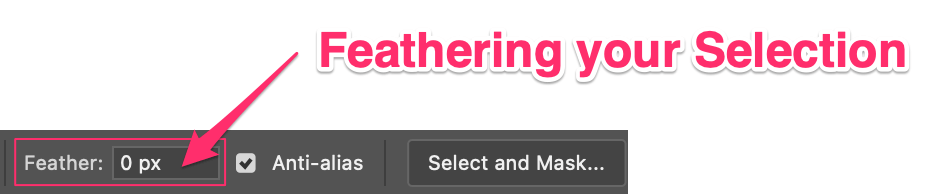
Feathering will essentially smooth out any of those rough or jagged edges. Make sure to familiarize yourself by experimenting with this value so you can figure out what’s appropriate for your particular selections!
Modify Selection Options
You can modify the way your selection tool works by utilizing the Modify Selection buttons in the overhead panel.
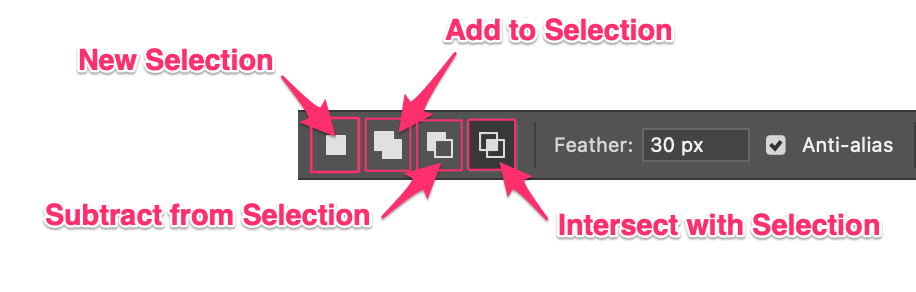
These buttons will determine how you can add to, subtract from, or even intersect new selections with existing ones. These buttons will not only speed up, but also optimize your workflow when using any of the Lasso Tools available in Photoshop.
Magnetic Lasso
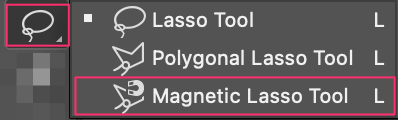
The Magnetic Lasso tool works just like the original lasso tool – except it uses AI to determine where the edges of an object are and snap to it automatically. This is extremely useful for more complex geometric shapes or even architectural photography.
Polygonal Lasso
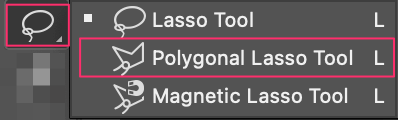
The Polygonal Lasso tool works just like the original as well, but it allows you to create polygonal selections with extreme control and precision. It doesn’t use AI, so it’s a completely freehand selection tool.
Mastering Your Understanding of Photoshop Selection Tools
If you’ve enjoyed learning and utilizing the Original, Magnetic, and Polygonal Lasso tools in Photoshop, and are now wondering what other kinds of selection tools the program offers, look no further!
This tutorial will walk you through all of the selection tool options available to you in Photoshop, and how to use them. From the Quick Selection Tool to the Magic Wand, you’ll be well on your way to mastery after watching this video.
Conclusion
Not only is the classic Lasso Tool by far one of the most useful tools in Photoshop’s ever-expanding arsenal, but it’s also just the beginning of the selection tools available to you! Now that you’ve begun to master the original, the Polygonal, and the Magnetic Lassos, how will you use them?