
The Liquify Tool is used to change the shape of anything in Photoshop. Like all of Photoshop’s tools, it is extremely helpful and easy to get the hang of.
First, convert your layer into a smart object so that our filter becomes a smart filter. Go to Filter > Liquify and use the first tool on the left to click and drag on your image. Settings for the brush can be found on the right in the Properties panel.
Hello, internet sleuth! My name is Jayde, and I am here today as your Photoshop coach.
In this tutorial, I’ll show you how to use the Liquify Tool, and soon you’ll know all about its versatility in this wonderful design program.
Without further ado, let’s dive in!
Key Takeaways
- If necessary, unlock your layer by clicking on the Lock symbol in the layers panel.
- Convert your layer into a Smart Object by right-clicking on it in the layers panel.
- Use the shortcut Ctrl/Command + Z to Undo any mistakes.
- Go to Filter > Liquify and take note that the filter has its tools listed on the left, and settings in the Properties panel on the right.
Note: The screenshots from this tutorial are taken from the Adobe Photoshop Windows version. Mac or other versions can look slightly different. I generate or use AI photos from firefly.adobe.com.
Detailed Guide to Using the Liquify Tool in Photoshop
Follow the steps below to use the Liquify Tool in Photoshop.
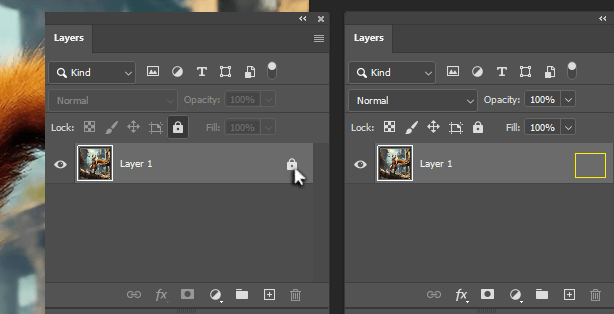
Step 1: If your layer is locked, click on the lock symbol to unlock it.

Step 2: Right-click on the layer and go to Convert to Smart Object.
The Liquify Tool is considered a filter, and by applying it to a smart object, we retain the ability to change or get rid of it later.
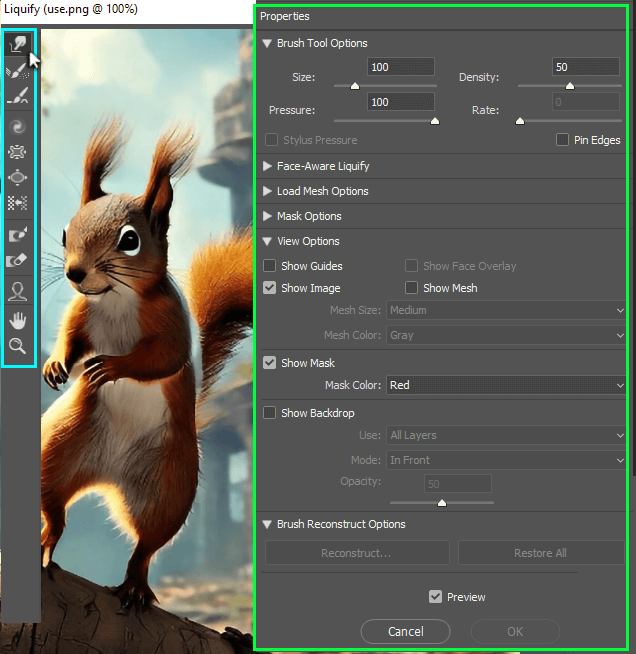
Step 3: Go to Filter > Liquify. Your tools for Liquifying appear on the left, and settings and adjustments can be made in the Properties panel on the right.
Take note of the different tools on the left, which are pretty self-explanatory once you know how to use the features I’m going to go over with you.

Step 4: Select the Forward Warp Tool on the top left and adjust the size of your brush with [ or ]. Click and drag to try out the tool on your photo.
This is what I have now. You can definitely see that the building in the background is warped now, but there’s an easy way to fix that.
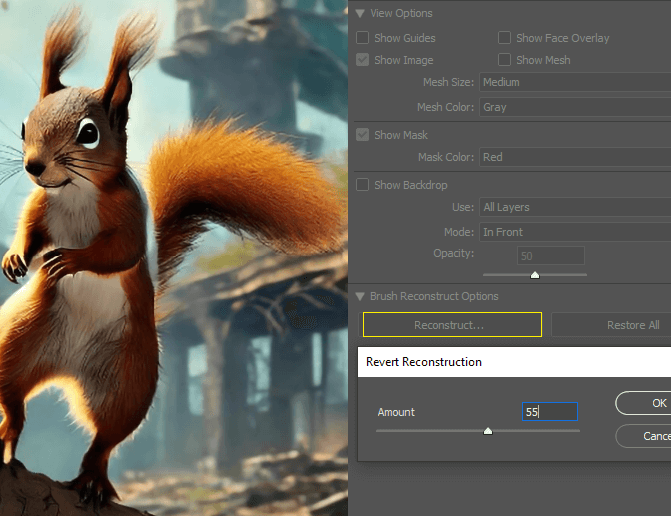
Step 5: In the Properties panel, at the top, you will find the brush settings. At the bottom, under Brush Reconstruction Options, we get two options.
The first is Reconstruct… a slider to see how much we changed our photo and potentially decrease how strong the effect is.
The second is Restore All which takes away all the Liquifying we’ve done.

Step 6: The second tool on the left is the Reconstruct Brush, which helps to reconstruct just one area of your photo.
I’ve zoomed in and used this to fix the building and where his back meets his tail. I can’t get rid of the line separating his back and tail unless I use a different tool, like the Clone Stamp Tool.
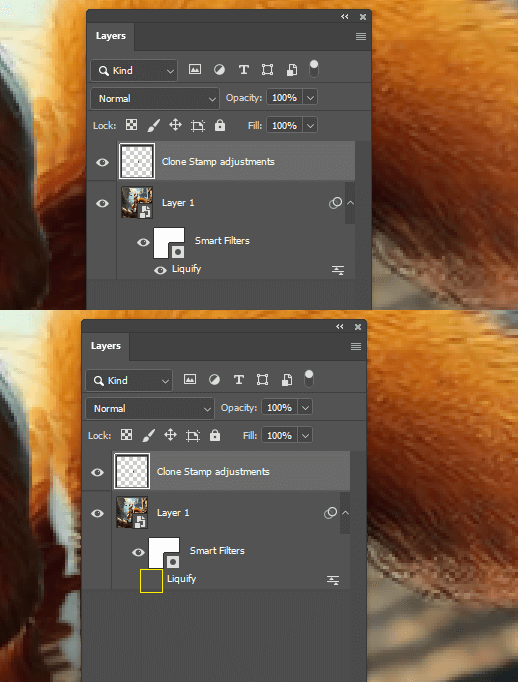
Step 7: After you click OK in the Liquify window, look at the Layers panel.
Take note that you can toggle off and on the Smart Filter’s visibility by clicking this eye symbol.
You can also double-click on the word Liquify to change this filter’s settings at any time.
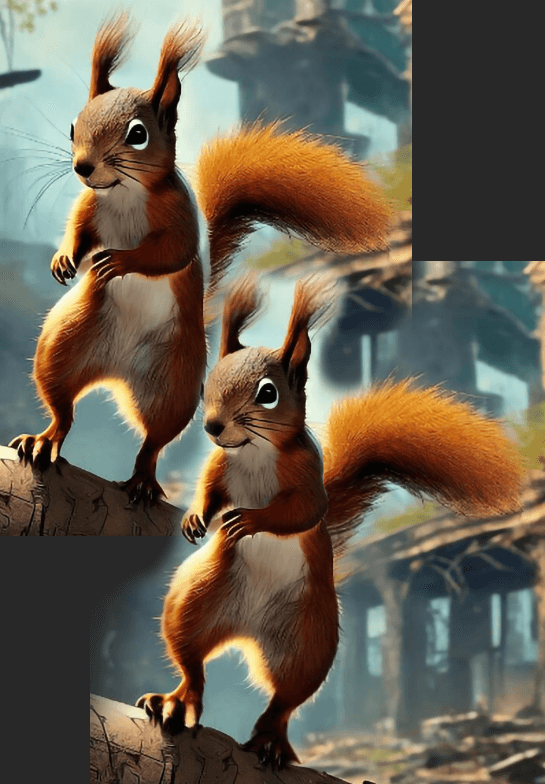
Let’s take a look at our comparison:
Final Thoughts
This concludes today’s Photoshop tutorial, covering how to use the Liquify tool in Photoshop. I love using this tool because it is easy to adjust targeted areas and draw attention to things you want while minimizing the things you don’t.
Did you find this tutorial helpful? Let us know in the comments below.