
Clip Studio Paint has become the go-to software for professional comic and webtoon creators. Learn how to use the tools to bring your story to life.
Hi there, I’m Zoe, a professional illustrator and webtoon hobbyist. Creating a webtoon or comic strip involves a lot – from character design, text design, working with layouts and special effects.
In this comprehensive guide, I’ll walk you through creating comics and webtoons in Clip Studio Paint, covering everything from setting up your document, adding frames, characters, speech bubbles, and special effects, to exporting your final work.
Let’s dive in!
Table of Contents
Key Takeaways
- Comics traditionally feature framed panels, while webtoons use a vertical scrolling format. Choose the format that suits your storytelling style and audience preference.
- Enhance your comic’s dynamism by incorporating special effects like speed lines, focus lines, lighting, shading, gradients, and textures.
- Choose fonts that match your comic’s tone; explore sites like 1001FreeFonts, DaFont, or Fontspace for free options, always considering usage rights for personal or commercial projects.
- Maintain consistent proportions, create complex backgrounds, experiment with dynamic poses, and explore unusual perspectives using 3D models.
Here is an overview of how to create a comic or webtoon in Clip Studio Paint.
Note: All screenshots from this tutorial are taken from the CSP Mac version.
Setting Up Your Comic Document
Before you start creating your comic, it’s essential to set up your document with the correct specifications. Follow these step-by-step instructions to set up your comic document in Clip Studio Paint:
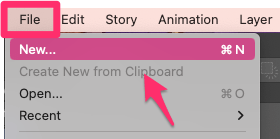
Step 1: Open Clip Studio Paint and select New from the File menu.
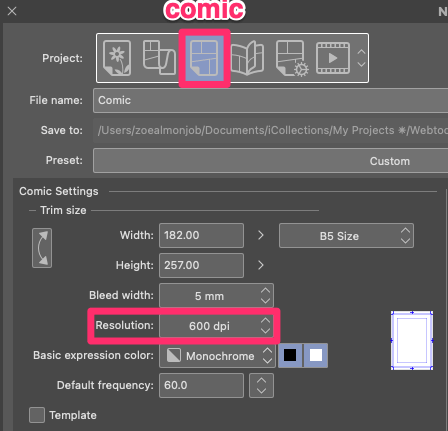
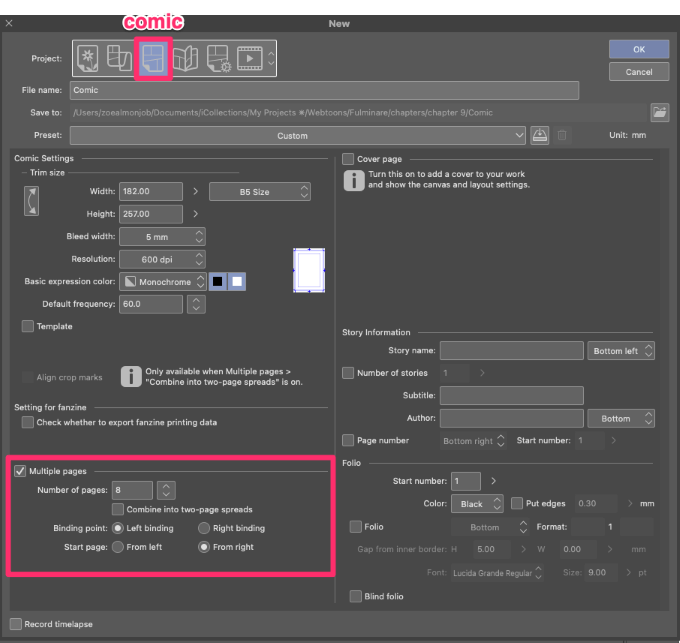
Step 2: In the New Document dialog box, choose either the Webtoon layout (for a digital comic with a vertical scrolling format) or the Comic layout (for a traditional comic format).

Step 3: Specify the desired size for your comic. You can opt for a preset size or input custom dimensions.
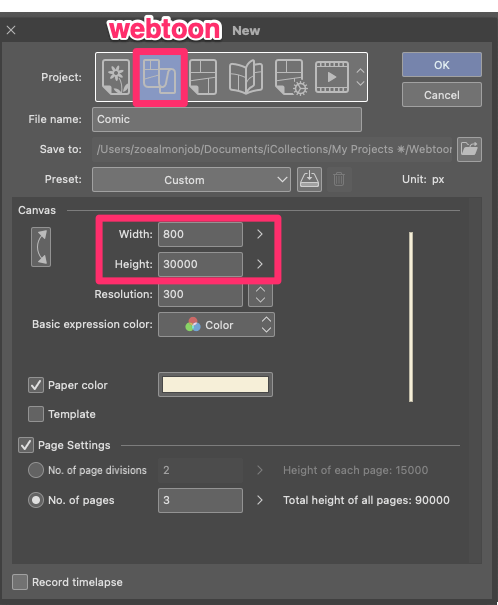
Step 4: If you intend to print your comic, ensure that the resolution is set to a minimum of 300 DPI.
Step 5: Customize other settings, including the number of pages (available exclusively in Clip Studio Paint EX), orientation, and more to match your comic’s requirements.
Step 7: Click OK to generate your comic document.
Now, your document is primed and ready for you to bring your comic to life!
Creating Frames and Panels
One of the essential aspects of creating a comic is the arrangement of frames and panels. Frames and panels help organize your story and guide the reader’s eye through the narrative.
Follow these step-by-step instructions to create frames and panels in Clip Studio Paint:
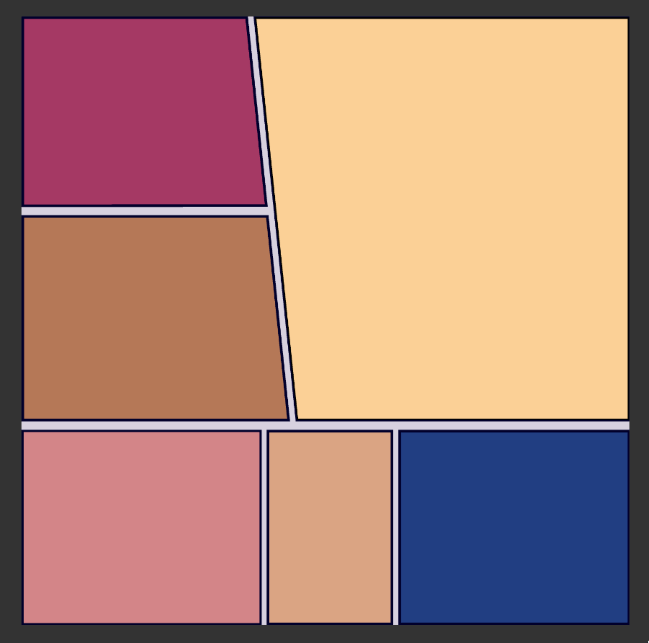
Step 1: Select the Frame Border tool from the toolbar. Most commonly, you’ll be using the Rectangle Frame tool, but the Polyline and Pen Frame tools can make for dynamic layouts.
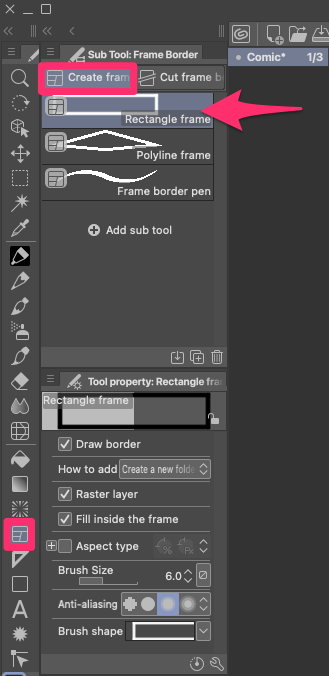
Step 2: Click and drag on the canvas to create a rectangular shape. This will serve as the outer boundary of your frame.

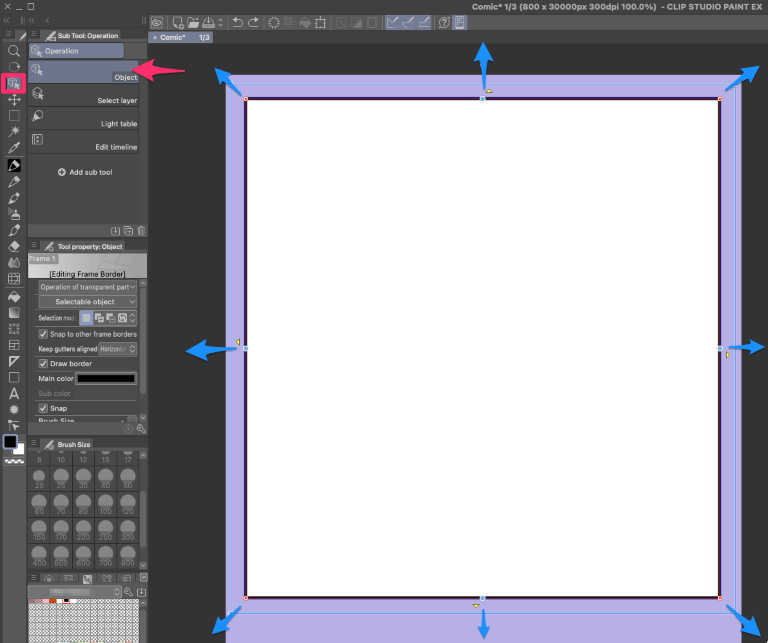
Step 3: Adjust the size and position of the frame as desired by selecting the Object tool and manipulating the handles.
Step 4: Once you have your frame, you can use the Divide Frame Border tool to create panels within the frame. Click and drag on the frame to divide it into multiple panels.
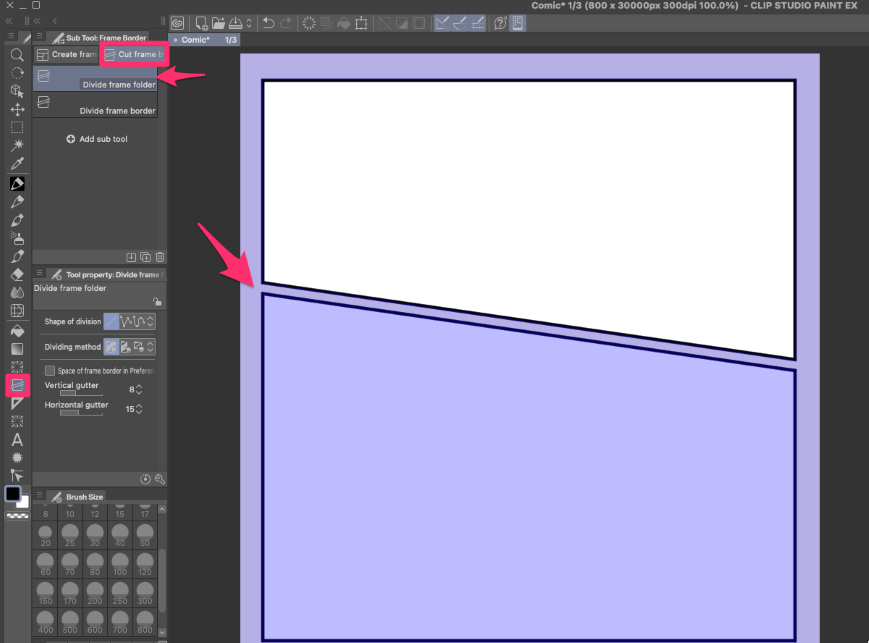
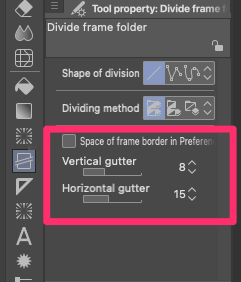
Adjust the settings in the Tool Property Panel to add gutters (the spaces between panels).
Step 5: Repeat the process to create additional frames and panels as needed for your comic pages.
With these steps, you can effectively structure your comic with frames and panels, enhancing the storytelling experience for your readers.
Adding Characters and Scenes
Now that you have your comic document set up and frames in place, it’s time to populate your comic with characters and scenes. Creating engaging characters and captivating scenes are essential elements of a compelling comic.
Here are some tips and techniques to help you bring your comic to life:
- Storyboard Your Scenes: Before diving into the final artwork, create rough storyboards to plan the composition and flow of each page. This helps avoid composition issues later in the process.
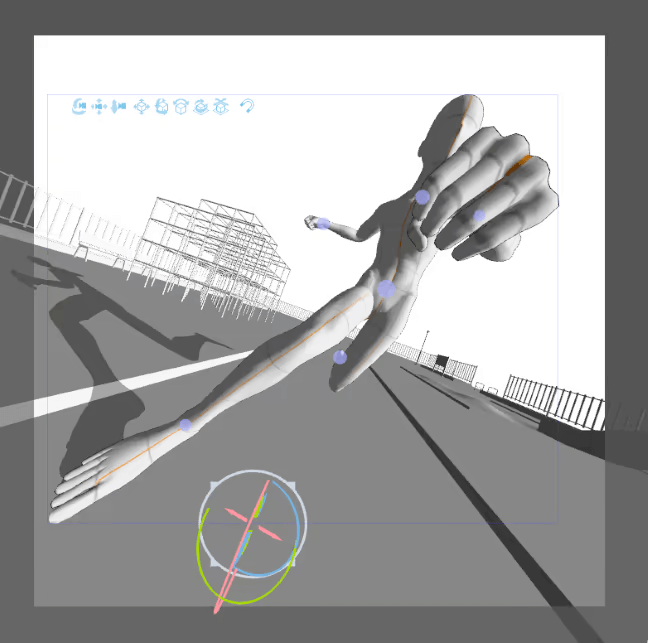
- Use 3D Models for Consistency: Clip Studio Paint offers 3D character and prop models that can be posed and customized. These models provide consistency in character design and help maintain proportions across different panels.
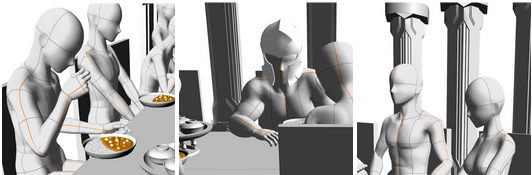
They also allow you to experiment with dynamic camera angles and perspectives to convey emotion and action effectively. Overhead shots, extreme close-ups, and wide-angle views can add drama and depth to your story.
- Consistency in Style: Maintain a consistent artistic style throughout your comic to provide a cohesive reading experience. Consistency in character design, line art, and coloring is key. Gradient Maps can help keep a consistent color palette for characters and scenes.
Adding Dialogue Bubbles and Text
Dialogue bubbles and text play a crucial role in conveying the story and character interactions in a comic. Follow these steps to add dialogue bubbles and text using Clip Studio Paint:
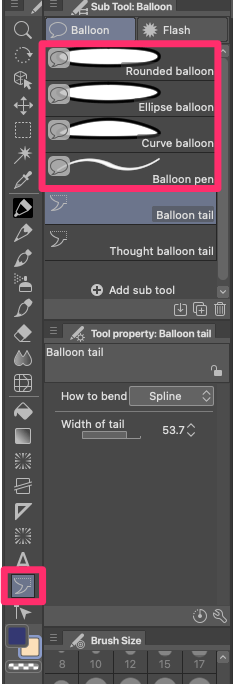
Step 1: Select the Balloon tool from the toolbar.

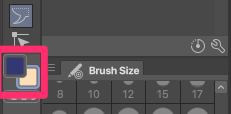
Step 2: Select your foreground and background colors, which will be used for your balloon’s fill and outline. You can always modify these later, so don’t worry too much about it now.
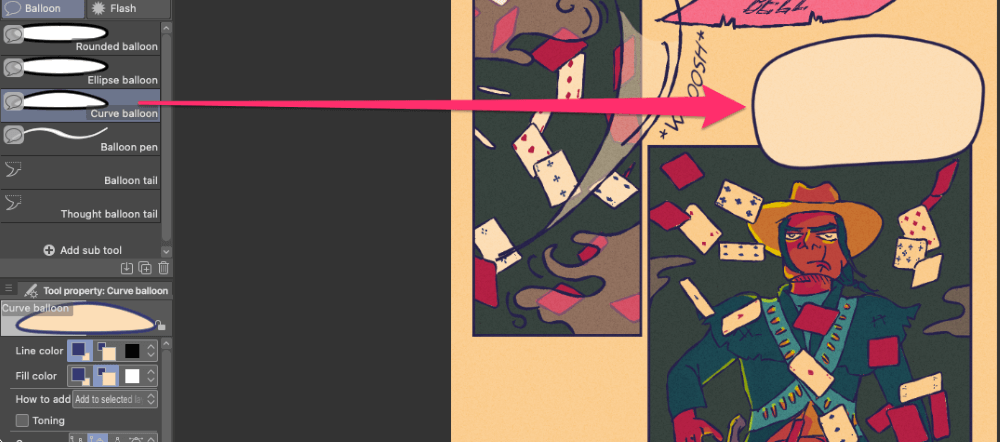
Step 3: Choose the desired balloon style from the options panel. To create a standard shape, opt for the Rounded or Ellipse Balloon Sub Tools. If you want a more irregular or freeform shape, use the Curve Balloon or Balloon Pen.
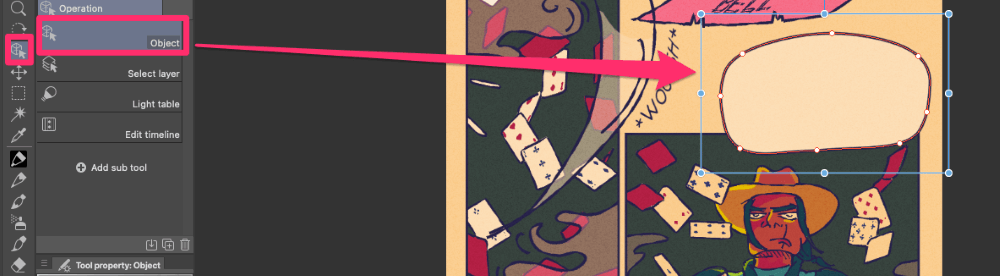
Step 4: Click and drag on the canvas to create a dialogue bubble. Adjust the size and position of the bubble as needed. You will be able to continue manipulating the balloon later with the Object Tool.
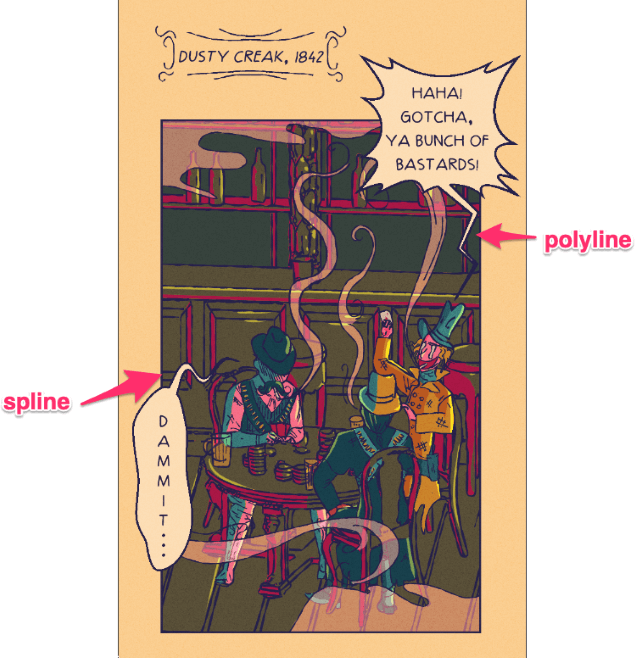
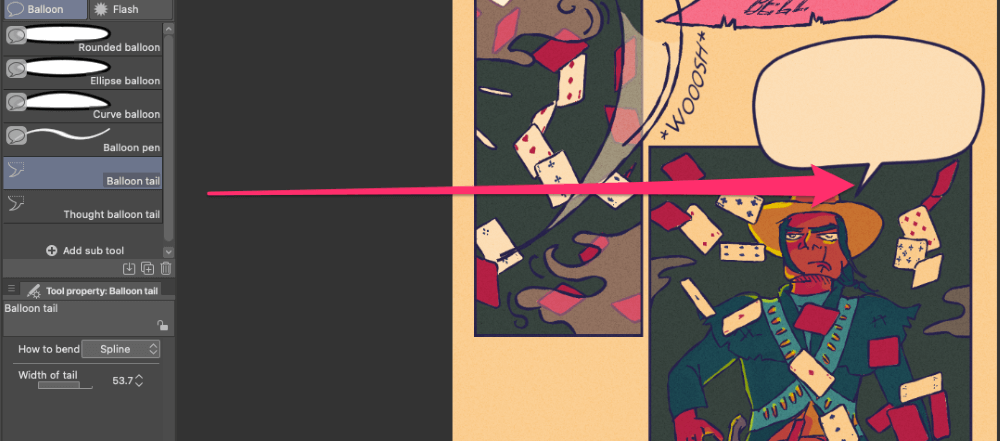
Step 5: Now, go to the Balloon Tail Sub Tool. In the Tool Property Panel, you’ll discover three distinct styles: Straight Line, Spline, and Polyline.
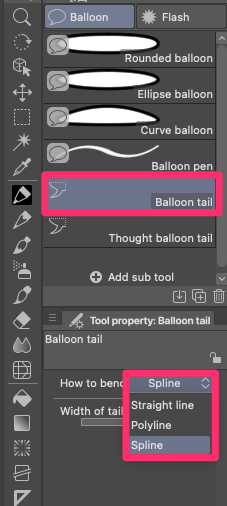
Select the one that suits the tone and mood of the dialogue and complements your webtoon’s style.
Step 6: Click and drag on the dialogue bubble to create a balloon tail. You can make adjustments afterward by selecting the Object Tool and clicking on the tail.
Step 7: Use the Text tool to add text inside the dialogue bubble. Customize the font, size, and alignment of the text to match the character’s voice and tone.
With these steps, you can effectively integrate dialogue bubbles and text into your comic. You can also find more bubble styles under Manga Material > Balloon, and even download more from Clip Studio Assets!

Creating Special Effects
Special effects can add visual impact and enhance the storytelling in your comic. Here are a few tips to add special effects to your comic:
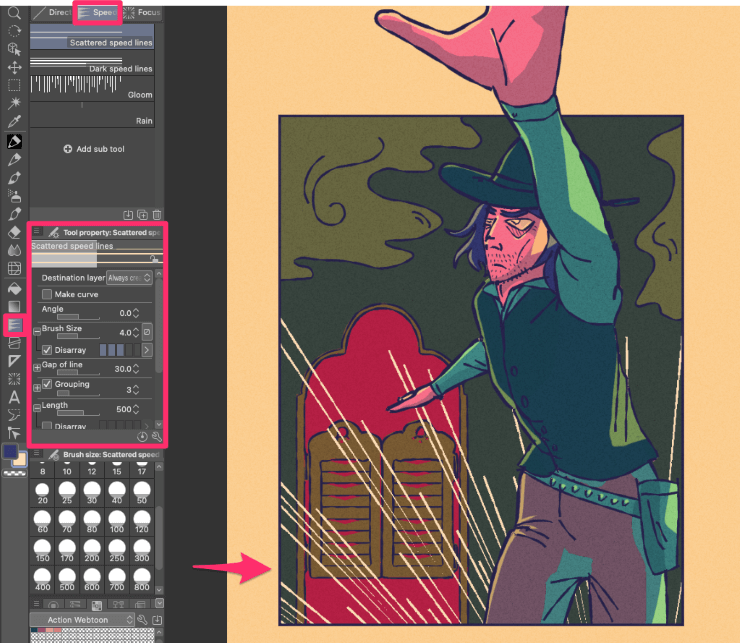
- Speed Lines: Use the Speed Lines Tool to create dynamic motion lines that convey speed and movement. Customize the length, thickness, and direction of the speed lines to match the action in your panels.
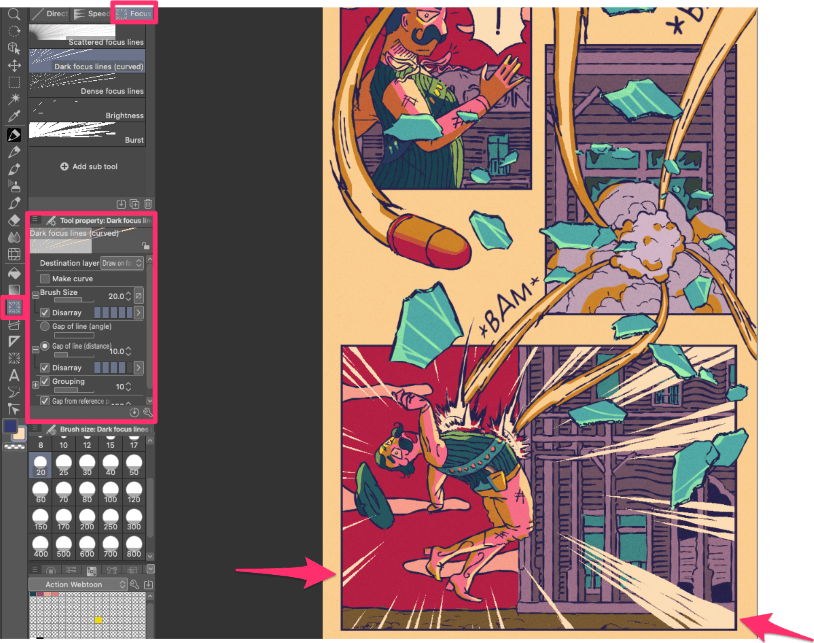
- Focus Lines: Experiment with the Focus Lines Tool to add emphasis and depth to specific elements in your artwork. Focus lines can help draw attention to a character or object.
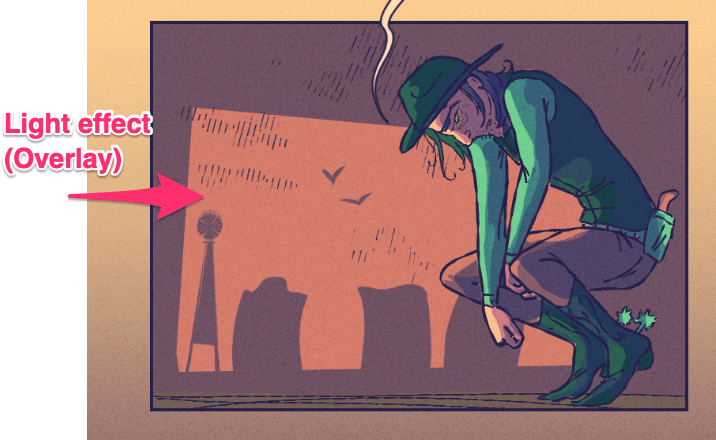
- Lighting and Shading Effects: Play with lighting and shading effects to enhance the mood and atmosphere of your scenes. Clip Studio Paint offers various blending modes that can help you achieve different lighting effects. You can also try the Shading Assist function to create shading faster.
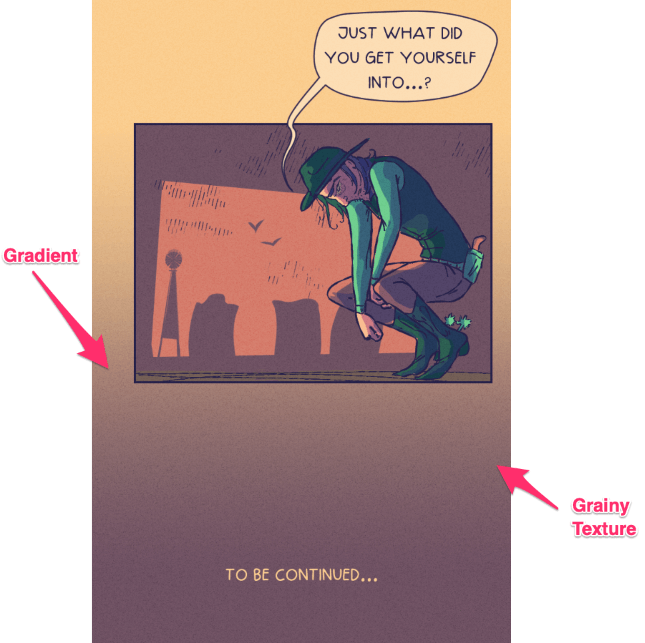
- Other Special Effects: Explore other special effects tools, such as halftone patterns, gradients, or texture overlays, to add visual interest to your comic.
- Comic Artwork Resources: Clip Studio Paint comes with pre-installed comic artwork that may come in handy. Find more Balloons, Effect Lines, Sound Effects, and Signs under Materials > Manga Material, or explore Clip Studio Assets for even more resources!

Exporting Your Comic
Congratulations! You’ve completed your comic masterpiece using Clip Studio Paint.
Now, it’s time to share your creation with the world. Clip Studio Paint offers various export options to ensure your comic looks its best in different formats. Here’s how to export your comic in Clip Studio Paint:
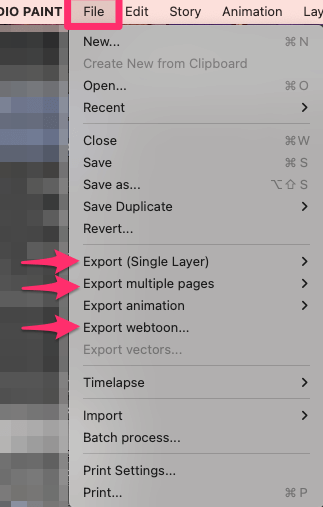
Step 1: Go to the File menu and select Export (if you are exporting a single page of a comic), Export Multiple Pages (if you have a multi-page comic and own Clip Studio Paint EX), or Export Webtoon (if you’ve created a vertical digital comic).
Step 2: Choose the desired file format for your comic. Clip Studio Paint supports popular image formats like JPEG or PNG.

If you’re creating a Webtoon and want to upload it to platforms like Webtoons or Tapas, be aware that there’s a size limit and JPEG images can sometimes be significantly lighter.
Step 3: Adjust the resolution and quality settings according to your requirements. Higher resolutions are ideal for printing, while lower resolutions are suitable for digital sharing.
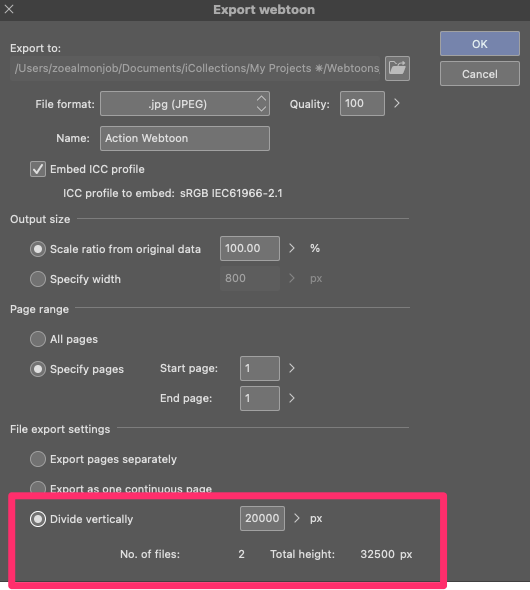
Step 4: If you plan to upload your webtoon to a publishing platform, some platforms require you to divide your images into smaller parts. Choose the height for each division, and you’ll see how many separate files will be created below.
Step 5: Select the destination folder where you want to save your exported comic.
Step 6: Click Export to generate the final output file.
By following these steps, you can effortlessly export your comic and share it with your audience, whether in print or digital form.
Final Thoughts
From setting up your comic document to exporting the final product, Clip Studio Paint offers a comprehensive set of tools and features that streamline the comic-making process. You can easily create frames and balloons, and bring your story to life with colorful characters and exciting scenes.
Don’t forget to plan your pages with storyboards, maintain a consistent style, and experiment with 3D models for dynamic storytelling. With these techniques, your comic can be both captivating and visually appealing.
Do you have experience creating comics in Clip Studio Paint? Feel free to share your thoughts or questions in the comments below.