
If you prefer using Google Chrome over Safari, you might want to switch your default browser and make it official. This way, you won’t have to worry about which app to open things like web links, internet shortcuts, and even PDFs.
So, how do you change the default browser to Google Chrome on Mac?
Working in a computer repair shop, I encounter many people who like using a specific browser, but don’t know exactly how they can set it as their default. If Chrome is your favorite browser, then setting it to be the default will save you lots of time in the long run.
Luckily, making Google Chrome your default browser on Mac is a simple process and can be done in just a few steps.
Let’s get into it!
Table of Contents
Key Takeaways
- If you don’t already have Chrome, you’ll need to download and install it by visiting www.google.com/chrome and following the prompts.
- You can use Apple System Settings to set Chrome as your default browser in a few steps.
- Alternatively, you can use the built-in Google Chrome Settings to set Chrome to Default.
Steps to Make Google Chrome the Default Browser on Mac
Google Chrome is a very popular internet browser due to its speed, security, and user-friendly interface. Lucky for us Apple Users, Chrome is available on Mac and can be set to the default browser! This means that whenever we try to open a webpage or click a link, it will open in Chrome rather than Safari.
There are two ways that we can set Google Chrome as the default browser, the first using system settings for your Mac and the second using the settings for Google Chrome. This article will provide instructions for both of these options.
Step 1: Install Chrome
The first step to set Google Chrome to default on Mac is downloading and installing Chrome.
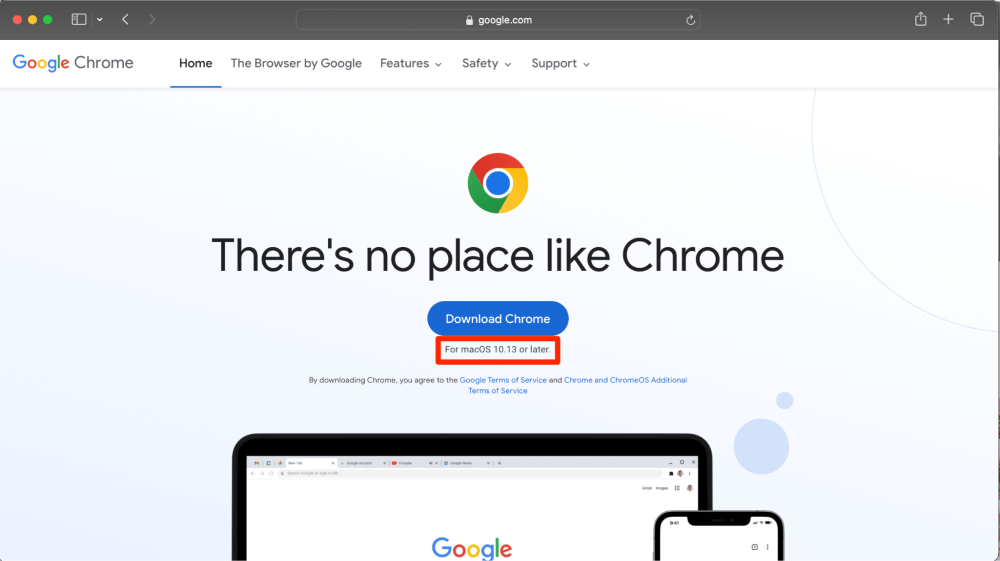
Using Safari, visit www.google.com/chrome. Scroll down and verify that the Chrome version is compatible with your MacOS software.
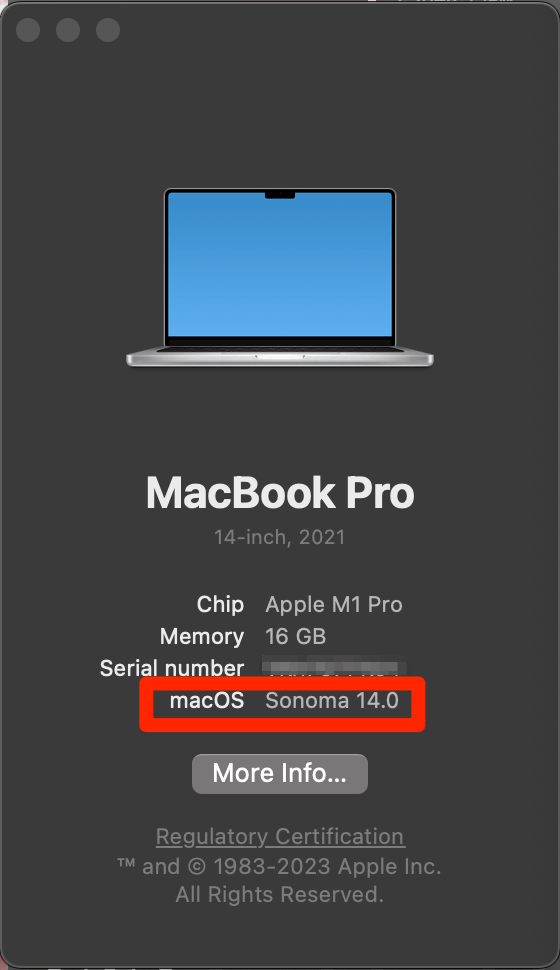
Hit the Apple Menu at the top of your screen and select About this Mac if you do not know which version of MacOS you are running.
Once verified, click download and follow the on-screen instructions to install Google Chrome.
Step 2: Set as Default Browser using System Settings
After you have Google Chrome downloaded and installed, you can use System Settings to set Chrome as default.
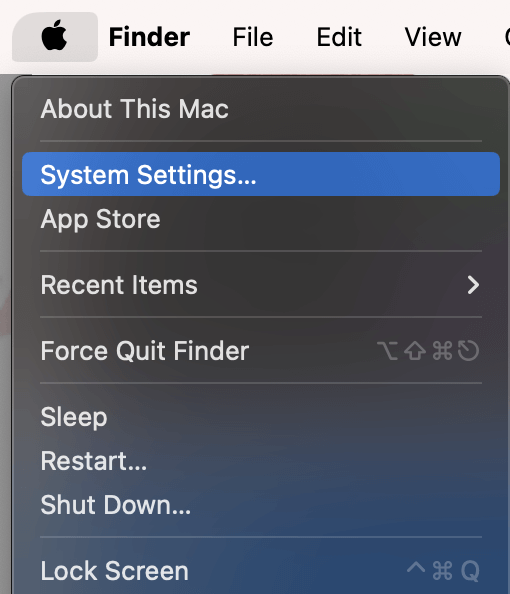
Click the Apple Menu and hit System Settings from the drop-down menu.
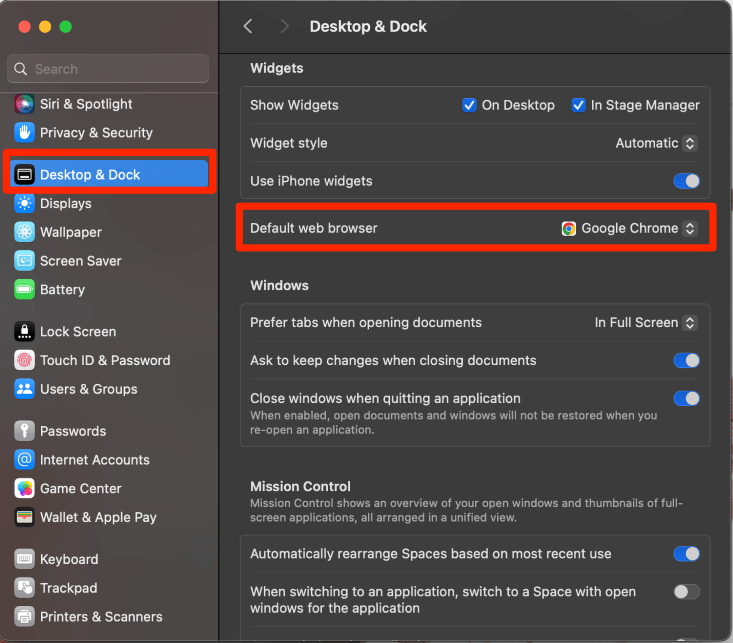
Scroll down to Desktop & Dock on the left. Then, scroll down to the Widgets section. Just under the widgets section, choose Google Chrome in the drop-down menu for the Default web browser.
Step 3: Set as Default Browser using Chrome Preferences
Lastly, you can also use Google Chrome Settings to set Chrome as your default browser.
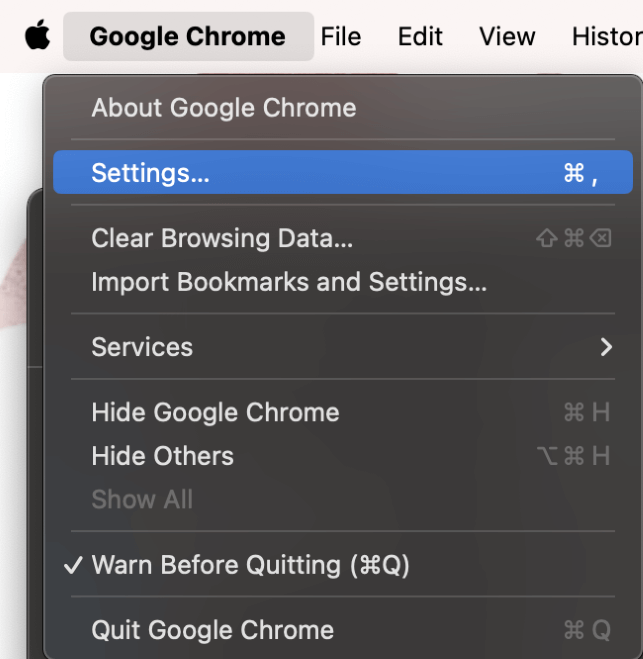
With Chrome open, click Google Chrome from the menu at the top of your screen and select Settings.
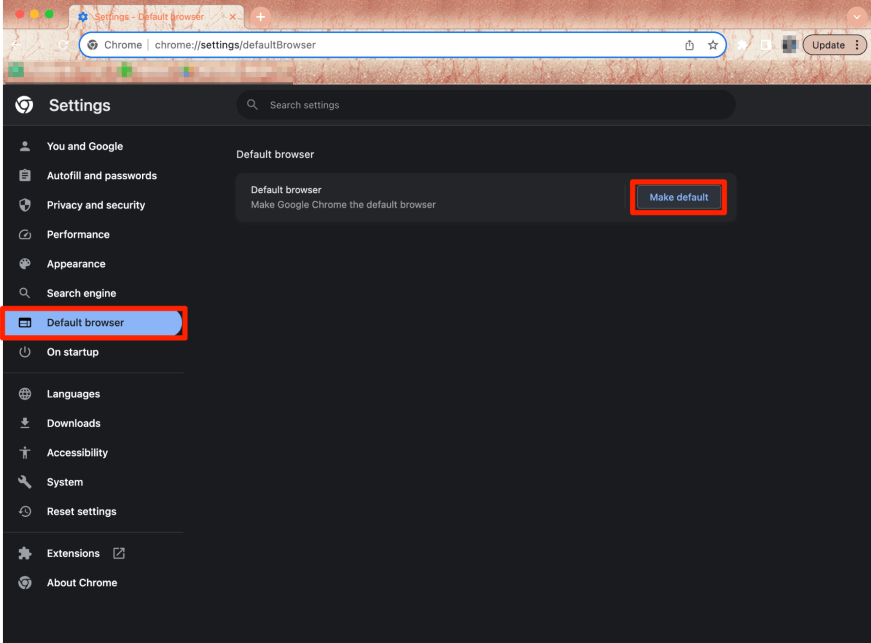
On the left, choose default browser. On the right, choose Make Default.
Click Use Chrome to confirm.

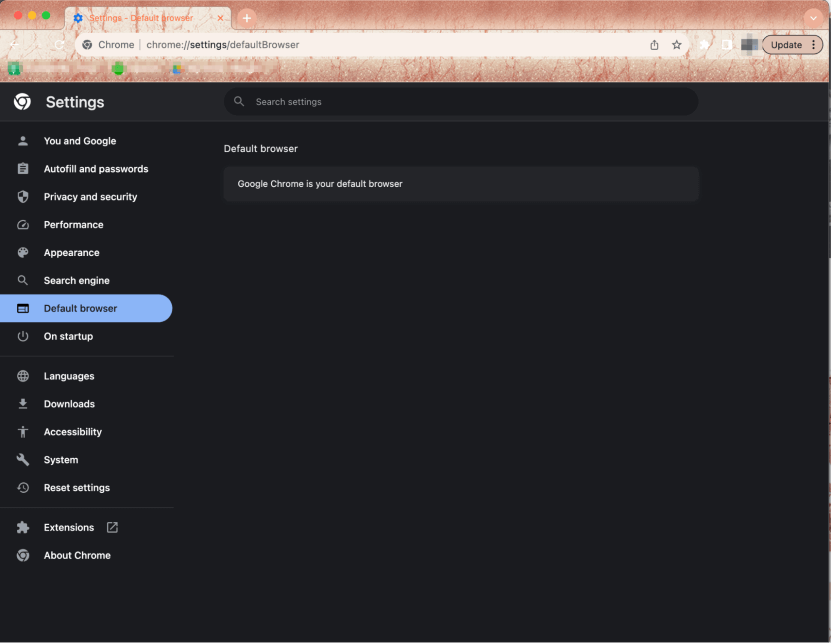
Now, Google will say that Chrome is already your default browser. Voila! That’s all there is to it.
Final Thoughts
With the popularity of Chrome, the ease of use, and the speed, it makes sense that you may want to set it as your default browser on your Mac. This is a very simple process, especially if you already have the Chrome Application downloaded and installed. Even if you don’t have it yet, downloading it is a quick process.
This article provided you with two ways to set Chrome as default on your Mac. You can use your Mac’s System Settings, or you can navigate over to Google Chrome’s built-in settings.
Which method did you use? Is there a reason you chose one over the other? Let us know in the comments!