
You can create a gradient by using the Gradient tool to click and drag a line in the direction you want the gradient to go. To change the gradient settings, open the Gradient Editor by clicking on the gradient preview in the tool’s settings across the top. You can save your created gradient(s) by typing in a name and clicking on the “New” button.
Hello! I’m Jayde, and I started using Photoshop years ago to create fantasy images of my online game characters. Now, Photoshop has made it possible for me to work from home, sharing what I’ve learned with other graphic designers around the world.
In this article, I’ll show you how to create a gradient in Photoshop. Keep reading to the end of the tutorial to learn how to make your gradient(s) wavy!
Table of Contents
Key Takeaways
- On a new layer, use any Selection tool to create a space or shape that you want the gradient to fill.
- With the Gradient tool selected, click on the gradient dropdown box to open the editor and change its settings.
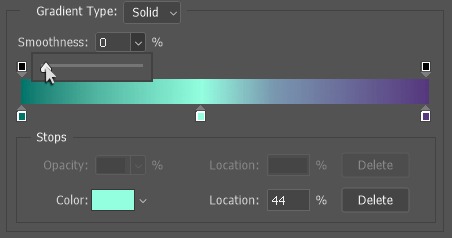
- In the Gradient Editor, Color Stops are the little tabs along the gradient preview bar.
- Using the Color Stops, you can add, change, and move colors.
- With an Opacity Stop selected, you can change the opacity of a portion of your gradient.
How to Use Gradient in Photoshop
There are some Photoshop gradient palette options, but you can only create and use your custom gradient palette.
Here’s a quick guide to find an edit gradient colors in Photoshop.
Note: All screenshots from this tutorial are taken from the Adobe Photoshop CC Windows version. Other versions can look different.

Step 1: Make a New Layer and use any Selection tool to select where you want your gradient to appear.
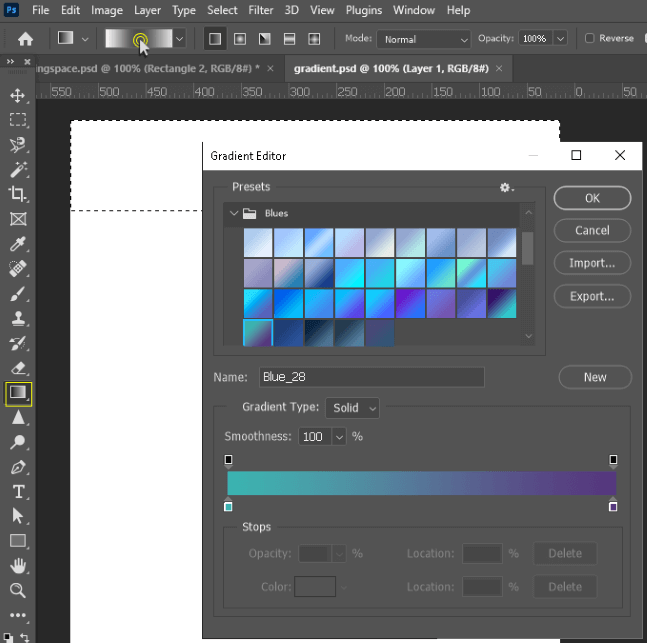
Step 2: Select the Gradient tool and click on the dropdown in the tool’s settings. This opens the Gradient Editor. Click on any one of these presets to start making a custom gradient.
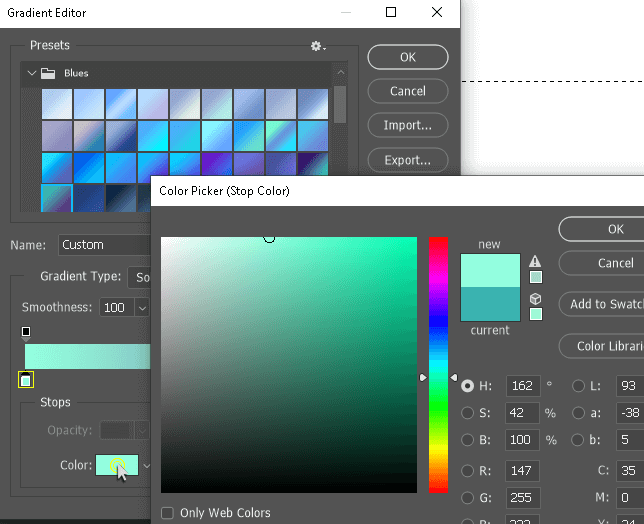
Step 3: Click on one of the Color Stops to change its color. Click and drag these to move the color. If you click and drag a color stop down, it will be removed.
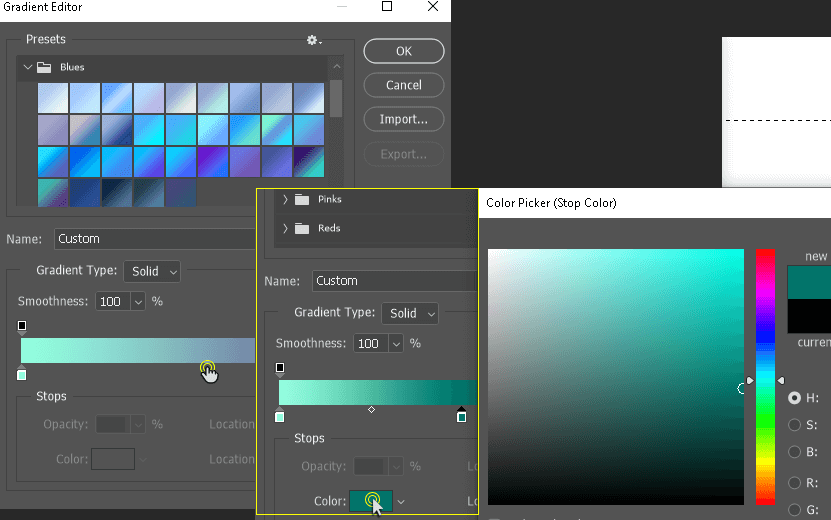
Step 4: Add a Color Stop when your cursor changes to a small pointing hand. Change the color to whatever you like.
I’m going to click and drag the first color stop past the one I just created in the middle to change the order of colors.
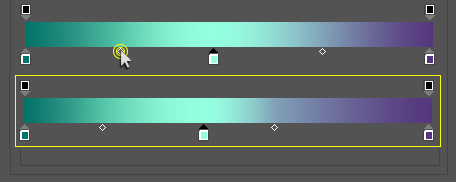
Step 5: Change the fade of a color by moving this small marker.
Step 6: Changing the Smoothness affects the whole gradient. It changes how smoothly the colors blend into one another.
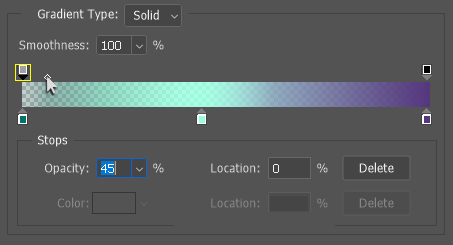
Step 7: Click on one of the black stops on the top of the color bar. These are called Opacity Stops. As you can see, this affects the entire gradient to an extent, even if you move the fade marker.
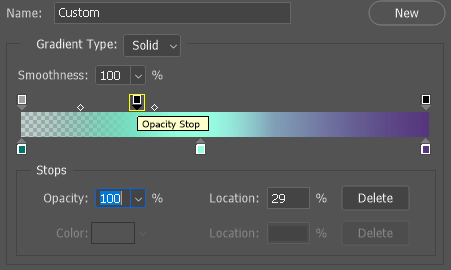
Step 8: Adding an Opacity Stop the same way we added a Color Stop stops the opacity change. It is possible to reduce the opacity to 0, making points in your gradient color-free.
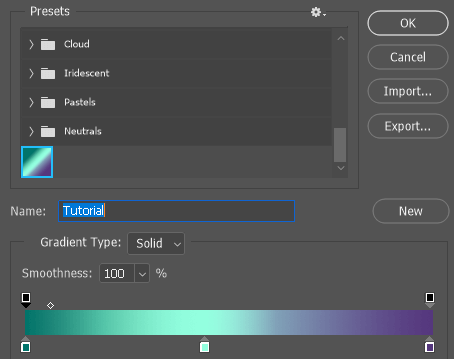
Step 9: Save your custom gradient by naming it and clicking the New button.
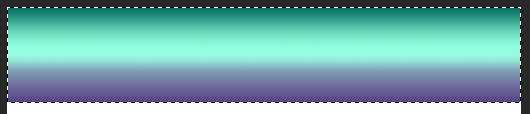
Step 10: With your gradient all set, use the Gradient tool to click and drag a line in the direction you want your gradient to flow.
Bonus! Making Your Gradient Wavy
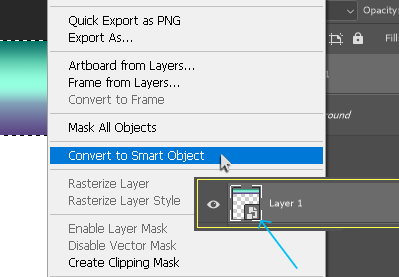
Using the same example above, Right click on your gradient layer and go to Convert to Smart Object.
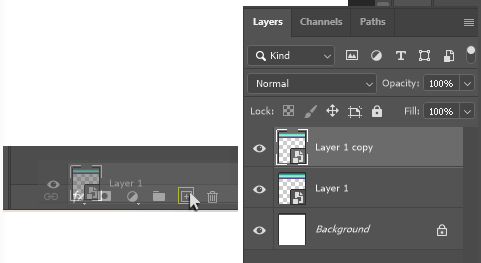
Click and drag this smart object layer onto the New Layer icon. This creates a copied layer. Use the shortcut Ctrl/Command + D to deselect the area we added to our gradient.
Use the shortcut V to select the Move tool and use the arrow keys or your mouse to move this layer down.
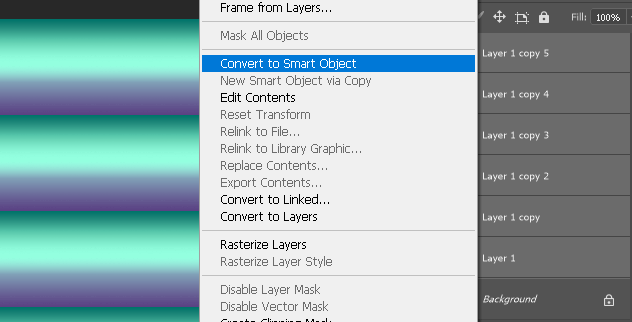
Repeat this until your page is full of color.
Select the stack of smart objects by clicking on the bottom one, holding the Shift key, and then clicking on the top one. Right-click on these and go to Convert to Smart Object again.
This way, if you want to edit the gradients at a later time, you can do so. Simply double-click on the Smart Object thumbnail to open the contents in a separate file and click Save when finished, so that the changes reflect in the original file.
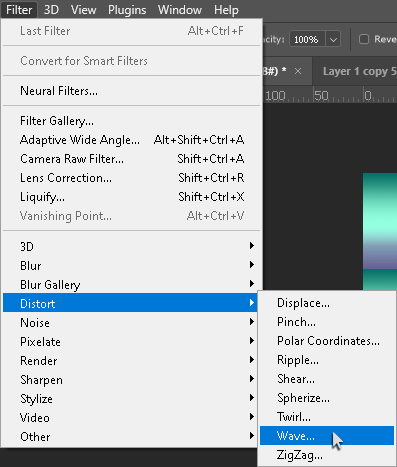
Go to Filter > Distort > Wave.
We have some options here. You can click the Randomize button to see different wave settings. The Wavelength is how stretched out the wave is and the Amplitude is how deep and steep the waves are.
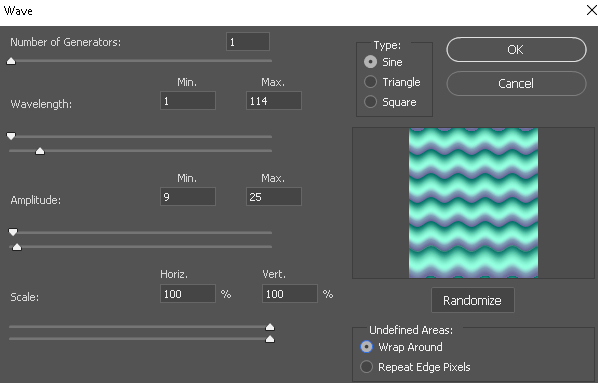
You can also adjust the type for different, creative options. I clicked Randomize until I was happy with it. I also checked off Wrap Around so that I can see green at the very bottom and purple at the very top.
Final Thoughts
Gradient colors are fun to play with and they’re beautiful elements as design backgrounds or you can make special photo effects with them.
Do you have a favorite filter in Photoshop? Have you ever used smart objects before? Let me know in the comments below.