
You can make a great black-and-white image in Photoshop by adding an adjustment layer for the Gradient Map. Click on the gradient bar in the Properties panel to adjust the color ratio and smoothness. Alternatively, you may add an adjustment layer for Black and White.
There are other ways to make an image black and white, and it’s best to learn all these methods to increase your Photoshop editing skills. Kind greetings to you, fellow Photoshopian. I’m Jayde, and today I’ll be showing you how to make a great black and white image in Photoshop.
Making an image black-and-white in Photoshop is extremely easy. I encourage you to take additional steps to make your black-and-white image even better.
Table of Contents
Key Takeaways
- Duplicate your image layer by dragging it onto the New Layer symbol or using the shortcut Ctrl/Command + J.
- Quickly make an image layer black and white by adding an adjustment layer for Gradient Map or Black & White.
- Use the shortcut Ctrl/Command + Z to Undo any mistakes.
- In addition to the Gradient Map, use Hue/Saturation, Selective Color, and Color Balance to perfect the black-and-white image.
Note: The screenshots from this tutorial are taken from the Adobe Photoshop Windows version. Mac or other versions can look different.
Method 1: Desaturate
This is the quickest way to make an image black and white in Photoshop.
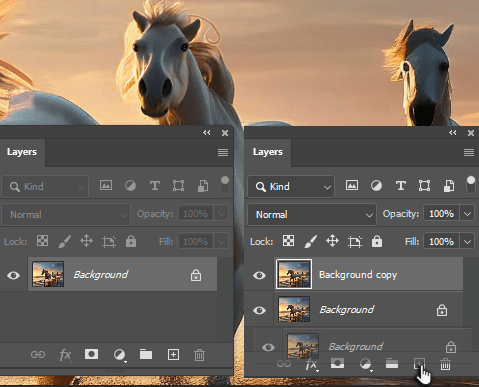
Step 1: First, make a copy of your image layer by using the shortcut Ctrl/Command + J or by clicking and dragging the layer onto the New Layer symbol.
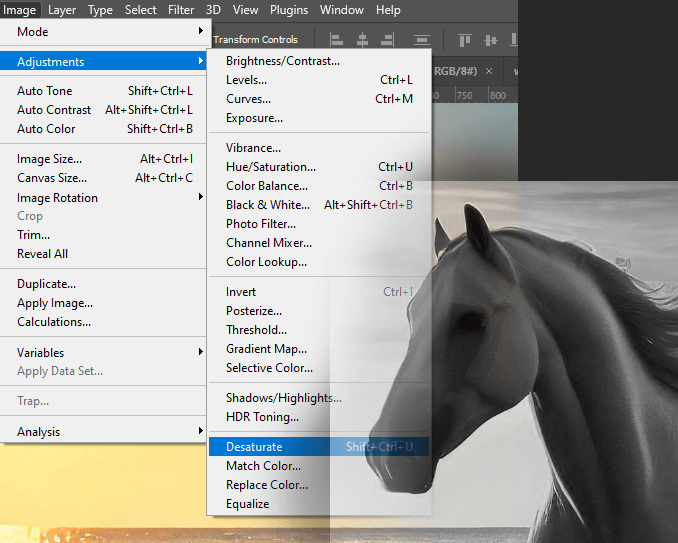
Step 2: Desaturate the image by going to Image > Adjustments > Desaturate or using the shortcut Shift + Ctrl/Command + U.
That’s it!
Method 2: Black & White Adjustment Layer
Let’s try the Black & White adjustment layer.
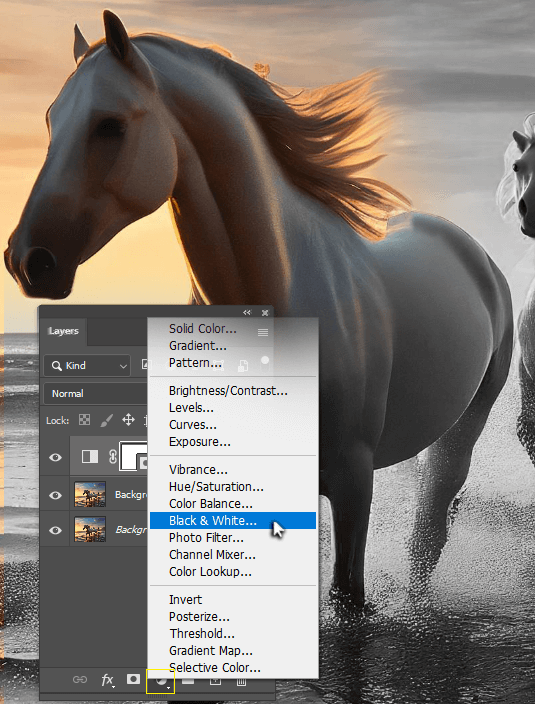
Simply duplicate the image, same as in Method 1, click on the Add a new adjustment layer button, and choose Black & White.
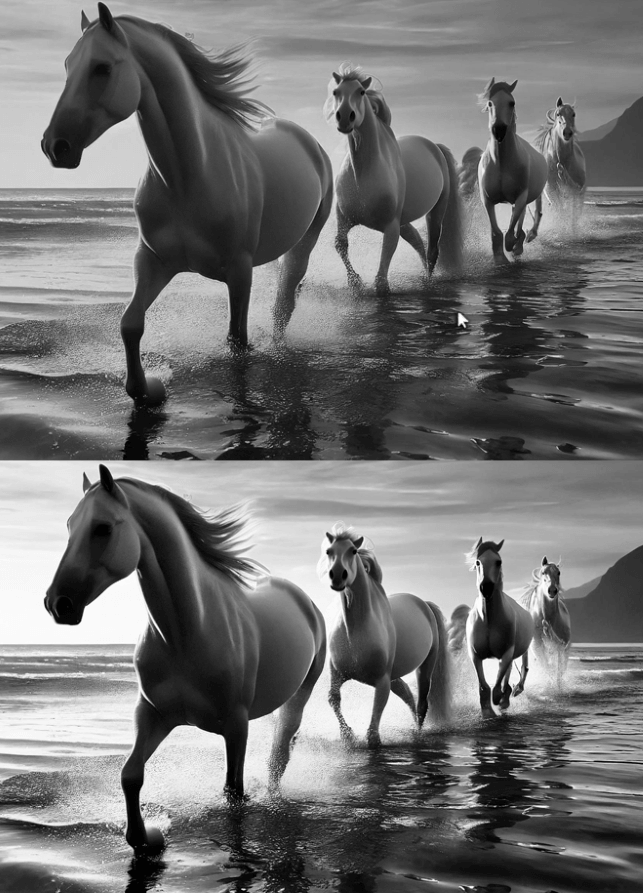
The problem with methods 1 and 2 is that the image doesn’t give a high contrast of black and white, it’s more like a grayscale effect.
Method 3: Gradient Map
Gradient Maps are quick and easy to use.
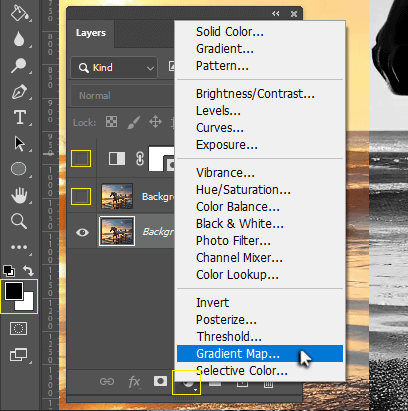
Step 1: Turn off the visibility of the Black and White adjustment and copied image layer. Make sure your foreground and background colors are set to the default black and white.
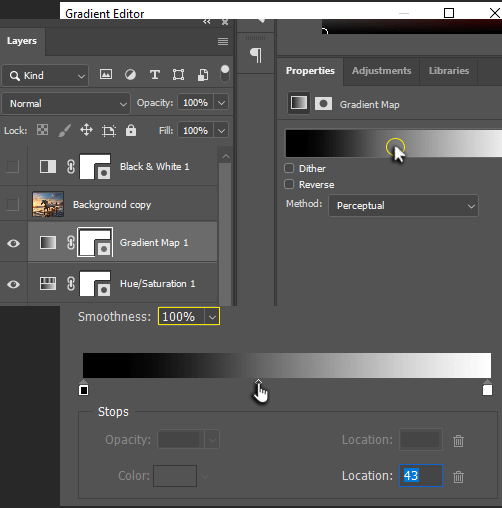
Click on the adjustment layer icon and select Gradient Map.
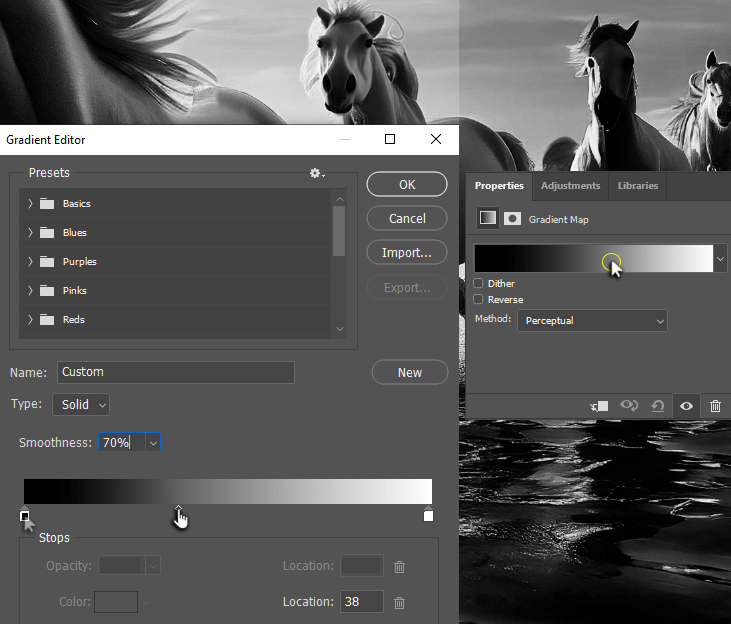
Step 2: Click on the Gradient Editor in the Properties panel. After clicking on one of the color tabs, a center diamond will appear on the gradient.
By sliding this to the left, towards the black, you’re telling Photoshop you want white to extend further into the grays than black. Doing so will lighten your photo.
You may also lower the Smoothness of your photo, which lowers the contrast of the image.
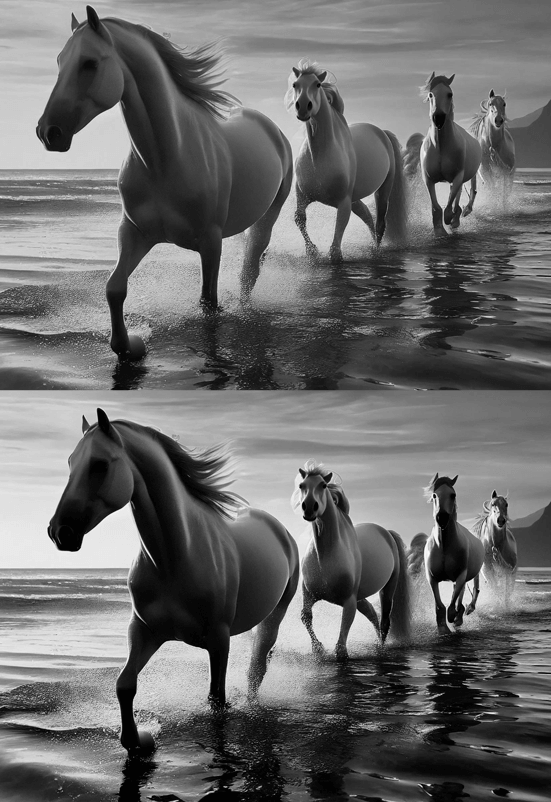
Let’s compare the difference between the Black and White adjustment layer and the Gradient Map.
Method 4: Other Adjustment Layers
Let’s take this a step further and see how we might gain even more control over our black-and-white image.
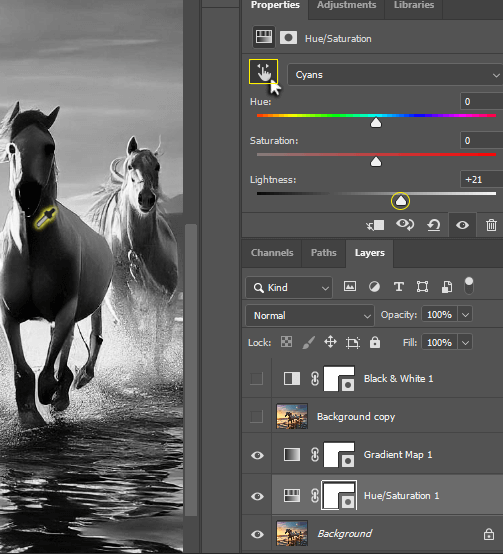
Step 1: Below our Gradient Map adjustment layer, let’s add another adjustment layer for Hue/Saturation.
Now if you click this hand symbol and then click somewhere on your image, Photoshop knows what color you’re clicking on, and you can go ahead and increase or decrease the saturation and lightness of that hue.
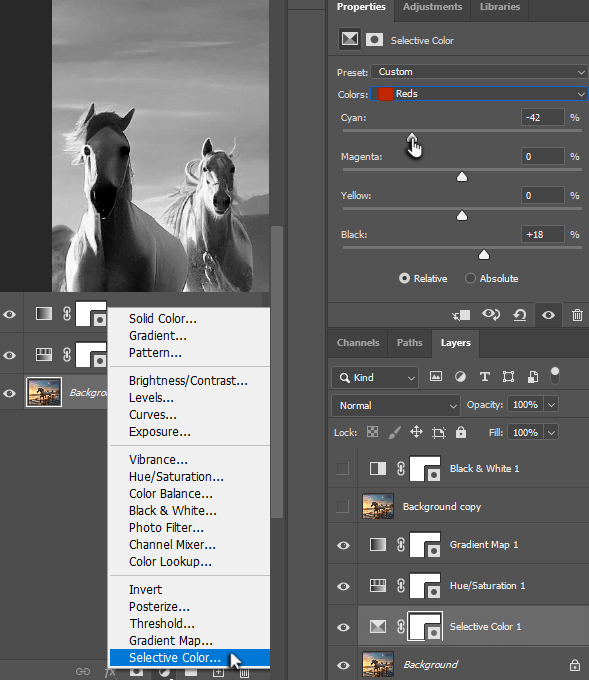
Step 2: Add an adjustment layer for Selective Color and choose a color from the drop-down menu. Adjust the sliders to see how each one affects your photo.

Step 3: Add an adjustment layer for Color Balance and shift the sliders here as well. Start with midtones and then adjust the highlights as well.
Step 4: Now let’s return to the Gradient Editor by selecting the adjustment layer and clicking on the gradient bar.
Adjust the center point to make your photo predominantly black or white. If you wish, return the Smoothness to 100%, increasing the contrast again.
Let’s compare a single Black & White adjustment layer to this custom black and white image made with four other adjustment layers.
Final Thoughts
That concludes How to Make an Image Black and White in Photoshop. By exploring a few different ways to do this, we’ve become more familiar with this amazing design program, and more prepared for our future art projects.
Were you able to turn your image black and white in Photoshop? Which method did you like the most? Let me know in the comments below!