
You can make a brush in Photoshop with any selected brush settings, a doodle, a design, or an image. Simply have your brush selected and changed, or select your black or black and white design and go to Edit > Define Brush Preset and name it whatever you’d like.
You can save a brush or brush set as an abr file by going to Edit > Preset Manager, selecting them, and clicking Save Set.
Hello! I’m Jayde, and I never get tired of Photoshop. Today I’m going to show you all about brushes including the brush settings. You’ll learn how to create and edit brush strokes to be exactly as you need them to be. Then I’ll show you how to save the brush as a preset stroke.
Table of Contents
Key Takeaways
- Create a brush preset with the brush tool, after tweaking the settings to exactly where you need it to be. There are so many brush settings (shortcut: F5) available to make your brush unique.
- You can also create brush presets with a black-and-white image. Cut it out, and with it selected, go to Edit > Define Brush Preset.
- You can also create a brush preset with a black-and-white drawing or design. Select it, and go to Edit > Define Brush Preset.
Note: The screenshots from this tutorial are taken from the Adobe Photoshop Windows version. Mac or other versions can look different.
Without further delay, let’s get started.
Creating a Brush Stroke in Photoshop
The key to creating a brush stroke is learning all the different settings within the Brush Settings panel which can be opened with the shortcut F5.
I’m going to start with a round Brush and go through each brush setting with you. It is necessary to know all of the options available to you so that you may create the exact brush you have in mind.
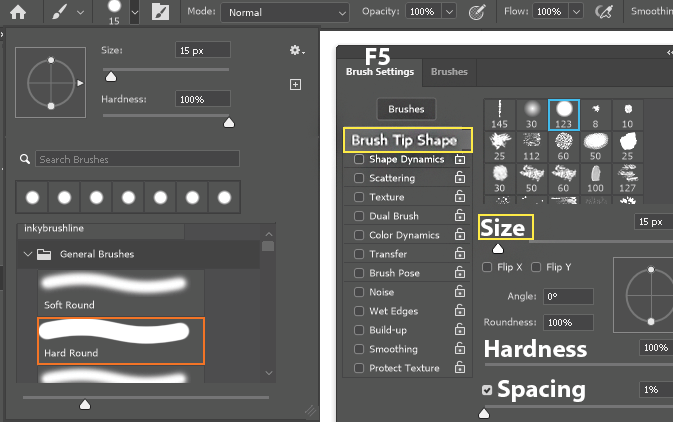
Press F5 to open the Brush Settings and first, we’re going to look at the Brush Tip Shape.
Here you can change your brush, size, flip it around, angle it, and adjust the roundness, hardness, and spacing. I recommend that you try out each of these adjustment options to see how they affect your brush.
A lot of brush designing involves going back and forth between the tabs to tweak things as you go.
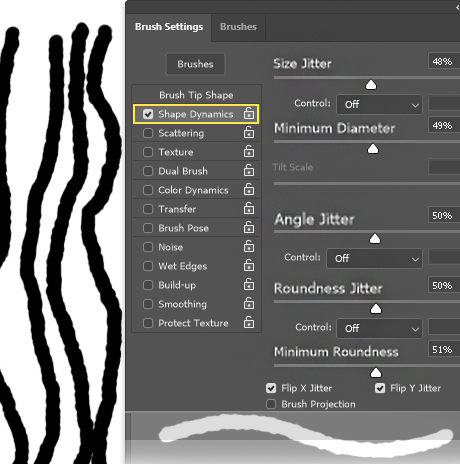
Shape Dynamics is a great tab. Here, I changed the Size Jitter to about 50% and drew a line to see what difference it made. I did the same for Minimum Diameter, Angle Jitter, Roundness Jitter, and Minimum Roundness.
I also checked off the Flip X and Y Jitters. Overall, my line looks a little more like chalk or a pencil.
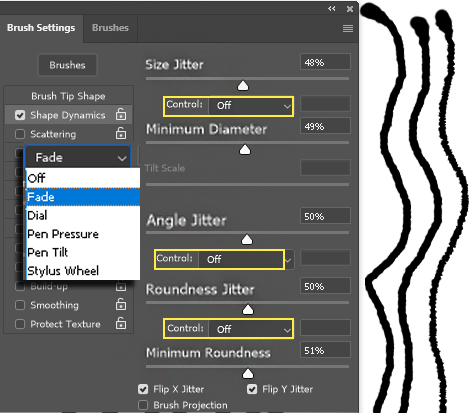
We have three different Control drop-downs for the aforementioned adjustment settings. Here is what Fade did for each one. Selecting Fade gives you another number you can adjust.
The options after Fade involve a drawing tablet. Going through each option would make this an extremely long tutorial, so I’ll just encourage you to try out each of these on your own.
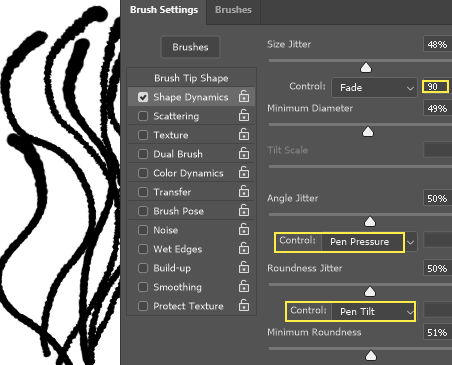
Here are my settings before moving on to the next tab.
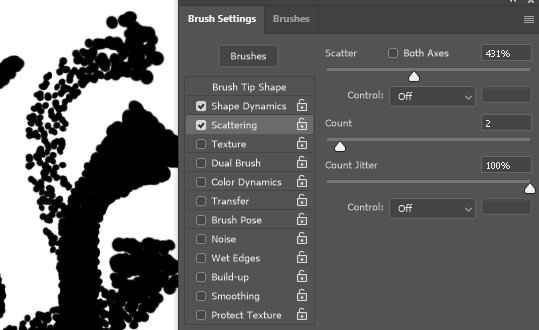
Scattering is great for making your brush randomly placed without forcing you to think too much about it. Although this looks very interesting, I’m going to uncheck Scattering and move on to the next box.
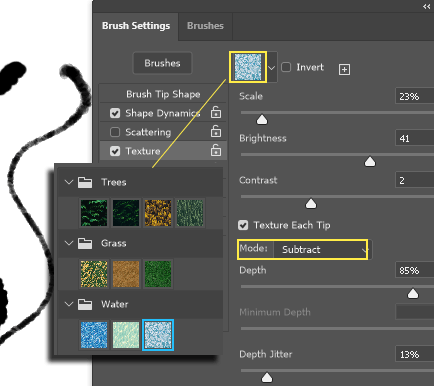
Texture makes your brush look like something else entirely. As you can see, I just have Photoshop’s very basic patterns, but if you make any of your own, you can apply them to your brushstroke! How cool is that?
I liked the water look a lot, after changing the Mode for it to Subtract.
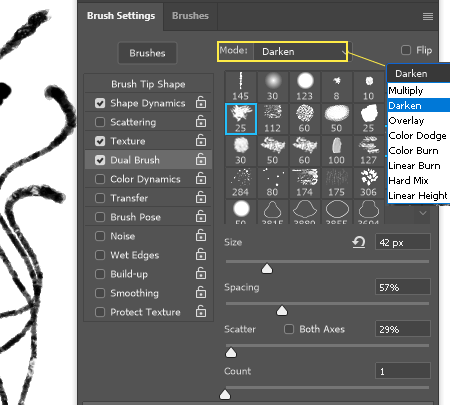
Dual Brush mixes an existing brush with the brush you’re creating. You can change the Mode of this option as well, and for my situation, Darken looked great.

Color Dynamics changes the color of your Brush. Changing the Foreground/Background Jitter alternates the colors you have selected. Hue Jitter varies the hue of the colors you have selected. I had to increase the Purity of the brush to make the colors show up at all.
To save this brush as a preset for later, I’m going to uncheck Color Dynamics.
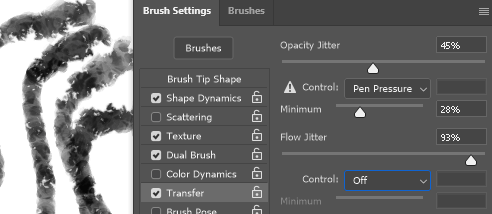
Transfer is all about Opacity and Flow jitter. Flow changes the speed at which the paint flows from the brush and the Opacity changes the visibility of the paint. Jittering these offers a unique look to your stroke.
Flow allows you to go back over your stroke to make it darker. Opacity doesn’t layer or darken within the same stroke.
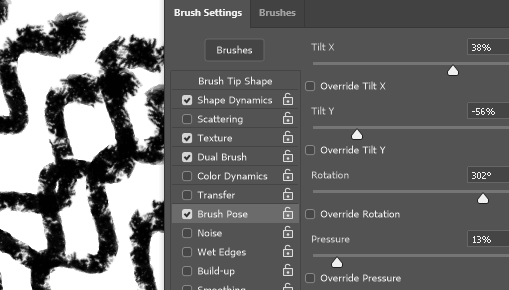
Brush Pose offers tilting, rotation, and pressure options. It did change the look of my stroke and helped to change it up a little.
Noise, Wet Edges, Build-up, Smoothing, and Protect Texture are all options you can simply check on or off.
Let’s save the brush I have now as a preset.
Saving a Custom Brush as a Preset

Step 1: With the Brush tool, click on the dropdown arrow at the top of the page, then the settings wheel in the corner. Click on New Brush Preset. Name it as descriptively as you can.
Now let’s make a little doodle that we want to keep as a brush preset.
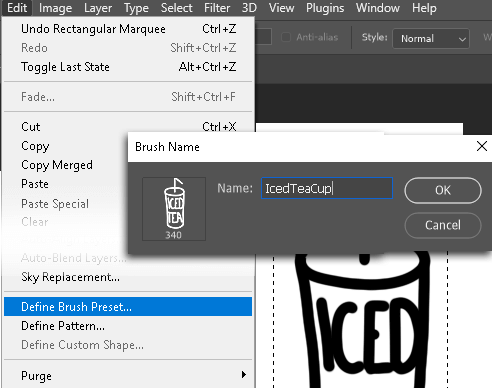
Step 2: Draw any black-on-white doodle or design and save it as a brush by going to Edit > Define Brush Preset.
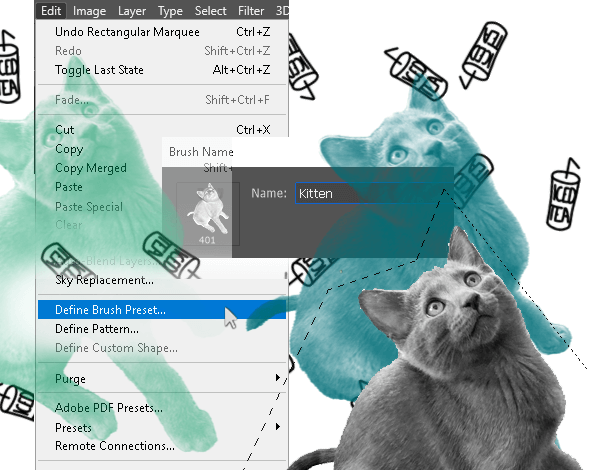
Step 3: You can even use a black-and-white image. Cut it out, select it, and go to Edit > Define Brush Preset. I added color to it with Color Dynamics in Brush Settings.
You can save the brush as a .abr file.
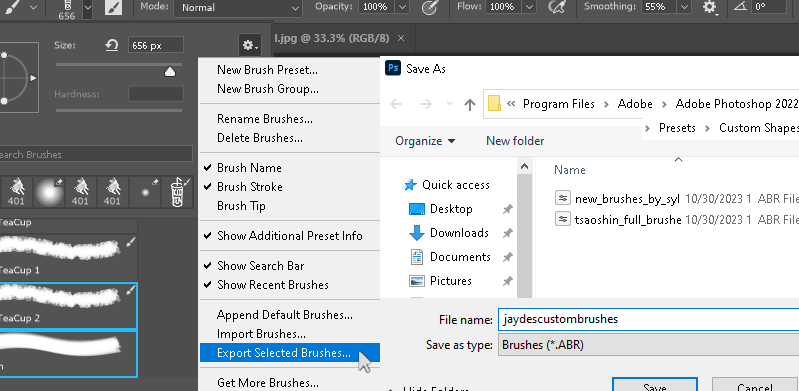
I selected the Iced Tea and Kitten brushes. Then, go to the wheel in the corner of the brush dropdown and click on Export Selected Brushes. From there, choose where you want to save the .abr file.
Final Thoughts
We’ve gone over everything there is to know about brushes, brush settings, and how to make your own brushes to share with fellow artists! I certainly hope this tutorial was everything you hoped to learn and more.
Did you find my tutorial helpful? Let me know in the comments below.