
Masks in After Effects are used to selectively hide or reveal parts of a layer. You create a mask by selecting a layer and then using either the shape tools for basic forms or the Pen tool for custom, detailed shapes.
Hi, I’m Zoe! In my years of using After Effects for various projects, I found masking a vital technique. For instance, while animating a character flying through clouds, masking was key to achieving realistic interactions between the character and the clouds.
In this post, we’ll explore how to create and adjust masks in After Effects.
Let’s get started!
Table of Contents
Key Takeaways
- Masks in After Effects offer a non-destructive way to hide or reveal parts of your layers, meaning you can edit and adjust without permanently altering your original footage.
- Adjusting mask properties such as feathering, opacity, and expansion gives you precise control over how the mask interacts with your layer, ensuring a perfect blend with the rest of your composition.
- Adding keyframes lets you animate a mask’s properties or path to change over time.
- Whether using shape tools for basic forms or the pen tool for custom designs, masks can be tailored to any shape and size.
- By stacking and adjusting multiple masks, you can create complex visual compositions and effects.
Note: All screenshots from this tutorial are taken from the After Effects Mac version.
This article will guide you through creating and manipulating masks in After Effects to enhance your video and animation projects.
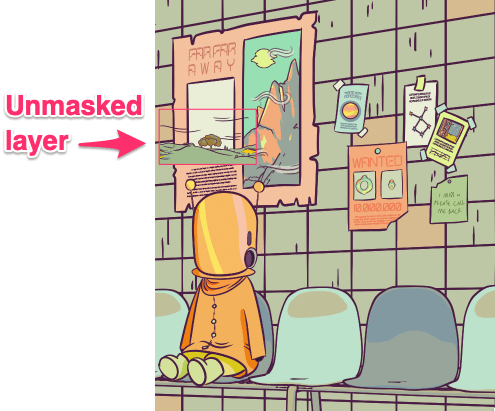
What are Masks in After Effects
Creating a mask means defining a path on a layer that specifies what’s visible and what’s hidden. Whether it’s a basic shape like a rectangle, or a complex design using the Pen Tool, masks are versatile and applicable to any layer, offering control over your composition’s visual elements.
Creating a Mask in After Effects
Follow the steps below to create a mask.
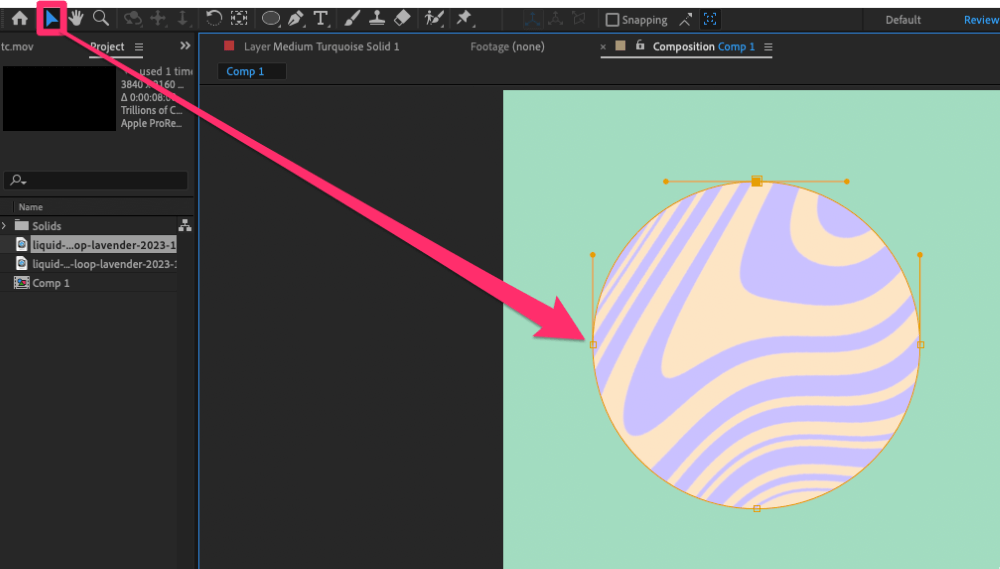
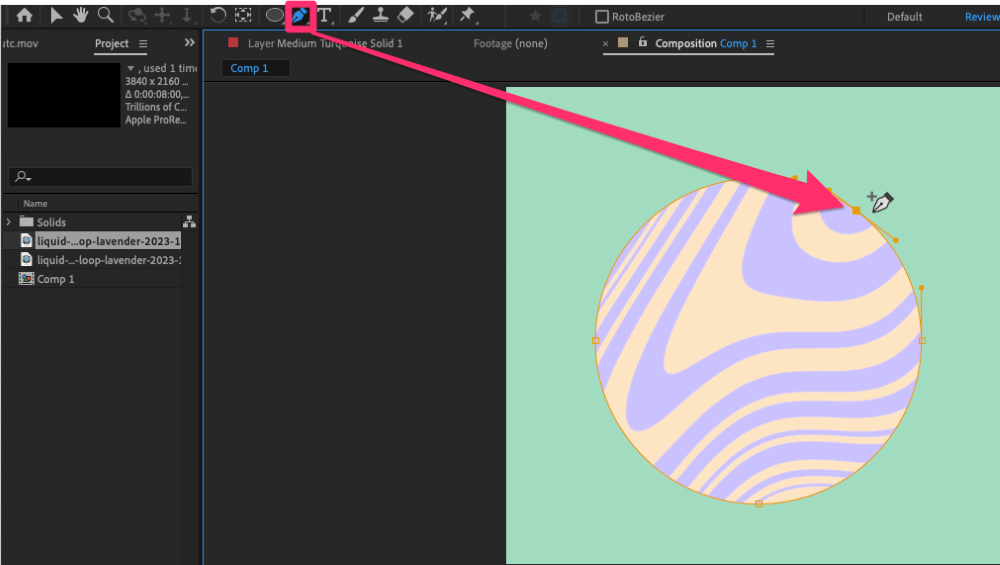
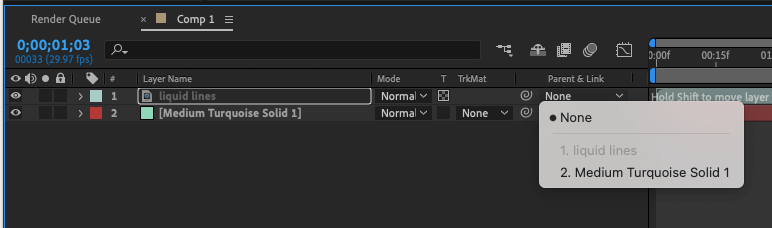
Step 1: Click on your target layer for masking in the Timeline.

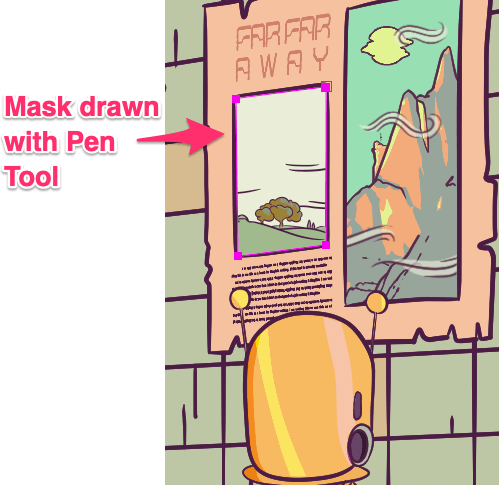
Step 2: Select a Shape Tool or the Pen Tool.
- Shape Tools: Quick and easy, these tools let you make basic geometric shapes. Use Q to cycle through them and hold Shift for perfect squares or circles.

- Pen Tool: For more complex and custom shapes, the pen tool is your go-to. Click to place points and click and drag to create curves.

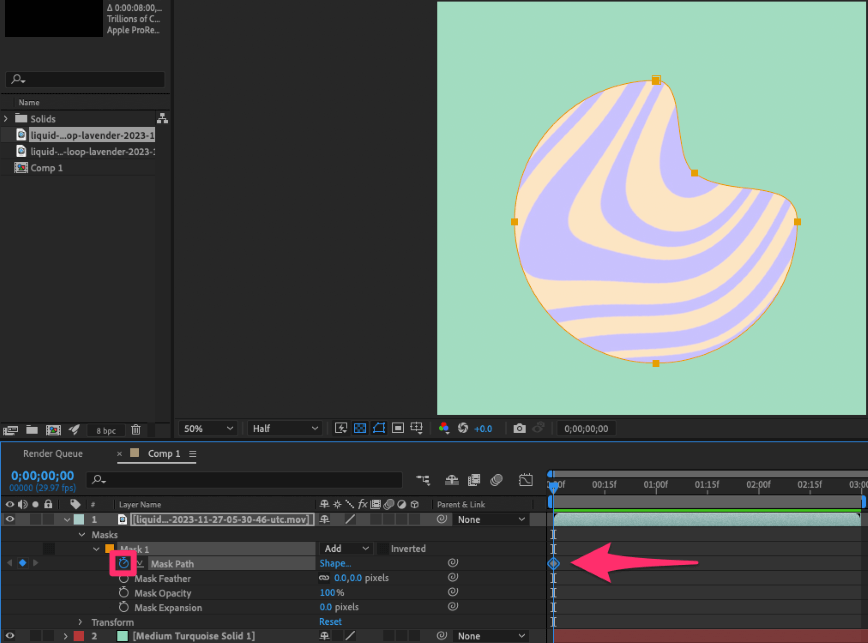
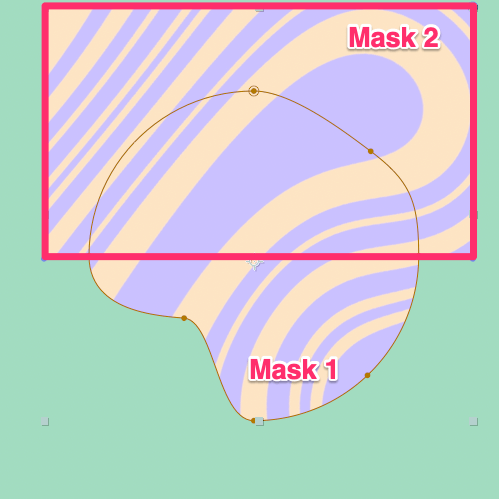
Step 3: After creating your mask, adjust its properties in the timeline. You can change its position, size, and shape, as well as feathering, opacity, and expansion. Layer multiple masks for complex effects.

And that’s how you create a mask in After Effects! By following these steps, you can effectively use masking to enhance your animation projects.

Adjusting Mask Properties in After Effects
You can find these settings in the Layer Panel, under the mask properties for the selected layer. Here’s a rundown of key properties and how to use them:
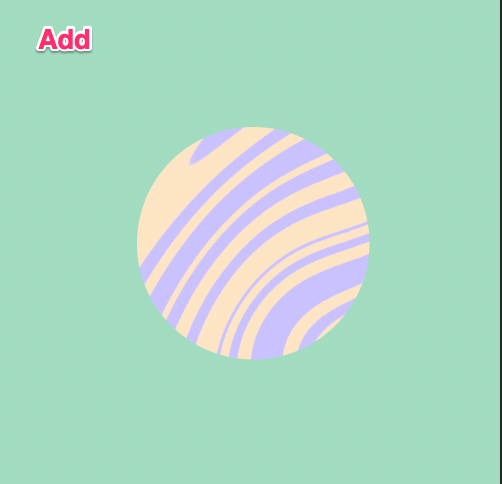
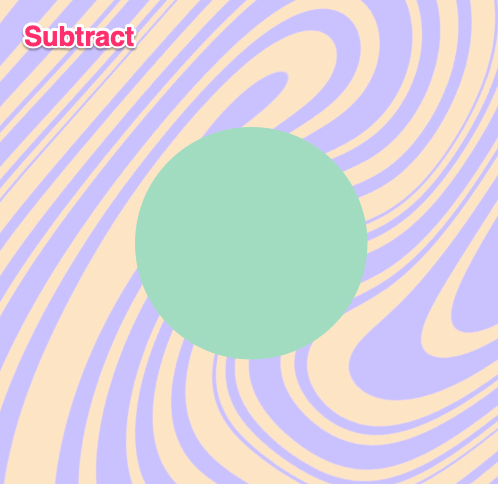
- Mode: Determines interaction with the layer; Add for inside, Subtract for outside, or None for both.
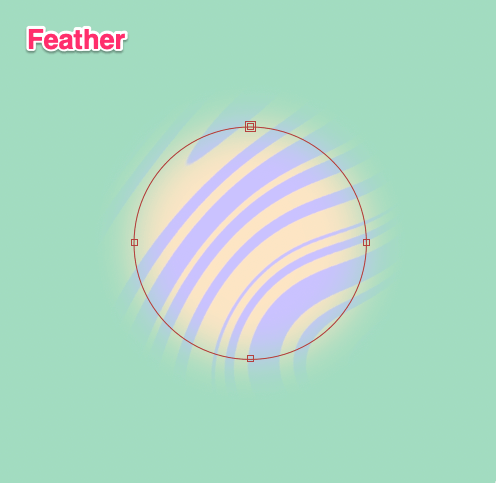
- Mask Feather: Softens edges for smoother transitions. Higher values soften the transition between masked and unmasked areas.
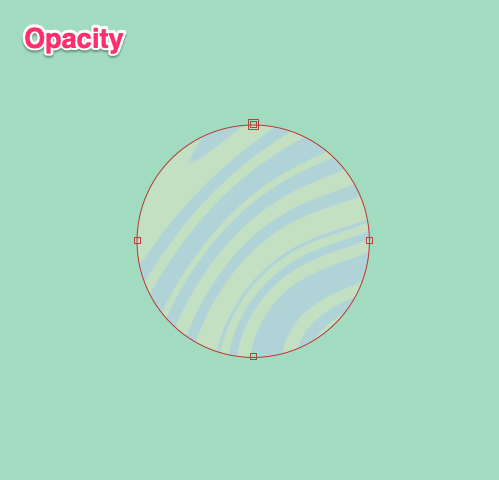
- Mask Opacity: Alters transparency.
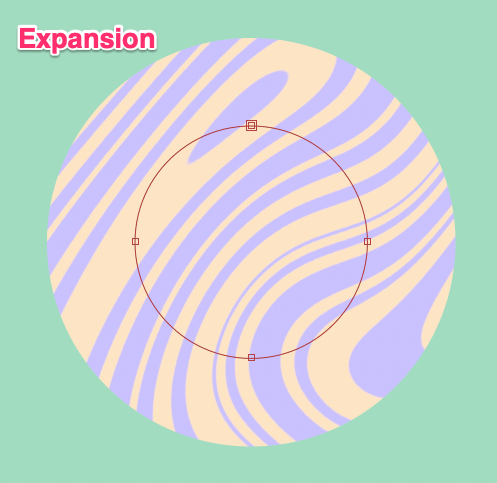
- Mask Expansion: Expands or contracts the mask without altering the path.
Transforming Masks in After Effects
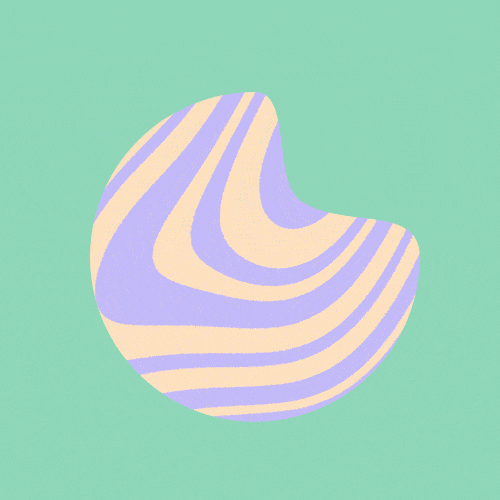
Once you have created a mask, you can easily manipulate and transform it in After Effects. Changing the shape of a mask and animating it can add dynamic visual elements to your project.
Here’s how to adjust a mask shape and, if desired, animate it:
Step 1: Select your Mask on the timeline. You can adjust its shape with the Selection Tool (V) by moving the anchor points or control handles.
For more detailed adjustments, use the Pen Tool (G). With the pen tool, you can add new points by clicking on the mask path or delete existing points by clicking on them while holding down the Alt/Option key.
Step 2: To animate your Mask Path, move the playhead to the point in the timeline where you want the mask animation to begin. Click the stopwatch icon next to Mask Path in the mask properties to create the first keyframe.
Step 3: Move the playhead to another point in your timeline where you want the next stage of the mask animation. Adjust the mask path by moving its points or control handles. After Effects will automatically create a new keyframe for these changes.
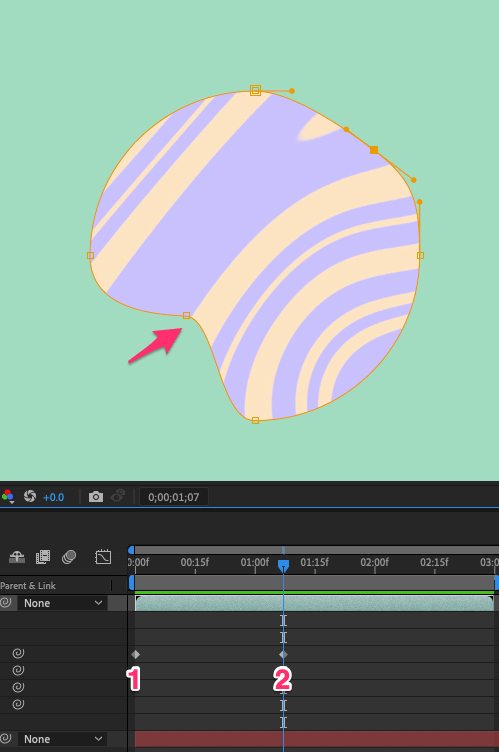
Step 4: Repeat the process of moving the playhead and adjusting the mask path to create your desired animation. Each change will automatically generate a new keyframe, creating a smooth transition between mask shapes.
And there you have it! Remember, the same technique can be used on any of a mask’s properties, such as Feather, Opacity, or Expansion.
Note on Track Mattes
While masks are great for basic adjustments and animations within a single layer, if you want to create more complex interactions between different layers and their movements, you might need to use Track Mattes.
A Track Matte uses one layer to determine the transparency of another, allowing for sophisticated effects without altering the original mask paths. This technique can be particularly useful when you want a layer to reveal or be concealed by another layer’s motion or shape dynamically.
Pro Tip: Masking an Effect in After Effects
Masking isn’t just for layers. You can also apply it to specific effects. By using masks on effect layers, you can localize where an effect is applied. For instance, you might want to apply a blur or color correction to only part of a scene.
Here’s how to mask an effect in After Effects:
Step 1: Select the layer you want to apply the effect to. Then, using either the Shape Tools or the Pen Tool, create a mask directly on the layer where you want the effect to be applied.
Step 2: Choose the effect you wish to use from the Effects & Presets panel and apply it to your layer.

Step 3: In the timeline, twirl down the effect applied to your layer to reveal its settings. Look for an option labeled Compositing Options and expand it.
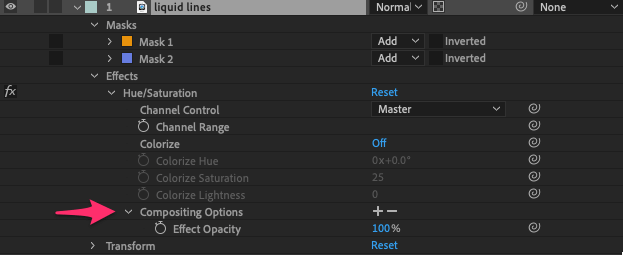
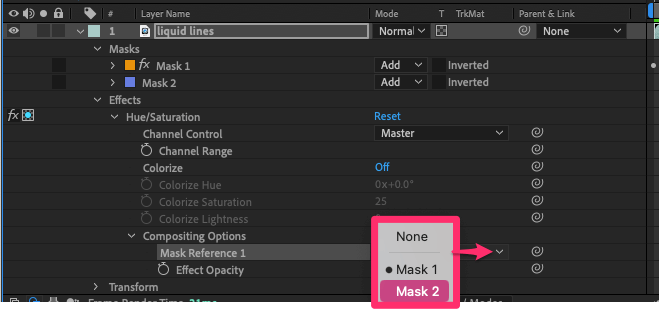
Step 3: Inside the Compositing Options, you’ll see a Plus button. Click it to add a Mask Reference. This action links the mask to the effect.

Step 4: Choose the mask you’ve created from the dropdown menu in the Mask Reference section. This step ensures that the effect applies only to the area covered by the mask.
Step 5: Now, the effect is confined to your masked area. You can further refine the effect by adjusting the mask properties. Change the mask mode to control how the effect blends with the layer, adjust the feathering for softer edges, and alter the mask opacity for varying intensity.

With these simple steps, you can apply and control effects in specific areas of your project using masks in After Effects.
Final Thoughts
Masking in After Effects allows you to hide or reveal parts of your footage, animate different elements, and apply effects precisely where you need them. With the flexibility to create custom shapes and the ability to animate masks, knowing how to use masks in After Effects can greatly enhance the quality and creativity of your projects.
I hope you found this guide helpful. If you have any questions or would like to share your experiences with masking in After Effects, feel free to leave a comment below!