
You can mirror an image in Photoshop by duplicating it and using Free Transform to move the reference point to the mirrored side and flip the copy horizontally or vertically. To expand your visible canvas, go to Image > Reveal All.
Hello! I am glad you’re here and managed to find my tutorial in the vast, metaphorical sea of information (false and true) that we call the internet. I started working in Photoshop many years ago, just to make fantasy images to use on an online RPG.
Today, I use Photoshop for my projects and teach others how to use this great program. Without further ado, let’s go over how to mirror an image.
Table of Contents
Key Takeaways
- Duplicate your image layer with the shortcut Ctrl/Command + J.
- Activate Free Transform with the shortcut Ctrl/Command + T.
- With Free Transform activated, the Reference Point can be seen in the center. Click and drag this to the side where you want the mirror point to be.
- With Free Transform activated, right-click inside the box for other transforming actions, including Flip Horizontal and Flip Vertical.
- When you can’t see everything within the bounds of your canvas, go to Image > Reveal All.
- To trim access canvas space, go to Image > Trim.
- Merge the selected layer with the one below by using the shortcut Ctrl/Command + E.
Note: The screenshots from this tutorial are taken from the Adobe Photoshop CC Windows version. Mac or other versions can look slightly different.
Method 1: Duplicate and Mirror an Image
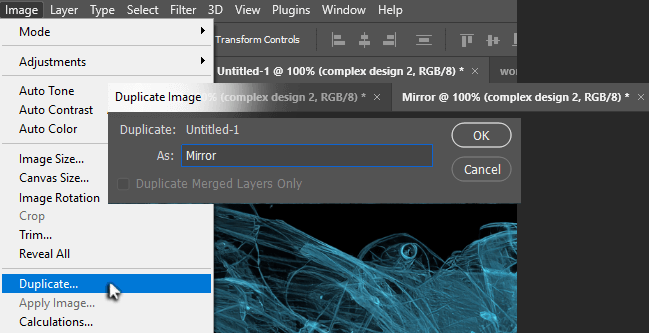
Step 1: To keep an original copy of this image, go to Image > Duplicate. Name this copy “Mirror.” This opens up the copy of the image in its document tab.
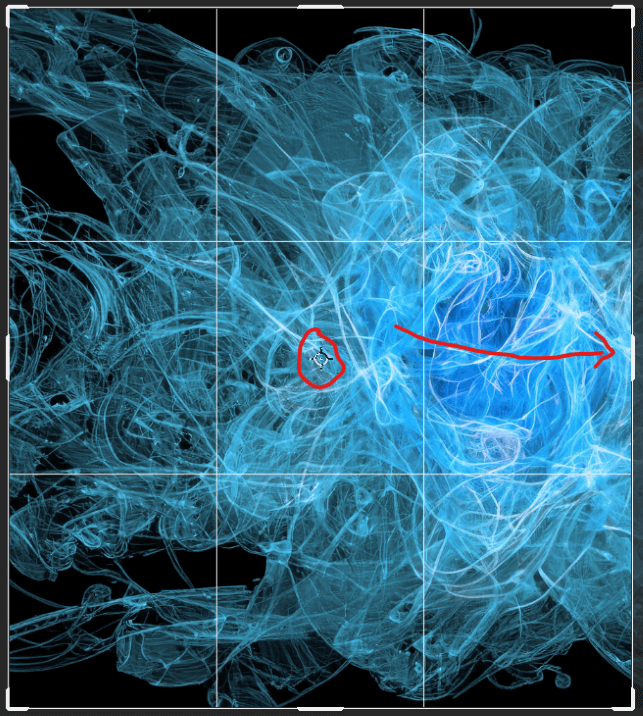
Step 2: Activate the Crop tool with the shortcut C. Crop the image with one side imagined to be the mirror point. Also, take note of the circle in the middle referred to as the Reference Point.
Press Enter to accept these changes.
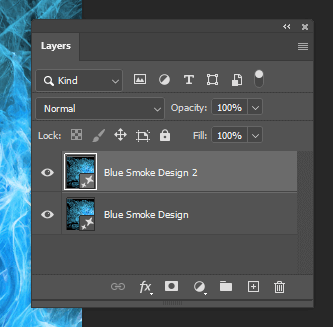
Step 3: Copy this image layer using the shortcut Ctrl/Command + J.
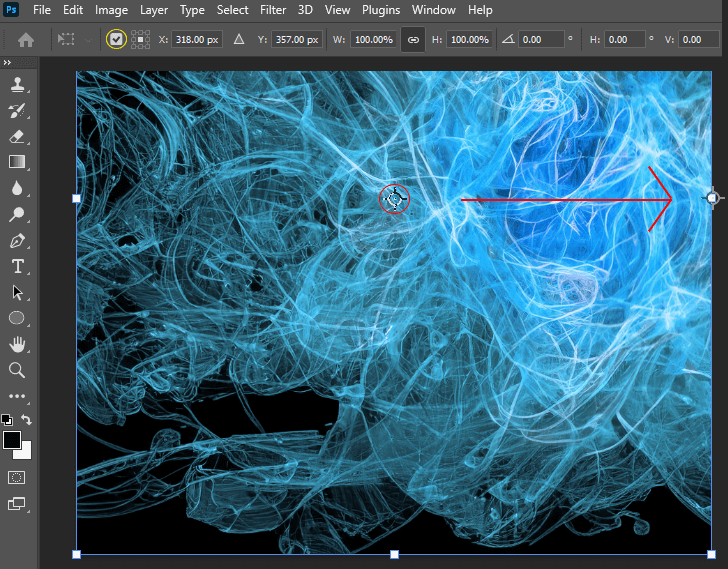
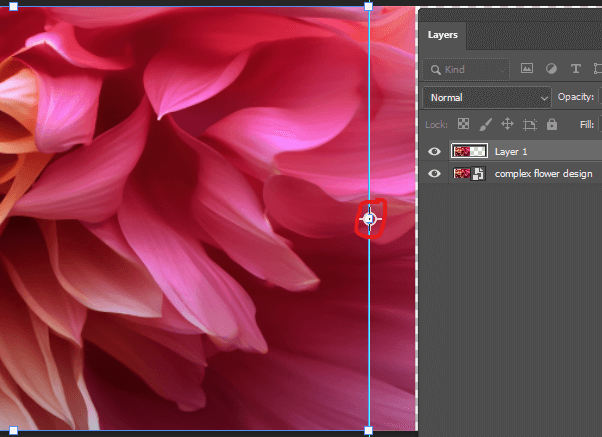
Step 4: Use the shortcut Ctrl/Command + T to activate Free Transform. Click and drag the Reference Point to the handle on the mirror point side.
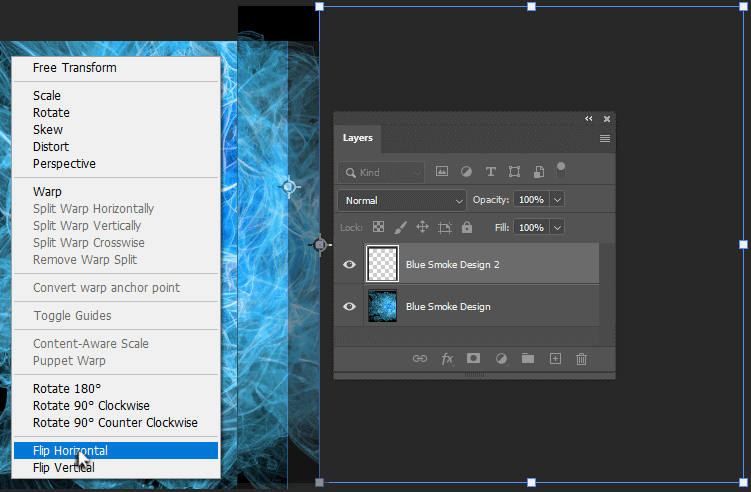
Step 5: Right-click inside the Free Transform box and go to Flip Horizontally. At first, it won’t look like anything has changed, but you’ll notice that the Free Transform box has moved over, right beside this visible image.
Hit Enter on your keyboard to accept these changes.
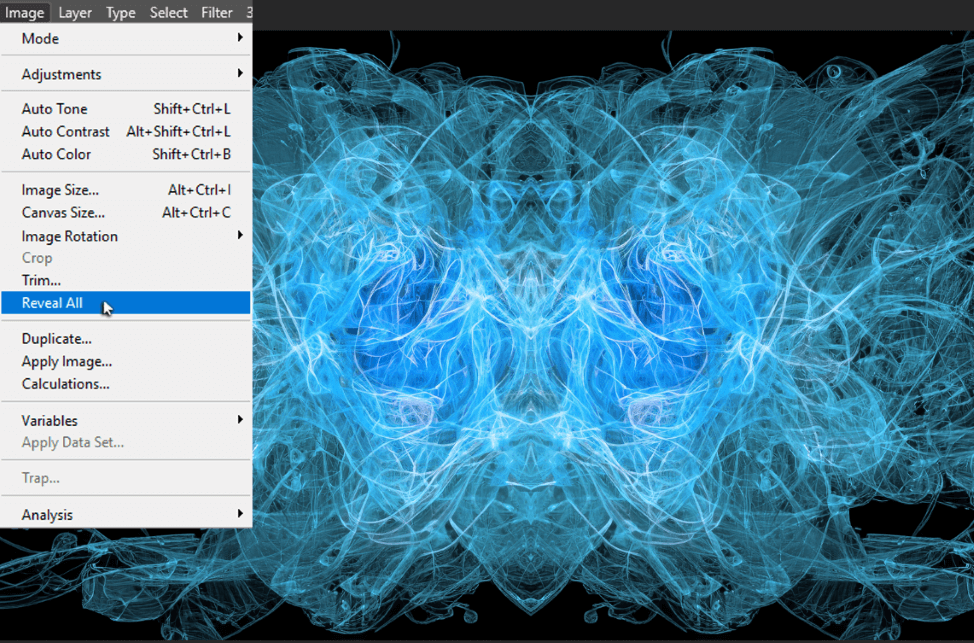
Step 6: Go to Image > Reveal All.
Method 2: How to Duplicate and Mirror an Image
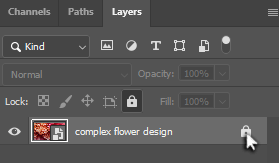
Step 1: Unlock the background layer by clicking on the little lock symbol, if there is one.
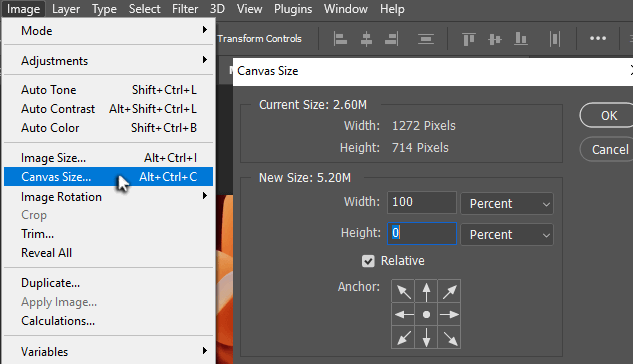
Step 2: Go to Image > Canvas Size. Set the width to 100% and leave the height at 0. Make sure Relative is checked off and the Anchor is the center dot so that your image remains in the center of the canvas.
Go to View > Fit on Screen.
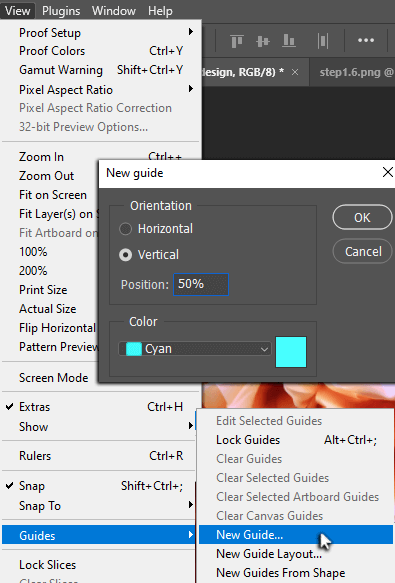
Step 3: To find the exact center of the image, go to View > Guides > New Guide. Set the orientation to Vertical and add 50% to Position.
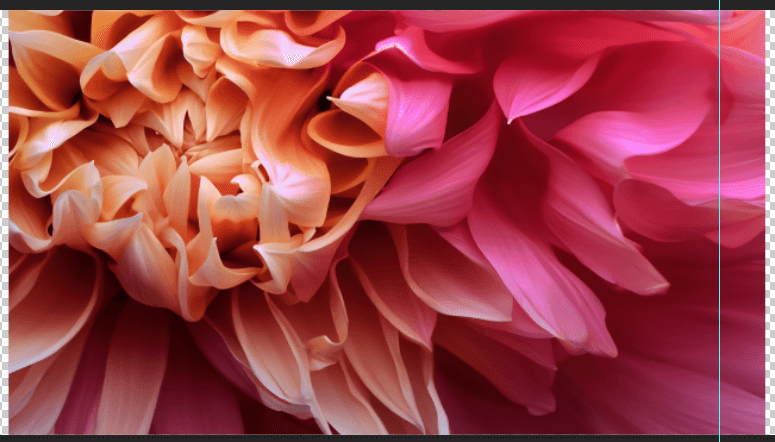
Step 4: Use the shortcut V to select the Move tool and hold the Shift key while dragging the image to the left or right so that the center line is the mirror point.
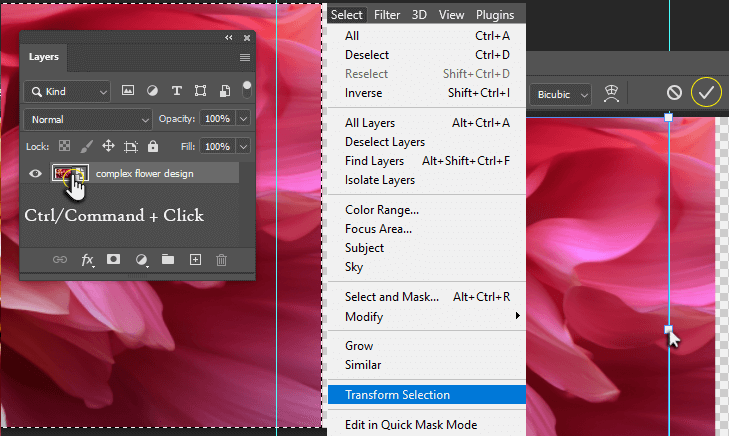
Step 5: To select the image itself, hold Ctrl/Command and click on the layer’s thumbnail.
We only need to select the side we want to mirror, so go to Select > Transform Selection.
New adjustment handles appear around the image. Click and drag one side so that only the image after the mirror point is selected. Hit Enter or click the checkmark in the options bar.
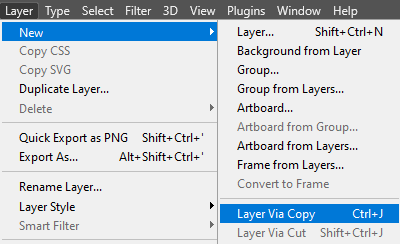
Step 6: Copy your selection onto a new layer by going to Layer > New > Layer via Copy or use the shortcut Ctrl/Command + J. Now all that’s left to do is flip this layer horizontally.
Step 7: Use the shortcut Ctrl/Command + T to activate Free Transform. Click and drag the Reference Point to the mirror side of the image.
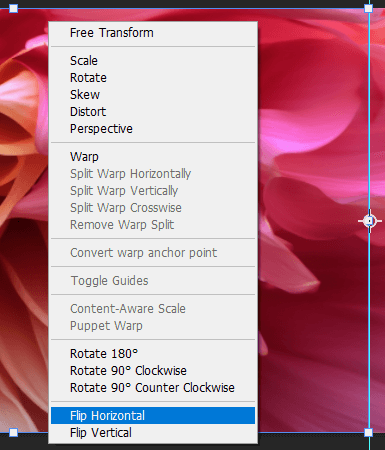
Step 8: Right-click inside the box and go to Flip Horizontally. Press Enter to confirm changes.
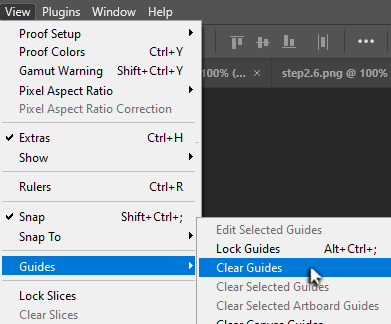
Step 9: Go to View > Clear Guides to see your work.

Step 10: To trim the access canvas space, go to Image > Trim and make sure Transparent Pixels are selected. Go to View > Fit on Screen.
Make a Design from Mirroring
Continuing from the previous method, let’s create an interesting design with the image we have so far.
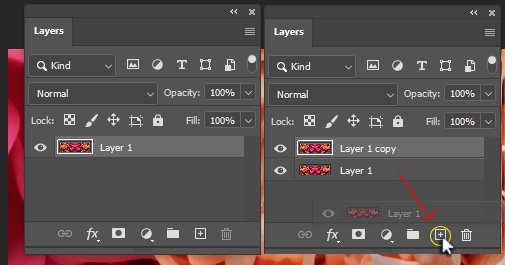
Step 1: Merge the top selected layer with the one below by using the shortcut Ctrl/Command + E.
Click and drag this layer to the New Layer icon to duplicate it.
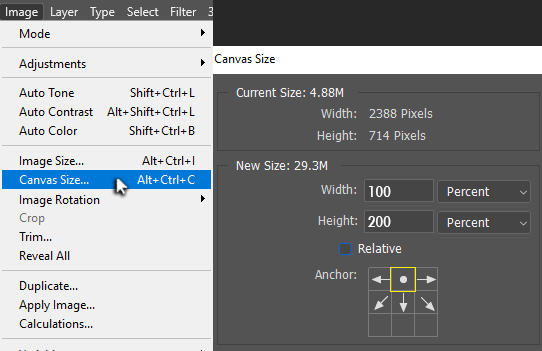
Step 2: Let’s increase the size of our canvas again. Go to Image > Canvas Size and leave the width at 100%, but change the height to 200%.
This time, uncheck Relative and click on the top middle square to move the image layer above the newly made space.
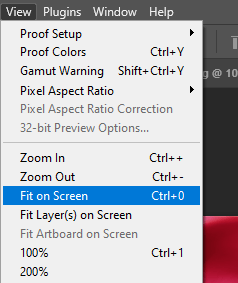
Step 3: Go to View > Fit on Screen or use the shortcut Ctrl/Command + 0.

Step 8: Use the shortcut V to select the Move tool, click on the image, hold Shift, and drag into the extra canvas space.
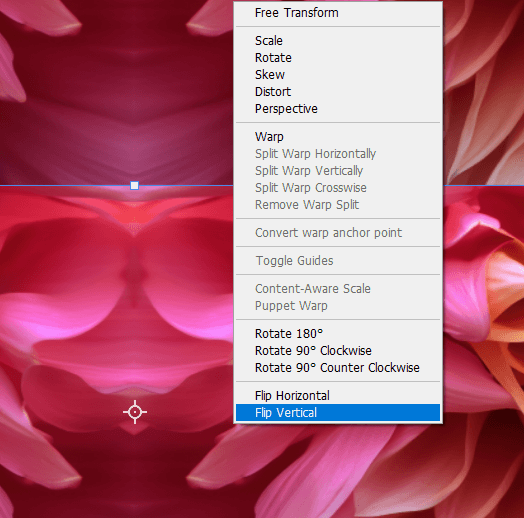
Step 4: Use the shortcut Ctrl/Command + T for Free Transform and right-click inside the box to go to Flip Vertically.
Within Free Transform, you can also rotate (third option from the top), which offers endless possibilities for mirroring designs.
Here’s our final image:

Final Thoughts
There’s nothing quite like seeing the artistic dream you imagine come to life right before your eyes. Sometimes, Photoshop’s features offer artistic creations I never even thought of.
Did you find this tutorial helpful? Let us know in the comments below.