
With the Pen tool selected, click to add a point on your screen. Click a second time for a second point, and so on. Click and drag to create handlebars that affect the curve of your shape or path. You can also adjust the anchor points and handlebars with the Pen tool while holding Ctrl/Command, which utilizes the Direct Selection tool.
Hello! I’m Jayde, and I’ve used the Pen tool to create my own cartoon characters, symbols, and holiday cards. It has a variety of uses and I don’t think Photoshop would be the same without it.
In this article, I’ll show you how to use the Pen tool in Photoshop to create vector shapes or paths for text.
Table of Contents
Key Takeaways
- With the Pen tool selected, you can hold Ctrl/Command to click and drag an anchor point or handlebar to change the curve angle.
- If you ever lose the selection of a path you’ve created, make sure the layer is selected and then use the Direct Selection Tool to highlight it again. Click and drag it to adjust it or show the anchor points.
- The Path Selection and Direct Selection tool work closely with the Pen tool and paths or shapes. The keyboard shortcut to both of these tools is A, and if you hold Ctrl/Command and click and drag a point while using one, it switches to the other.
Without further ado, let’s get started on this tutorial.
Note: All screenshots from this tutorial are taken from the Adobe Photoshop CC Windows version. Other versions can look different.
How to Draw a Shape Using the Pen Tool in Photoshop
I’m going to show you an example of making a cartoon face.
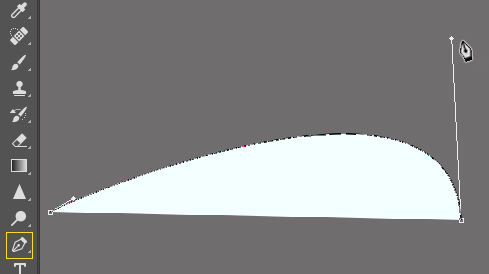
Step 1: Select the Pen tool from the toolbar and click to add the first point. For the second point, click and drag.
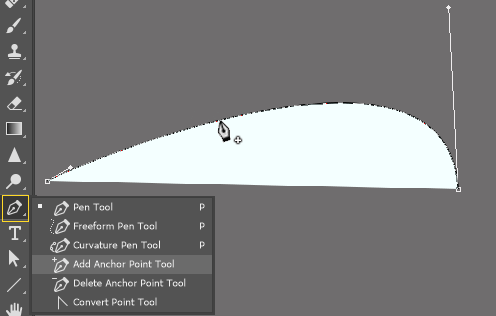
Step 2: There are other variations of the Pen tool. When you click and hold in the yellow box you’ll find a list of different Pen tools. When you hover over the edge of the shape you just created, your cursor will change to the Add Anchor Point tool. You can click to add an anchor point.
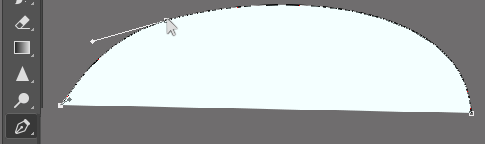
Step 3: Hold Ctrl/Command, click and drag the newly added anchor point to stretch out and change your shape. Holding Ctrl/Command with the Pen tool selected gives you the use of the Direct Selection tool. You can do this to adjust the handlebars as well.
I’m going to continue doing the steps I’ve shown you to make more of an oval for a face.
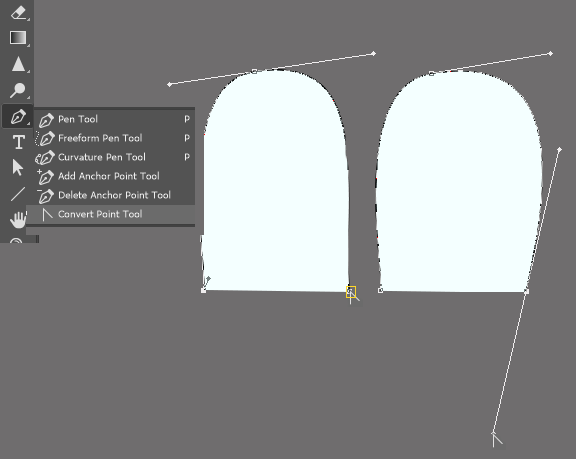
Step 4: I got to this point when I needed the Convert Point tool. Click and drag the point to create curved handlebars.
Note: If you ever lose the selection of a path you’ve created, make sure the layer is selected and then use the Direct Selection tool to highlight it again. Click and drag it to adjust it or show the anchor points.
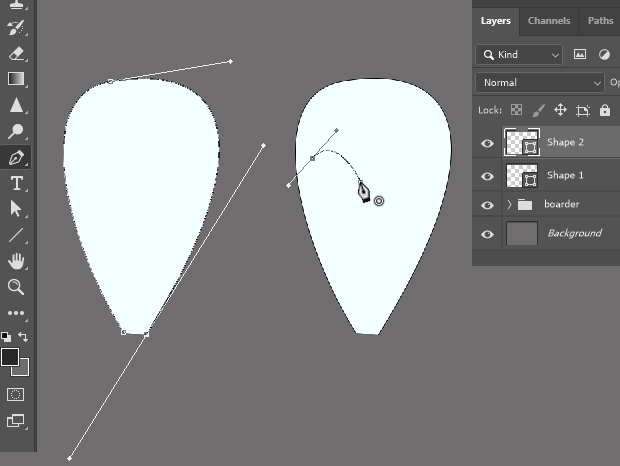
For example, When I was ready to start the next shape, I just clicked once inside my first shape with the Pen tool. This adds our Shape 2 layer.
For the second point, I clicked and dragged to create handlebars. Then, when I hover the Pen tool over the first point I made, I see a little circle beside it. This completes the shape.
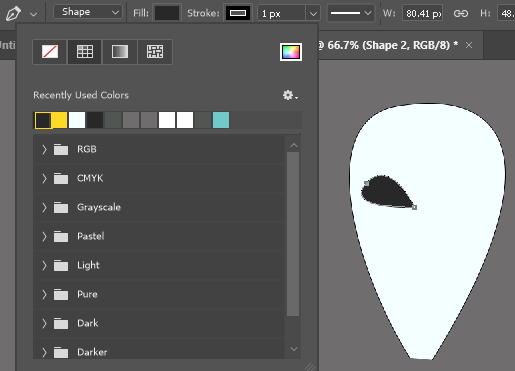
Step 5: Now you can go to the shape settings on the bar across the top to change the fill to your color choice.
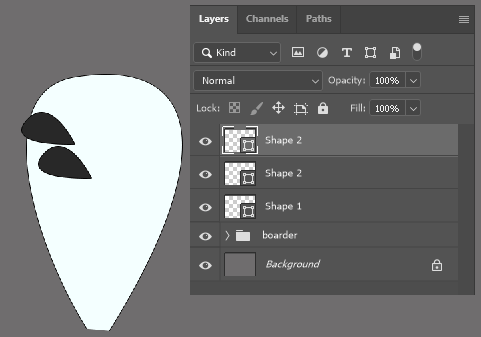
Step 6: Duplicate this eye we’ve just made. With the shape layer selected, use the keyboard shortcut Ctrl/Command + C to copy. Then, Ctrl/Command + V to paste. Now we have another eye on a new layer.
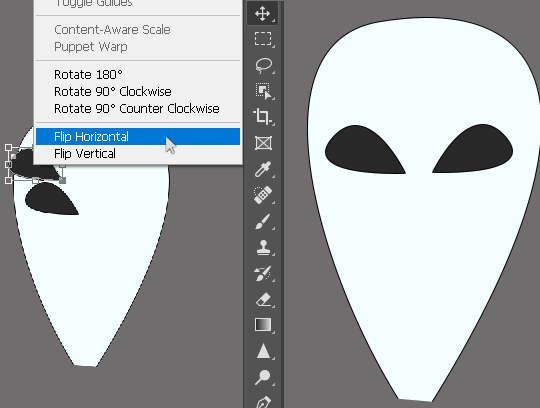
Step 7: Use the shortcut Ctrl/Command + T to use the Free Transform Tool. Right-click inside the shape and go to Flip Horizontally. Use the keyboard shortcut V to Move the shape into place.

Step 8: Let’s use the Pen tool to create the mouth. Click once where one corner of the mouth would go. Click again for the other corner, creating a straight line. Hover the Pen tool over the center of the line to add an anchor point with the Add Anchor Point tool.
If you ever need to delete an anchor point, hovering over one with the Pen tool brings up the Delete Anchor Point tool.
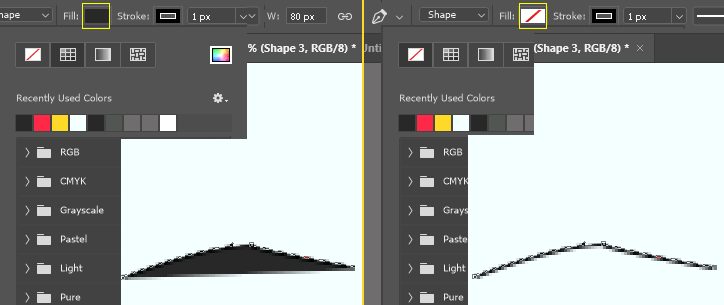
With the Pen tool still selected, hold Ctrl/Command and click and drag the center anchor point either down or up. If you don’t want your shape to be filled, change the fill at the top.
Now let’s add some text that goes along with the image.
How to Make Text Follow a Pen Tool Path
Now let’s create a path for text, so it looks like the Alien is sending a brain wave message.

Step 1: First change the Pen dropdown from Shape to Path. Use the Freeform Pen tool to click and drag a wavy line out from the Alien’s head.
The Curvature Pen tool works the same way the Pen tool does, except that each line is curved.
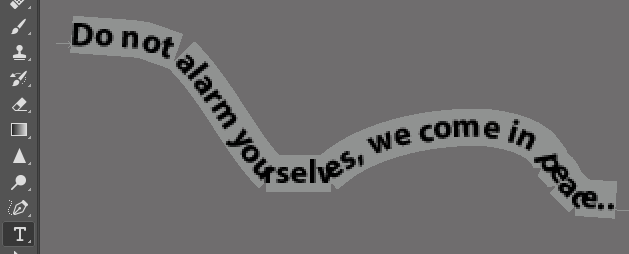
Step 2: With the Text tool selected, click on the start of the line to add text. As you can see, mine needs some adjustments.
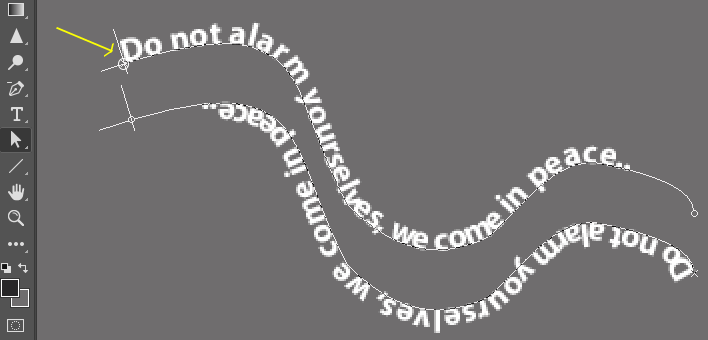
Step 3: With the Direct Selection tool, I’ve moved the anchor points and handlebars to smooth out my path line and text.
The arrow is pointing to the exact spot where the text begins, and where your cursor changes when you hover over it. If you click and drag at this point, you can flip your text.
That brings us to the end of this tutorial. Here is our final image:

Final Thoughts
Now that you’ve completed the tutorial, you know everything there is to know about the Pen tool and all the great possibilities it offers to you as a creator!
Thank you so much for joining me in this project. I’ll help you learn all there is to know about Photoshop’s tools and features.
Yikes! Would you get on their ship? What do you want to create using the Pen tool? Let me know in the comments below.