
Ever want to see something from a different perspective? Well, I’ve got you covered. The Perspective Warp is one powerful tool, and it allows us to manipulate all kinds of images, layers, or texts in Photoshop.
My name is Skyler, and I’ve been using Photoshop on a personal and professional level for well over a decade. I’ll be showing you how to use the Perspective Warp in Photoshop like a pro! The techniques I’ll show you here will allow for a whole new level of freedom when editing!
I’ll be walking you through applying the perspective warp grid to Images, Layers, and Objects accurately. This is an essential skill that designers and editors everywhere should work on mastering, so I’ve prepared not one but two separate examples to demonstrate how versatile this tool is.
Alright, now it’s time to put things into perspective!
Table of Contents
Applying Perspective Warp to an Image
For my first example, I’ll be using an image of a building. This is the easiest introduction to the tool, seeing as we can identify two places of perspective right off the bat to base our grid on.

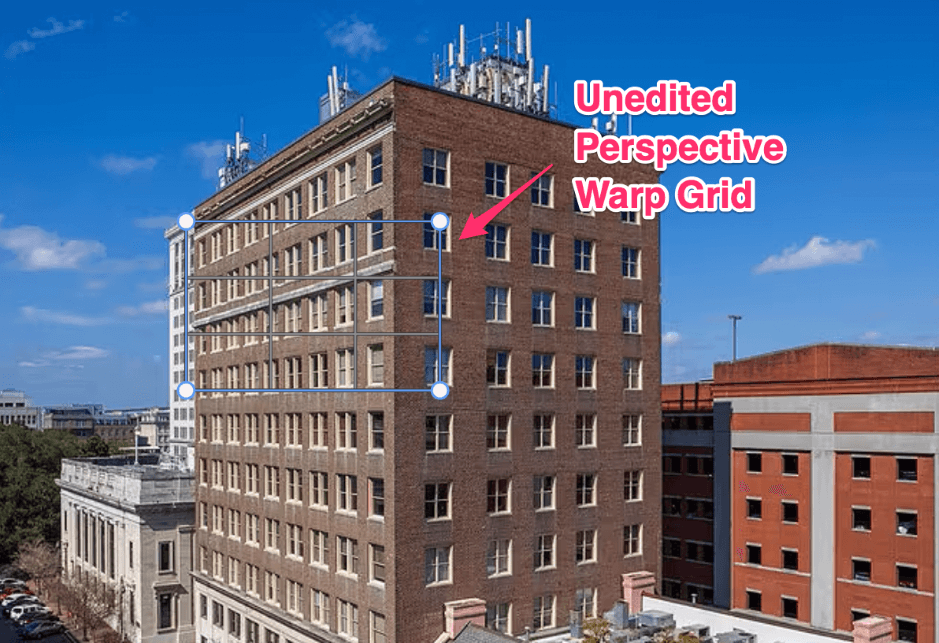
Step 1: Apply the Perspective Warp Grid
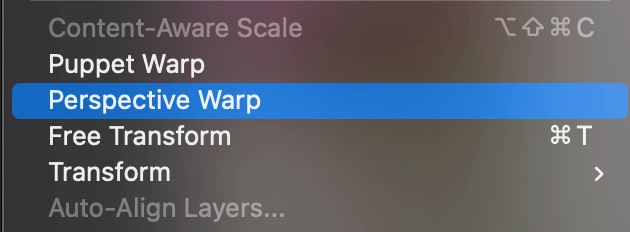
Once you have your image added in Photoshop, simply navigate to Edit > Perspective Warp.
This will prompt Photoshop to provide you with an unedited Perspective Warp Grid. Make sure to take note of each of the four handles, or nodules in each corner of the gid. This is how you’ll be able to click and drag your grid into the correct position before warping.
Step 2: Edit your Warp Grid
Now you’ll have to drag the Warp Grid by each handle to line them up with one perspective plane on your building. Next, we’ll create an additional warp grid to cover the right-hand plane.
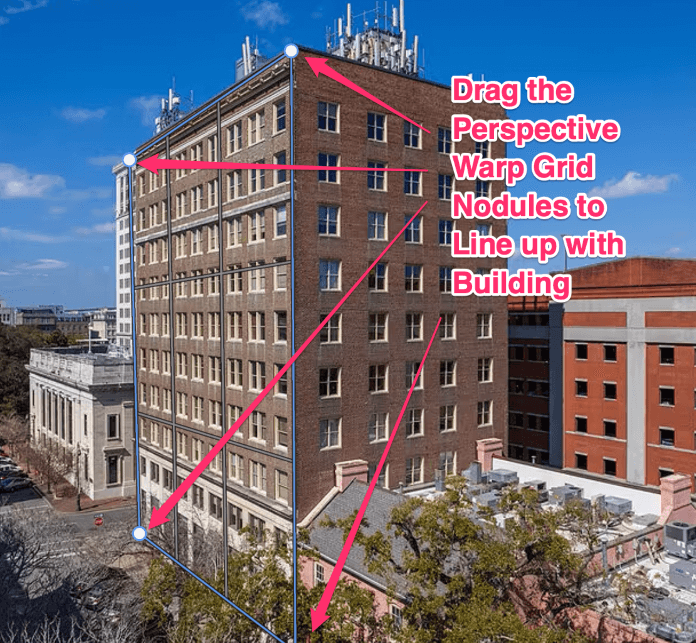
You’ll want to take extra care and attention when lining up your warp grid so the selection is accurate. As you can see, I lined up each corner of the building with my grid as close as possible.
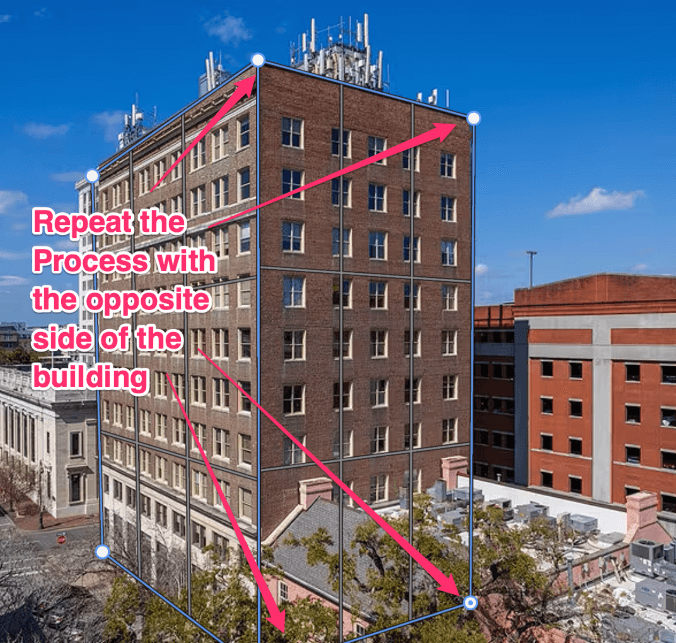
To create an additional grid, you only have to click a separate area on your canvas. This will prompt another Warp Grid to appear for your use. Now you can repeat the process with the opposite side of the building.
The grids will automatically merge when you overlap their handles, so be sure to attach them on at least one plane before moving on.
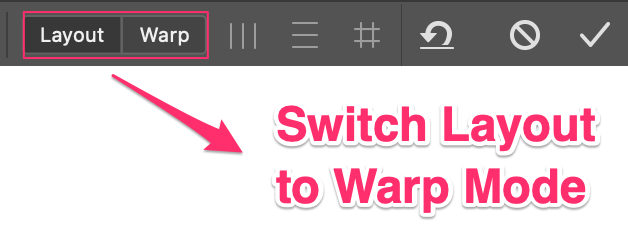
Step 3: Warp your Image
Now that we’ve selected our building using both grids, we can change the setting in the overhead menu from Layout to Warp Mode.
You’ll know you’ve enabled Warp Mode correctly when the blue grid lines disappear and the handles change in style, as shown below.
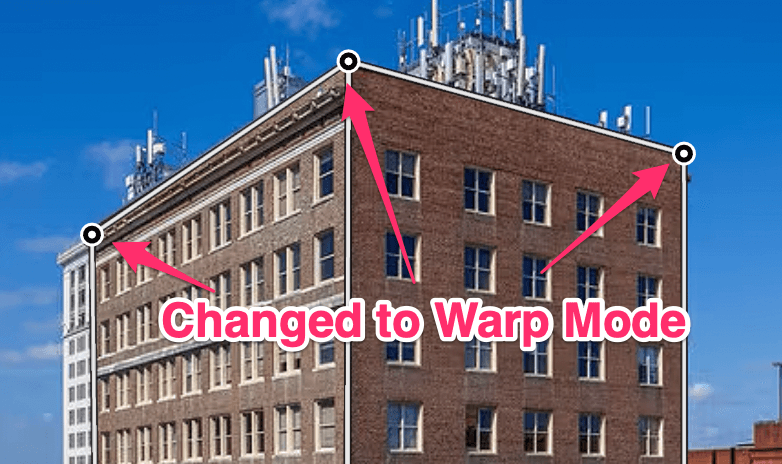
Now we can begin editing the perspective until we’re satisfied with our manipulation.
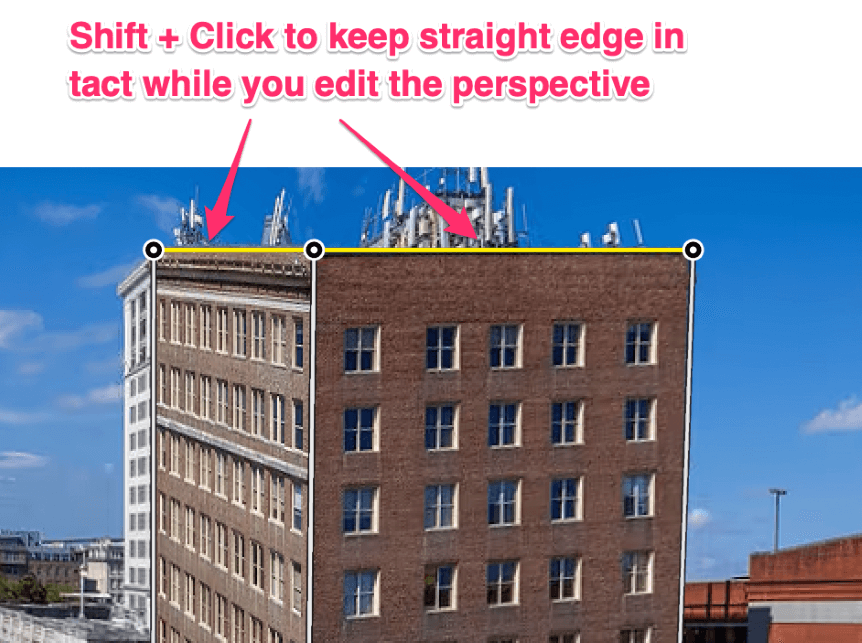
There are two ways you can manipulate the perspective from here. You can simply use the handles to drag the building into the desired position, or you can hold down the Shift key and select whichever lines you want to straighten and keep straight-edged while manipulating the image further.
In some cases, after extended manipulation, you may also need to crop your image. This is easily handled by using the Rectangle Marquee Tool and navigating to Image > Crop once you have your selection.
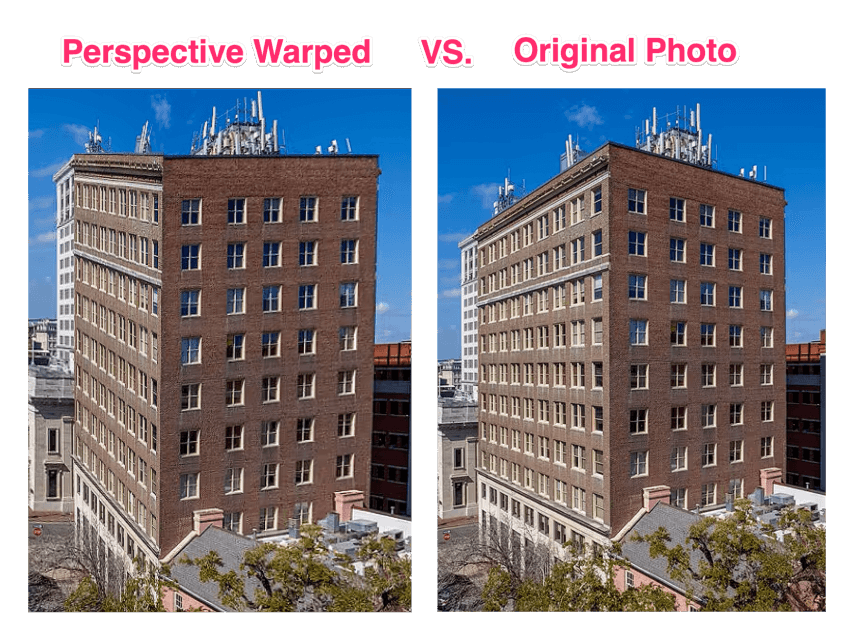
As you can see, even the slightest manipulation of perspective gives us an entirely different angle to view the building! Pretty neat, right?
Note: This is an especially useful application of the Perspective Warp Tool for all you photographers out there – it’ll often come in handy correcting the perspectives of architectural photos due to initially capturing the image too close, or not having the correct lens for the job.
Applying Perspective Warp to Individual Layers
Another fantastic application of the perspective warp tool is the ability to warp individual layers onto a preset image! Whether to put text, illustrations, logos, etc into perspective on a given plane. This is a fundamental technique for those working in social media, graphic design, and more.
Step 1: Importing Your Images and Layers
Unlike the last example, you’ll have to load up your background image and import your desired text or artwork for manipulation. You can do this by simply dragging your image from a folder or your desktop into the project you opened, or you can open it as another PSD file and simply copy and paste your layer into the project.
Either way, once you have both elements loaded into the one project we can begin applying the perspective warp.
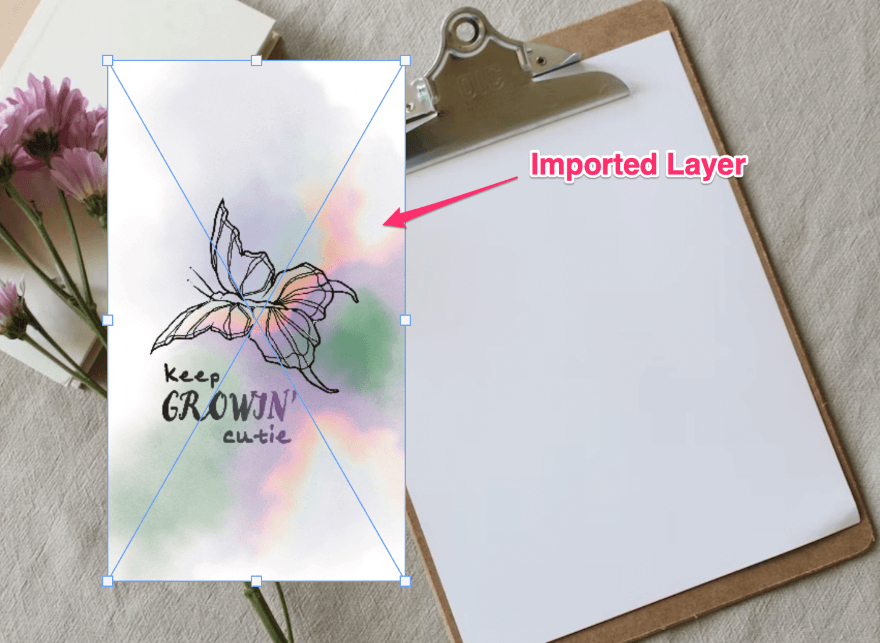
Note: Before manipulating your imported image, you may want to transform it into a Smart Object so it doesn’t lose quality or resolution during the process. This can be done by right-clicking on the image layer and selecting Convert to Smart Object.
Step 2: Putting your Image or Layer into Perspective
Remember this? Just as you did for the building manipulation, you’ll apply your unedited grid by going to Edit > Perspective Warp while the imported layer is selected.
Once this is done and your unedited grid becomes available, simply line up your perspective grid with the corners of your text or artwork to the best of your ability.
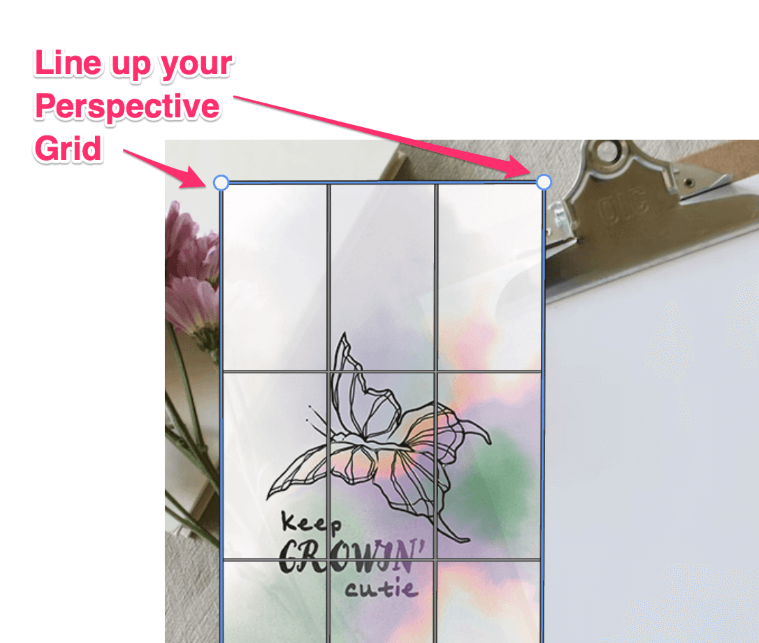
Now all that’s left before you place your artwork into perspective is to switch it to Warp Mode in the overhead menu.
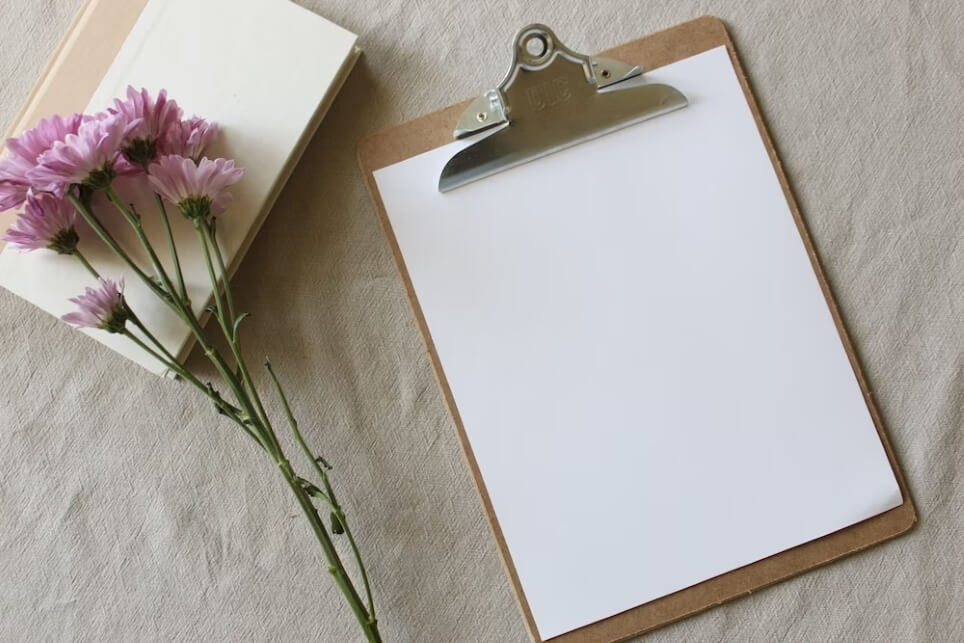
Last but not least, go ahead and drag each of the corners of your artwork onto the background image perspective plane. In my case, I’ll be lining it up with four corners of the clipboard so it appears as though the image is there naturally.
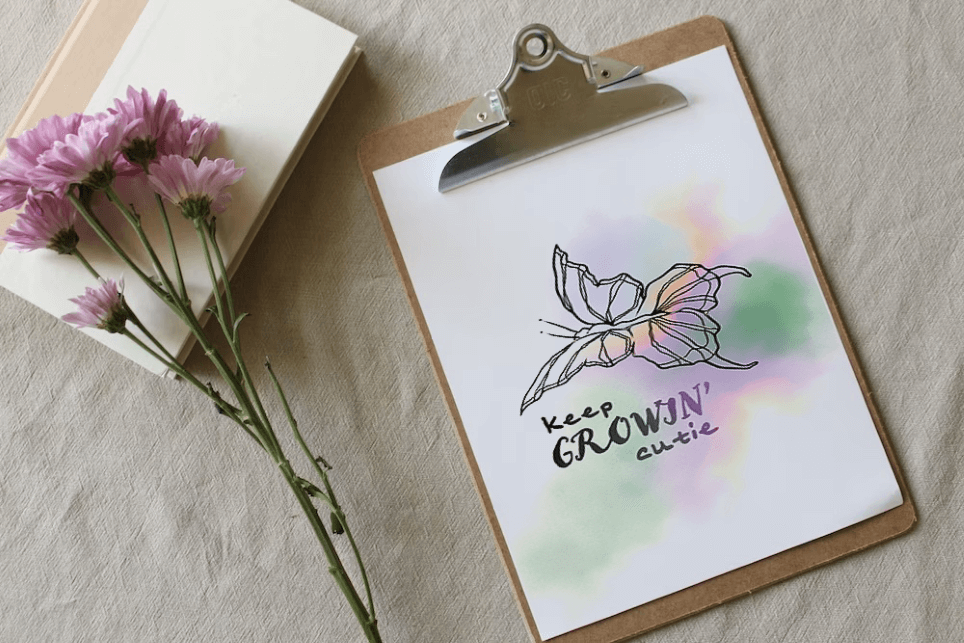
There! Just like that, you’ve accomplished two entirely different applications of the perspective warp tool like a pro.
Further Mastering the Perspective Warp Tool
Now, I did mention how versatile this tool was, right? These are only two of many potential methods. So, I wanted to make sure to link everyone to a more in-depth tutorial that’ll dive into all the potential ways you can get even more creative with this new skill!
Conclusion
The Perspective Warp is probably one of my favorite tools, if only because of the potential and possibilities to get those creative juices flowing! I’d love to see some of what you all come up with and create using this new skillset you’re now well on your way to mastering.
If you’ve enjoyed using this tool, don’t sleep on learning more methods and applications for it! I guarantee this knowledge will come in handy throughout your creative career and beyond. Happy editing my friends!