
A Photoshop Layer Mask allows you to conceal specific parts of a layer’s visibility/effect. Masks attach to a specific layer or group. When it comes to layer masks, black conceals and white reveals. So, when you have a layer mask selected, use the brush tool with black or white to either conceal or reveal the layer it’s attached to.
In this tutorial, I’ll explain what I know about Photoshop Layer Masks, and how to use them. These are a great feature, and ever since I learned about them, this program’s capabilities have increased “8-fold.”
Without further ado, let’s dive in!
Table of Contents
Key Takeaways
- Use the brush tool on a layer mask with black or white to control the visibility of the layer(s) it’s attached to.
- Use the shortcut Ctrl/Command + Z to undo any mistakes.
- Use the shortcut Ctrl/Command + G to group selected layers.
- Use the shortcut B for the Brush tool.
- Use the shortcuts [ and ] to adjust the size of your brush.
- Use the shortcut V for the Move tool.
Note: The screenshots from this tutorial are taken from the Adobe Photoshop Windows version. Mac or other versions can look slightly different. I generate and use AI photos from firefly.adobe.com.
How to Use Layer Masks in Photoshop
Since we’ve covered the basis of what a layer mask is, let’s put it to use.
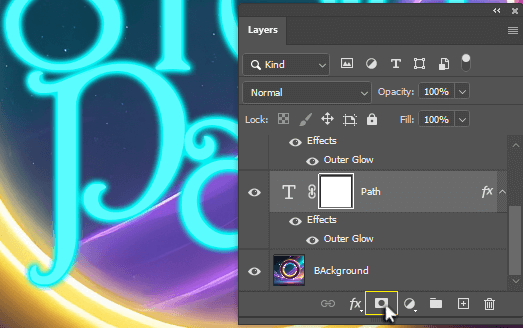
Step 1: Here I have three text layers. I want to hide the bottom of the letter P so that it appears to be behind the ring.
With my Path text layer selected, I click on the Layer Mask symbol. By default, the layer mask is already selected and attached to this text layer.
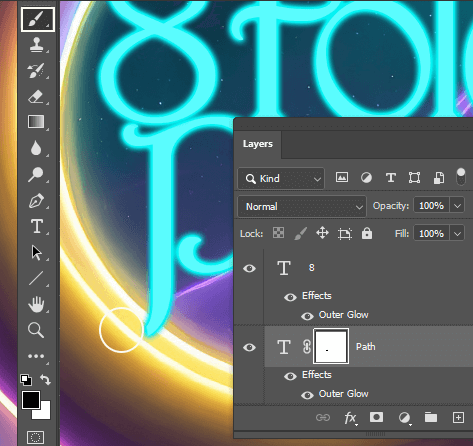
Step 2: Use shortcut B to select the Brush tool and make sure the foreground color is black.
Paint wherever you want to conceal the layer.
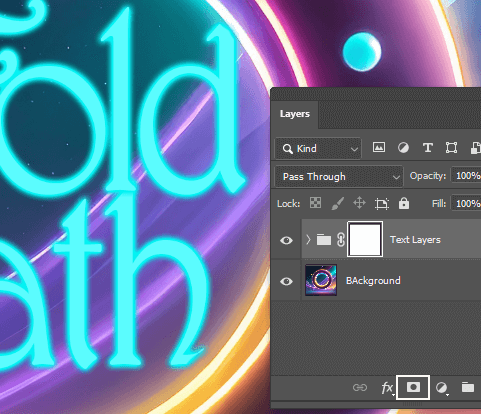
Step 3: Now that I have my text hidden right where I want it, I’m going to group these text layers by selecting them and using the shortcut Ctrl/Command + G.
After renaming the group, click on the layer mask symbol again to add a mask to the group.
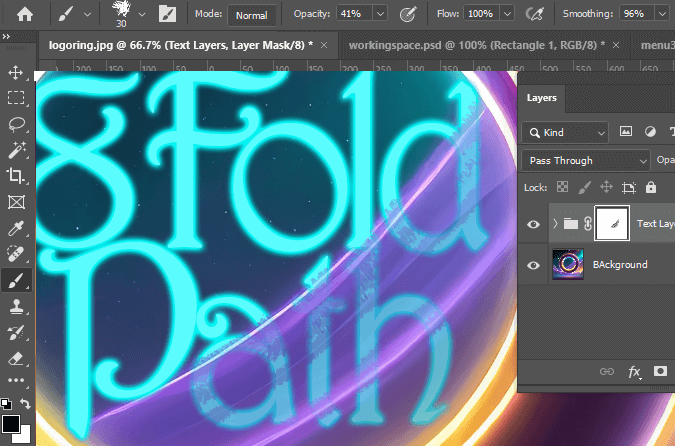
Step 4: Use a brush to paint with black wherever you want to conceal the layers included in this group folder.
Using the different settings at the top, I was able to create smooth strokes that brought the purple from the background through my text.
The great thing about this is that the text is still editable.
Final Thoughts
Just like that, we’ve covered the functionality and purpose of layer masks. These can be applied to adjustment layers, groups, smart objects, images, text, and more.
Photoshop makes it possible to do anything and everything you can think of, all while retaining the ability to edit things later on.
Be sure to check out some of my other tutorials, like How to Edit Text or How to Blend Images in Photoshop.
Did you find this tutorial helpful? Have I left any questions unanswered? Let the team know in the comments below.