
There are lots of approaches to eliminating photo bombers from your favorite family pictures or vacation shots, but only so many are convincing! With the help of Photoshops Clone, Content-Aware Fill, and Remove tools among others, we can ensure we produce a quality cover-up.
I’m Skyler, and I’ve been using Photoshop on a personal and professional level for well over a decade! These techniques have been more than helpful for me in post-production, especially when I’ve been shooting in a non-controlled environment or a public area.
I’ll be discussing which methods are best in which circumstances, and explaining their pros and cons along the way so you can apply these techniques to your own pieces appropriately!
Table of Contents
Method 1: Clone Stamp Tool
Select and Clone method is the most straightforward, but is only effective if you have redundant background imagery. For example, the mountains that span the length of the photo entirely.
This will be helpful because we can choose a spot that mimics what we imagine is behind the person we’ll be erasing.
Step 1: To begin, we’ll go ahead and load up whatever image we intend to edit. We can do this by navigating to File > Open and choosing as desired.

Step 2: Now select the target of our cover-up, in my case the woman in the midground of our photo. You can use any of the Photoshop selection tools for this task, like the Quick Selection and Lasso Tool. So go ahead and choose your preferred tool to select the person you wish to remove.

Pro Tip: For the most effective results, include some of the background in your selection as well. This will help Photoshop mimic the imagery when we choose the Clone Tool next!
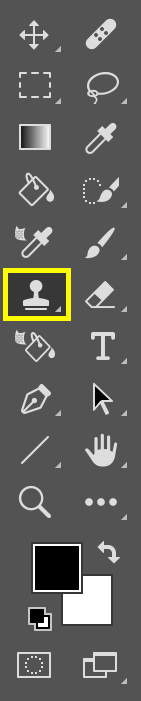
If you’re unfamiliar, the Clone Tool resembles a stamp. Selecting the Clone Tool will allow us to choose a space and create a “stamp” of it to paste elsewhere.
Step 3: Choose a place to create our stamp. In my case, I went directly left of my selection. Stamp a spot in your photo to replicate by pressing Option + Clicking.

Now that we’ve created a stamp, we can fill in our selection.
Step 4: The Clone Tool acts like any other Photoshop Brush, so go ahead and brush inside your selection.

Great! Easy as that. Now you can deselect and admire your work.
Method 2: Content Aware Fill
The Content Aware Fill is really smart, so we won’t have to choose or “stamp” a selection like before. It takes in background imagery in your photo, analyzes it, and generates one similar to fill your selection accurately.
First things first, we need to make our selection again.
Step 1: Make a selection using any of the selection tools in Photoshop.
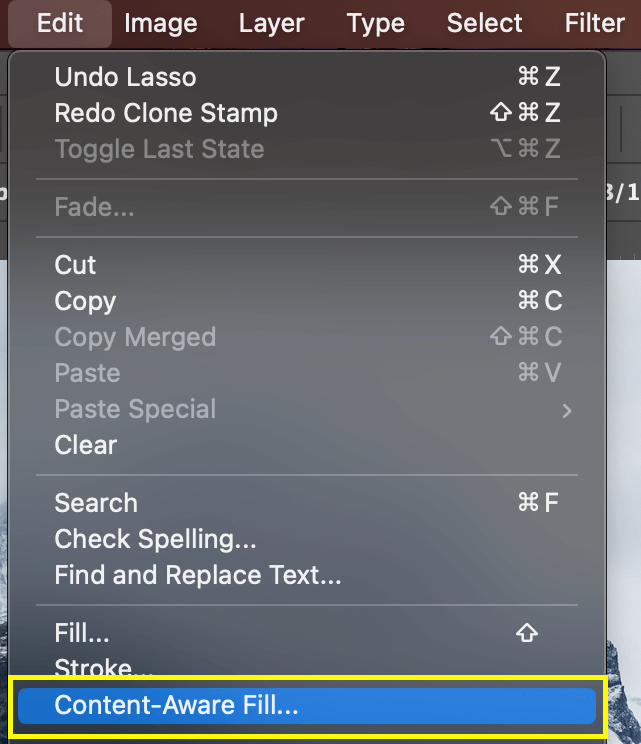
Step 2: Go ahead and navigate to the Edit Menu and find Content Aware Fill in the dropdown.
Now we can see the layout of Photoshop change a bit to accommodate a new Preview Window. This will generate an example of how your selection will look after.
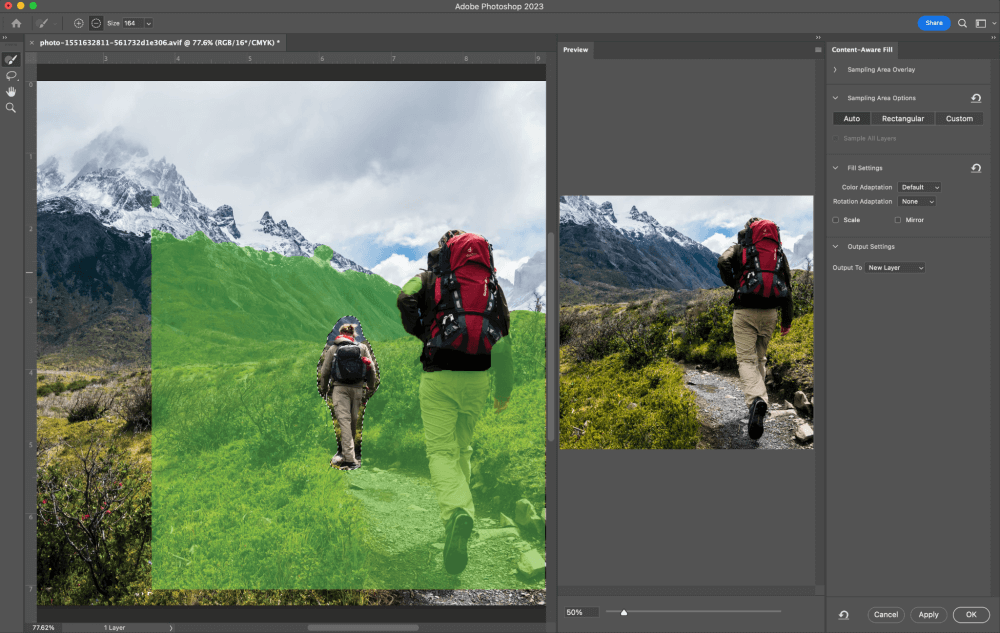
Great! The preview looks good but before you press OK in that bottom right corner, you’ll want to ensure you look a bit closer and find any problem spots, etc.
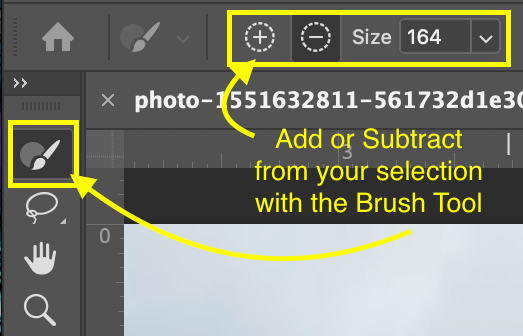
Step 3: Fine-tune and further edit your selection using the Add and Subtract buttons next to our Brush Tool.
Do keep in mind while you’re editing that you can adjust the preview window. Just drag the slider back and forth to zoom in and out, ensuring a more accurate view.

Step 4:Check on our Output Settings in the Content Aware Fill Panel.
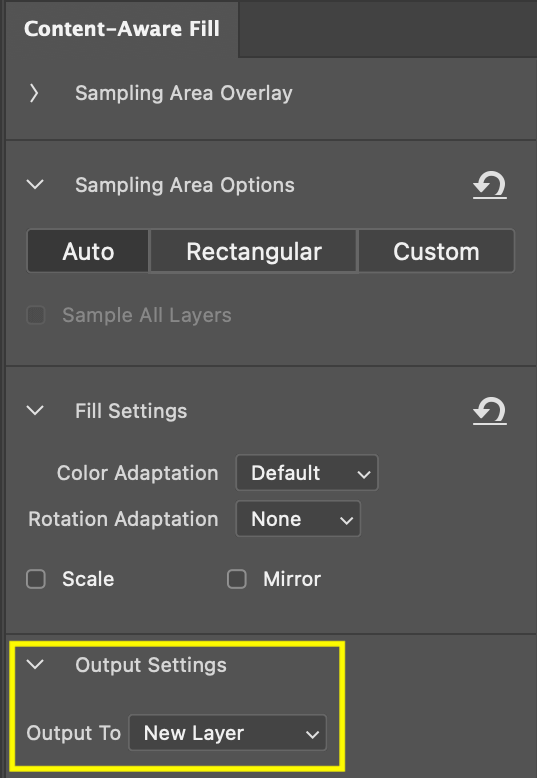
Ensure that your Output is set to New Layer, and click OK. Now we can admire how impressively accurate and easy it is to use Photoshop’s Content Aware Fill!
Method 3: Remove Tool
This one is similar to the last method, but instead of selecting the standard tools, we’re going to use the Remove Tool itself to paint over the person you want to remove from the photo.
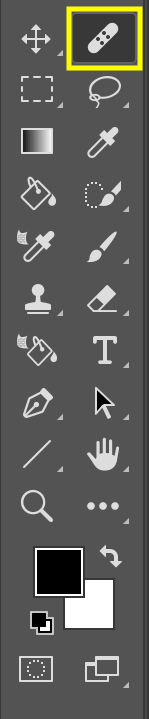
Step 1: Go to the Tools Panel and find our Remove Tool (that resembles a bandaid!).
Step 2: Before we use this tool, we’re going to want to take a look at the Control panel, directly next to our brush. By default, the Remove After Each Stroke box is enabled, so take care to uncheck this box. That way we can decide manually when the Remove Tool works its magic.
Also, take note of the Checkmark. It’s what we’ll manually press when we’re done coloring our selection!

Step 3: Take that brush tool and paint over the person you want to remove.
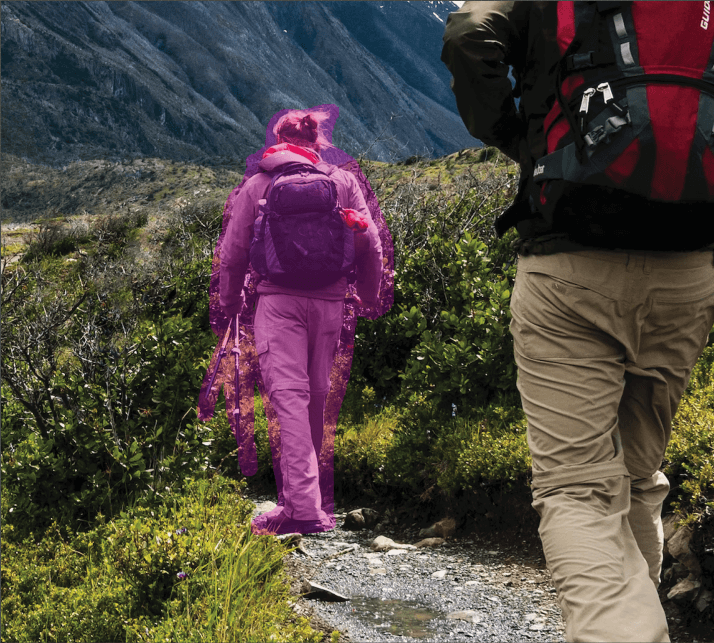
It should look something like this when done. Once you’ve achieved this, click that Checkmark in the Overhead Menu.

Done! Fantastic results, and very simple. It reminds me of how we use White-Out to correct an error – and I’m sure we’ve all been there once or twice! So this should be an easy-to-remember skill for all and a valuable one at that.
Conclusion
There are lots of approaches to removing someone in Photoshop, but after learning all three of these methods you’re sure to produce some superior edits in the future!
This skill is sure to take you to greater places in your own creative career, and thankfully Photoshop makes it easy to apply these methods to your own photos or designs. Happy editing!