
In Photoshop, you can edit someone into an image by selecting, scaling, positioning, and blending them into the desired picture.
My name is Jayde, and I’ve been using Photoshop for many years to create fantasy photo manipulations, my own cartoon characters in the form of digital puppets.
In this article, I’ll show you how to add a person to a photo. There are countless ways to do this, but the best methods involve multiple steps.
Table of Contents
Key Takeaways
- You can use Select Subject, the Polygonal Lasso tool, the Eraser, or a layer mask to cut out an image.
- The resolution, lighting, and shadows in the pictures you want to combine should at least be similar, otherwise, it may take a lot of editing to make the subject look like they belong in the desired photo.
- Remember you can always Flip your subject Horizontally if you need the light to shine in the opposite direction.
- It’s possible to paint lighting highlights or shadows on your subject, and that’s the part you’ll spend the most time on. Thanks to Photoshop’s elaborate tools, it’s always possible to go back and change things later on.
- It may be possible to quickly match the color tones from the new subject to the desired photo background by going to Image > Adjustments > Match Colors.
Let’s dive into this screenshot tutorial for adding someone to an image.
Step 1: Selecting the Person
Check the resolution of each photo to make sure you aren’t having to scale up, which lessens the quality of the image. Consider the angle of the person and the intended background.
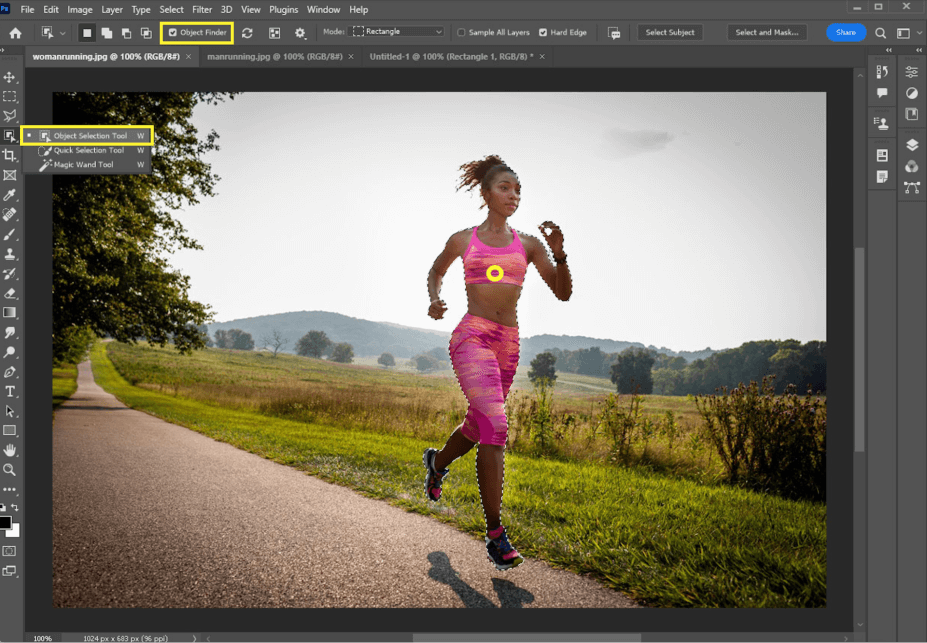
To cut her out, let’s go to the Object Selection tool with Object Finder checked off. Click once on your person.

Go to Select > Select and Mask. Use the hair tool, or Refine Brush, to go over the smallest pieces of hair. Make sure Decontaminate Colors (towards the bottom right) is checked off. Click OK.
Step 2: Scaling and Positioning
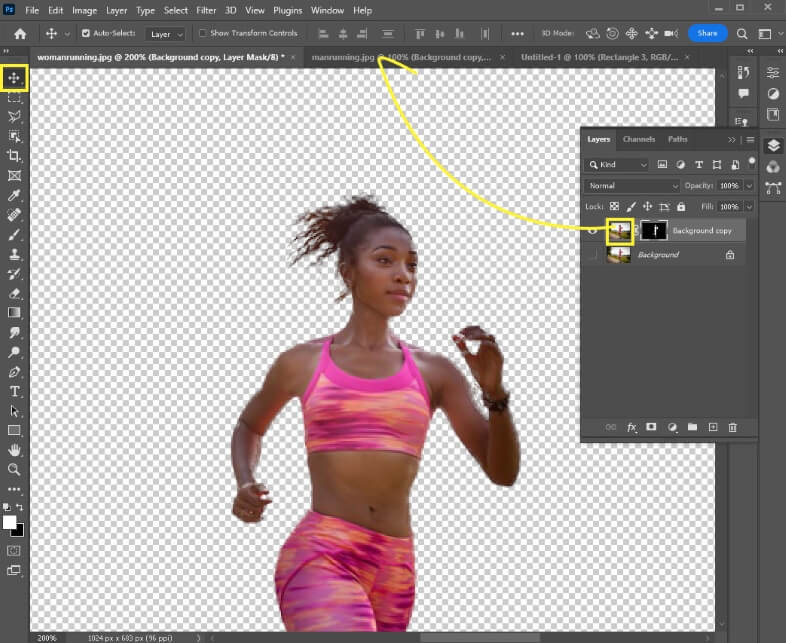
Click and drag your new person layer into the tab with the desired photo. Don’t release your mouse drag until you’re in the center of the image.
Take note of where the shadows are in the desired photo. In my example, it appears as though the light is shining on the front of this man.
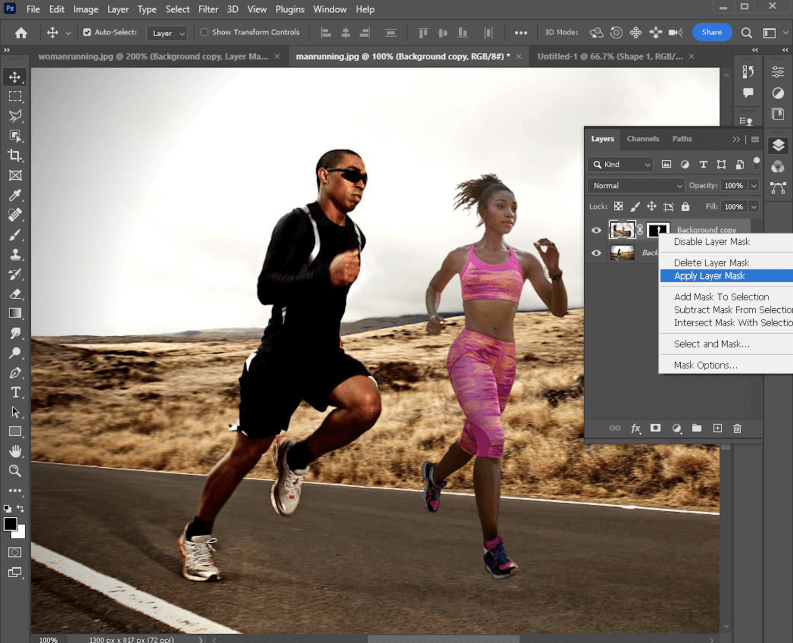
Before anything else, scale and position your subject with Ctrl/Command + T. Once you get the ideal position and size, right-click on the mask and go to Apply Layer Mask.
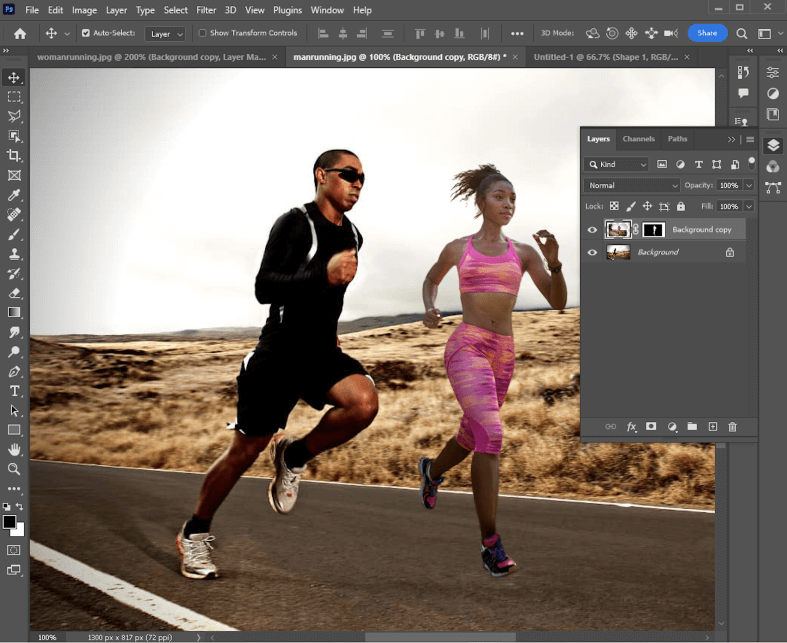
Step 3: Blending the Person Into the Environment
Now the real work begins. The lighting, brightness, and contrast must match for the photo to look believable.
Lighting, Brightness, and Contrast
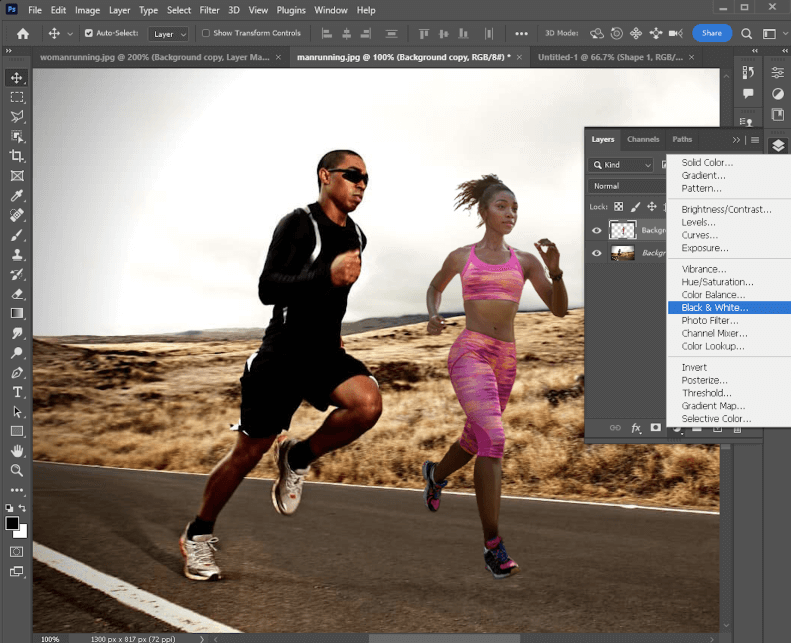
Add a Black and White adjustment layer for a better visual of the values in the two photos.
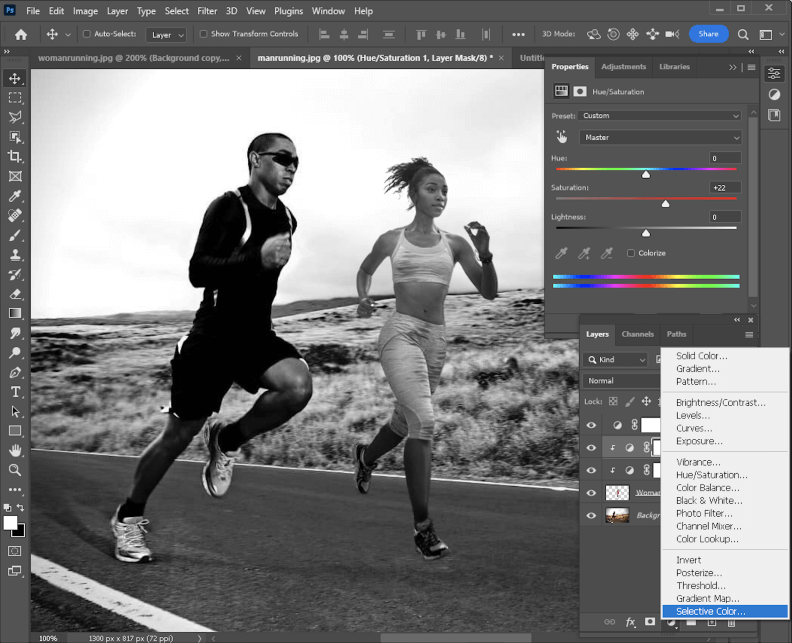
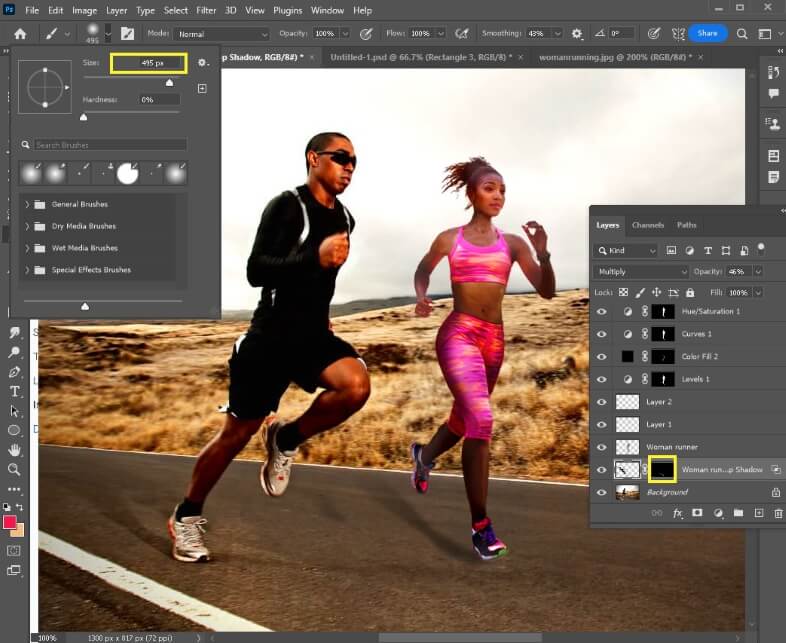
It’s easy to see that there’s more contrast and slightly different lighting in the desired image. Let’s click on the woman layer (background copy) and rename it, by double-clicking on the words.
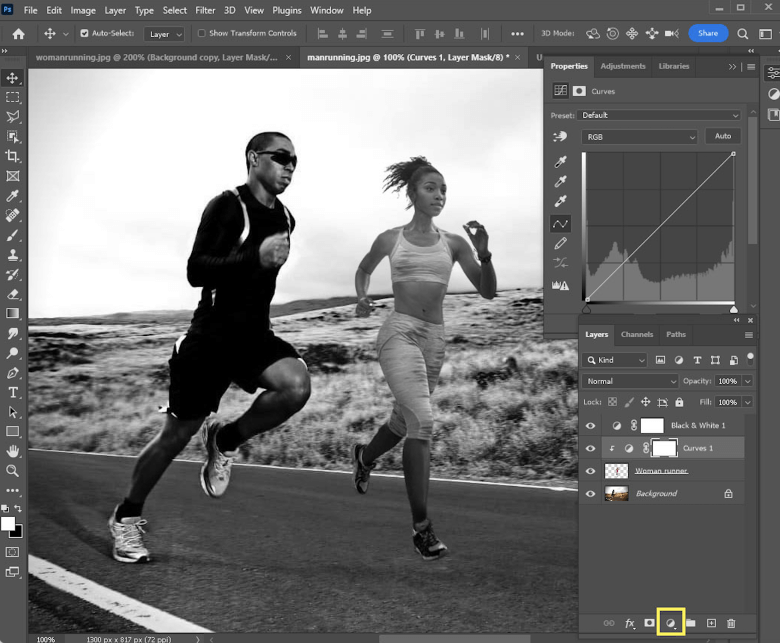
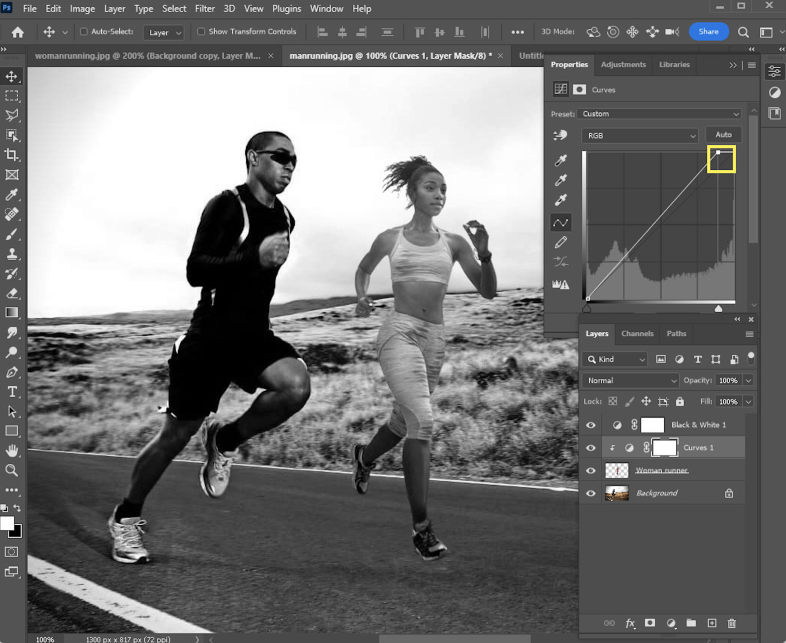
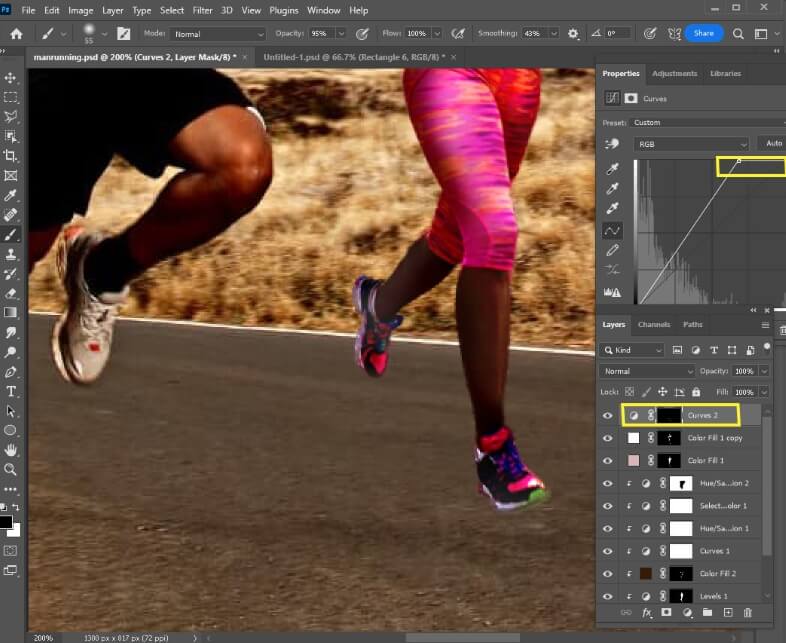
Add a Curves adjustment layer and use the shortcut Ctrl/Command + Alt/Option + G to clip this layer to the woman.
To better match the brightness level of the man runner, I moved the white pin-up.
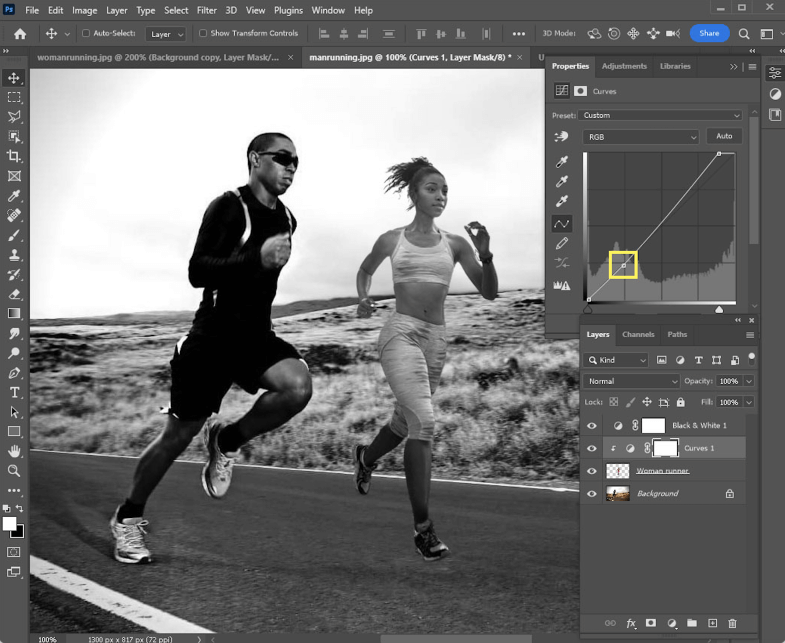
I added a pin to lower the brightness of this photo another way.
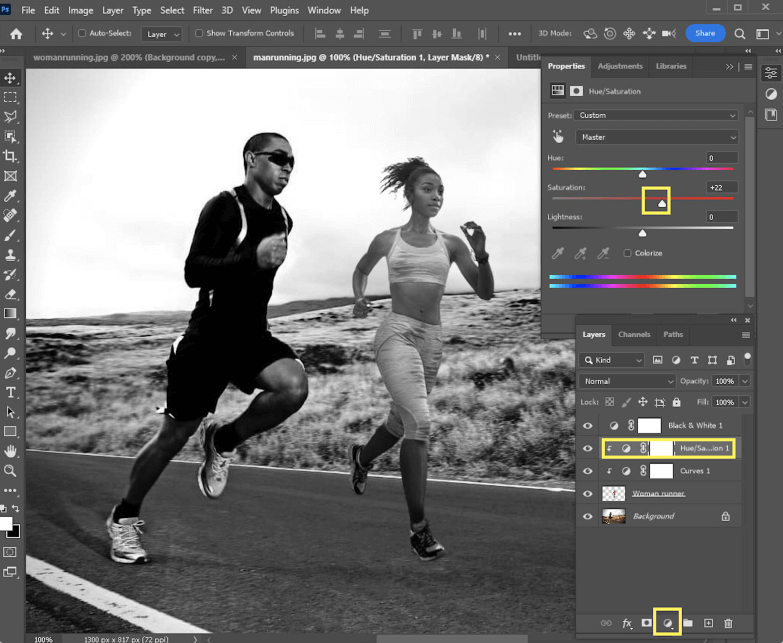
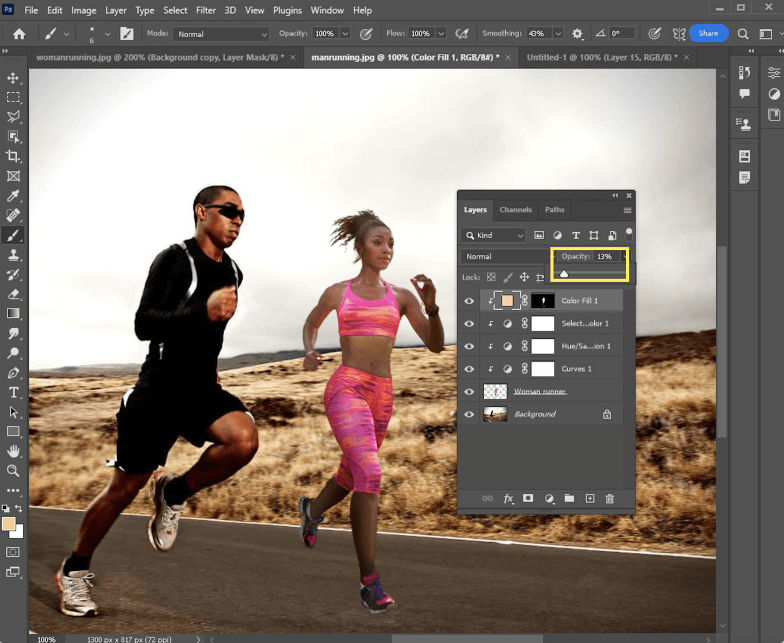
Add a Hue and Saturation adjustment layer and clip it to the woman layer. I increased the saturation.
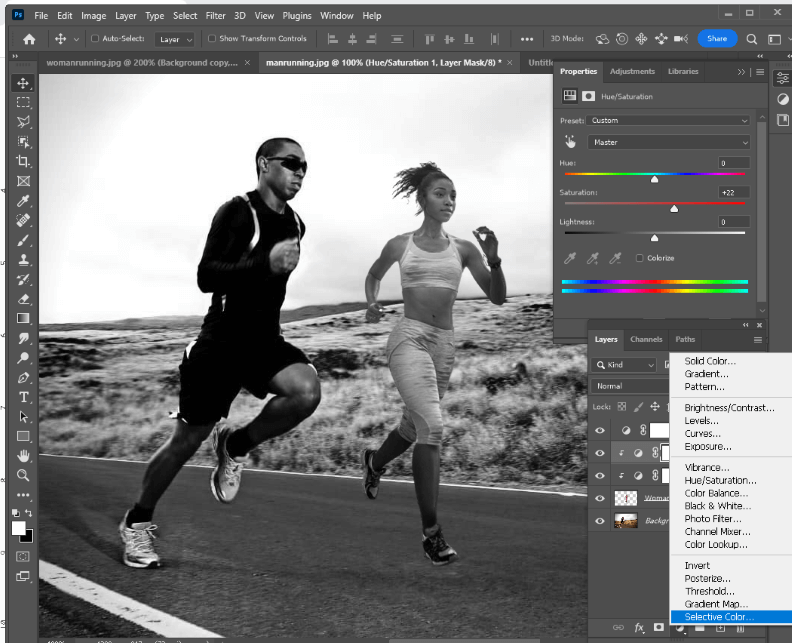
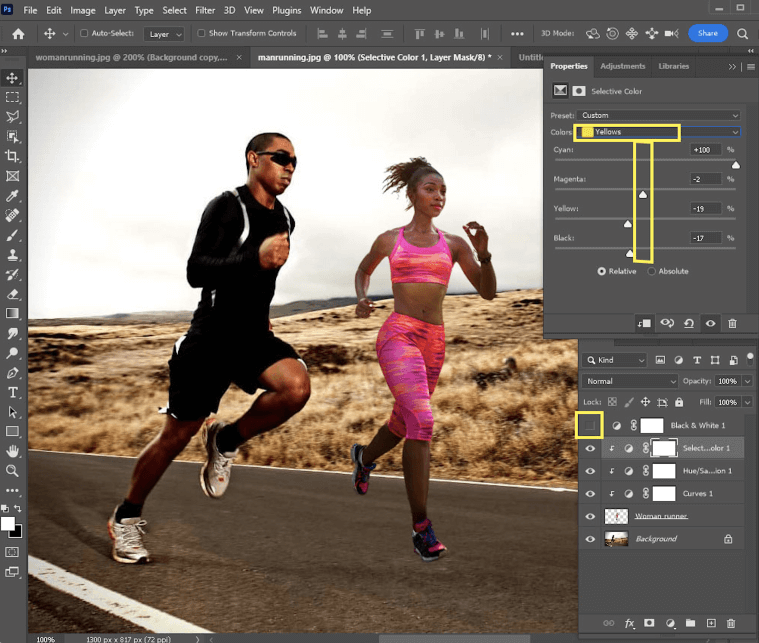
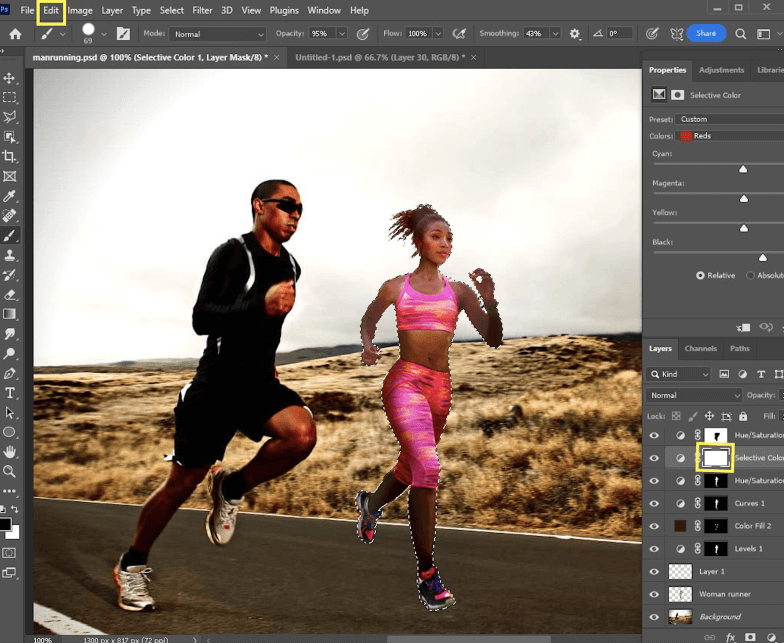
Add an adjustment layer for Selective Color and clip it to the woman.
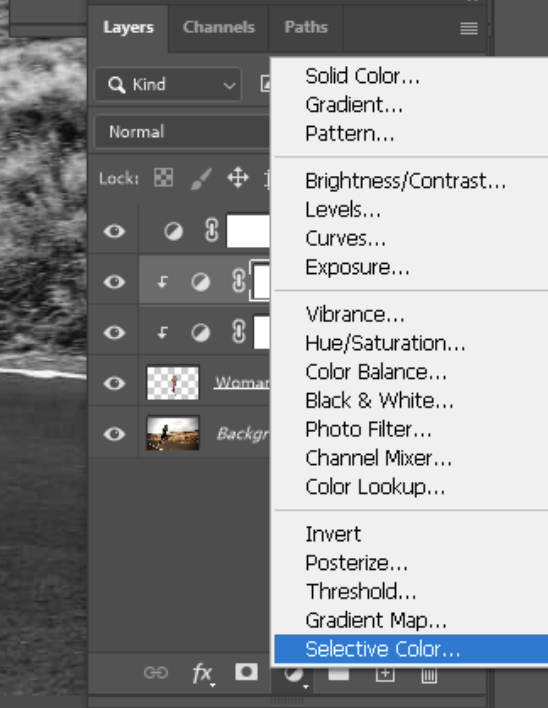
For example, I made the black and white layer invisible, but we can just delete it now. I tried each slider in the drop-down menu and found it most helpful to adjust the Yellows as seen here.
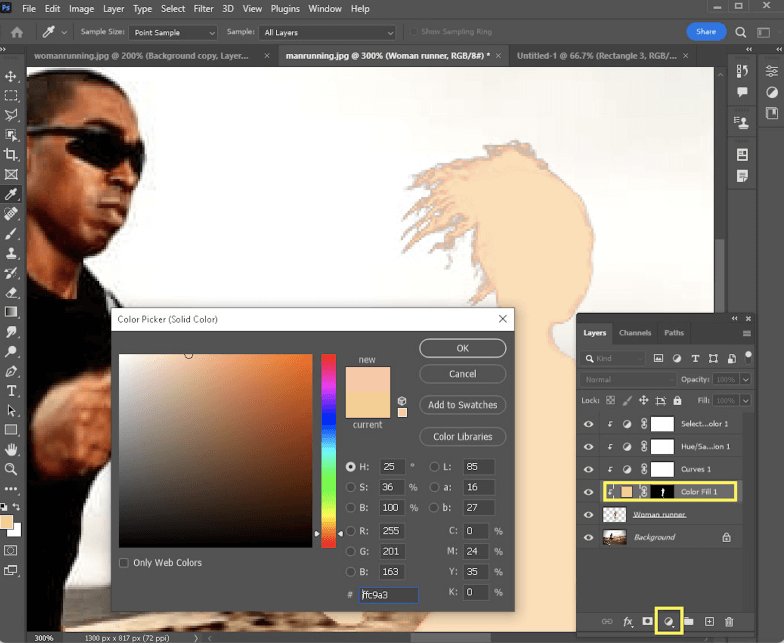
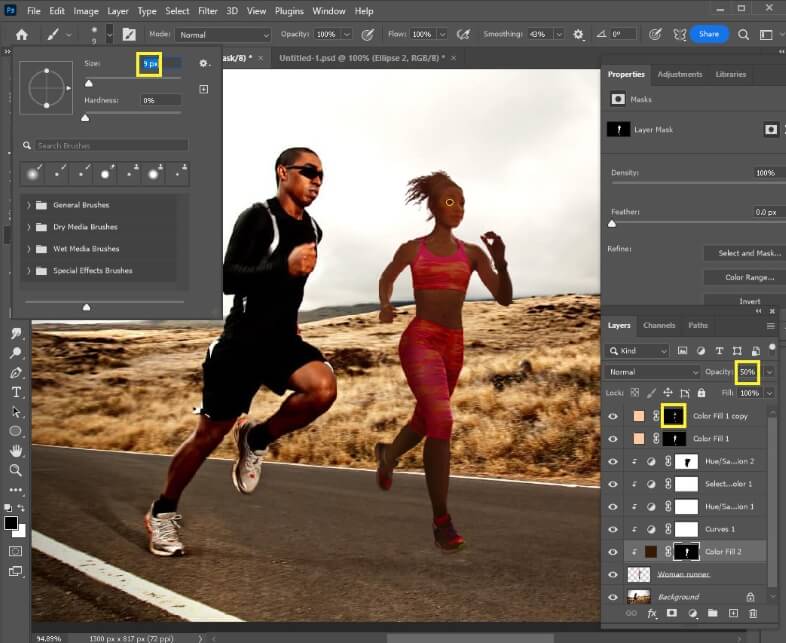
Press Ctrl/Command and click on the woman layer thumbnail to make her our selection. Add an adjustment layer for Color Fill. I chose a color that looks like the reflection of sunlight on their skin. Lower the Opacity of this layer to 50%.
Click on the mask of this Color Fill layer and use the Brush tool with black to conceal some of this color mask. We only want highlights to match the other runner.
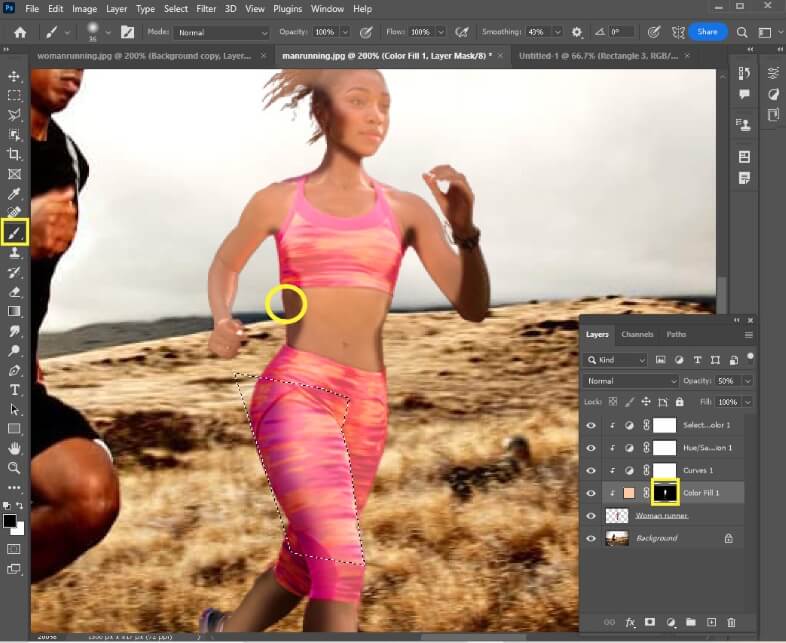
During this process, I used the Polygonal Lasso to select her leg on this mask. Then I went to Select > Inverse so that I could add shadow to her left leg without getting it on her right.
Use the keyboard shortcut Ctrl/Command + D to deselect.
Cut out the eyes on the mask by painting black over them. Lower the Opacity.
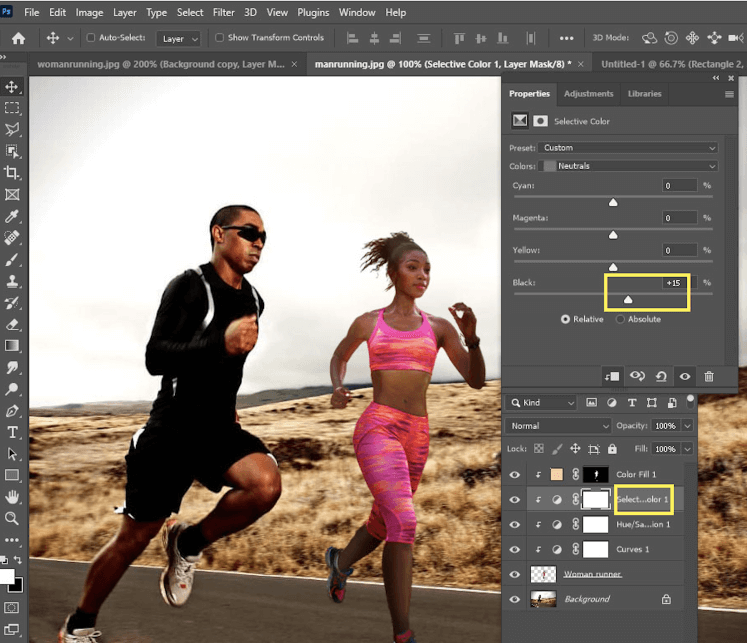
Click on the Selective Color layer and change the drop-down to Neutrals before increasing the level of black in the photo.
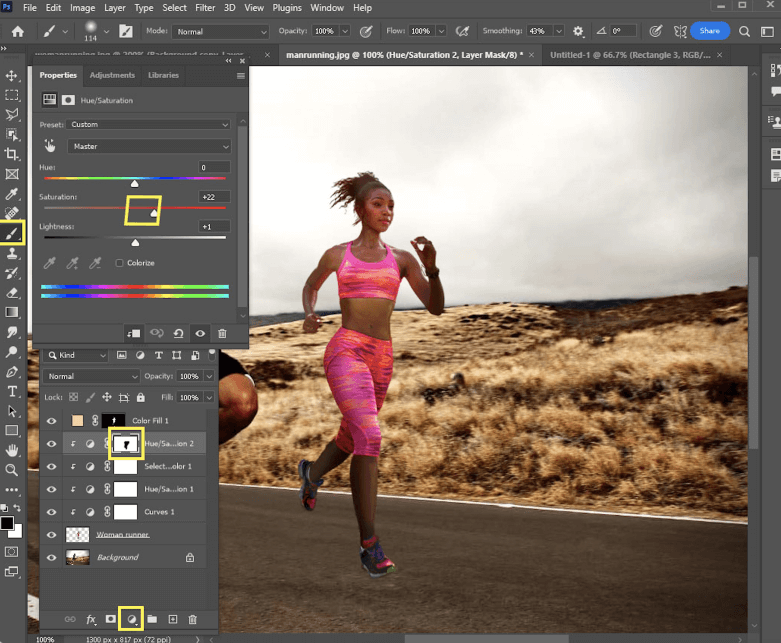
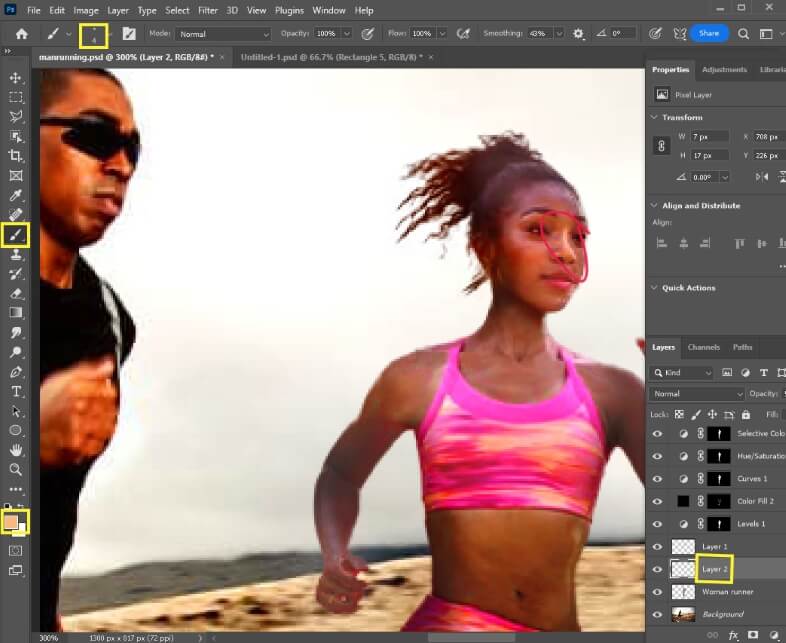
Create another Hue and Saturation adjustment layer and increase the saturation. Use the Brush tool on the layer mask with black to cover everything except her face.
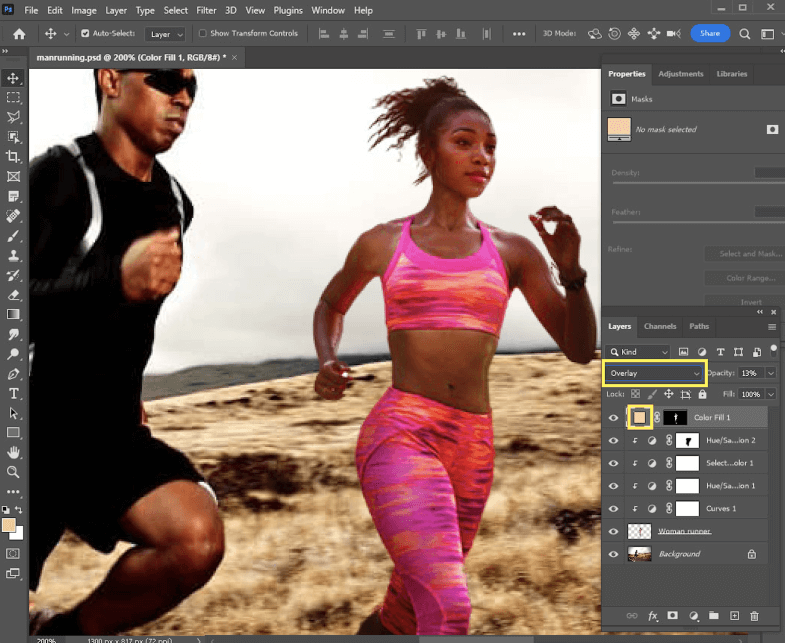
Change the blending mode of the light color layer to Overlay and duplicate this layer.
Step 14: Change the copied layer blending mode to Hard Light and select the mask of it. Grab the Brush tool and use black to paint wherever the extra light isn’t needed to shine on the woman.
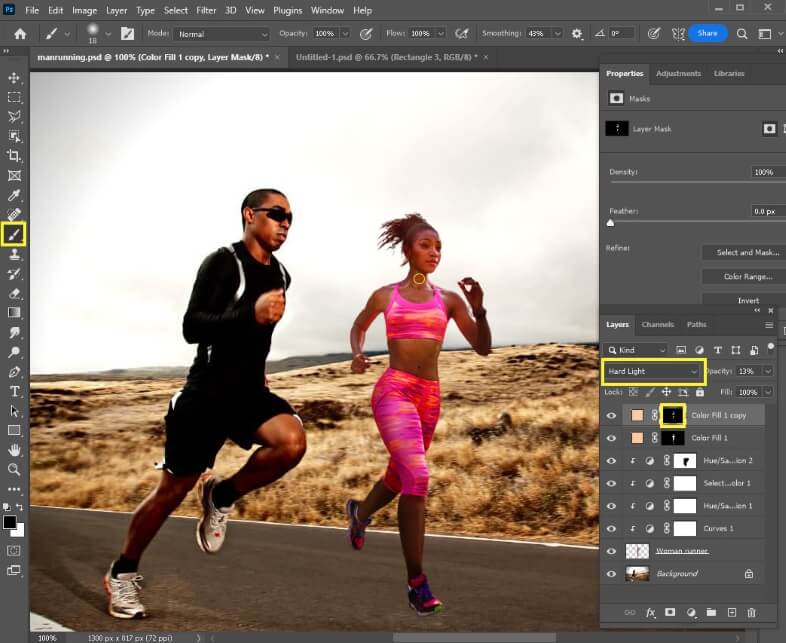
Keep referencing the shadows and highlights of the man. I’m using a small, feathered brush to take away light in the V of her neck.
Advanced Editing
You can continue your editing to make this photo look really realistic. For example, I’m going to show you how to add shadows.
Step 1: Press Ctrl/Command and click on the woman to make her our selection. Add an adjustment layer for Solid Color and choose a dark shadow color from the man.
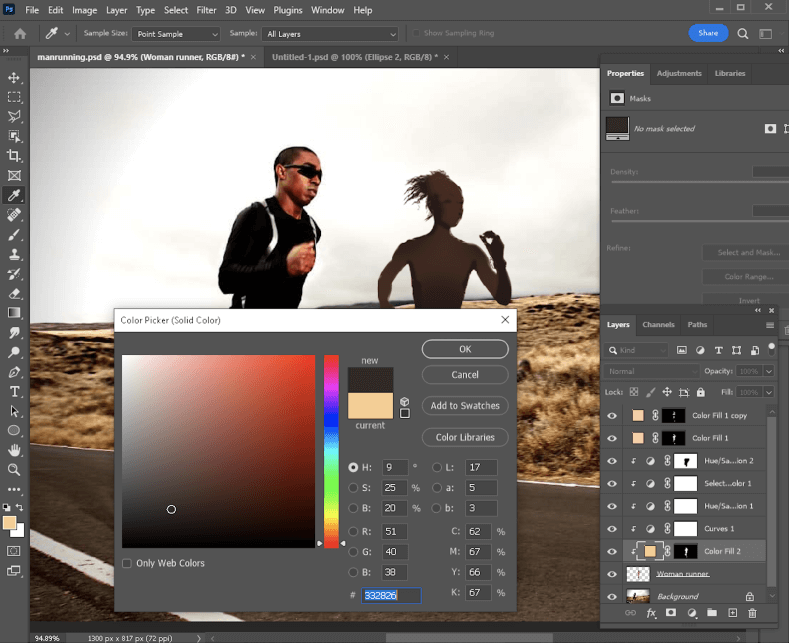
Step 2: Lower the opacity and click on the mask to start removing some of the shadows with the black Brush tool. I’m going to start small, with her eyes.
Step 3: Add a Levels adjustment layer to the woman image. I adjusted the sliders as you can see above.
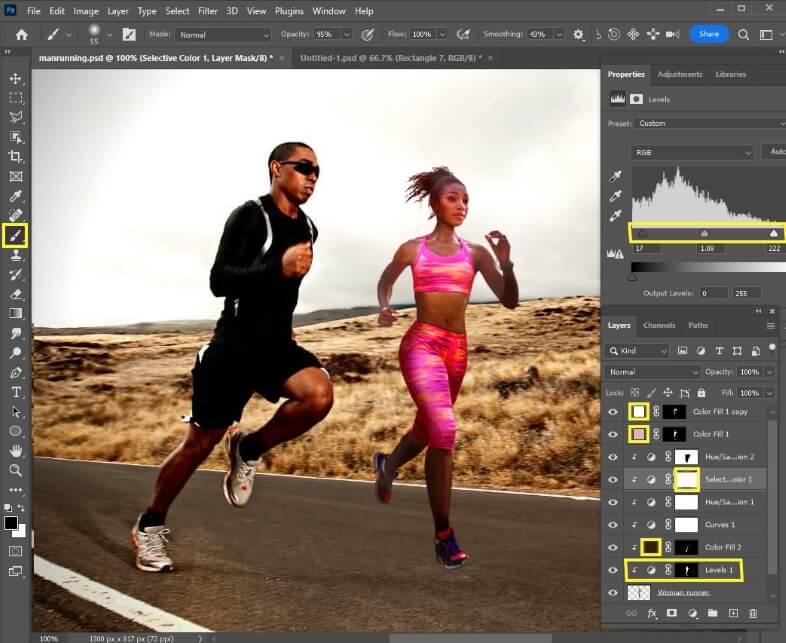
Using the Brush tool with black to conceal and white to reveal, I edited where the masks lay on the woman. I also changed the colors of my adjustment layers.
Step 4: The men’s sneakers are quite bright, so I selected the women’s shoes, painted the brown mask off of them, and added a new Curves adjustment layer.
You can see the change I made in the Properties panel. This brightened her shoes greatly.
Then I created a layer above the woman and selected the Clone Stamp tool. At the top, change the dropdown to Current and Below. That way, any changes you make will be on another layer, leaving the original photo untouched.
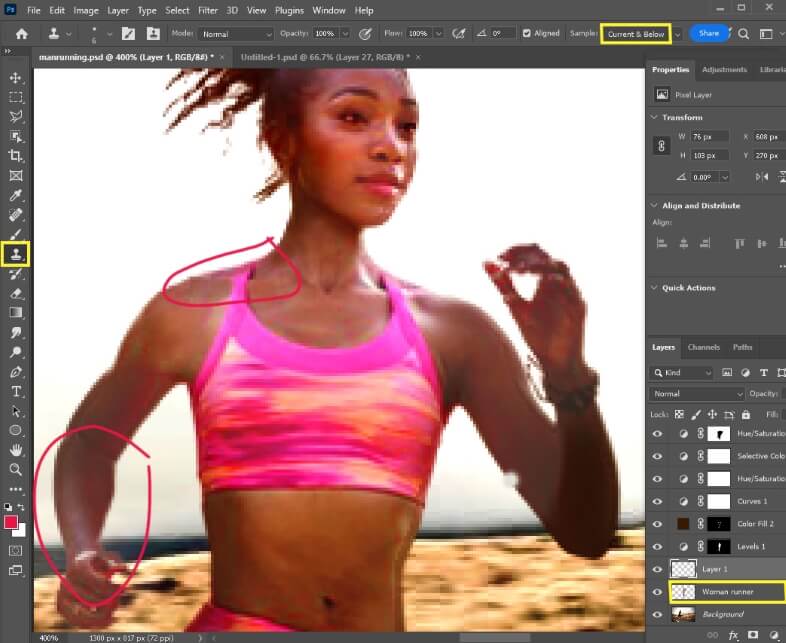
In the photo of the man, he has light shining on the front of him, and a little bit on the side. I’m going to do what I can to remove the originally reflected light on the woman’s shoulders, arm, and face.
I realized I accidentally unclipped these adjustment layers from the Woman’s shoes. To fix this, select the woman layer and go to Select > Inverse to reserve the selection. Click on each white layer mask (like the one in the yellow box) and go to Edit > Fill > Foreground color.
This fills in the surrounding space with black, which makes the runner’s shape the only affected space with all of our adjustments.
Step 5: Create a new layer above the woman. Lower the layer Opacity and use the Brush tool (adjust the size with the left and right bracket keys) with a skin-sunlight color and start painting highlights on the woman that match the man in the original photo.
You can use a larger, feathered Eraser tool to fade the end of highlights.
Here’s what we have now. I only added a highlight to her nose and cheek.
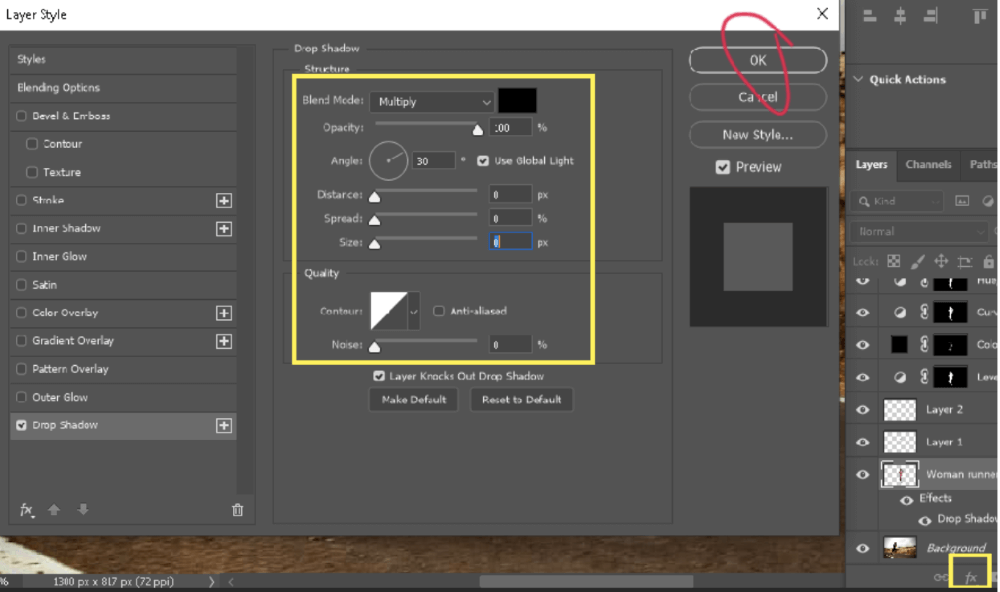
You can also add a drop shadow to the image.
Step 1: Click on the woman’s thumbnail and add a drop shadow effect by clicking the fx in the yellow box. With the settings above, click OK.
Step 2: Right-click on the Drop Shadow and click on Create Layer.
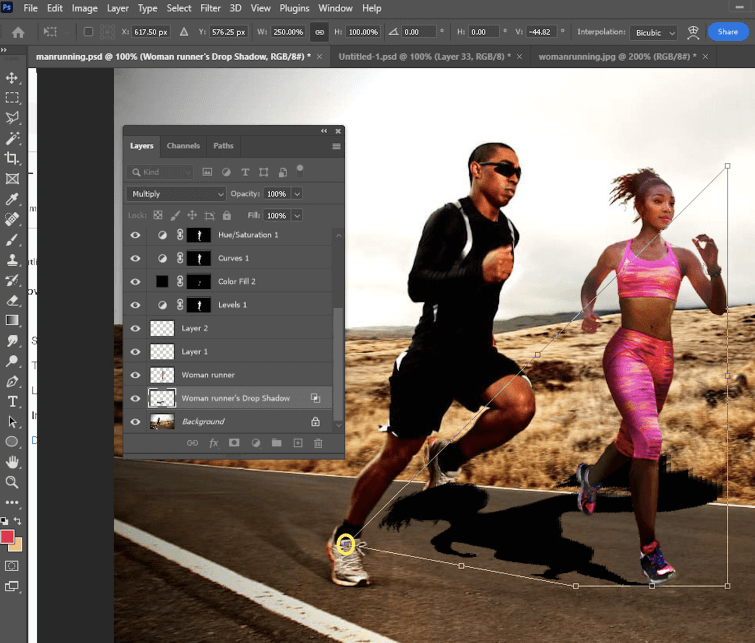
Step 3: Use the shortcut Ctrl/Command + T to go to Transform mode. Right-click inside the box and click on Distort. Click and drag one corner of the shadow down to the ground. Continue shaping it in this way, so that the foot/feet line up, and compare in angle to the other person.
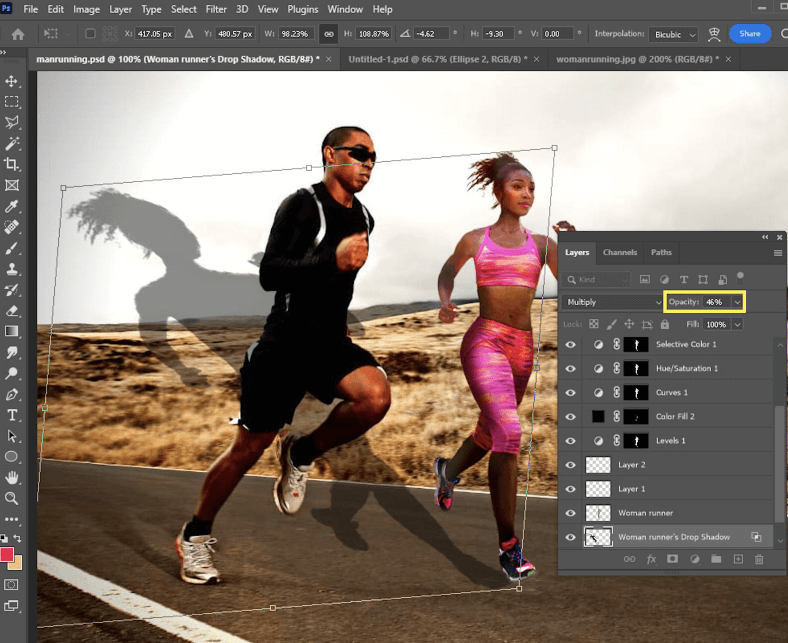
Step 4: Lower the opacity to match the darkest point of the other person’s shadow. This is the angle I landed on. With the shadow layer selected, go to Filter > Blur > Gaussian Blur. I’m going to set mine to 2px.
Step 5: Press Ctrl/Command click on the shadow thumbnail and click to add a layer mask. Paint with black over the mask, to cover the top half of her shadow. I used a big brush to finish that fade in the shadow.
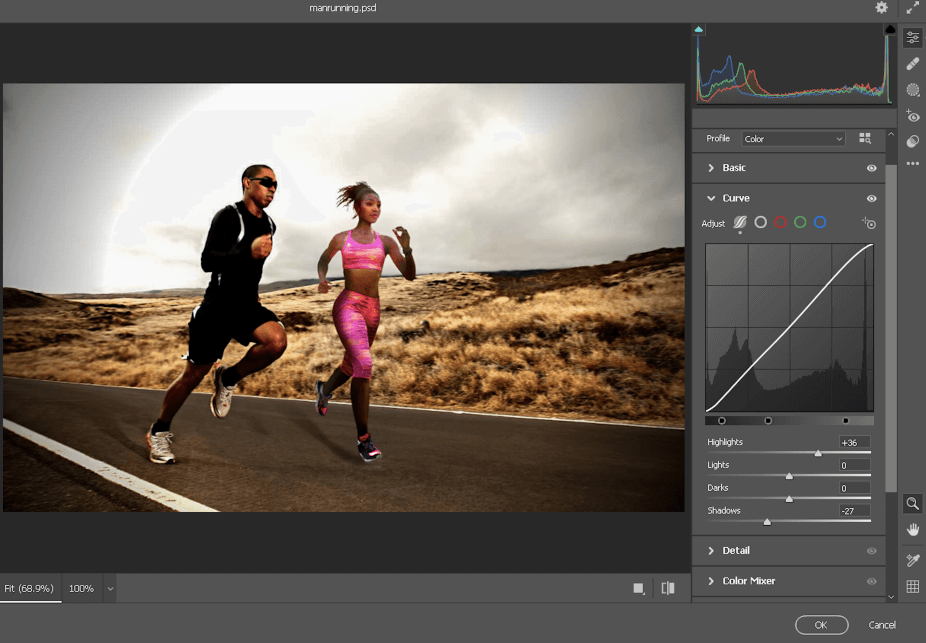
The finishing touch is to add a filter over the entire image.
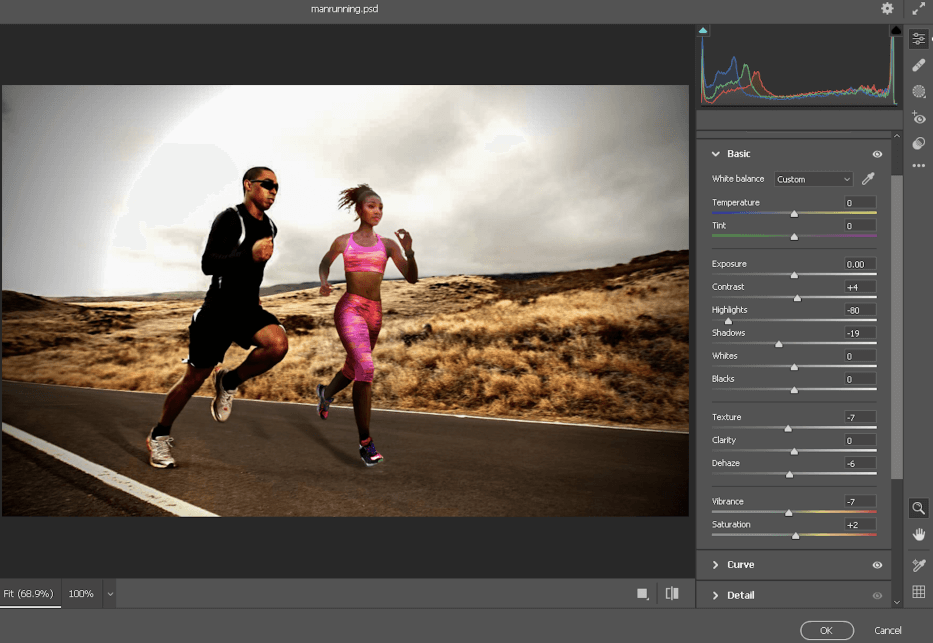
Step 6: Go to Filter > Camera Raw Filter. You can see the settings I chose for the Basic and Curve options. There are even more categories you can use for changes and adjustments.
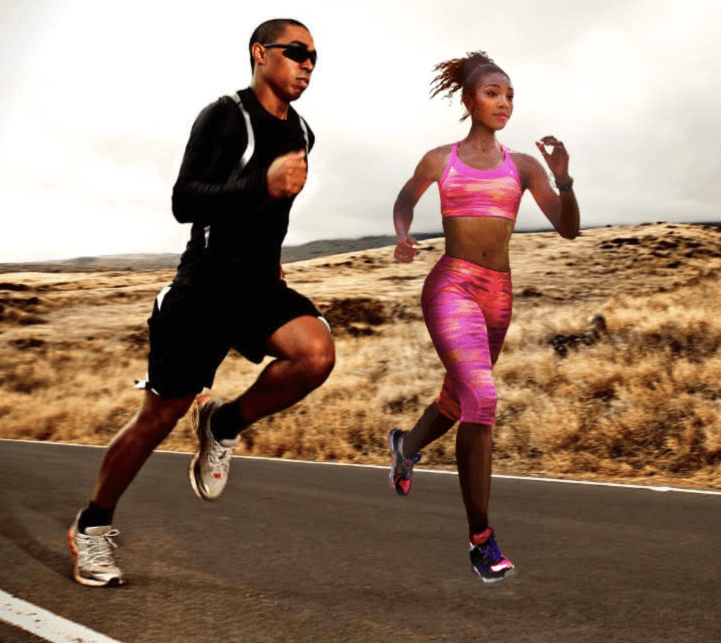
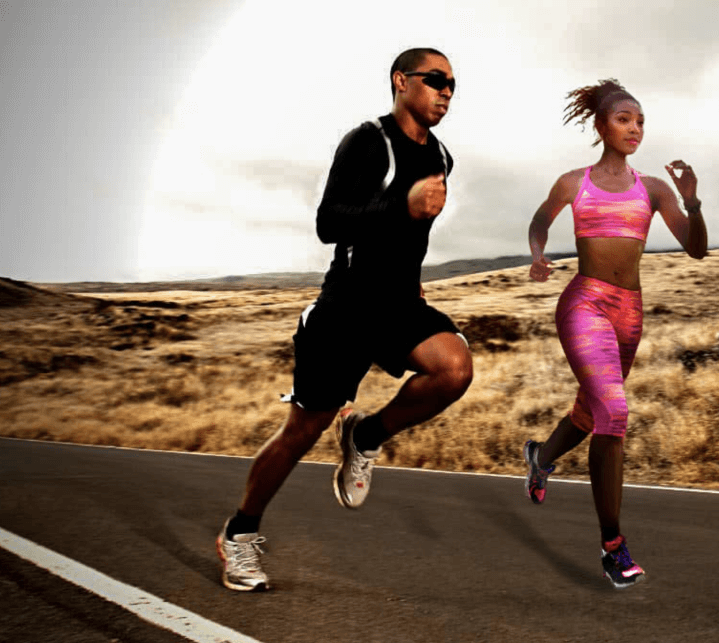
Here’s our final result.
Final Thoughts
Learning the ins and outs of Photoshop is key to building your graphic design skills.
By learning how to Photoshop someone into a picture, we’ve become familiar with helpful and universal tools that will make your future projects come to life.
Did you find what you came here for? Is there anything you would’ve done differently? Let me know in the comments below.