
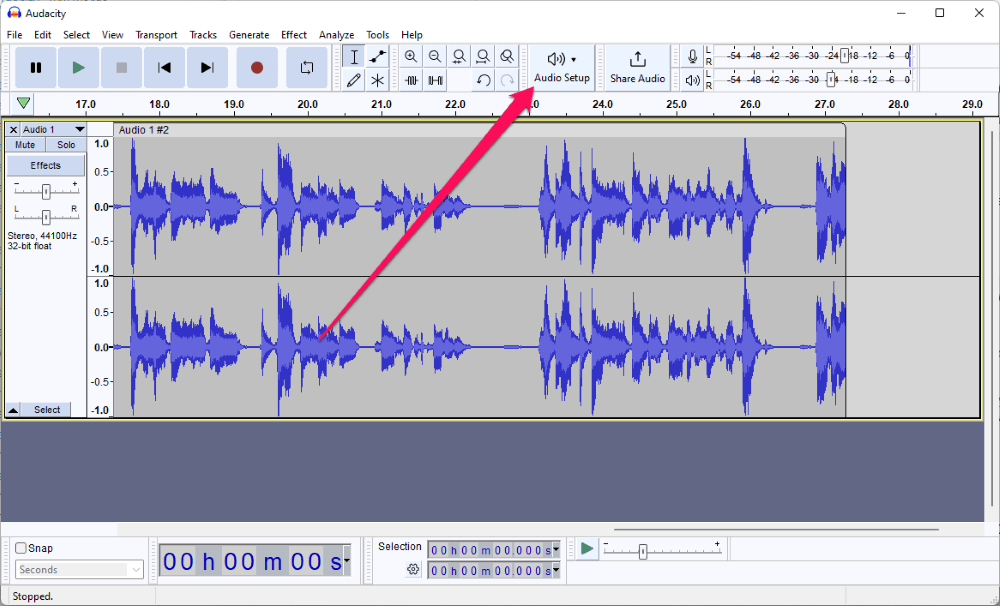
To record desktop audio with Audacity, click on the Audio Setup button. Set your Host to Windows WASAPI and your Recording Device to the one marked loopback then click the record button.
Hello, I’m Andrew Gilmore, a long-time user of Audacity. In this article, we’ll look at how to record desktop audio using Audacity on Windows, Linux, and macOS. I’ll also answer a few frequently asked questions at the end.
Let’s get started.
Table of Contents
How to Record Computer Audio in Windows 10 or 11 with Audacity
Whether you’re running Windows 10 or 11, the steps for recording computer audio in Audacity are the same.
- Open Audacity and locate the Audio Setup button on the top toolbar.
If you don’t see the button you can add it to your toolbar by going to View > Toolbars > Audio Setup Toolbar. You can also modify the necessary settings in the Preferences window.
- Click on Audio Setup > Host and choose Windows WASAPI.
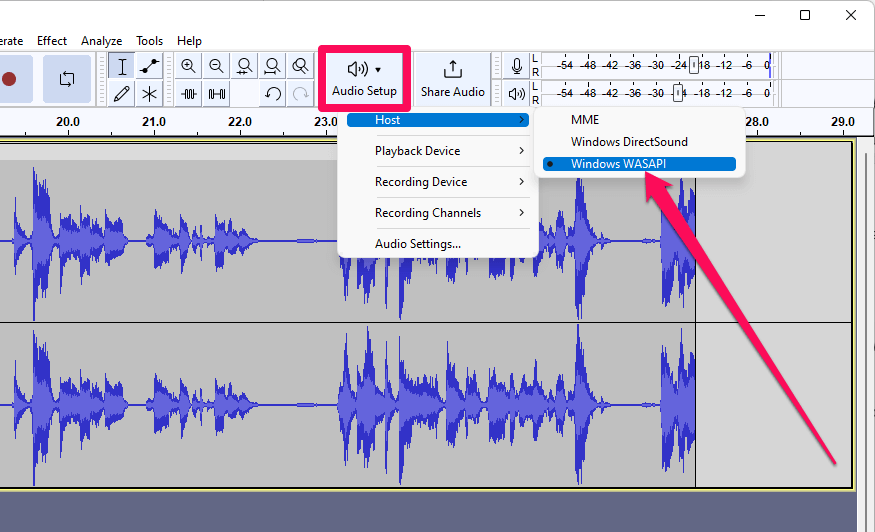
- Click on Audio Setup > Recording Device and choose the device marked (loopback).
If you have multiple loopback devices, choose the one through which you listen to audio on your computer, e.g. your computer speakers or headphone jack.
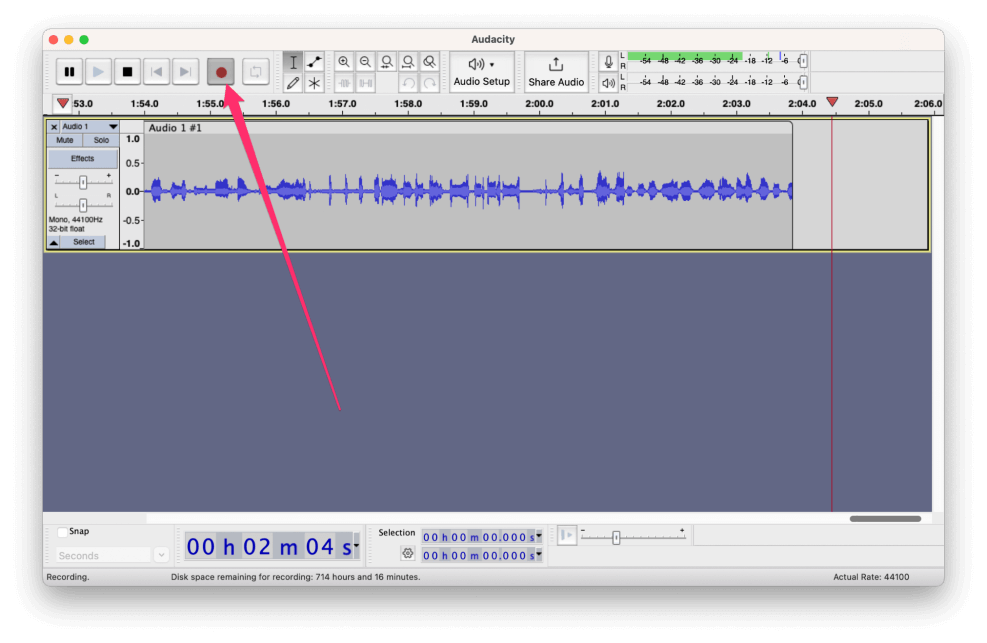
- Click the record button on the toolbar.
When using WASAPI, recording won’t occur until an audio signal is present. WASAPI, an acronym for Windows Audio Session Application Programming Interface, is a digital audio interface that allows applications to interact directly with audio data.
Microsoft introduced WASAPI in Windows Vista, so the feature should be available on nearly every Windows device in use today. Nevertheless, if you don’t have the option, there are alternative host devices you can use. Select MME or Windows DirectSound instead.
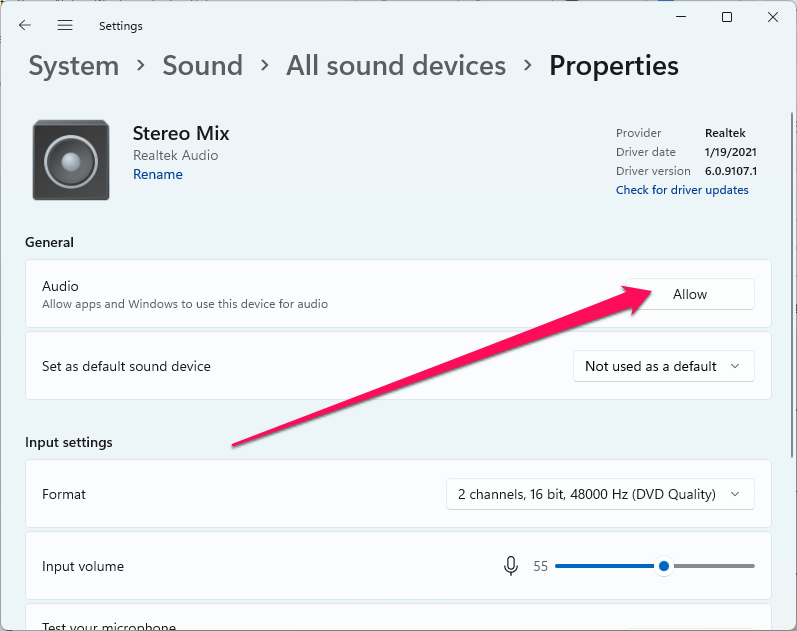
Note: You might not see loopback as a recording device option when WASAPI is not your host. In this case, choose Stereo Mix. If stereo mix is not an option either, you need to give applications permission to use the device in Windows Settings.
You should use Windows WASAPI if it is an option because using the API, Audacity can capture digital audio directly. In the alternative method, Windows translates the audio from digital to analog then Audacity captures the analog signal and converts it back to a digital format. The latter method can result in loss of quality.
How to Record Computer Audio on a Mac with Audacity
You cannot capture macOS audio in Audacity without first installing a third-party audio device. Fortunately, the people at Existential Audio offer a virtual loopback driver called BlackHole which allows you to route system audio to applications like Audacity.
Soundflower has been a popular virtual audio driver, but it currently does not support Apple Silicon. In my experience, BlackHole does everything you need when it comes to routing system audio.
To install and configure BlackHole, follow these steps:
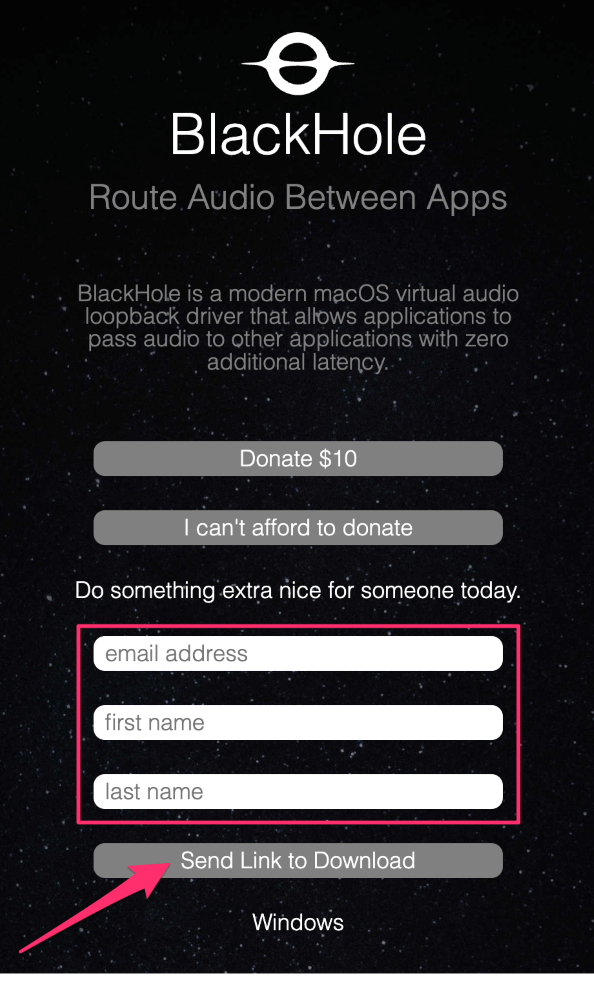
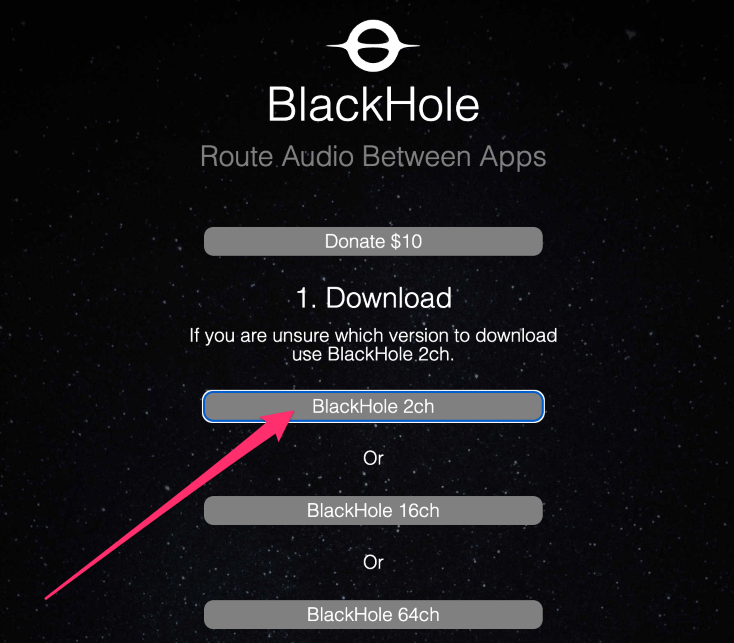
- Visit https://existential.audio/blackhole and click either the Donate $10 or I can’t afford to donate button.
- Enter your email address, first name, and last name, and click Send Link to Download.
- Check your email and click on the link inside to download the software.
- Select the BlackHole 2ch option unless you need more channels for audio mixing.
- Open the downloaded pkg file to begin the installation process.
- Click Continue through the introduction and Agree to the license terms. Then click the Install button.
- Enter administrator credentials, if prompted, then click Install Software.
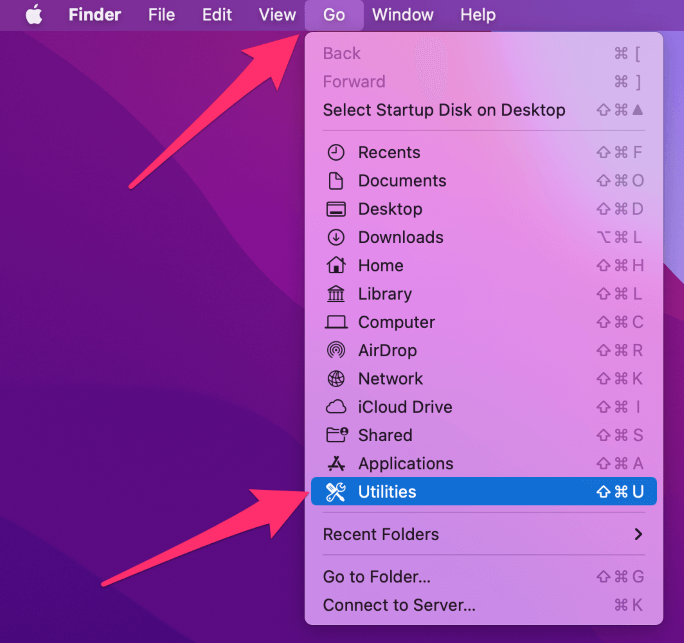
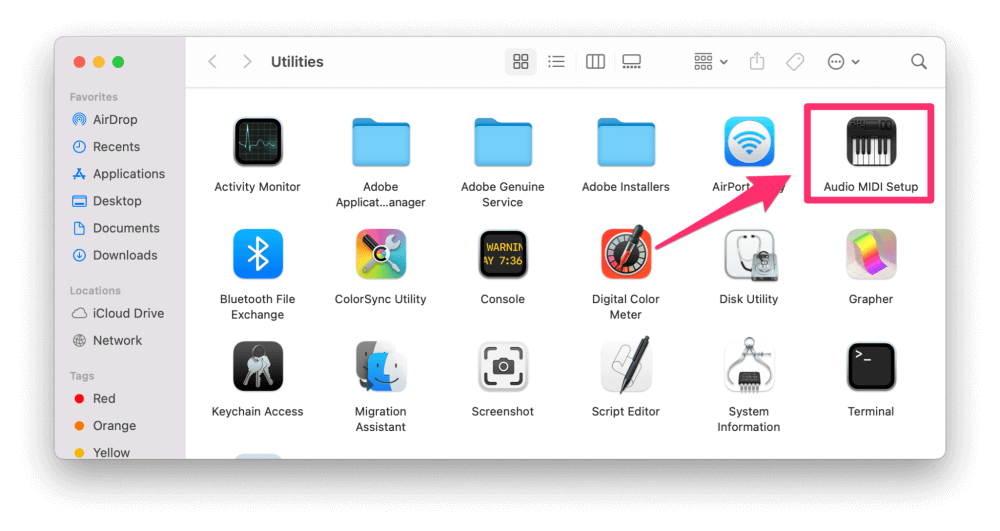
- Once the software is installed, open Audio MIDI Setup from the Utilities directory by clicking on Go and then Utilities from the Finder menu.
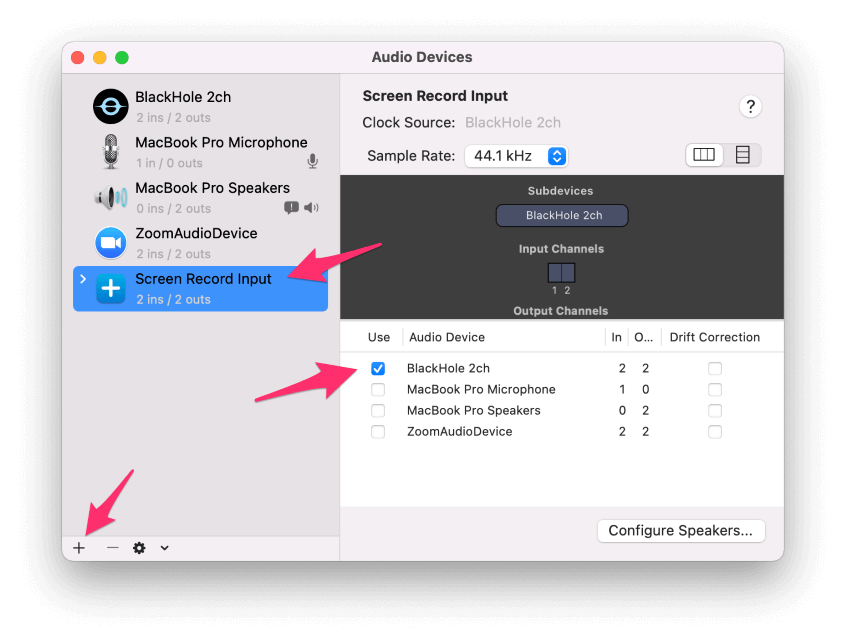
- Click on the plus sign in the bottom left corner of the window and choose Create Aggregate Device.
- Click on the name of the new aggregate device and rename it to something more meaningful like Screen Record Input. Then click the checkbox under the Use column for BlackHole 2ch.
- Click on the plus sign again and select Create Multi-Output Device.
- Check the boxes for MacBook Pro Speakers (this might also be labeled Built-in Output) and BlackHole 2ch. Make sure MacBook Pro Speakers is set as the Master Device and that it is the top option in your list of Audio devices. If not, deselect the BlackHole device and reselect it.
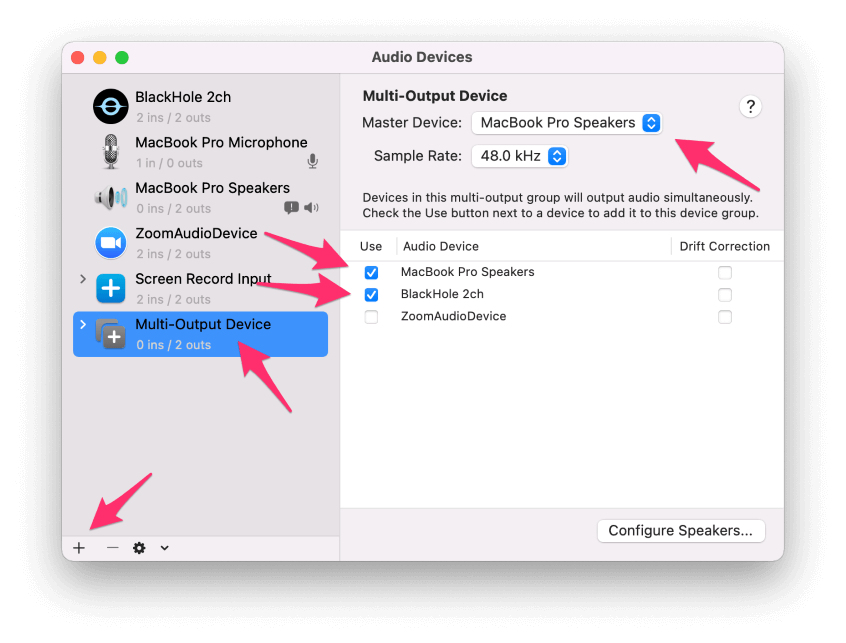
This last step allows you to hear the system audio while the screen recorder captures the sound. Other loopback options can only accomplish one or the other.
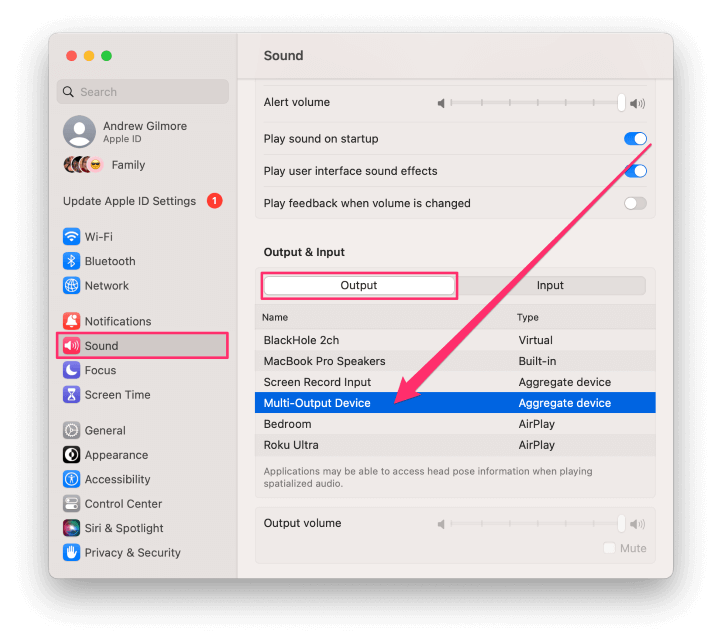
- Next, open the Sound pane in System Settings and click on the Output tab.
- Select Multi-Output Device for sound output.
- Open Audacity.
- Click the Audio Setup button and choose the Screen Record Input device we created using BlackHole under Recording Device.

- Click the record button.
Audacity will now record your system audio.
When finished recording, be sure to go back to the Sound settings and change the output device back to your built-in speakers.
How to Record Computer Audio in Linux with Audacity
To record computer audio in Linux, you’ll need to install the PulseAudio Volume Control software available in most repositories. These instructions are for Ubuntu, but they are the same or similar for other distributions.
- Open Terminal and run sudo apt install pavucontrol.
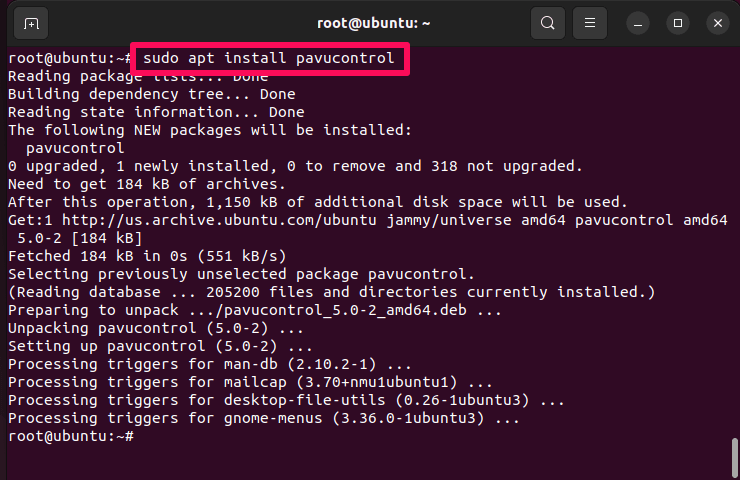
This command installs PulseAudio.
- Open Audacity and click on the record button.
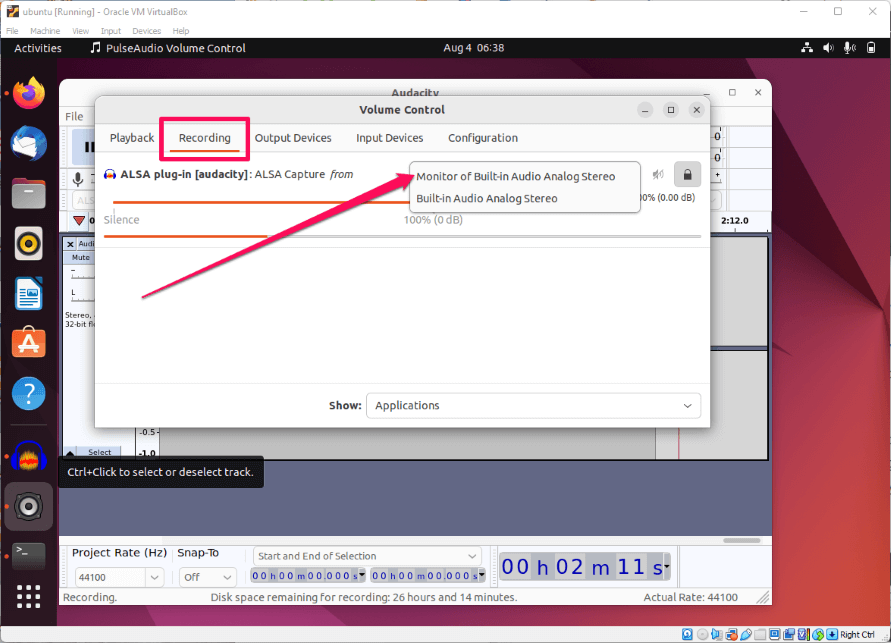
- Open the PulseAudio software.
- Click on the Recording tab.
- In the drop-down menu next to the ALSA plug-in, select Monitor of Built-In Analog Stereo.
- Start playing any audio you want Audacity to record.
FAQs
Here are some common questions about recording computer audio in Audacity.
Why is stereo mix not working? How do I enable stereo mix in Windows 10?
If you can’t see stereo mix, you might need to enable the device:
- Open the Control Panel and select Sound.
- Click on the Recording tab.
- Right-click in the recording tab pane and select Show Disabled Devices.
- Right-click Stereo Mix and choose Enable.
- Click Apply and then OK.
If stereo mix doesn’t show up in the list after showing disabled devices, you might need to update your audio driver. Check your PC manufacturer’s or sound card maker’s website for the latest driver.
If stereo mix is enabled but not working, try setting it as the default device: right-click the device and choose Set as Default Device.
Why is Audacity loopback not working?
Several things could cause the problem, but check to make sure your playback device is not set to surround sound (e.g. 5.1).
Additionally, check to make sure that if you have multiple recording devices marked as loopback you are selecting the proper device. You want to pick the one through which your audio is playing. If you don’t see the proper device make sure it is turned on and connected to your computer then, in Audacity, click Transport > Rescan Audio Devices.
How do I fix error opening sound device in Audacity?
Because the error message is generic, multiple issues can cause the error opening sound device prompt. Here are a few things to check:
- Make sure Audacity has permission to use the computer’s recording device.
- Change the default sample rate to match the recording device. 44100Hz is standard.
- Check that your audio driver is up-to-date.
- Verify that you enabled your audio devices in your operating system’s settings.
You can read more about this error on Audacity’s website.
Final Thoughts
Recording desktop audio with Audacity might seem complicated, but with a methodical approach, you’ll be capturing your computer’s sound in no time.
On Windows, use the WASAPI host and loopback device to capture audio. On macOS, first, install and configure the BlackHole virtual audio driver. On Linux, you’ll need to use the PulseAudio Volume Control software.
Regardless of your OS, check to ensure that Software Playthrough is off when recording desktop audio. You can access this setting via Transport > Transport Options.
Additionally, please be cognizant of copyrights and intellectual property laws before recording audio from the Internet.
I’ll turn it over to you now. What type of audio do you plan on recording with Audacity?