
We’ve all been in situations where we wish we could remove blemishes, or dark circles from under our eyes – but what about editing out more complex issues? Say, a double chin? This can seem like an overwhelming task at first, but I assure you it can most certainly be done using Photoshop’s ever-expanding toolset.
My name is Skyler, and I’ll be showing you how to remove a double chin in Photoshop flawlessly in this tutorial!
First, we’ll get familiar with the Pen Tool before diving into how exactly we’ll go about removing a double chin believably. This is not only useful for those pesky family photos or group shots with friends gone wrong – but being able to manipulate an image seamlessly is also a well-sought skill in any creative industry today.
Alright, time to get things started!
Table of Contents
Tracing Selection with the Pen Tool
The Pen Tool can be used in many situations, such as the creation of shapes, paths, and selections or even layer masks. In some cases, it can be more accurate than even the myriad of standard selection tools Photoshop provides us with.
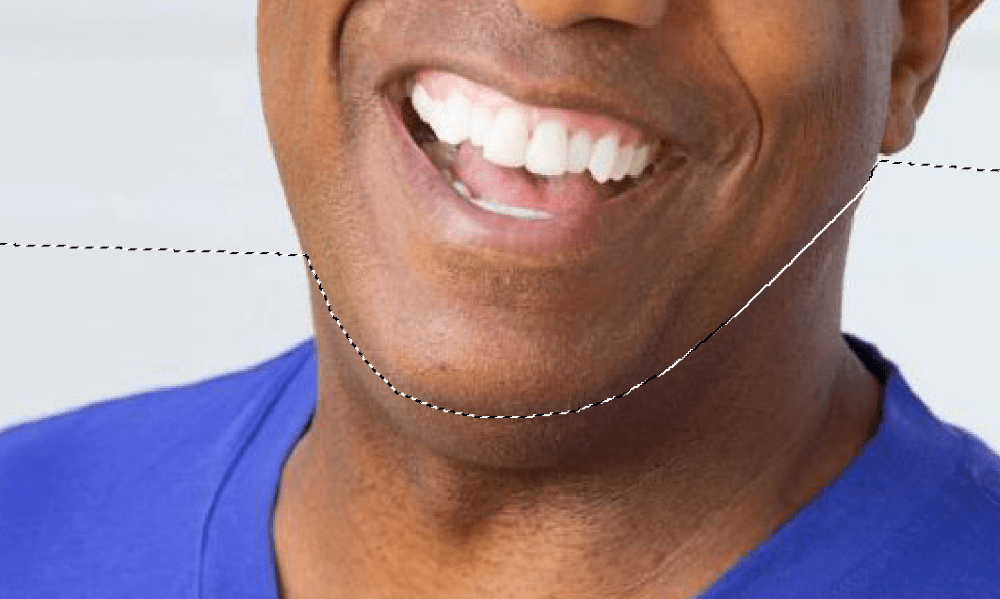
You’ll be using the Pen Tool to trace the true outline of the jaw, to the best of your ability or imagination.

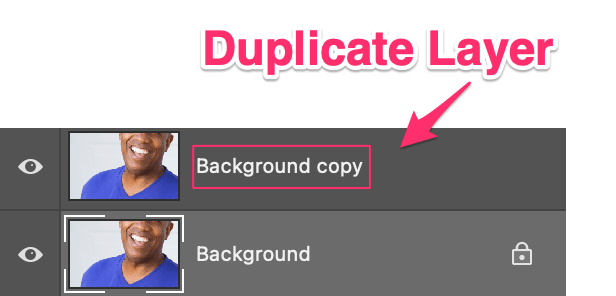
Step 1: Duplicate your Image
Before you reach for the Pen Tool though, let’s ensure you do not harm your original image by duplicating it. Simply right-click your layer in the layers panel and find Duplicate Layer. You’ll then be prompted to name your layer accordingly.
Once this is done, click OK and your duplicate will appear above your original image.
Great! Now we can get started making some changes.
Step 2: Tracing the True Jawline
You can go ahead and find the Pen Tool, now! It resembles a Calligraphy Pen, as shown below. Make sure this is selected before moving forward.

With the Pen Tool enabled, choose a starting point along the left or right-hand side of the jaw and begin tracing your image!
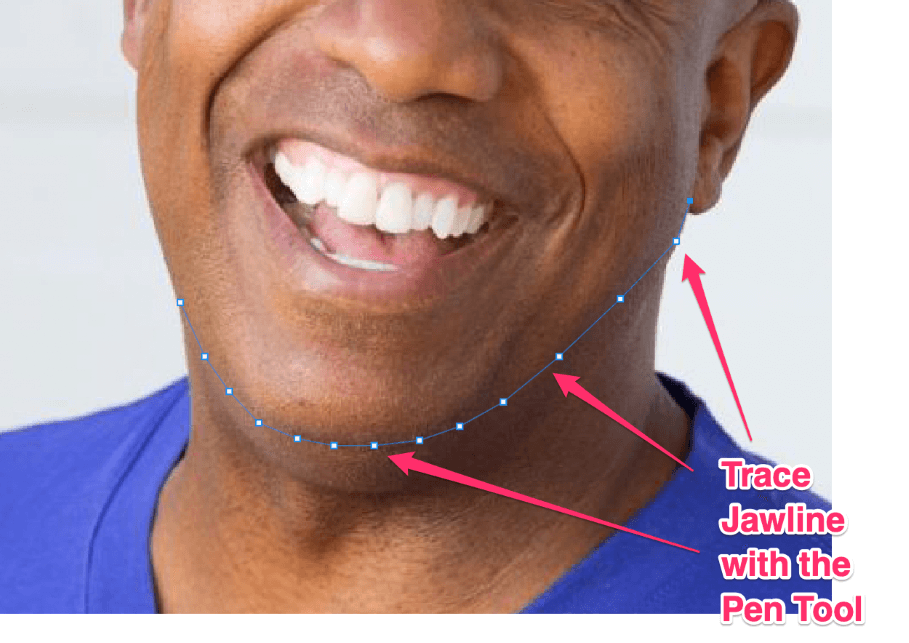
You’ll want to take extra care and attention when tracing your selection here. This will be the area we’ll manipulate, after all, so take your time. I made multiple anchor points step by step along the entirety of his jawline and stopped this process once I reached his neckline on the opposite side.
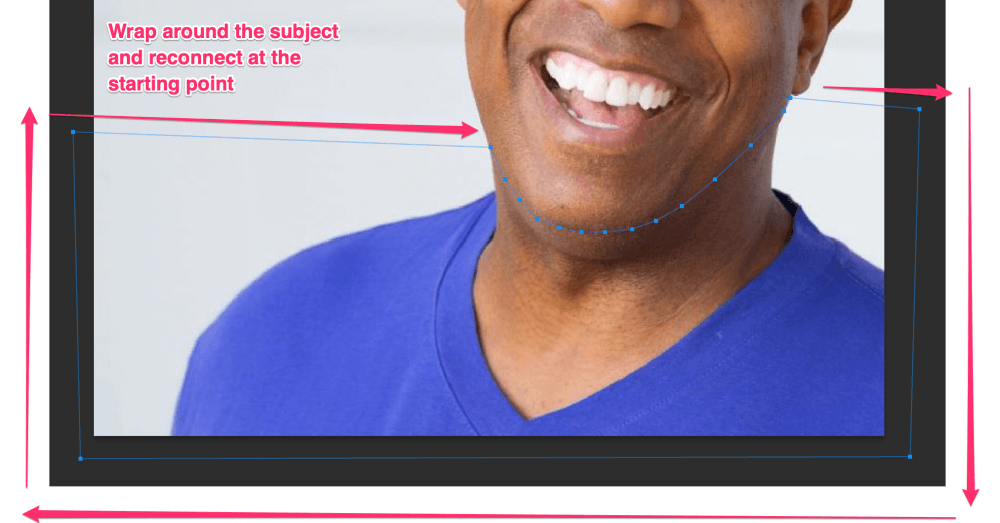
This part may look a bit silly, but it’s how you’ll be connecting your selection! You’ll want to place anchor points outside the canvas, starting with the first point on the right-hand side before continuing to wrap around your subject and reconnect at the original anchor.
Once you’ve connected your selection, you can feather it for a smoother appearance.
Step 3: Feathering Your Selection
This step is essential for achieving smooth curves and cutting out any jagged-edged linework you might’ve made with your Pen Tool selections.

In the overhead menu, you’ll see several options, but all you’ll need to pay attention to is the Selection Button. Once you’ve found it, click Selection and a new window will appear.
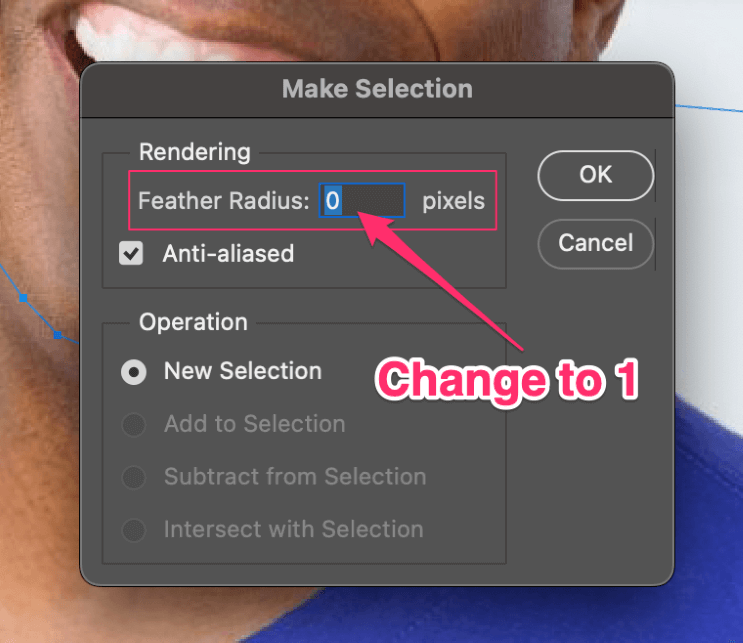
Simply change the Feather Radius from zero pixels to one. Click OK and Photoshop will smooth out those rough edges automatically.
Looks good! You’ve rounded out our selection and you’re ready to move on.
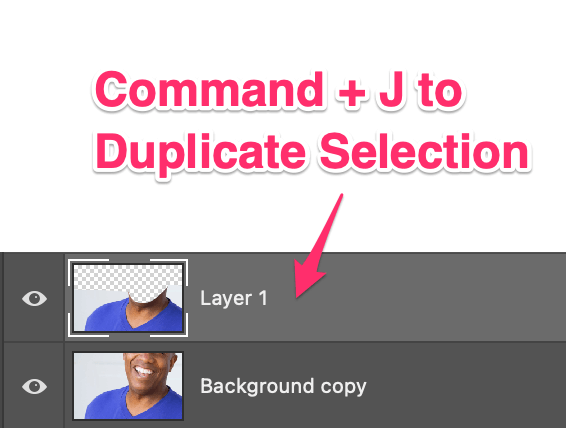
Step 4: Duplicate your Selection
To duplicate this selection you’ll have to press Command/Ctrl + J on your keyboard. After this is done, you should have a new layer that looks like this above your image.
Now you’re officially ready to remove that double chin using your new layer in the following steps.
Editing Selection
Your selection can be manipulated in many ways now, but I find the standard Warp Tool to be the most effective when shaping organic objects. In the last few steps you’ll be warping the new layer to overlap and line up with the true jawline, and then you’ll blend them seamlessly using a Soft Brush.
Step 1: Warping your Layer
Before you start warping an image in Photoshop, make sure your new layer is selected. Then navigate to Edit > Transform > Warp. Now you should see a Warp Grid appear over your selected layer.
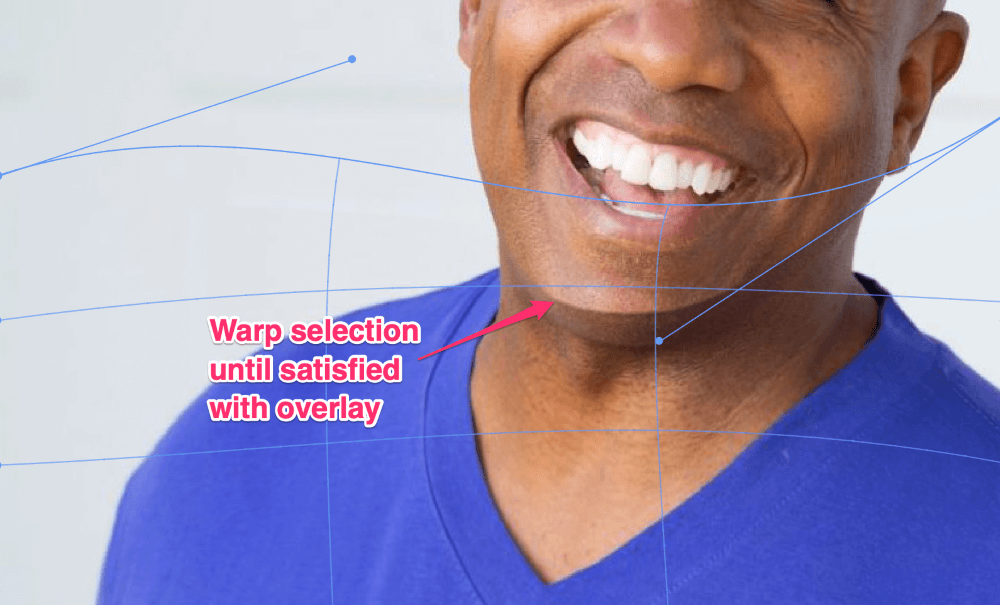
See how I’ve manipulated the handles of the warp grid to make the darker underside of the double chin overlap and line up with the true jawline? That’s the goal. Continue manipulating your selection until you’re satisfied with this, then hit Enter or click the Check Mark in the top menu to finalize your manipulation.
Step 2: Blending with a Brush Tool
Next, you’re going to find a soft, nonabrasive brush of your choice with the Eraser Tool enabled.
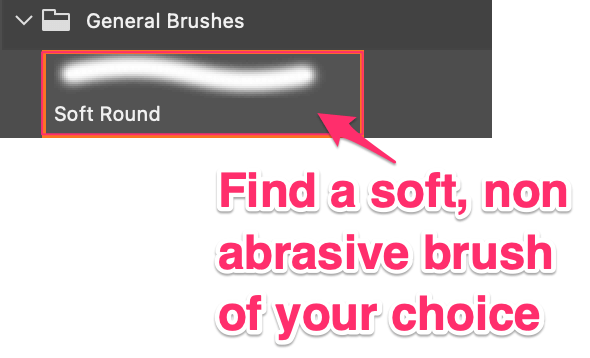
I’m going to be sticking with the Soft Round brush Photoshop provides, but I’ll be changing the setting so it blends my image more easily.
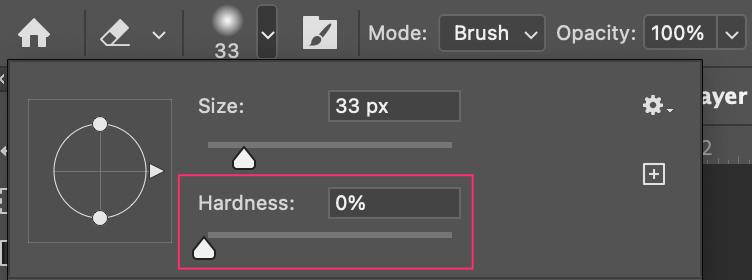
Underbrush size and hardness, you’ll want to set Hardness to zero percent. All that’s left to do now is gently begin erasing the darker part of the chin layer we overlapped earlier. Once the true jawline begins to appear, stop erasing and take a look!

There! Look at that. I’ve gone ahead and lined up the original photo against the manipulation for reference. What do you think? We’ve revealed the true jawline and done away with the double chin easily. Plus, it has a believability that rivals the original!
Congrats! No one will be able to tell you’ve been tinkering away in Photoshop to produce your next flawless portrait or picture with these techniques and tools.
Additional Edits for Blemishes and Imperfections
If you’ve enjoyed learning this new skill and wanna take things to the next level, look no further. Below I’ve linked an awesome tutorial showing you how to further edit out flaws like acne, blemishes, or other imperfections in portraits or photos.
Conclusion
Wow, what a powerful program Photoshop is! Not only can we design or illustrate whatever we please, but we can remove flaws from photos and edit portraits seamlessly in this way. I’m certainly impressed!
Now that you’ve successfully removed a double chin using Photoshop’s Pen and Warp Tools, you’ve got nothing to worry about when it comes time for photos with friends or family! I’m looking forward to seeing what you’ll create next.
Happy Editing!