
Transforming your videos by removing backgrounds and introducing new elements is a dynamic technique. In After Effects, the KeyLight effect makes green screen removal straightforward and effective.
Hello, I’m Zoe, an illustrator and graphic designer. Mastering green screen removal is a fundamental skill for anyone starting in video editing. Whether you’re working with your own green screen footage or integrating stock videos, being able to handle green screen footage is key to creating great and imaginative videos.
In this article, we’ll focus on removing green screens using the KeyLight effect in After Effects. We’ll also explore additional techniques for tackling even the trickiest elements. Plus, as a bonus, I’ll show you how to remove black or white backgrounds, ensuring you can seamlessly integrate your subjects onto any backdrop.
Let’s get to it!
Table of Contents
Key Takeaways
- Green screens, also known as chroma keys, allow video creators to replace the background with any desired image or video.
- Start with KeyLight: It’s your primary tool for removing the green screen.
- Refine with Key Cleaner: This effect helps in cleaning up the edges and reducing noise.
- Neutralize Spill with Advanced Spill Suppressor: Essential for removing color spill from your subject.
- Fine-Tune Your Key: Go back and forth between the effects for the best result.
Note: All screenshots from this tutorial are taken from the After Effects Mac version.
This guide will teach you all you need to know about removing green screens from your footage in After Effects.
Step-by-Step Guide to Removing Green Screen
Green screen technology is a staple in modern video production, allowing filmmakers and content creators to superimpose subjects onto virtually any background. Adobe After Effects is a powerful tool for removing green screens, and while this guide focuses on green screens, the techniques apply to other colored backgrounds too.
Sometimes, a simple KeyLight effect is enough to isolate your subject. However, for more refined results, combining KeyLight with Key Cleaner and Advanced Spill Suppressor is recommended.
Here’s a detailed guide on how to use these three effects together.
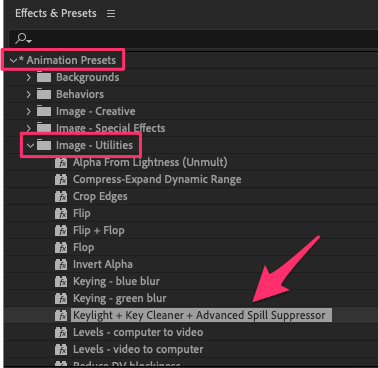
Step 1: Start selecting your green screen footage and opening the Effects & Presets panel. Navigate to Window > Effects & Presets to bring it up.
Step 2: In the Animation Presets folder, open the Image – Utilities subfolder and select the KeyLight + Key Cleaner + Advanced Spill Suppressor preset. Drag it onto your green screen footage.
Step 3: This preset combines three effects, each serving a specific purpose in green screen removal. We’ll begin by adjusting the first effect, KeyLight (1.2).
When using the KeyLight effect in After Effects to remove a green screen, you’ll adjust several settings, each playing a specific role in achieving a clean key (removal of the green screen). Here’s a simple breakdown:
- Eyedropper Tool: This is used to select the green color in your footage. By clicking on the green screen, you tell KeyLight which color to remove.
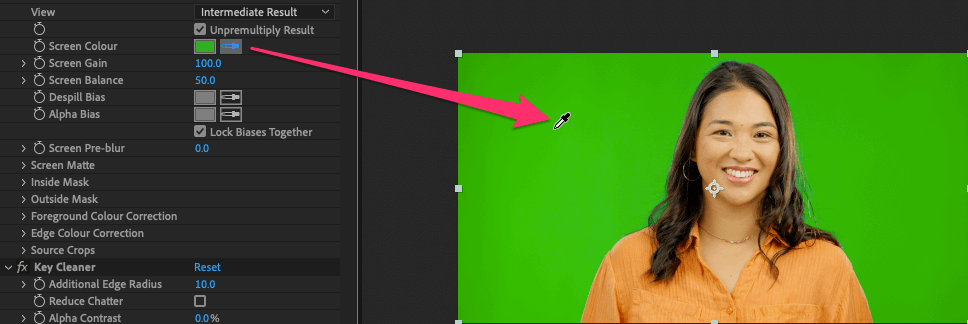
- Screen Gain: This controls the intensity of the keying effect. Increasing it can help remove more of the green screen, but too much can start affecting your subject.


- Balance: This setting helps balance the keying effect, ensuring that the green removal is even across the screen.


Step 7: If the key looks good at this stage, you can stop here. However, for more advanced refinement, continue with the next steps.
Note: If your subject appears slightly transparent but the background is well removed, a quick fix is to duplicate your layer several times, select them, and pre-compose.
Step 8: Enhance your key further with the Key Cleaner effect, located right after the KeyLight effect in your Effect Controls panel. You can tweak these settings:
- Additional Edge Radius: This helps to smooth out the edges of your subject, making the keying effect look more natural.
- Alpha Contrast: This enhances the contrast in the semi-transparent areas, like fine hair or glass, to make them more or less transparent.


The aim here isn’t to eliminate the remaining small green traces (we’ll address that in the next step), but rather to soften and naturalize our edges. As illustrated in the two samples above, although the edges are less green without the Key Cleaner effect, they appear pixelated and less natural.
Step 9: Now we can move on to the Advanced Spill Suppressor. The default settings often work well, but you can tweak the Suppression slider for finer control.


This removes any green spill (reflected green light) on your subject, ensuring that the colors of your subject remain true and unaffected by the green screen.
Step 11: Keep fine-tuning your adjustments in KeyLight, Key Cleaner, and Advanced Spill Suppressor. Alternate between these tools, tweaking their settings until you achieve a clean and natural-looking isolation of your subject.
With these steps, you’ll discover that After Effects provides a comprehensive toolkit for effectively handling green screen challenges, allowing you to create visually captivating and seamless compositions.

How to Remove Black or White Backgrounds in After Effects
Sometimes, you’ll need to remove black or white backgrounds from your footage. Here’s how to do it in After Effects:
Using the Shift Channels Effect for Black Backgrounds
When using this method to key out black backgrounds, evaluate your footage first. This method removes all dark areas, so if your clip contains essential dark elements, consider using masks to protect them.
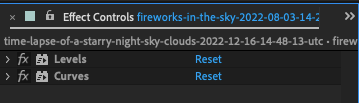
Step 1: Before starting, it’s helpful to apply the Levels and Curves effects to your clip. You don’t need to adjust them immediately; they’re there to fine-tune the keying later.
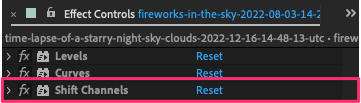
Step 2: Drag and drop the Shift Channels effect onto the layer you want to key out.
Step 3: In the effect’s settings, change the Take Alpha From option to Luminance.


Step 4: Continue tweaking your footage using the Levels and Curves effects applied earlier. Experiment with different settings before and after the Shift Channels effect to perfect your key.

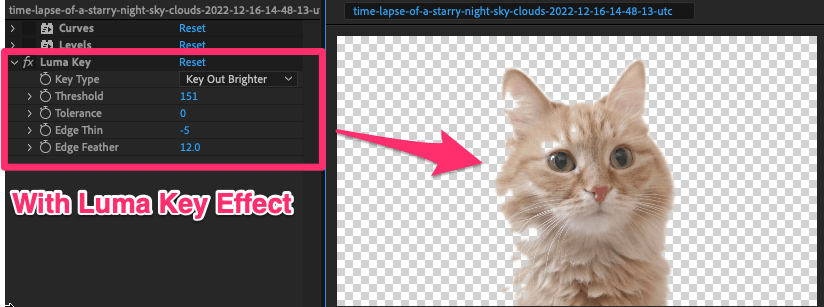
Using the Luma Key Effect for White Backgrounds
Keying out white backgrounds can be more challenging than black ones. This is because white backgrounds often share similar brightness levels with the subject, making it harder to isolate without affecting the subject itself. Here’s how you can tackle this with the Luma Key effect:
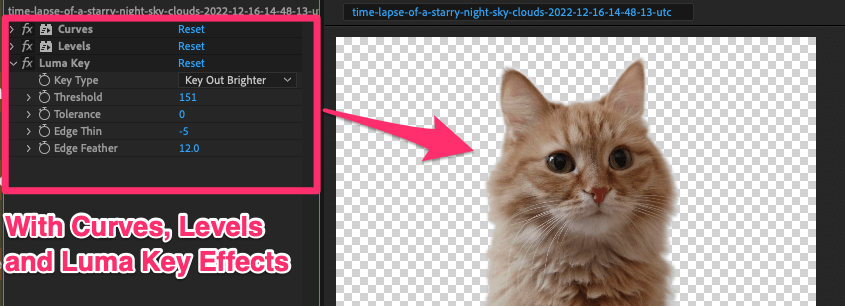
Step 1: As with black backgrounds, start by applying the Levels and Curves effects to your footage. These will be used later to refine the keying process.
Step 2: Add the Luma Key effect to your layer. This effect works by targeting specific luminance (brightness) levels in your footage.
Step 3: In the Luma Key effect settings, change the Key Type to Key Out Brighter.
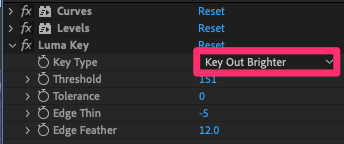
Step 4: Adjust the Threshold and Tolerance parameters. The Threshold sets the brightness level that will be keyed out, while Tolerance controls how gradual the keying effect is. For white backgrounds, you’ll typically set the Threshold towards the higher end of the scale.
You can also try adjusting Edge Thin, which contracts the boundary of keyed elements, or Edge Feather, which blurs the edges around the subject.
Step 5: Fine-tune the keying with the Levels and Curves effects.
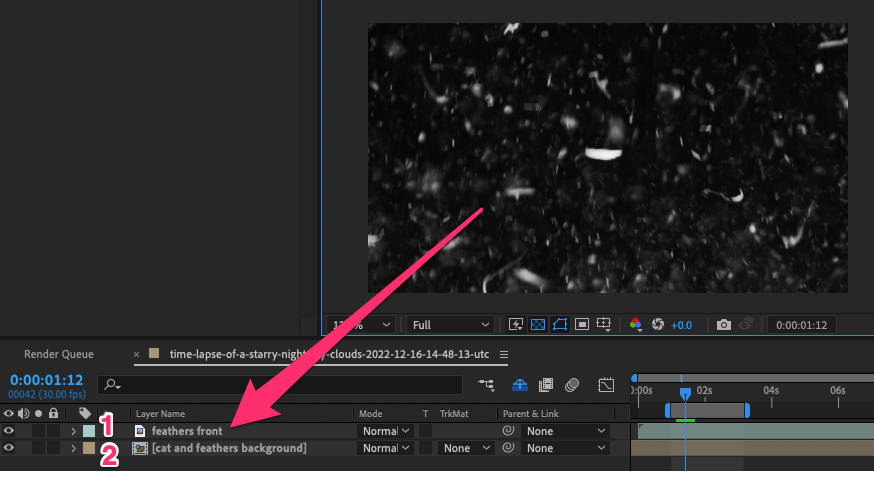
Step 6: If you notice parts of your subject getting keyed out, use masks to protect these areas.
This step requires a bit of precision but can improve the final result.

By following these steps, you can remove white backgrounds, even though it requires a bit more finesse compared to black backgrounds.
Using Blending Modes for Light or Dark Backgrounds
Blending Modes in After Effects offers a straightforward solution for removing black or white backgrounds. The effectiveness of this method can vary depending on the new background you’re planning to use underneath. Here’s how to do it:
Step 1: Import your footage and the new background into After Effects.
Step 2: Place the new background layer below your footage layer in the composition.
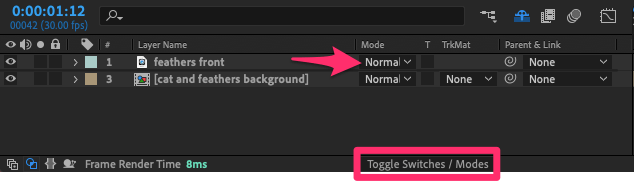
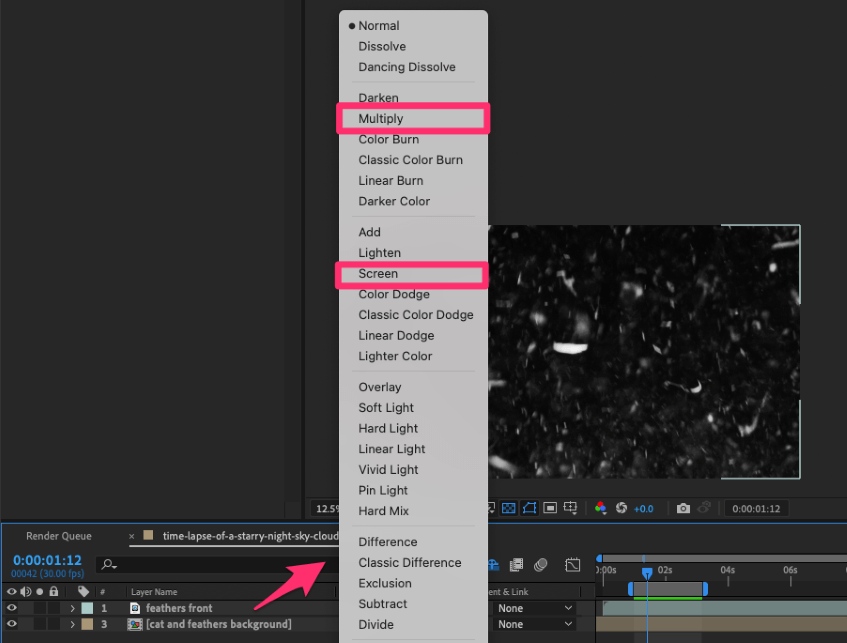
Step 3: Change the blending mode of your footage layer by clicking on the Mode drop-down menu. If the blending modes aren’t visible, click on Toggle Switches/Modes at the bottom of the timeline to reveal them.
Use Multiply to remove a white background and Screen to remove a black background.
Step 4: Adjust the layer’s opacity for better blending. Additionally, use Levels and Curves effects to fine-tune the brightness and contrast, making the background lighter or darker so the blending mode you applied works better.

Final Thoughts
Removing backgrounds in After Effects requires creativity and experimentation. Remember, the key to success with these tools is experimentation and adjustment based on the specific needs of your footage.
Combining KeyLight, Key Cleaner, and Advanced Spill Suppressor in After Effects allows for a more sophisticated approach to green screen removal. This method provides greater control over the keying process, ensuring a cleaner, more professional result.
Have you ever tackled green screen removal in After Effects? Share your experiences and tips in the comment section below!