
When it comes to the tools Photoshop offers us, there are multiple that are suited to removing one or more colors from an image! So if you’re looking to save a significant amount of time and find the best tool for the job, you’ve come to the right place.
My name is Skyler, and I’ve been using Photoshop on a personal and professional level for over a decade – and today I’ll be showing you how to remove a specific color from your images and projects in Photoshop.
By using the Magic Wand Tool or Color Range Tool in Photoshop we’re given the ability to make precise selections to remove a specific color or range easily! This method is best for solid colors and larger selections like backgrounds or backdrops of an image.
Thankfully though, these tools can handle one or more colors so complex imagery won’t be a problem either!
Table of Contents
Method 1: Magic Wand Tool
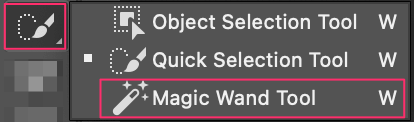
First, we’ll need to find the Magic Wand Tool. This will be the main tool we need to create and edit our selection in Photoshop. You can find the Magic Wand together with other selection tools in the toolbar.
Step 1: Select the Magic Wand Tool from the toolbar.
Once you’ve selected your Magic Wand Tool, we can move on to adjusting your settings to remove your selected color.
Step 2: Adjusting your settings. The most important thing to remember when adjusting your settings is that the type of color or colors you want to choose will change the settings you select.
For example, If you want to select a range of colors, you’ll want to increase the Tolerance. The higher the Tolerance, the more adjacent color pixels will be included in your selection.
Here’s a quick overview of what the different settings are.
- Tolerance: The tolerance levels refer to how many colored pixels are included in your selection. The higher the value, the broader the scope. Alternatively, the lower the value the more narrow the scope.
- Anti-aliasing: Enabling this feature will feather or smooth the edges of your selection to make it look more naturally appearing.
- Contiguous: Replaces contiguous colors (The colored pixels that share a common border, or are in sequence with one another) with the color under your cursor.
- Selection: This selects all adjacent pixels according to your tolerance and contiguous settings.
Great! Now that you’ve got the vocabulary down, you can better determine how you’ll adjust or edit these options to replace the colors in your image.
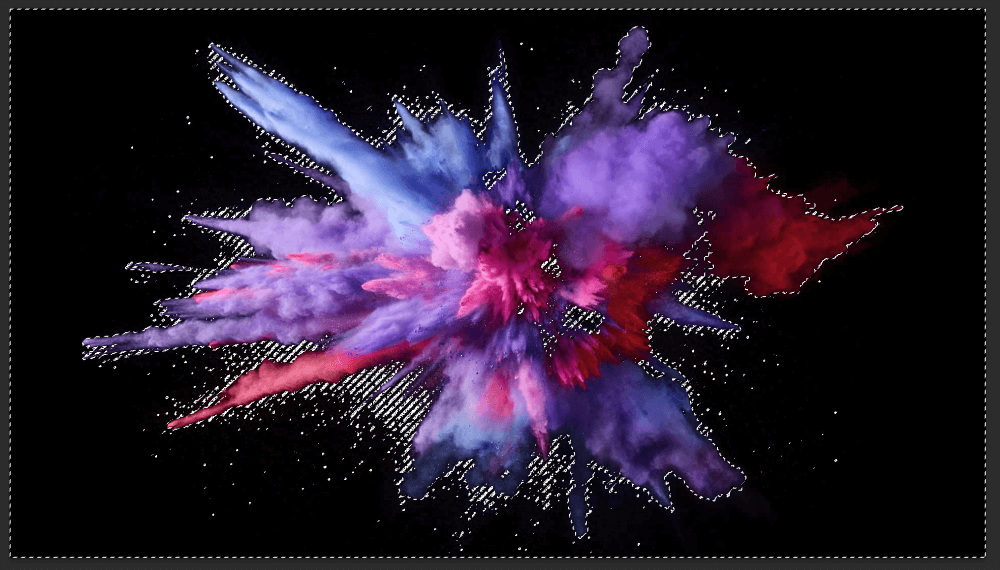
Step 3: Edit your selections. With the Magic Wand Tool enabled you can go ahead and click on the color you’d like to remove while holding down on the Option/Alt key.
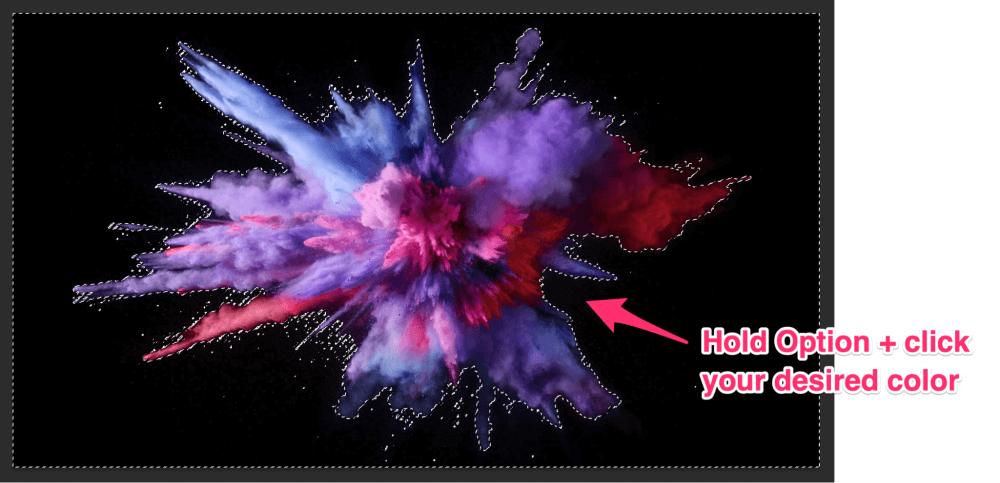
As you can see, with the black background I’ve selected the tool works, well, like magic! If there is a problem with your selection though, you don’t have to start all over. If the tool has missed a few targets, you can simply hold down on the Shift key and click on any additional colors it may have missed.
Alternatively, you can eliminate part of your selection by holding down on the Alt/Option key and clicking on the color you’d like removed.
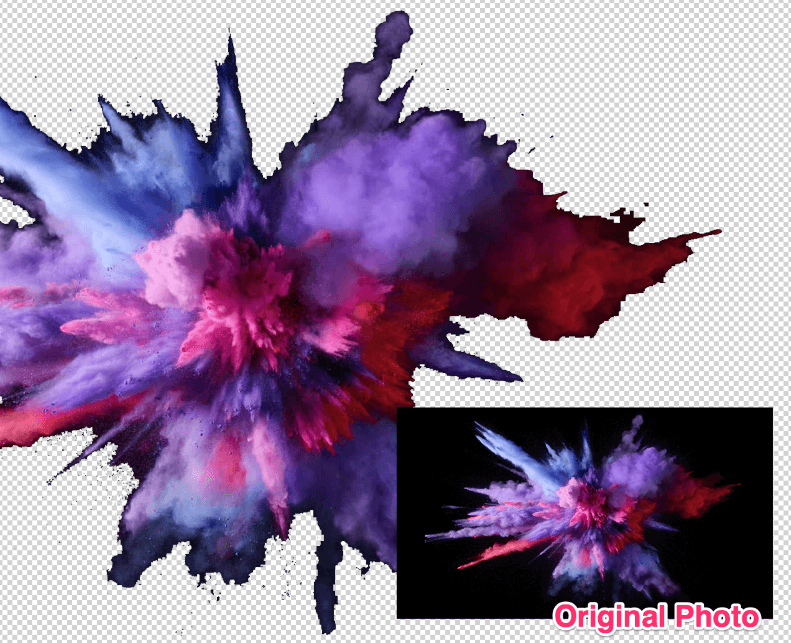
Step 4: Remove the selected color. Once you’re satisfied with your tolerance levels and selections, all you have to do is press the Delete key. This will delete everything inside your selection permanently.
If you’d like to continue to have the ability to edit after, follow along with a Non-Destructive Layer Mask in the next steps below instead.
To create a Non-Destructive Layer Mask, we’ll need to backtrack just a bit. Once your selection has been made with the Magic Wand Tool, we’ll want to Invert it instead.
Method 2: Color Range Tool
The Color Range Tool is another method for selecting and removing specific colors from your image. This tool allows for a more precise selection, with a few added adjustment settings like shade and tones. This is useful when your background or selected color is more of a gradient or varies in scale.
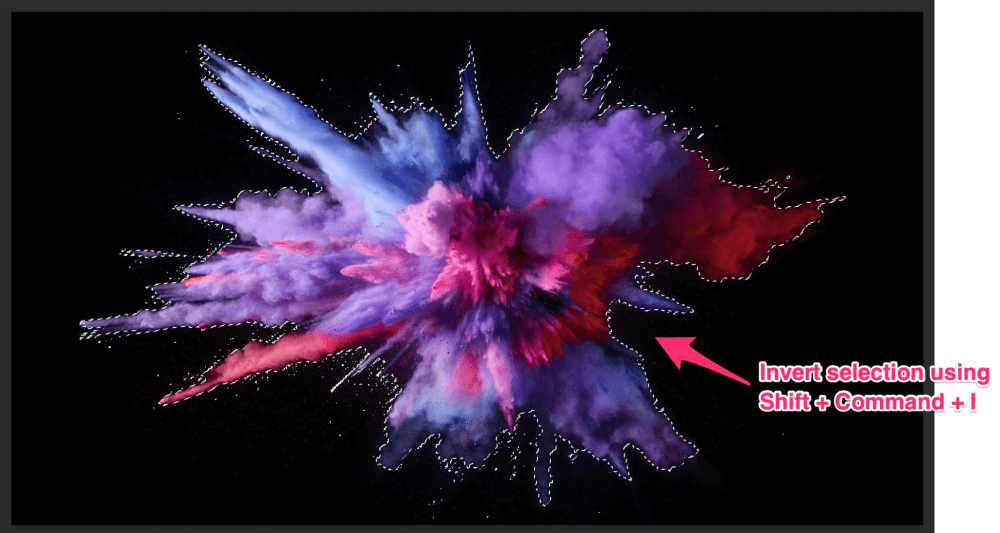
You can invert your selection by holding down Shift + Command/Ctrl + I on your keyboard.
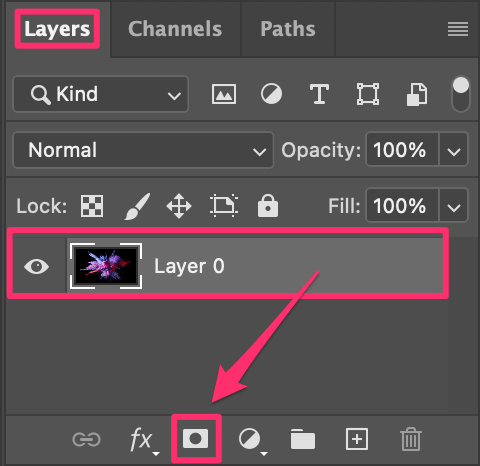
Once this is done, find your way to the Layers Panel. Ensure that your Image Layer is selected and click on the Layer Mask Icon below your Layers Panel. It resembles a square, with a hole punched out the middle.
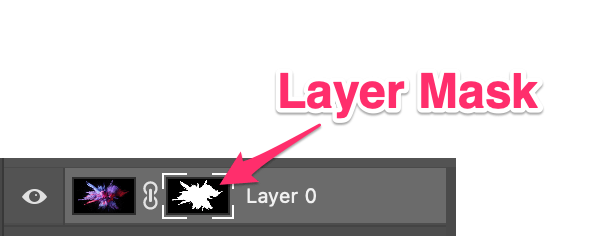
You’ll then see your Image Layer transformed into a Layer Mask. This will essentially block out everything but your selected part of the image, masking it.
Plus, you’ll retain the ability to edit your original image after the fact! Not too bad for a few extra steps, right?
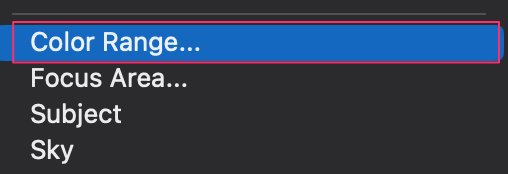
You can find the color range tool by navigating to Select > Color Range in your overhead menu.
This will summon the Color Range Menu, where you’ll either use the Eyedropper Tool to select a color from your canvas, or if you’ve got a darker selection you can set it to Shadows instead using the Select Drop-down Menu.
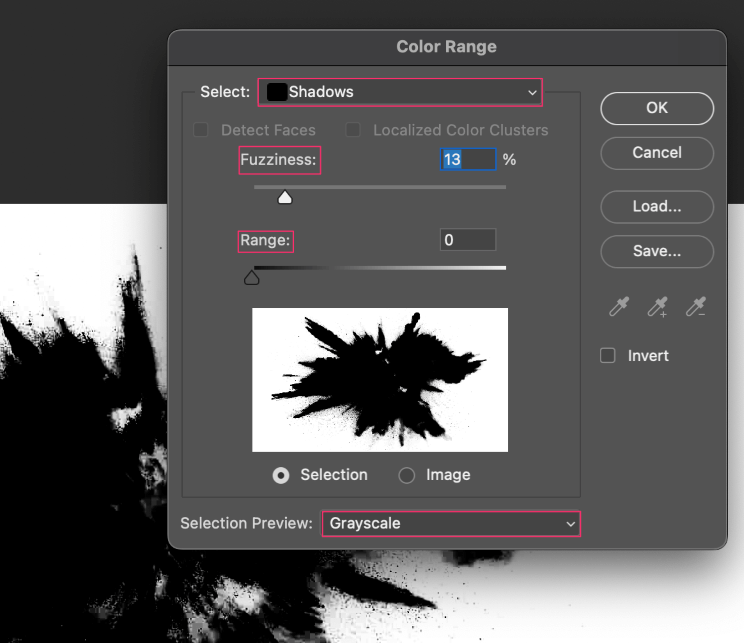
To achieve the best results, look at your Preview Window when making adjustments, and set the Selection Preview to Grayscale. Everything in the Preview Window that remains white will be visible, while the black portion is entirely transparent, or unselected.
Fuzziness adjusts the tolerance of your selected area so the higher you set this slider, the more lenient or liberal Photoshop will be in its selection of colors.
Range is only available under the Shadow option, and will adjust your selection of darker or lighter areas based on where the slider is set on this scale. Once you’re satisfied with your settings, go ahead and Click OK to finally make your selection!
Now that this is done, you’re once again given the option of using the Delete key to remove the selection entirely or alternately using a Layer Mask to preserve your image and work non-destructively.
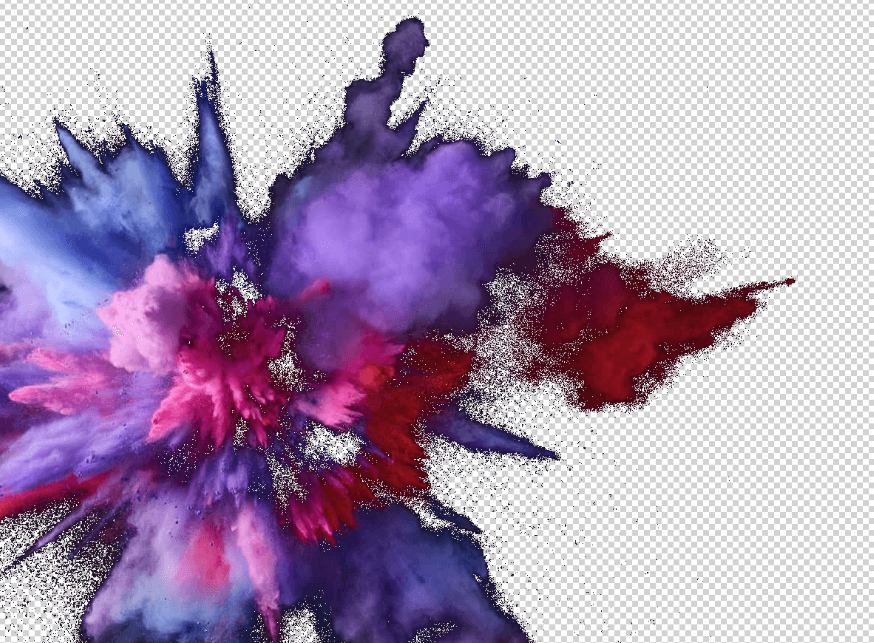
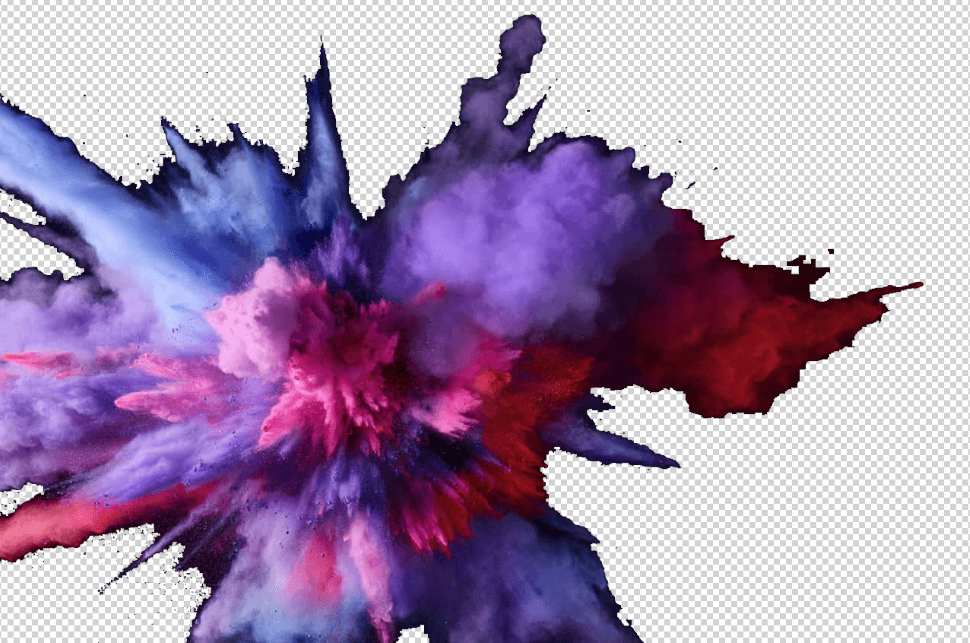
Wow! What fantastic results. Whether you decided to use Layer Masks or chose the Magic Wand over the Color Range Tool, you can now easily accomplish the removal of one or more colors in Photoshop like a pro!
Conclusion
When it comes to all the tools Photoshop offers us, we’ve got the advantage! There are always multiple ways and approaches to accomplishing any given task.
By using the Magic Wand Tool or Color Range Feature in Photoshop we’re given the ability to create uniquely precise selections and remove a specific color or range easily! I’m confident you’ll become a pro in no time with this newfound knowledge under your belt.