
You can save a Photoshop file as a JPEG by going to File > Save a Copy. If you’re working with an older version of Photoshop, you may be able to save a Photoshop file as a JPEG by going to File > Save As. Or go to File > Export > Export As which gives you different save options.
Hello! My name is Jayde, and I am glad you’re here. Today we’ll be going over something simple, yet not quite so. In the magical realm of Photoshop, let’s cover everything you need to know about saving a Photoshop file as a JPEG.
Table of Contents
Key Takeaways
- You can use the shortcut Alt/Option + Ctrl/Command + S to save a file copy in Photoshop.
- Under Edit > Preferences > File Handling you can check Enable Legacy “Save As,” to set JPEG, PNG, and other save options under the Save As option.
- The shortcut to Save As is Shift + Ctrl/Command + S.
- You can go to File > Export > Save for Web (Legacy) to view the Photoshop file copy side by side and edit other save options.
- By going to File > Export > Export As you have file options for JPEG, PNG, GIF, etc.
- The shortcut for Export As is Alt/Option + Shift + Ctrl + W.
- Before using Save As, Save a Copy, or Exporting, use the shortcut Alt/Option + Ctrl/Command + Shift + E to make a copied image layer of all the layers you have so that the layers will appear as you intended them to.
Note: The screenshots from this tutorial are taken from the Adobe Photoshop 2024 Windows version. Mac or other versions can look slightly different.
Method 1: Save a Copy
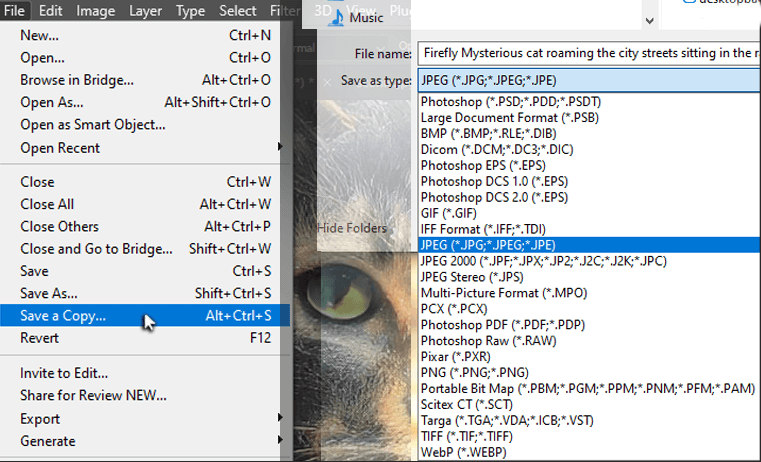
Use the shortcut Alt/Option + Ctrl/Command + S to select Save a Copy. This is where you will see multiple save options including JPEG, PNG, etc.
These options used to be found under Save As, so now I’ll show you how to change your Photoshop preferences so that you can save an image as a Jpeg by going to Save As.
Method 2: File Handling
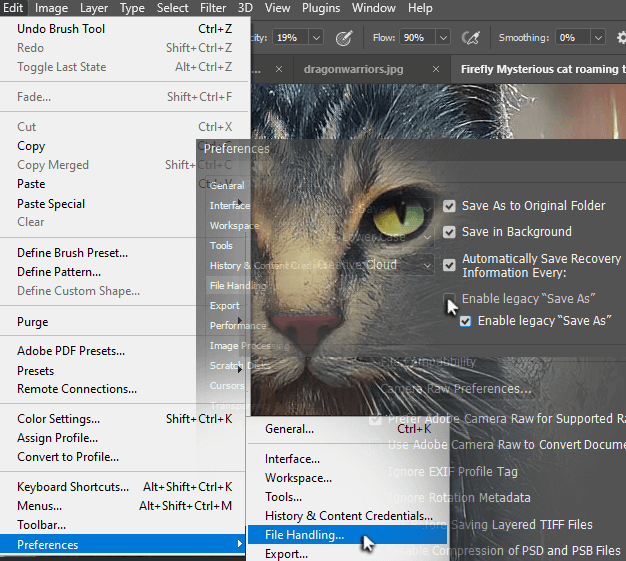
Go to Edit > Preferences > File Handling and check off the option for Enable legacy “Save As” and you’ll be able to go to Save As to save any file as a JPEG or something else.
Saving a Photoshop file as a JPEG risks losing some of its quality, or compromising its size just so you can upload it to a website. That’s why sometimes it’s a good idea for us to go over Export As.
Method 3: Export As
With Export As, you’re given a comparison of two different file versions and a multitude of save options.
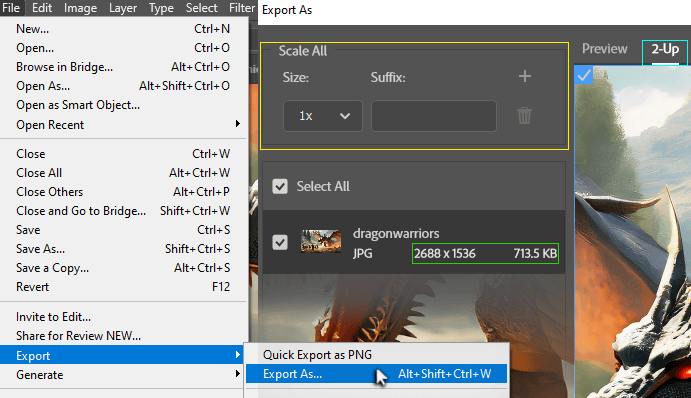
Step 1: Go to File > Export > Export As.
In the top left corner (yellow box), we see the option to save multiple different copies of this image in different sizes.
Below that (in the green box), we see the image dimensions and file size.
Click (in the aqua box) on 2-Up to see two image files side by side, for quality comparison.
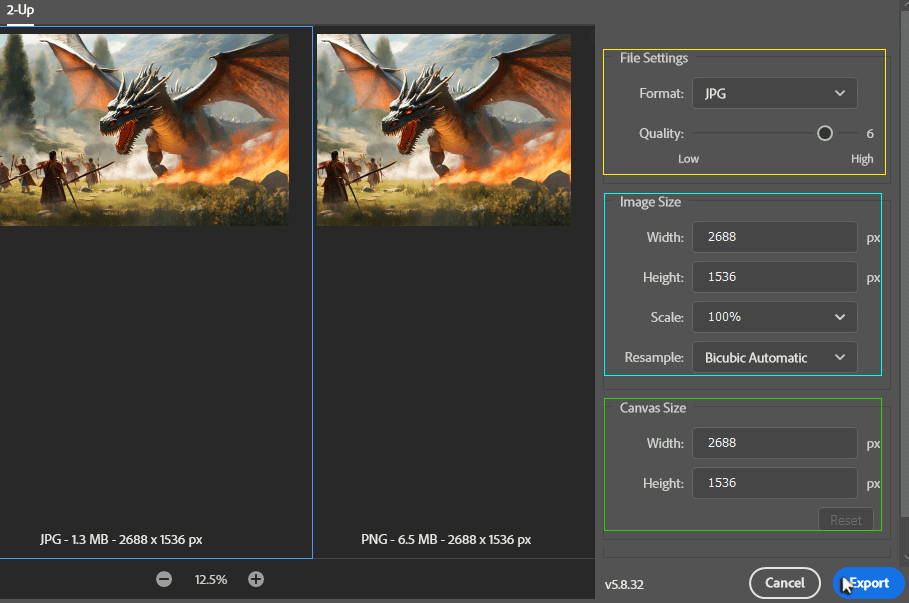
Step 2: On the right side under File Settings (in the yellow box), you can select the file format such as JPEG, PNG, GIF, and sometimes SVG, and change the quality of your image while comparing it to another file type.
When you select PNG, there is a checkbox for Transparency. Below that (in the aqua box) under Image Size, you can change the image size. And below that (in the green box) under Canvas Size, you can change the size of the canvas.
Final Tip: Sometimes a Photoshop file saved in a different format may have trouble properly rendering the layers and effects in your image. To prevent this, before saving, use the shortcut Alt/Option + Ctrl/Command + Shift + E to make an image layer copy of all your different layers as they appear.
Final Thoughts
As artists, we spend hours mastering our art pieces in this wonderful design program, so wouldn’t it be a shame to lose some of that hard work in lessened quality or ill-fitting file types?
I hope this tutorial answered any and all the questions you had about saving your artwork as a JPEG file.
Did you find this tutorial helpful? Let us know in the comments below.