
To slow down a video in After Effects, you can use the Time Stretch function for a quick adjustment, or Time Remapping for precise control. For more high-quality slow motion, apply the TimeWarp effect with keyframe adjustments.
Hi, I’m Zoe, an illustrator and graphic designer. Today, I want to dive into a topic that’s essential for any video editor or motion graphics artist: slowing down a video in After Effects. Whether you need to make a clip longer or just want to add some cool slow-motion effects, I’ll show you how it’s done. It’s a technique I use all the time and it’s easier than you might think!
In After Effects, there are several methods to achieve this, each with its unique advantages. We’ll delve into three main techniques: Time Stretch, Time Remapping, and the TimeWarp Effect. Additionally, I’ll show you how to smooth out any choppy slow-motion effects, ensuring your footage looks professional and seamless.
Ready to learn? Let’s get started!
Table of Contents
Key Takeaways
- Slowing down videos in After Effects can be achieved through three methods: time stretch, time remapping, and time warp.
- Time Stretch allows you to adjust the speed of the entire video clip, while Time Remapping enables you to control the speed of specific portions.
- The TimeWarp effect in After Effects provides advanced options for fine-tuning the speed and creating unique slow-motion effects.
- Use transition effects and frame blending to ensure a seamless and clean look in your slowed-down videos.
Note: All screenshots from this tutorial are taken from the After Effects Mac version.
This article provides a practical guide to creating slow-motion effects or adjusting video duration.
Method 1: Time Stretch
Time Stretch is the simplest method to slow down your footage. It’s perfect for when you need a quick fix to adjust the speed of an entire video clip. Follow these steps to slow down your videos using Time Stretch:
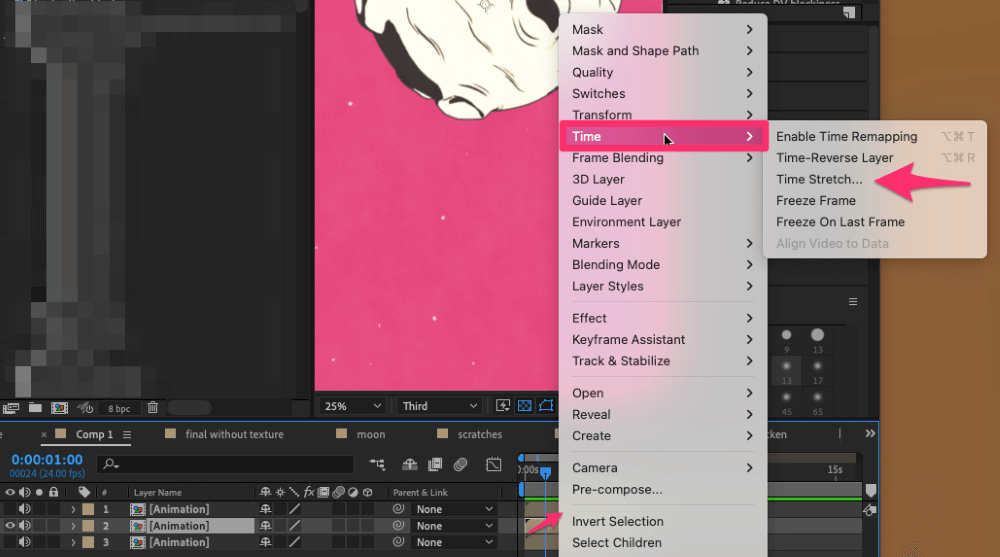
Step 1: In your timeline, right-click on the clip you want to slow down, navigate to Time, and select Time Stretch.
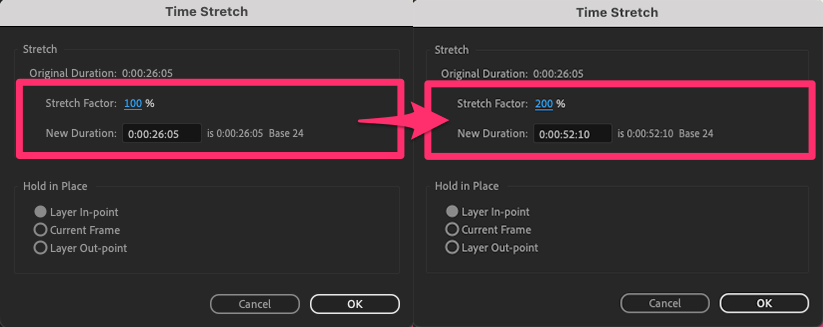
Step 2: A dialog box will appear. Here, you can set the Stretch Factor. A value over 100% will slow down your video. For example, setting it to 200% will make your clip play at half its original speed.
Step 3: Alternatively, you can change the Duration setting to fix the time length of the video instead. This is very handy if you’re slowing down your video to fit within a specific timeframe.
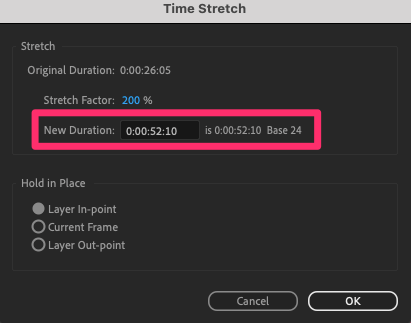
Click OK to save the settings, and your video is now slowed down according to the percentage or duration you chose!
Method 2: Time Remapping
Time Remapping offers more control and is ideal for slowing down specific parts of your clip while keeping other parts at normal speed.
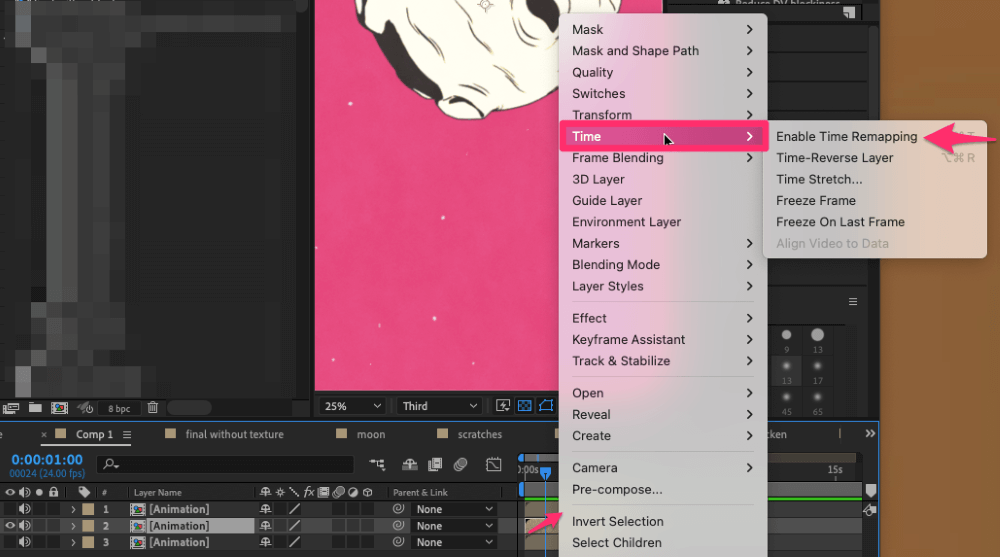
Step 1: Right-click on your clip, then click Time > Enable Time Remapping.
Step 2: You’ll see two keyframes added to your clip – one at the start and one at the end.

To slow down a specific part, add a keyframe where you want the slow motion to start and another where you want it to end.
Step 3: To slow down a specific portion of your clip using Time Remapping, drag the third keyframe to the right. This action increases the time between your second and third keyframes. The further apart these keyframes are, the slower the playback will be in that section of the clip.

By manipulating the distance between these keyframes, you gain precise control over the speed, allowing you to create slow-motion effects in your video.
Method 3: TimeWarp Effect
The TimeWarp effect in After Effects is an advanced tool perfect for crafting high-quality slow-motion effects. Here’s how to use it:
Step 1: In the Effects & Presets panel, search for and apply TimeWarp to your clip.
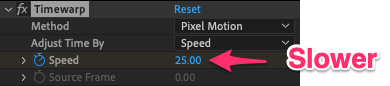
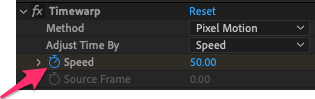
Step 2: In the Effect Controls, locate the Speed setting. Adjust this to control the playback speed. A value of 50 is normal speed, while lower values slow down the footage.
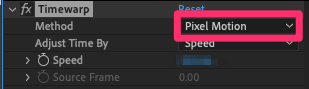
Step 3: For smoother slow motion, especially with lower frame rate footage, set the Method to Pixel Motion. This method generates new frames for a fluid effect.
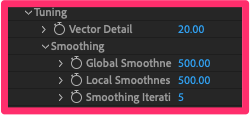
Step 4: Under the Tuning section, tweak the Vector Detail and Smoothness settings to refine your slow-motion effect.
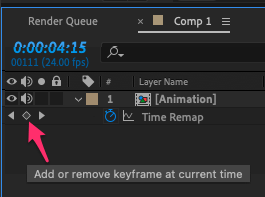
Step 5: To gradually introduce the slow motion, start by setting a keyframe at the point in your timeline where the slow motion should begin. Click the stopwatch next to Speed and set it to 50 (normal speed).
Step 6: Move forward in the timeline to where you want the full slow-motion effect. Adjust the Speed setting lower to slow down the footage. After Effects will add a new keyframe automatically.

Step 7: Repeat the same steps in reverse to ease out the slow-motion effect.
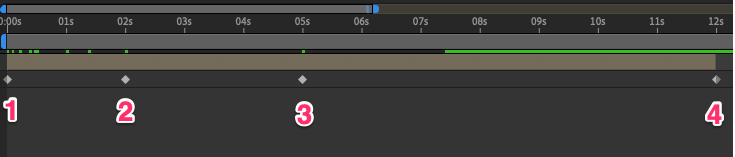
Step 8: Fine-tune the effect by adjusting the position and values of these keyframes. This ensures a natural transition into and out of the slow motion.
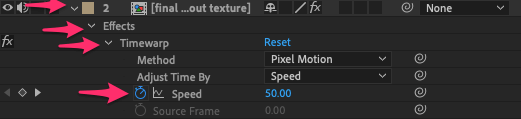
To view and adjust the keyframes, expand the Effects panel, then click on TimeWarp, and finally Speed. Drag the keyframes along the timeline to achieve the desired effect.
With TimeWarp, After Effects enables you to create a smooth slow-motion effect. You can apply gradual transitions, altering the speed seamlessly for a polished slow-motion effect.
Pro Tip: Frame Blending for Smoother Slow Motion
When using Time Stretch or Time Remapping in After Effects to slow down a video, you might notice the movement becomes choppy. This occurs because the frame rate of your slowed-down clip is now lower than the frame rate of your overall project.
To make the motion smoother, you can use Frame Blending. After Effects has two kinds:
- Frame Mix: This is quicker to render but might not look as smooth for significantly slowed footage.
- Pixel Motion: This takes longer to render but usually makes the slow motion look smoother, especially if you’ve slowed the footage down a lot.
Here’s how to make the blending between your frames as smooth as possible:
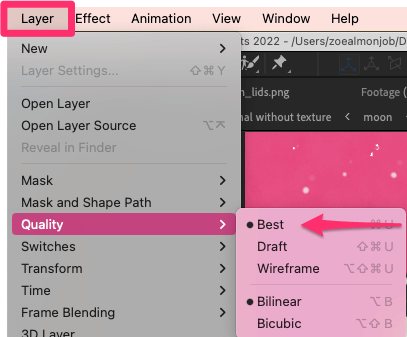
Step 1: Click on the layer in the Timeline panel, navigate to Layer > Quality, and make sure Best is selected.
Step 2: With your layer still selected, go to Layer > Frame Blending and pick either Frame Mix or Pixel Motion.
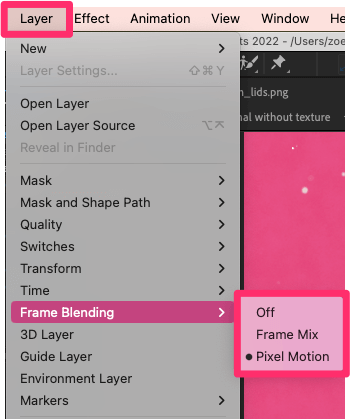
You’ll now see a checkmark next to the Frame Blending you chose and a switch in the Timeline panel, showing it’s on.

Note: You can’t apply frame blending to a whole precomposition layer at once. But, you can apply it to each layer nested within a precomposition.
Using Frame Blending, you can now smooth out the motion in your video when you change its speed.
Final Thoughts
Slowing down a video in After Effects can add dramatic emphasis to your projects, or simply help your footage fit into the desired timeline. Each method has its strengths: Time Stretch for simplicity, Time Remapping for precision, and TimeWarp for quality.
The key to successful slow-motion is not just in the slowing down but in how seamlessly it integrates with the rest of your footage. Use transition effects and minimize choppiness for a polished, professional look.
Have you tried slowing down videos in After Effects? Which method do you prefer? Share your experiences and tips in the comments below!