
A Smart Object is something you can create in Photoshop to contain multiple images, layers, shapes, or text. It’s a sort of nesting doll feature in Photoshop that allows you to combine multiple layers of different sorts into one “packaged” layer.
By merging these into a Smart Object, you can add filters and completely transform them while retaining the ability to edit these compressed layers individually in the future. I usually avoid rasterizing shapes or text, which makes them uneditable in the future and lessens the resolution.
Hello, you wonderful, artistic person. I am also a person who dabbles in Photoshop, and today I’ll be sharing what I know about Smart Objects. What they are, and how to use them.
Table of Contents
Key Takeaways
- A single layer can become a Smart Object as well. Copied Smart Objects are all connected, so that if any one of them is edited, the same changes appear to them all.
- To open the “package” and edit the contents, double-click on the Smart Object thumbnail.
- Whenever changes are made inside a Smart Object’s external file, be sure to use the shortcut Ctrl/Command + S to Save your changes.
- A single layer may become a Smart Object so that any filters added to it become Smart Filters, which offer a layer mask to target which area the filter is visible.
- Smart Objects can also be Transformed and Warped while retaining the original shape of the artwork inside the Smart Object.
- It’s great to convert shapes and vectors into Smart Objects to avoid rasterizing them, thereby lessening their resolution and quality.
Note: The screenshots from this tutorial are taken from the Adobe Photoshop Windows version. Mac or other versions can look different. I generate AI images on Firefly.Adobe.com to use in these tutorials.
How to Use a Smart Object in Photoshop
Since we covered what a Smart Object is, let’s delve into how to use it.
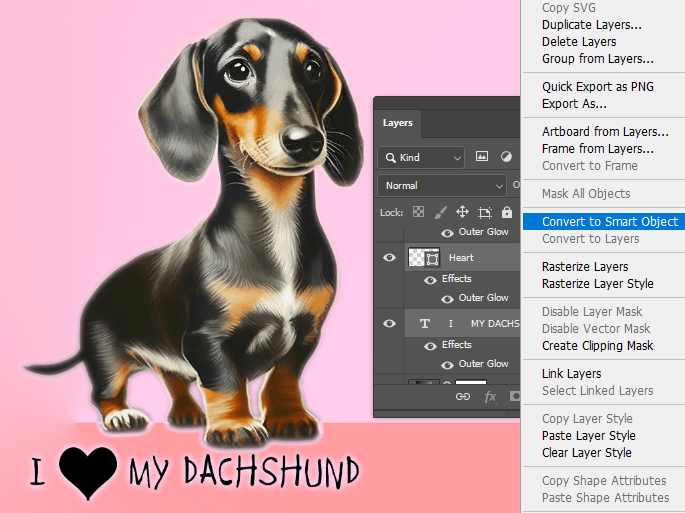
Step 1: To begin, I’m going to select both my Heart shape layer and my Text layer by selecting one, holding Shift, and clicking on the other.
Right-click on the selected layers and select Convert to Smart Object.
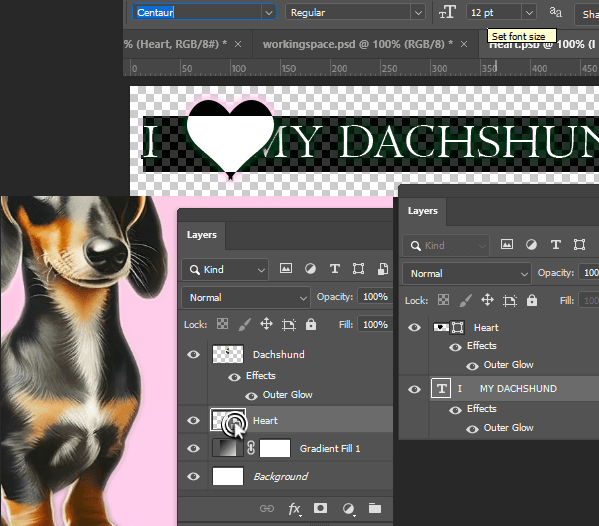
Step 2: Now both of these layers are inside this Smart Object named Heart.
Let’s edit the text within the Smart Object. Double Click on the Smart Object thumbnail to open its contents in another file.
I’m going to change the font by double clicking on a word and selecting a new font from the drop-down in the action bar.
After a few more changes, I used the shortcut Ctrl/Command + S to Save my changes.
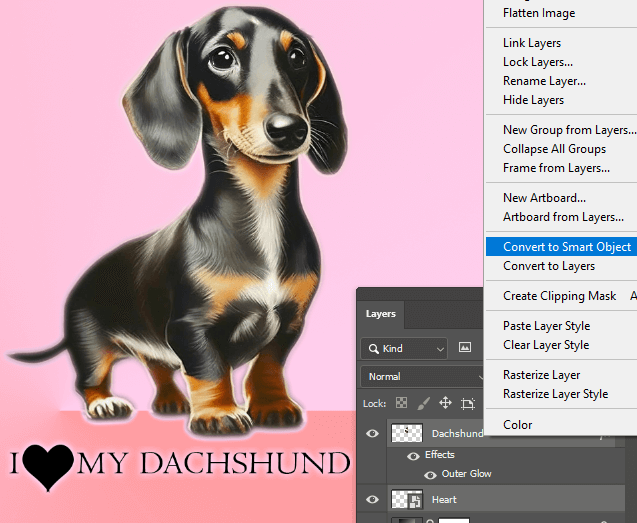
Step 3: Returning to the original file, I see that my Smart Object has been updated. Now I’m going to create another Smart Object containing Heart and the Dachshund layer.
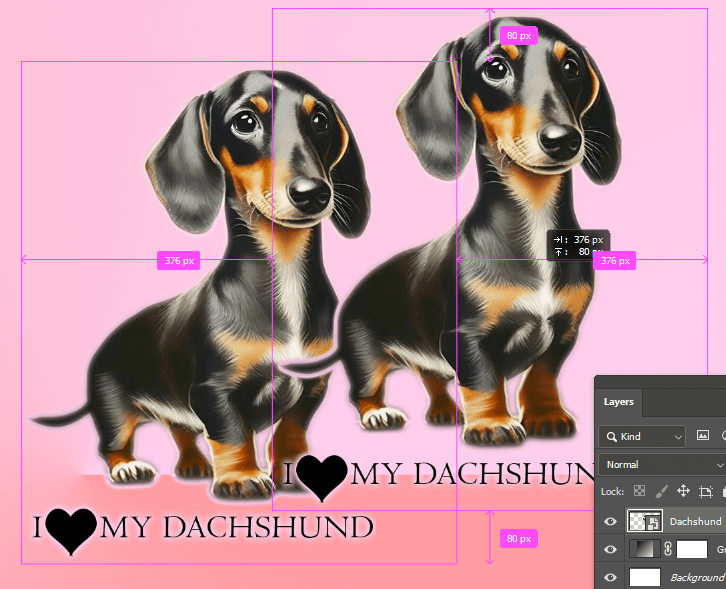
Step 4: To copy this nested Smart Object, hold Alt as you click and drag it.
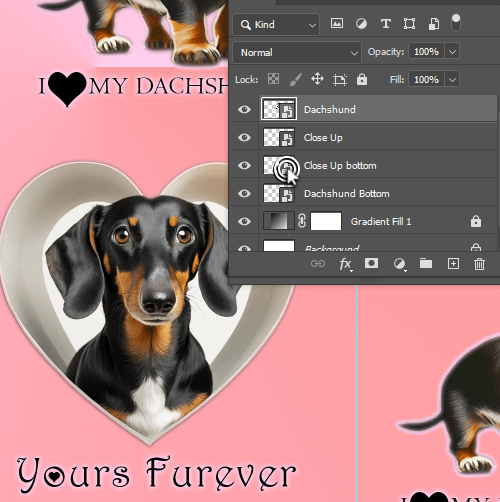
Step 5: I’ve added a second design named Close Up and duplicated it the same way.
Double-click on the thumbnail of either of the Close Up Smart Objects to open the contents.
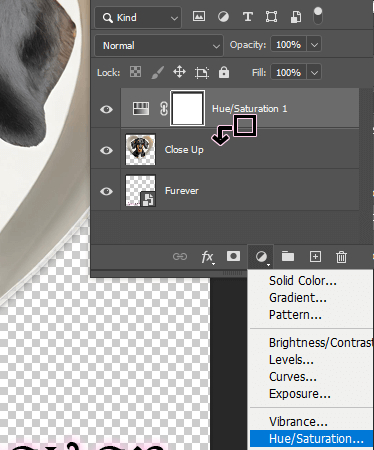
Step 6: Add an adjustment layer for Hue/Saturation over the Close Up layer, then hold Alt and click between the two layers, when your cursor changes like so.
This clips the adjustment layer to the layer below it.
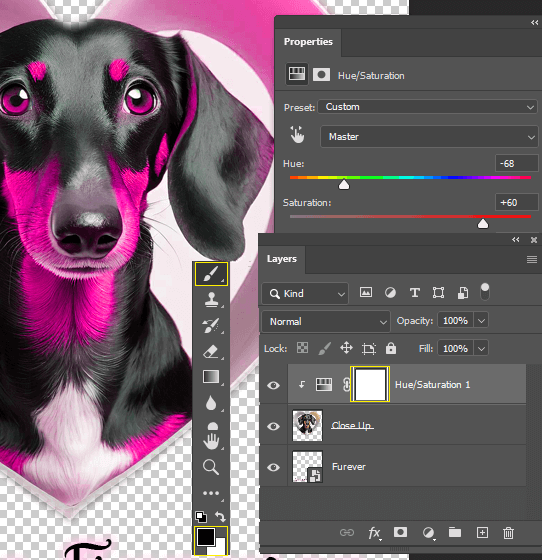
Step 7: With the adjustment layer selected, edit the Hue and Saturation in the Properties panel.
Since I don’t want this adjustment to affect the dog, I will use the paint tool to paint with black in the white box, which is the mask provided with the adjustment layer.
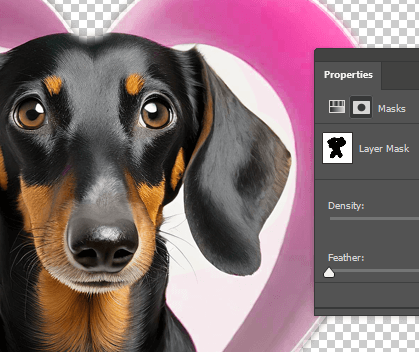
Once I’m done painting over the dog within the layer mask, I use the shortcut Ctrl/Command + S to Save my changes here and return back to the original file.
Step 8: Since I duplicated the Close Up Smart Object as we did in the previous step, the changes I made to it are reflected in the copy as well.
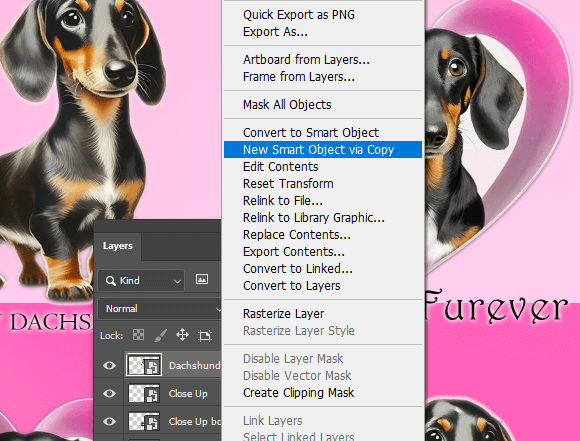
Let’s say you want one unique Smart Object copy that acts independently of the others. Right-click on any Smart Object and select New Smart Object via Copy.
The changes you make to that Smart Object copy will not affect all the previous ones, and vice versa.

Step 9: I’m happy with my design now, so I want to connect all of these and add a smart filter. Select all of your Smart Objects and right-click on them to Convert to Smart Object.
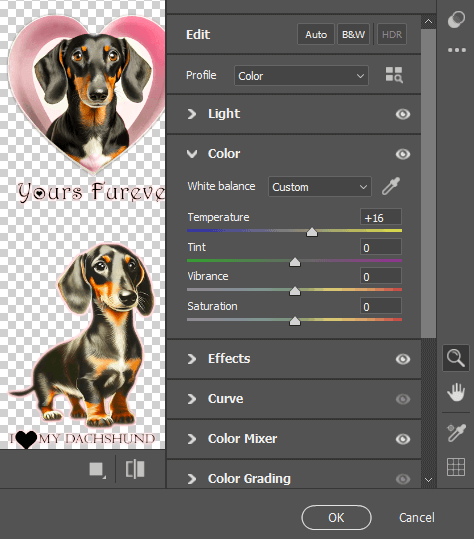
Step 10: Go to Filter > Raw Camera Filter and make whatever adjustments you’d like, then click OK at the bottom.
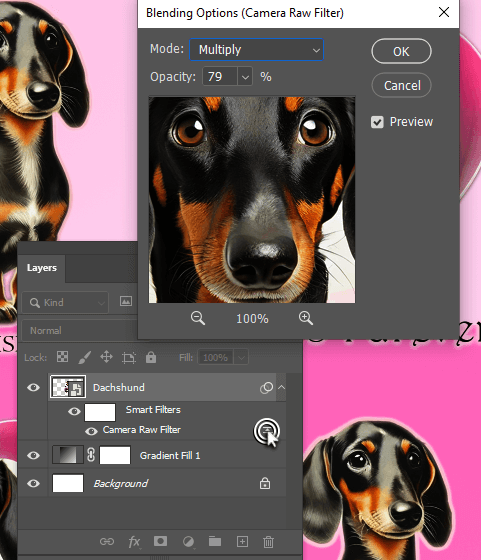
Step 11: Now I have a mask included in my Smart Filters, so that I may exclude any section of my artwork from these adjustments.
I can also double-click on the sliders to adjust the Blending Options for the filter in question.
Final Thoughts
With that, we’ve gone over everything there is to know about Smart Objects. This is an incredibly useful feature in Photoshop, and now you know why.
Did you know you can warp text by converting it into a smart object? Did I answer all your questions about Smart Objects? Let me know in the comments below.
Be sure to check out some of my other Photoshop tutorials, like How to Remove Background and Make it Transparent and How to Use the Pen Tool.