
The quickest way to remove blemishes and smooth skin is to use Photoshop’s AI Generative Fill. You can also do it yourself with the use of filters and layer masks.
Photoshop makes it extremely easy to perfect anyone’s skin. Let’s dive into this tutorial and build our photo editing skills.
Table of Contents
Key Takeaways
- Select the face/shoulders/skin, without the eyes, eyebrows, nostrils, or lips. On your Contextual Task Bar, type in the Generative Fill bar “remove face acne.”
- With your image layer selected, always use the shortcut Alt + Ctrl + J or Option + Command + J (for Mac users) to make changes to your image nondestructively.
- When it comes to layer masks, black conceals and white reveals.
- Besides smoothing, we will also cover how to add skin texture and color tones.
Method 1: Generative Fill
One of the easiest and quickest ways to remove acne or blemishes from the skin is by using Photoshop’s newest AI Generative Fill.
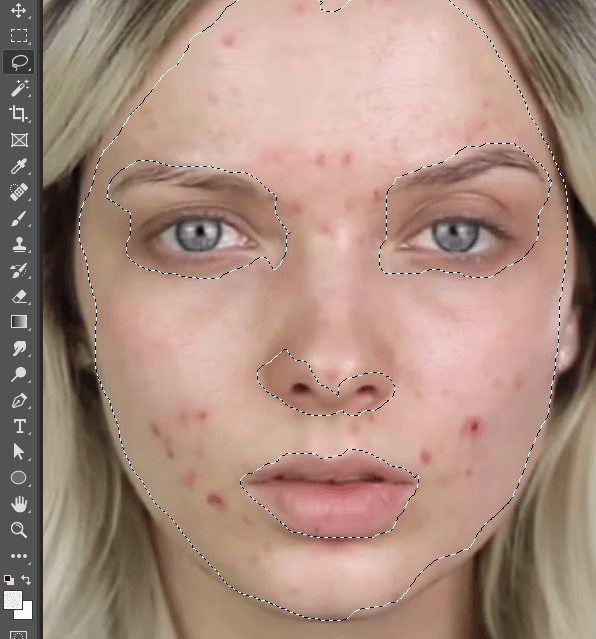
Step 1: Select the face with the Lasso tool and then hold the Alt/Option key to go around the eyes, eyebrows, nostrils, and lips.
Step 2: In the Contextual Task Bar, type in Remove Face Acne. You can also type in other things, separated by commas. Try skin smoothing, skin toning, etc.
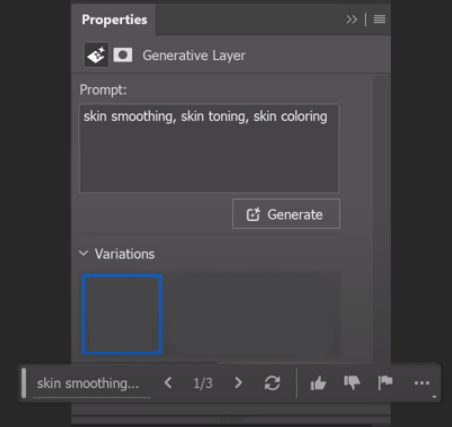
Step 3: Choose the option you like the most. For more generated options, simply select one of the options provided and click Generate.
This will most likely have removed the acne and fixed any skin blemishes. However, I want to go over other ways to smooth skin in Photoshop, so that you can learn more and increase your graphic design skills.
Method 2: Photoshop Filters
You can make skin smoother using Photoshop effects and filters.
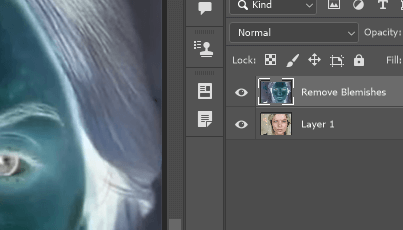
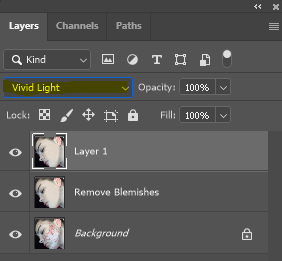
Step 1: Make a copy of your image and use the keyboard shortcut Ctrl/Command + I to invert your image.
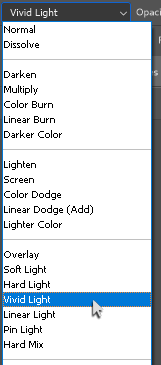
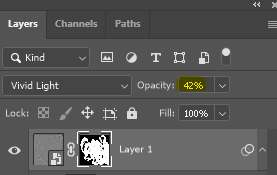
Step 2: Change the blending mode of the layer to Vivid Light.
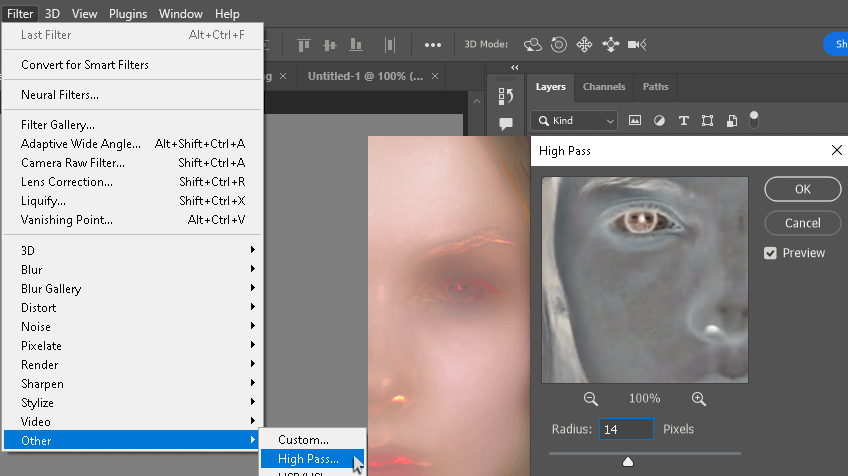
Step 3: Go to Filter > Other > High Pass. Change the radius to a point where the skin is heavily blurred.
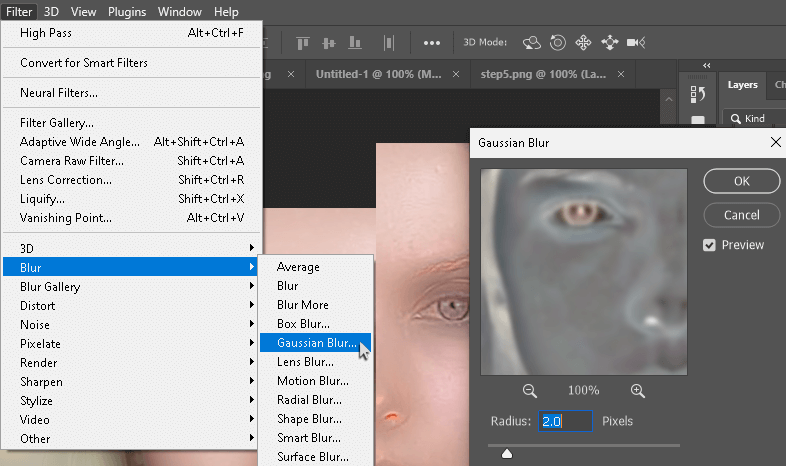
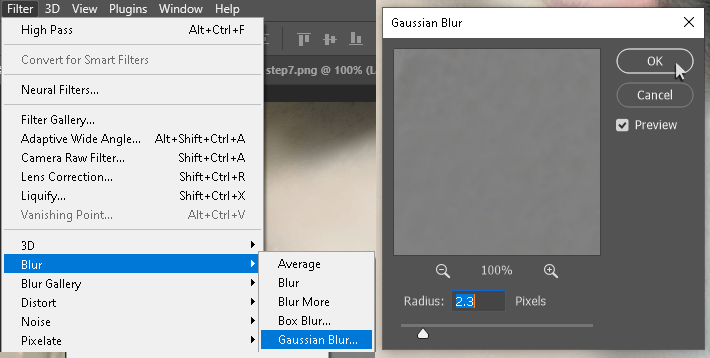
Step 4: Go to Filter > Blur > Gaussian Blur and change the radius to a point where the skin’s natural texture starts to show.
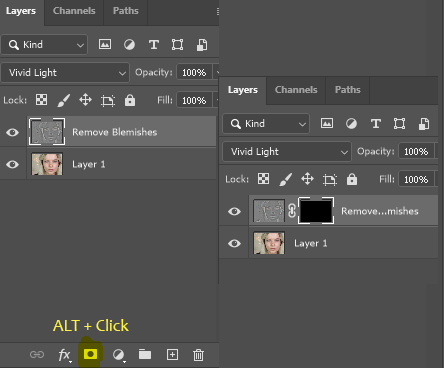
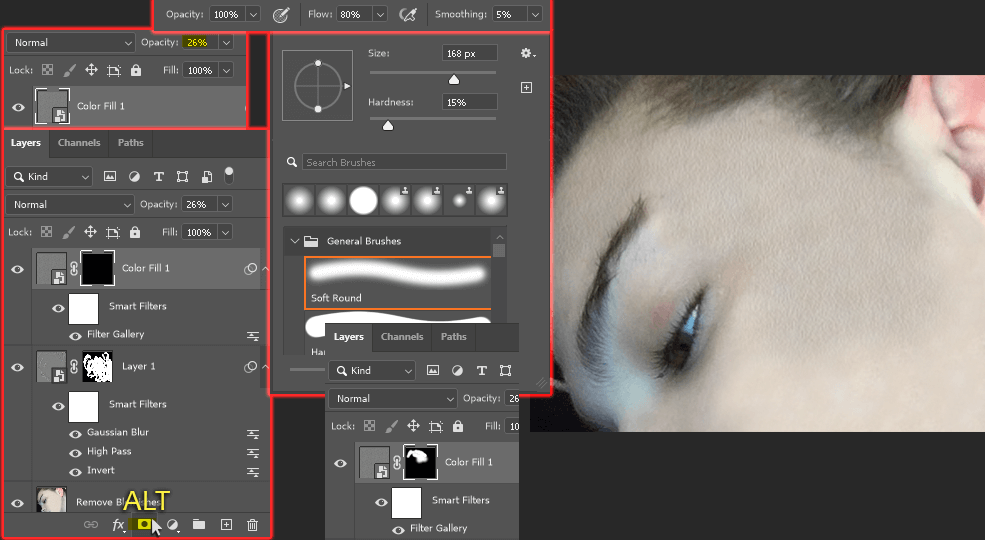
Step 5: Create a negative layer mask (one filled in black, which is to conceal) by holding Alt/Option and clicking on the layer mask symbol.
Step 6: Use the Brush with a white foreground to paint on the layer mask. White reveals, so we are applying the blurry, soft skin that we created.
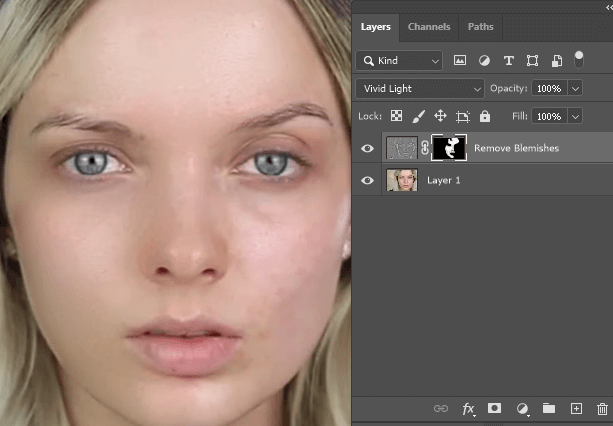
Avoid the edges, nostrils, lips, eyes, and eyebrows. Don’t forget the neck and any other skin visible in the image. I used a feathered brush with 5% smoothing.
Adjust the opacity of this layer if you’d like.
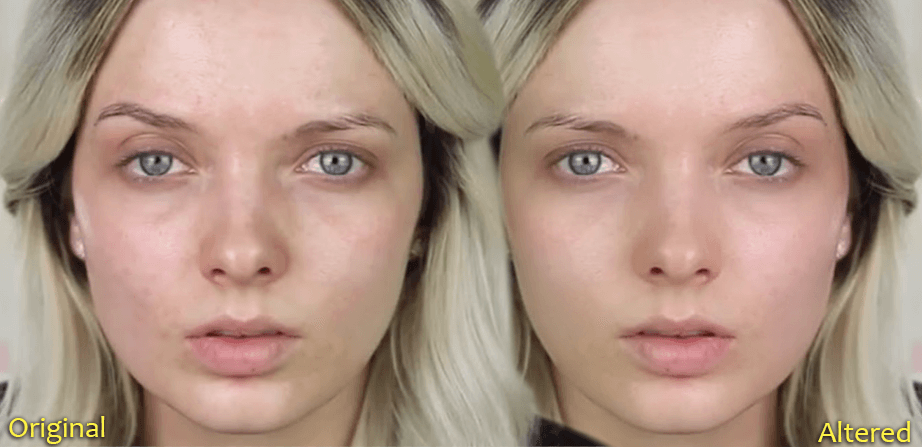
Here’s the final comparison.
Method 3: Spot Healing Brush
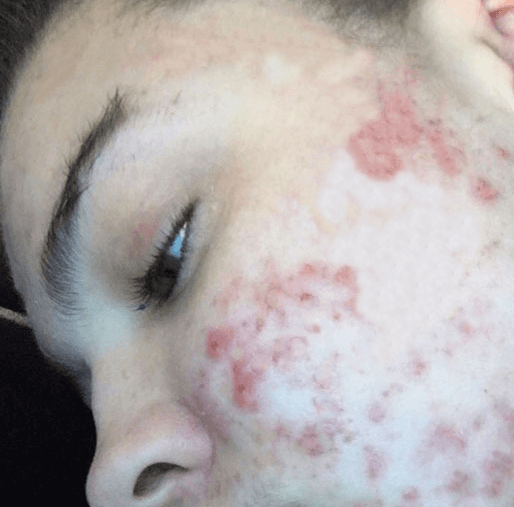
If you want to remove skin blemishes or acne in Photoshop, this is the go-to method.
Step 1: Create a duplicate of your image.
Step 2: Select the Spot Healing Brush tool with 100% hardness. Photoshop will fill in these spots for you with each click.

Step 3: Use the Clone Stamp Tool to remove the reddened areas. Hold Alt/Option and click on a clear area of clear, healthy skin. Then, click on the red area to paint over it with the sourced area.
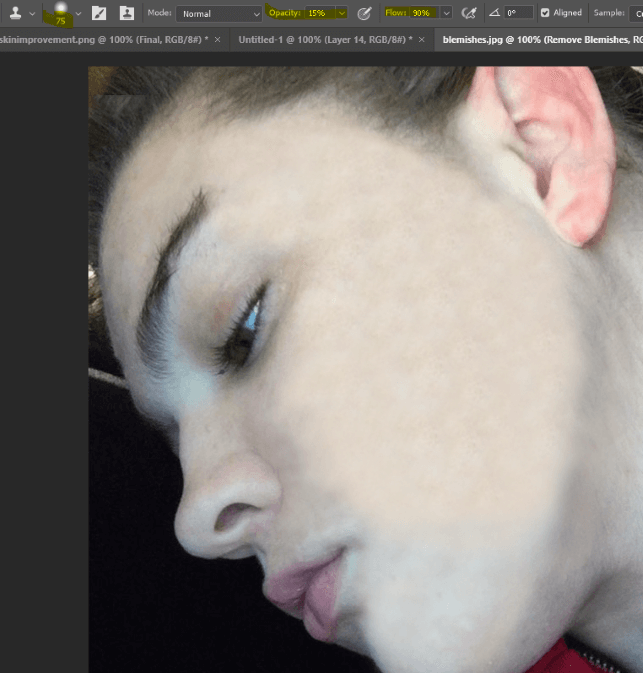
As you can see in this image, I used a feathered clone stamp tool with reduced opacity and flow to blend the different skin tones. Once I had a clear area of skin, I could use that as my source and lessen the opacity as I spread it over skin color changes. Maintain the jawline.
Step 4: Once you’ve removed the red spots, use the shortcut Alt + Ctrl + Shift + E to make a copy of what you’ve done so far. Change the blending mode of this new layer to Vivid Light.
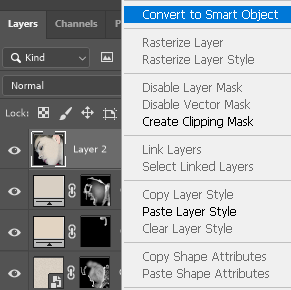
Step 5: Right-click on this layer to Convert to Smart Object.
Step 6: Use the shortcut Ctrl/Command + I to invert this layer.
Step 7: Go to Filter > Other > High Pass. Increase the Radius until all the blemishes are invisible.

Step 8: Go to Filter > Blur > Gaussian Blur and increase the radius until the skin’s natural texture begins to show.
Step 9: Hold Alt/Option and click on the layer mask symbol to create a filled mask. Like before, we’re going to use the Brush tool to paint on the effects we’ve created, avoiding the edges, nostrils, eyes, lips, and eyebrows. You can adjust the size of your brush with the left and right bracket keys.
Lower the opacity if it’s too strong.
Method 4: Add Natural Skin Texture
Playing with the texture filter and blending mode is another way to smooth skin in Photoshop.
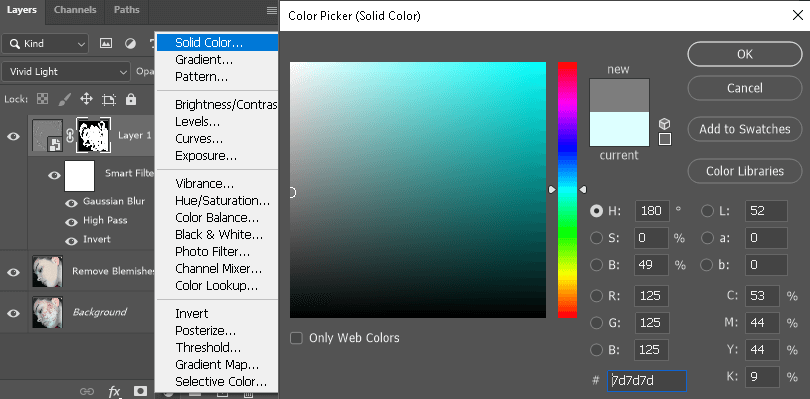
Step 1: Add an adjustment layer for Solid Color and choose a medium gray.
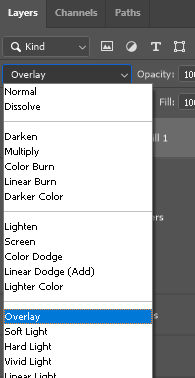
Step 2: Change the Blending Mode to Overlay.
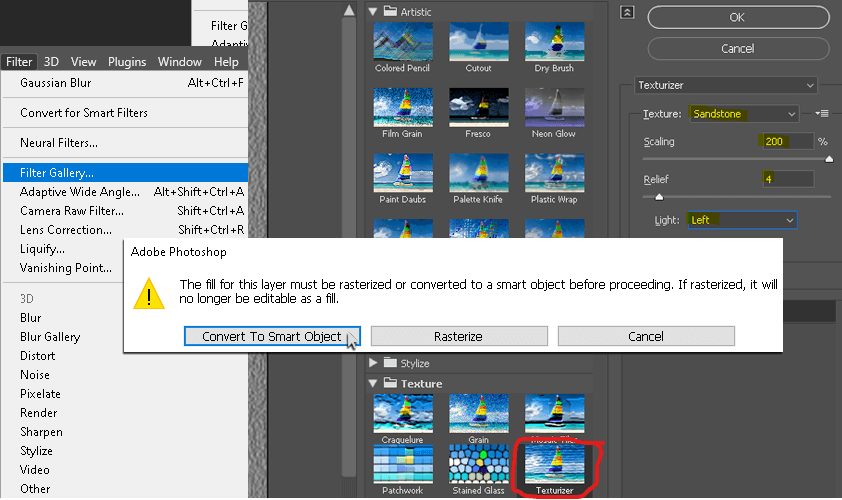
Step 3: Go to Filter > Filter Gallery. On the popup, click Convert to Smart Object. In the Texture folder, choose Texturizer. You can see my highlighted settings here.
Step 4: Lower the opacity of the solid color fill. Hold Alt/Option and click on the layer mask symbol. Like before, use the Brush with white to paint this texture on the face and neck. In places where there would be less texture, like the nose, you can reduce the flow or opacity of the brush.
Method 5: Camera Raw Filter
You can add color fills and adjust the Camera Raw Filter settings to make skin smoother.
Step 1: Add a couple of color-fill layers and choose a color close to the skin tone.
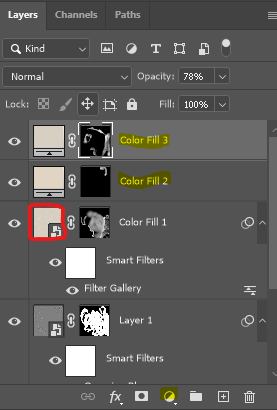
Step 2: Change the color of the color fill by double-clicking on the colored square in the layers panel.
For example, I painted with white on the layer mask and reduced the flow to 15%. Then changed the colors and added additional color fills for her neck and ear. You can also do this to remove shiny spots on the skin.
Step 3: Make a copy of the image and convert it to a smart object.
Step 4: To go Filter > Camera Raw Filter.
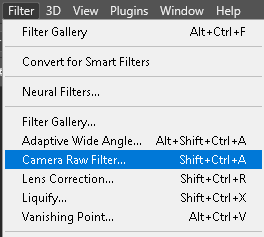
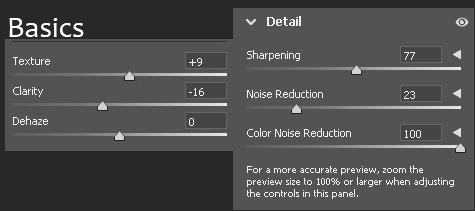
Under Basics, change the Texture and Clarity. Under Detail, change the Sharpening, Noise Reduction, and Color Noise Reduction.
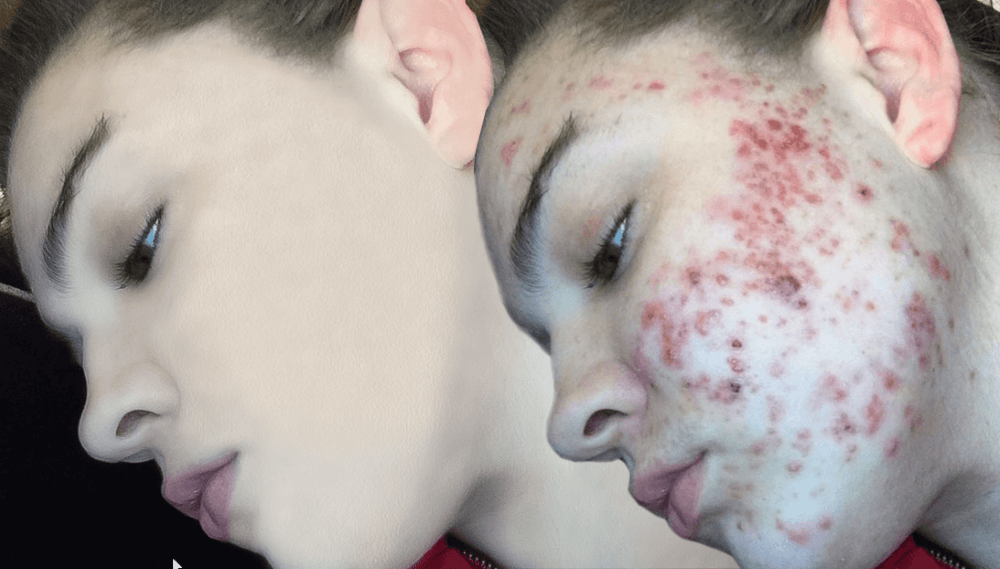
Here is the final comparison.
Final Thoughts
By taking the time to learn how to remove acne and blemishes in photos, you can make professional photographs that make your clients smile.
Do you find this article helpful? Do AI advancements thrill or concern you? Let me know in the comments below.