
There are many ways to type on a path in Procreate. After adding your text, you can activate the Selection tool (cursor icon) and select the Warp menu. Activate the Advanced Mesh setting and adjust the nodes of your text in the path of your choice.
I’m Carolyn and I’ve been running my own digital illustration business for over three years. I primarily use the Procreate app to create all of my artwork for my clients and as many of my orders are graphic design based, I have to have my text and lettering skills up to scratch.
I have found many ways to manipulate and shape my text in a canvas to suit my client’s needs. Today, I will show you a few ways in which I type on a path in Procreate which includes adding text using the warp tool and freehand drawing text using a drawing guide.
Table of Contents
Key Takeaways
- The Add Text feature in Procreate automatically types your lettering on a straight path.
- You can use a Drawing Guide if you want to apply freehand text on a certain path.
- Using the Warp tool allows you to change the shape, fluidity, and movement of your text in any path that you require.
- This is a unique feature to be familiar with and can be used for all types of graphic design projects like logos, posters, and invitations.
3 Ways to Type on a Path in Procreate
There are three ways that I often use to add text to my projects when I need them on a specific pathway. All you need to follow along is your iPad and your Apple Pencil.
Method 1: Warp Tool
This method allows users to create really cool and unique lettering options. It’s the best method to use if you want to create curved or dramatic lettering once you have added your text to your canvas. Here’s how:
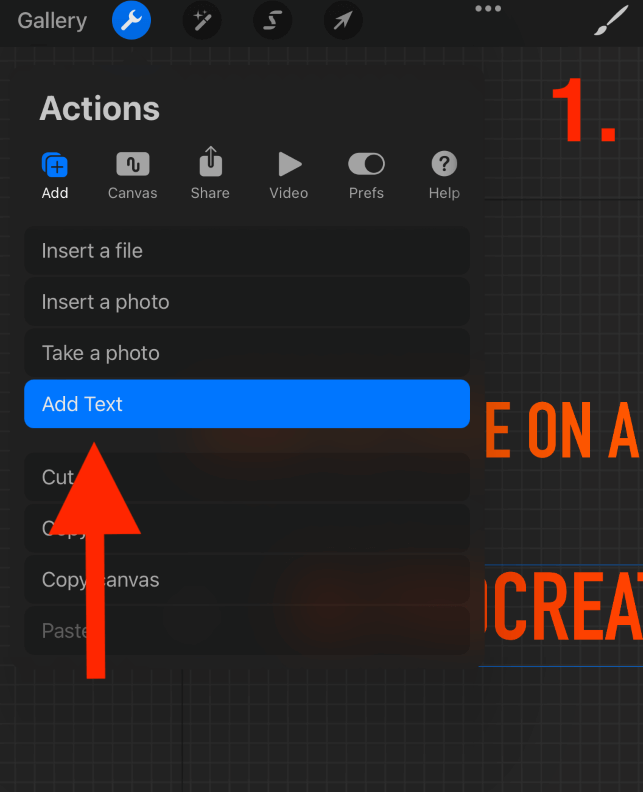
Step 1: Tap on your Actions tool (wrench icon) and under the Add menu, choose Add Text and type your message.
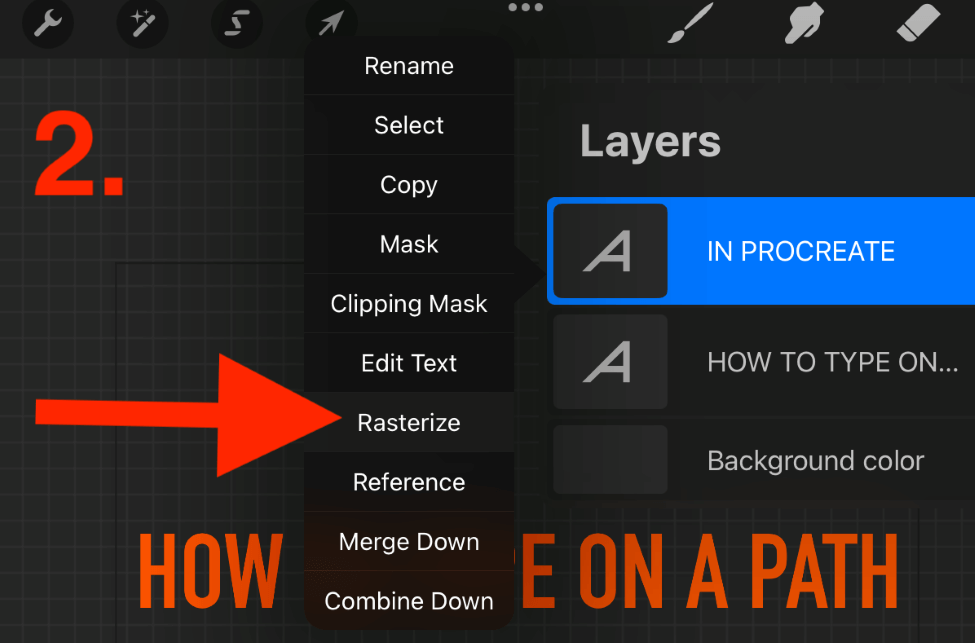
Step 2: On your text layer(s), tap on the thumbnail. In the drop-down menu, select Rasterize. This will now confirm your text settings and make your layer editable in the next step.
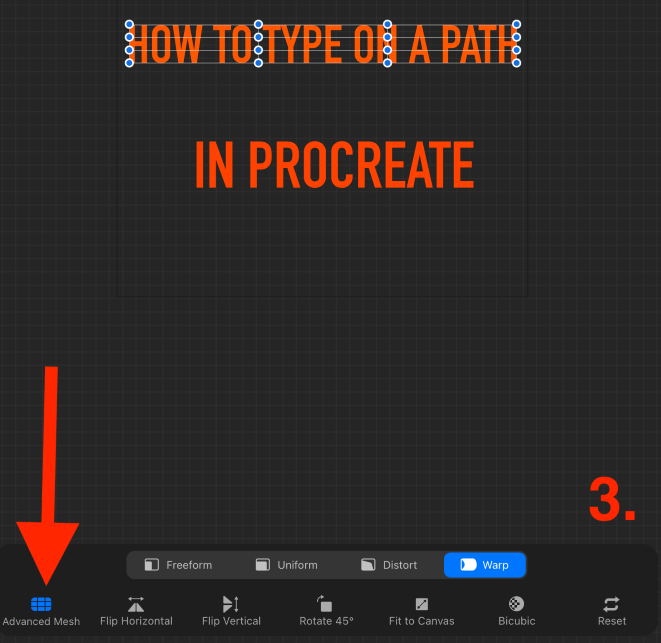
Step 3: Tap on your Selection tool (cursor icon) and activate the Warp tool in the bottom settings window. Then select the Advanced Mesh option. Blue nodes will appear around your text box.
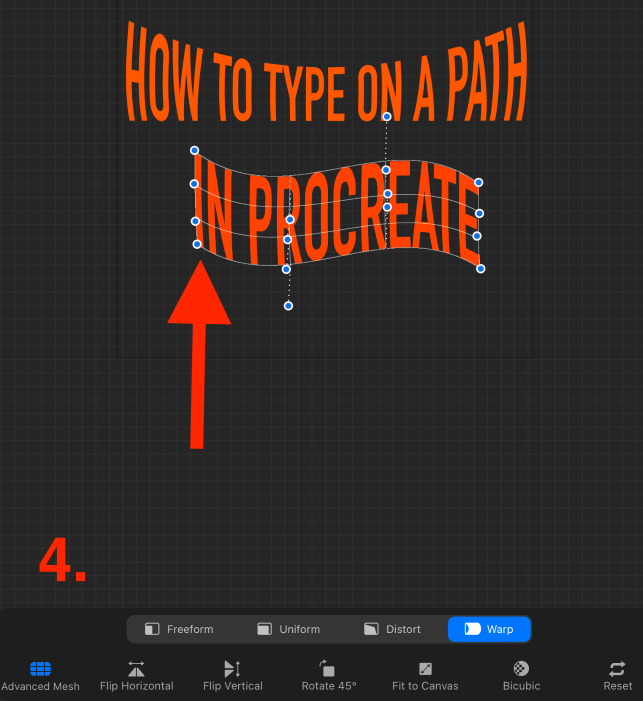
Step 4: Adjust the nodes until you achieve your desired pathway in your text. Try experimenting with different styles and directions until you find the one you like. When you are done, tap on the Selection tool (cursor icon) again to close the tool.
Pro Tip: Before using the Warp tool, always ensure your Snapping setting is activated. This will ensure that when you move your text around the canvas, its proportions will remain as intact as possible.
Method 2: Drawing Guide – Text
This method can be used if you want to add text to your canvas and preserve the font, size, and shape of the text. This is the best way to move your original lettering while ensuring the accuracy of your path and not changing anything about the text itself. Here’s how:
Step 1: Open the Actions tool. Under the Canvas menu, slide Drawing Guide toggle to on and then tap on Edit Drawing Guide.
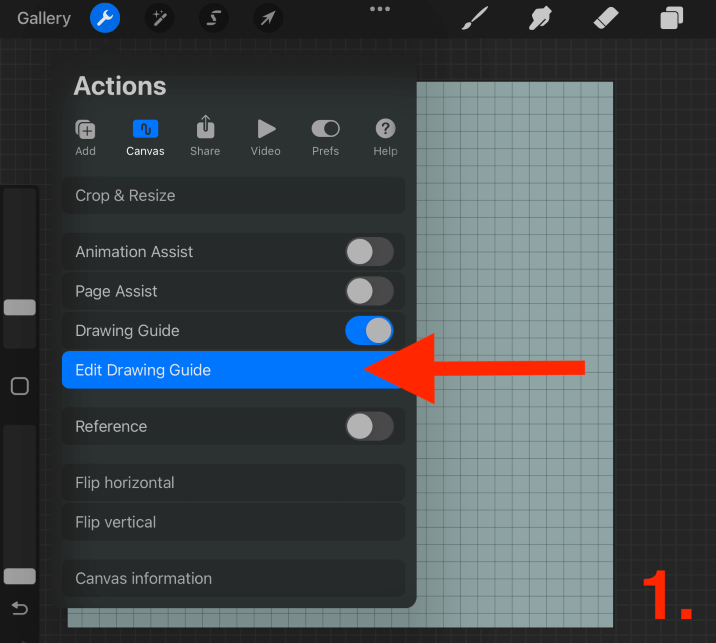
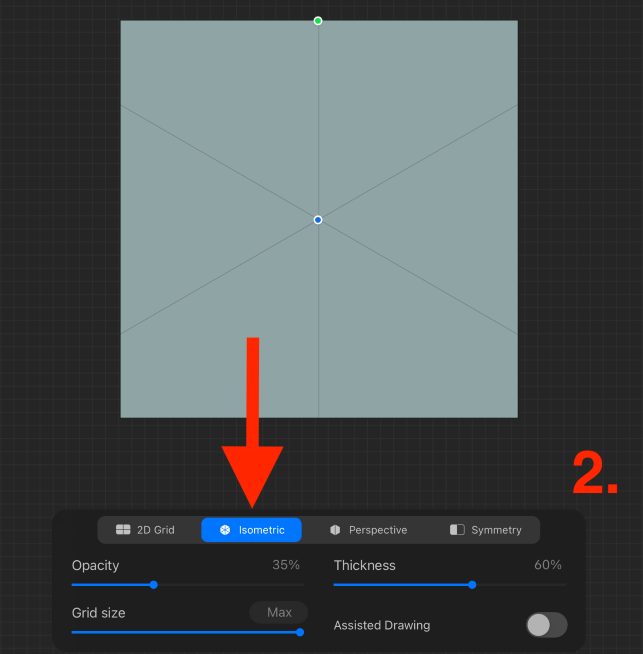
Step 2: Select a Drawing Guide that will give you the path you want to achieve. I chose the Isometric option with the max Grid Size as I wanted a diagonal pathway. When you have chosen, tap on Done to close the menu.
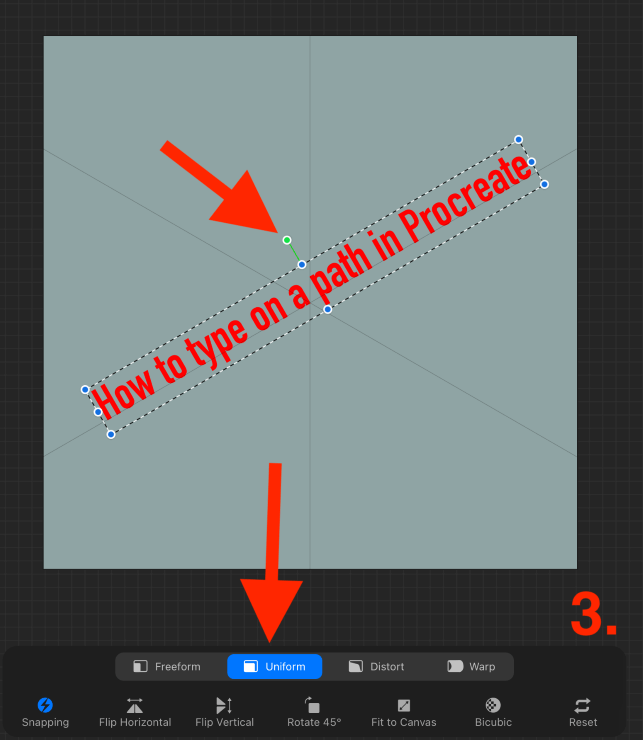
Step 3: Add your text and then select the Transform tool by tapping on the cursor icon. Ensure you are using the Uniform option and that your Snapping is activated. Use the nodes to align your text box with the grid path that you want to use.
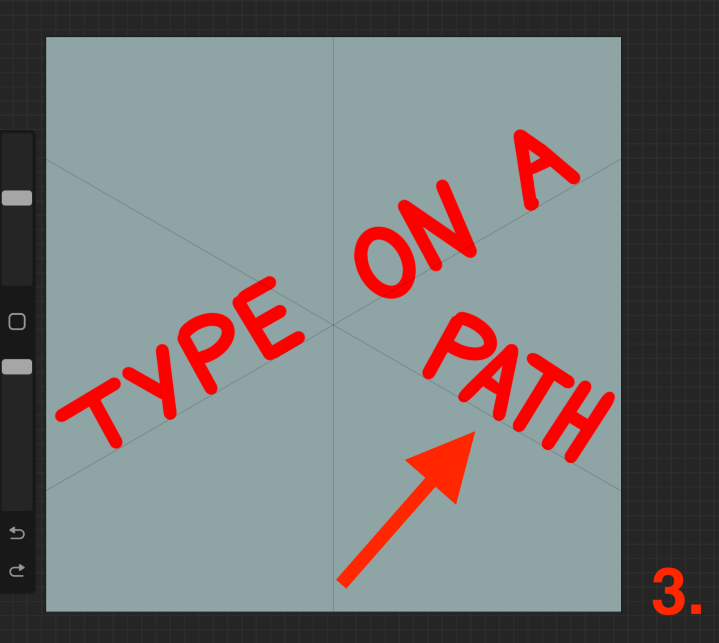
When you are happy with the result, tap on the Transform tool (cursor icon) again to close the menu and confirm your changes. You can also turn off your Drawing Guide if you are finished using it as a reference.
Method 3: Drawing Guide – Freehand
This method is for users who wish to add freehand lettering but want to ensure the pathway is accurate and straight. This is particularly useful when adding handwritten text and calligraphy to your canvas whilst using grid lines as a reference. Here’s how:
Step 1: Open your Actions tool and activate Edit Drawing Guide.
Step 2: Select a Drawing Guide that will give you the path you want to achieve. I chose the Isometric option with the max Grid Size as I wanted a diagonal pathway. When you have chosen, tap on Done to close the menu.
Step 3: Using the paintbrush of your choice, freehand draw your lettering in line with the grid path that you have added to the canvas. Once you are done, turn off the Drawing Guide to remove the grid reference lines from your canvas.
FAQs
Below is a selection of your frequently asked questions when it comes to typing on a path in Procreate.
Is there a typing tool on Procreate?
Yes. The typing tool in Procreate can be found under the Actions tool (wrench icon). Open the Add menu and scroll down until you see the Add text function. This will allow you to type your message and then edit the size, font, position, and shape of your text.
How to curve text in Procreate Pocket?
You can use the Warp tool in order to curve your text in Procreate Pocket. Once you have added your text, activate the Warp tool by tapping on the Transform tool (cursor icon) and selecting the Advanced Mesh option in the menu. This will all be available in the Modify menu.
How to angle text in Procreate?
You can add a Drawing Guide like the Isometric Grid in your canvas in order to move your text at a certain angle. Once you have selected and activated a Drawing Guide grid, use the Transform tool (cursor icon) to adjust the angle and position of your text box.
Final Thoughts
If you are a digital artist that uses text or lettering in your work, you should absolutely practice these methods in order to give yourself the best Procreate toolkit and expand your knowledge and skills in graphic design. This will be something you use frequently once you get going.
It doesn’t take long to familiarize yourself with these methods so I suggest spending some time today making sure you know what they can offer you. It opens up a world of opportunities when it comes to adding, editing, and creating eye-catching lettering in the Procreate app.
Do you type on a path in Procreate or Procreate Pocket? If so, what method do you use? Let me know by leaving your feedback in the comments section below.