
No matter what kind of project you’re working on in Photoshop, it’s inevitable that you’re going to want to undo or redo at some point. I’m pretty sure that we’ve all unexpectedly deleted or drawn on the wrong layer from time to time. Thankfully, Photoshop has many methods for correcting this!
I’m Skyler, and I’ve been using Photoshop on a personal and professional level for well over a decade! In this tutorial, I’ll show you how to redo and undo in Photoshop.
The easiest way to undo is no doubt using the famous Command/Ctrl + Z, but I’ll show you a couple more ways to redo and undo your steps – for example, using the History panel.
Let’s dive in!
Note: The screenshots from this tutorial are taken from Adobe Illustrator CC Mac version. Windows or other versions can look different.
Table of Contents
Method 1: Keyboard Shortcuts
Memorizing Keyboard Shortcuts will always be a surefire way to up your productivity as a Photoshop user, and the Undo and Redo Shortcuts are no exception to this rule!
- The shortcut for Undo in Photoshop is Command/Ctrl + Z
- The shortcut for Redo in Photoshop is Shift + Command/Ctrl + Z
You can click any of these shortcuts repeatedly until you run out of history, so these are the easiest and most accessible ways to undo and redo quickly!
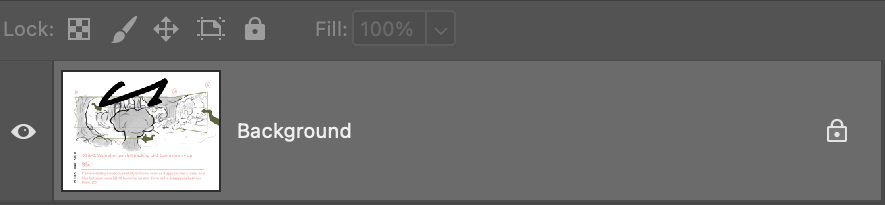
Our first instinct here may be to find the erase tool, but there are many circumstances where you cannot directly erase your work.
For example, when you’ve drawn on the wrong layer! Or in my case, directly over the background. So the only option in these cases is to undo this error in a more indirect way.
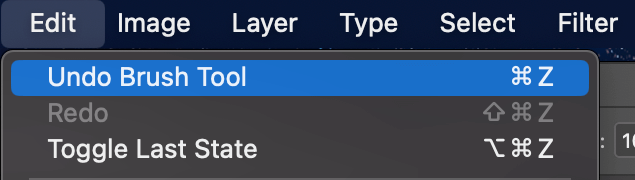
You can go to the overhead menu Edit and choose the Undo or Redo option. The redo or undo option will show you the last action you made. For example, my last action was using a brush, so it shows “Undo Brush Tool”.
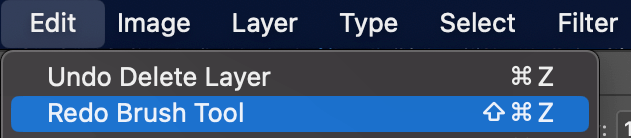
Now, we can select the Undo function and see our error disappear! Though, what if we wanted it back for whatever reason? Then you can choose Edit > Redo. In this case, “Redo Brush Tool”.
Great! Those are the basics for accessing the undo and redo functions through the Menu Bar. Now we can move on to the more efficient method.
Method 3: Using the History Panel
Having an advanced understanding of History Panel functions like Snapshots and the History Brush in Photoshop is something that’s sure to come in handy throughout your creative career!
What is the History Panel in Photoshop?
The history panel sounds self-explanatory, but it’s a much bigger deal than simply logging the history of your brushstrokes or actions. For example, how many times have you repeatedly clicked undo over and over again, until you’d found the action you desired?
This tool allows you to preview, and jump to your preferred point in history without all that fuss.
Not only is this a time saver, but it offers additional uses. You can set up your preferences to log more or less history, and even bookmark certain points using the snapshot tool so you can easily toggle between or compare edits!
Watch this video for more explanation:
How Many Times Can You Undo/Redo in Photoshop?
This being said, exactly how many times can we undo or redo in Photoshop? Long story short – the default History State is 50. Though I think beginners and veterans alike would agree: 50 paces backward or forwards in a project is not nearly as many as it seems!
This is especially true for longer projects, and you’ll likely be tempted to increase your History State once or twice. There are advantages and disadvantages to both though, so you’ll want to understand each and adjust according to your unique setup!
Pros and Cons of Changing the History State?
With this understanding, we can talk more about the pros and cons of changing this state of history in Photoshop.
For those with older, or slower setups you’ll want to be selective when changing this number. This is because increasing the number of History States will take a toll on the performance of your software, so it may actually result in decreasing your efficiency long term.
Alternatively though, if you’re working on a brand new state-of-the-art machine or just recently improved your setup then feel free to mess around with the limitations of this tool! Try upping your state gradually and testing your performance at different intervals until you gauge the best number for your specific setup.
Alright! Now that we’ve gotten all of that out of the way, we can dive into all of the different methods for undoing and redoing in Photoshop.
Conclusion
I recall animating a rough board sequence and giving up on the project after running out of options to undo it. Without learning how to utilize these tools and taking the opportunity to learn new techniques, I absolutely would’ve been stuck starting from scratch or losing good progress more than once.
Now that we know how to better utilize the history panel and state dependent on the project at hand, we should never again be stuck running out of options!