
The symmetrical ruler in Clip Studio Paint enables artists of all levels to effortlessly create visually captivating and balanced compositions. By automatically mirroring your strokes, it not only saves time but also ensures complete accuracy, making it ideal for tasks like character design, intricate patterns, and geometric shapes.
I’m Zoe, a freelance illustrator with extensive experience in the realm of digital art. When I started on Clip Studio Paint, I initially overlooked the symmetrical ruler. However, once I finally gave it a try, I was amazed by how versatile it is and the many ways it enhanced my artistic process.
In this guide, I’ll show you how to draw symmetrically in Clip Studio Paint. By following these instructions, you’ll gain the skills to adjust the ruler precisely to suit any artistic situation you encounter.
So let’s dive in!
Table of Contents
Key Takeaways:
- While one symmetry line is typically the most useful in most situations, don’t hesitate to experiment with more lines to create fractal art and unique patterns.
- Toggle the symmetry ruler on and off to incorporate subtle quirks and add natural variation to your drawings.
- Apply the same symmetry ruler across multiple layers to ensure that elements such as linework, filling, and other details perfectly match throughout your artwork.
- While symmetrical drawings may initially appear flat, you can still apply them as patterns and experiment with perspective transformations to add depth and unique twists to your artwork.
- Don’t forget to enable snapping for tools that don’t automatically snap to rulers. Simply check “Enable Snapping” under the sub-tool options to ensure precise alignment with the symmetry ruler.
Here are the three essential steps to creating a symmetrical drawing in Clip Studio Paint.
Note: All screenshots from this tutorial are taken from the CSP Mac version.
Step 1: Activating the Symmetrical Ruler
To begin using the Symmetrical Ruler in Clip Studio Paint, open the software, locate the toolbar, and select the Ruler tool.
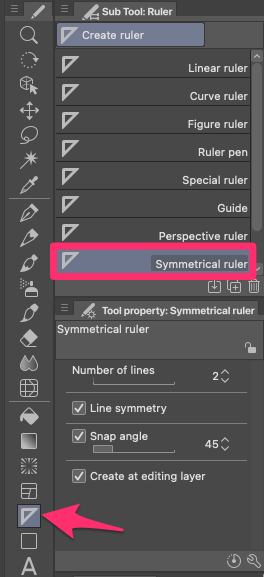
In the Sub Tool palette that appears, choose the Symmetrical Ruler option.
Step 2: Adjusting the Symmetry Settings
From there you’ll be able to adjust the Symmetry settings according to your needs. Under the Symmetrical Ruler’s tool properties, you’ll find several options. Let’s explore each one:
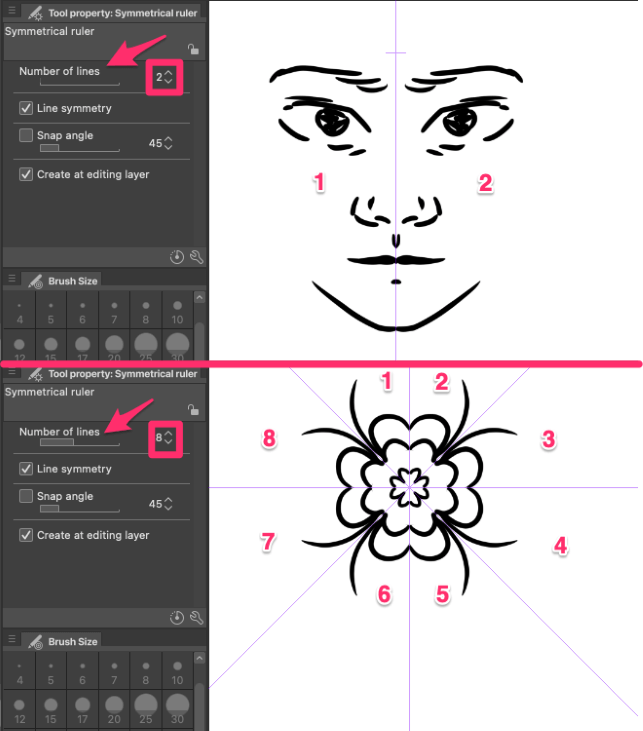
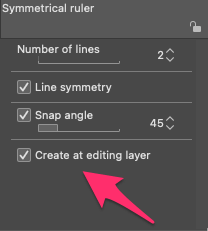
Number of lines: By default, this setting is set at 2. This determines the number of sections your strokes will be reflected in. For example, if you enter 8, your drawing will be mirrored in 8 sections.
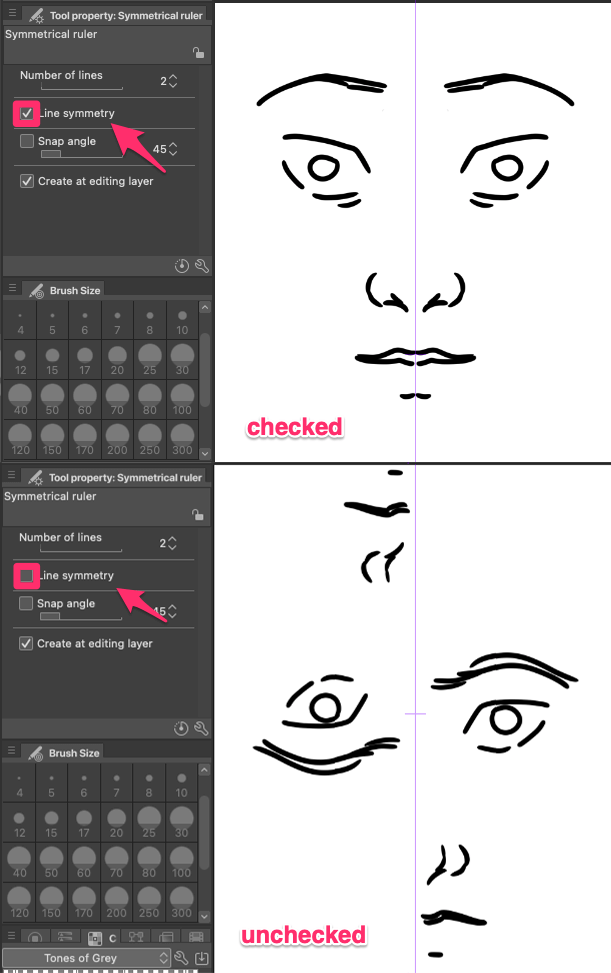
Line Symmetry: This determines whether your ruler reflects patterns or rotates them. When checked, patterns are mirrored; when unchecked, they are rotated instead. Odd numbers of lines always use rotational symmetry, while even numbers allow you to choose.
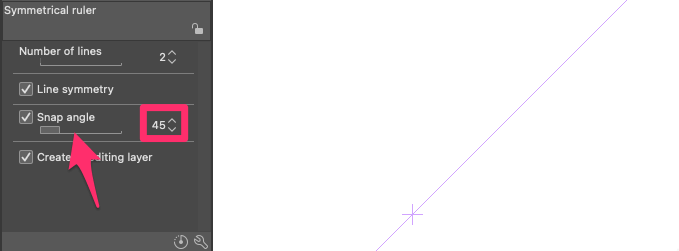
Step of Angle: If you have a specific angle in mind for your symmetry line, you can enter its value here. The symmetry ruler will snap to this angle as you drag it across the canvas.
Create at Editing Layer: If this option is enabled, the symmetrical ruler will be added to the currently selected layer. If disabled, it will create a new layer for the ruler.
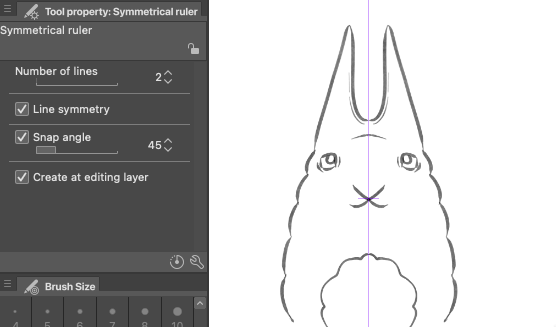
Step 3: Drawing Symmetrically
Now you’re ready to create a symmetrical drawing in Clip Studio Paint. Simply drag your mouse across the canvas to create a symmetry line at your desired position.
To create a horizontal or vertical line, hold down the Shift key while creating the symmetry line.
Once placed, every stroke you make on one side of the symmetry line will be mirrored on the other side. This allows you to focus on drawing one-half of your artwork while the software simultaneously reflects it to create a perfectly symmetrical image.
How to Erasing Symmetrically in Clip Studio Paint
If you make any mistakes that need erasing, you’ll notice that the eraser in Clip Studio Paint doesn’t follow symmetry by default. However, you can easily change this setting for future erasing. Here’s how:
Step 1: Select the Eraser tool and choose the eraser you want to use.
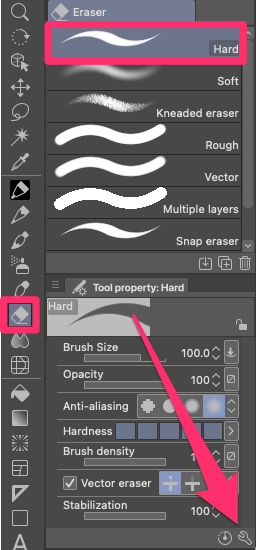
Step 2: Click on the wrench icon to open the Sub Tool Detail menu.
Step 3: Navigate to Correction and check the box that says Enable Snapping.
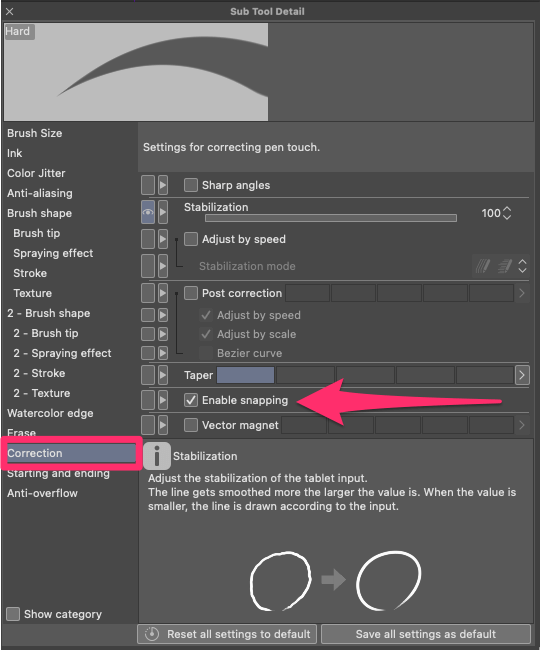
The same steps apply to any other tool that doesn’t snap to the symmetry ruler by default, such as other erasers, as well as certain brushes or blending tools.
Pro Tips
As you continue working with the symmetrical ruler, here are some additional tips that may come in handy:
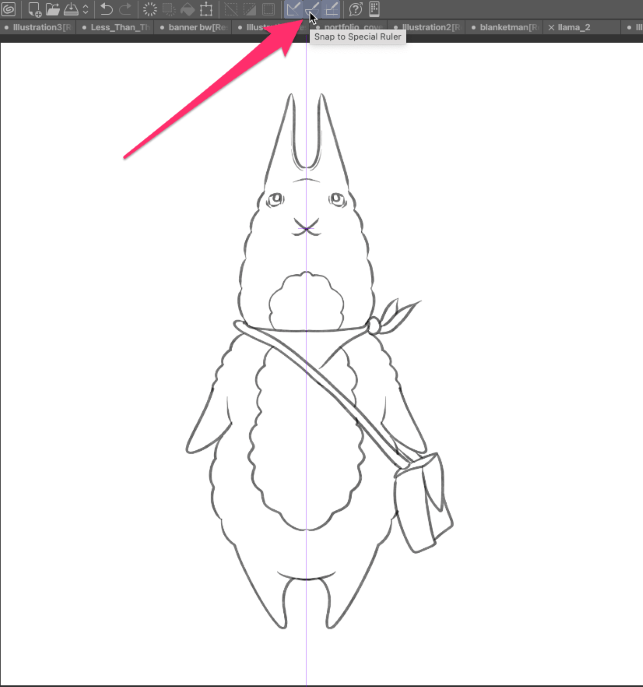
- Temporarily Disabling the Ruler: If you want to work on asymmetrical elements in your drawing without the symmetry constraints, you can toggle the ruler on and off. Simply go to the View menu and select Snap to Special Ruler, or click on the Snap to Special Ruler icon on the command bar.
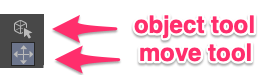
- Moving the Ruler: You can move the symmetry line along with your design at any point using the Move tool. If you want to move the ruler without affecting your drawings, use the Object cursor and click on the symmetry line.
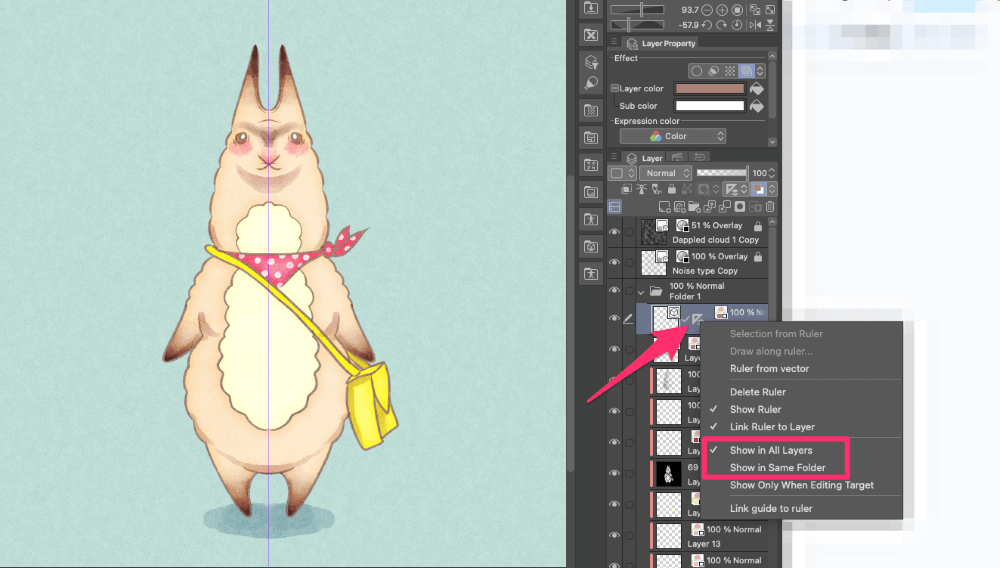
- Applying Symmetry Across Layers: To apply the same symmetry line across multiple layers, right-click on the Symmetry button and choose either Show in All Layers or Show in Same Folder. This ensures that your symmetry remains consistent across all the layers.
Final Thoughts
Knowing how to use the symmetry ruler in Clip Studio Paint opens up a world of possibilities and enhances your drawing experience. With just a few strokes, you’ll see your artwork coming together in a visually pleasing and balanced manner.
I would love to hear your feedback, tips, and creative breakthroughs with the symmetry ruler. Leave a comment below and join the conversation!