
You can change a regular image file into a vector in Photoshop by following some easy steps. This makes it possible to turn any photo into a cartoon or vector. After applying a few filters, the image is smoothed over and ready to be changed into vector layers.
In this article, I’ll show you a detailed guide on how to vectorize an image in Photoshop. This is extremely helpful for creating quality graphic designs with JPEG, PNG, and more.
Table of Contents
Key Takeaways
- The filters you apply to your jpeg will clearly define the colors and edges in your image, which will make it easier to vectorize.
- Vectors in comparison to rasters are of higher digital quality, and easy to edit while maintaining resolution.
- Save a copy of your vector as a Photoshop EPS to import it to other programs, like Adobe Illustrator.
Let’s take the time to prepare our image for vectorization so that we get better end results.
How to Prepare Image for Vectorization
Today I’ll be using a horse photo to show you how to vectorize an image in Photoshop in the steps below.
Note: The screenshots from this tutorial are taken from the Adobe Photoshop CC Windows version. Mac or other versions can look different.
Step 1: Create a new file in Photoshop that is at least 2000px wide.
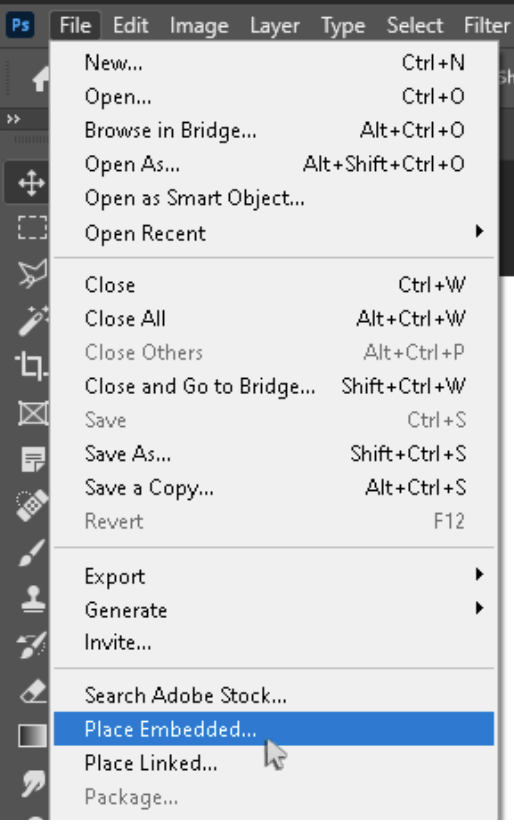
Step 2: Go to File > Place Embedded and select your image. Scale it to size.
Step 3: Use any selection tool to select your subject. I used the Object Selection Tool with Object Finder checked off, so all I had to do was click once on the horse.
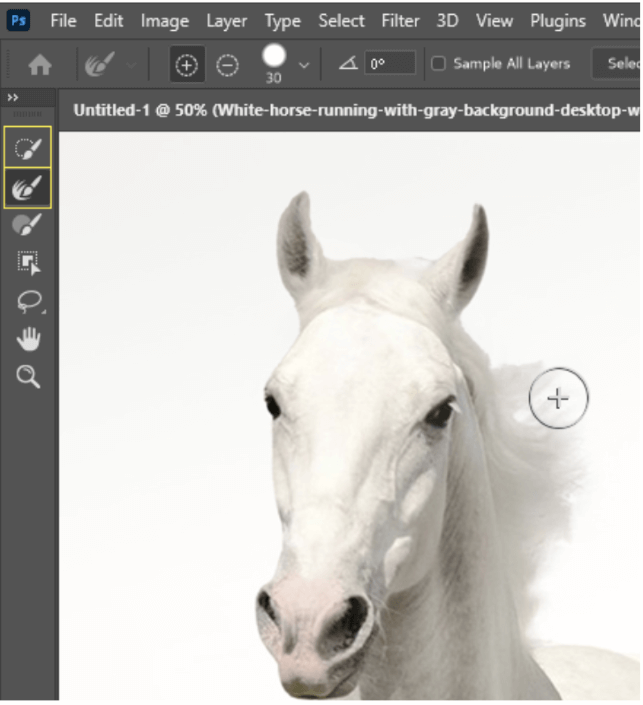
With my selection, I went to Select and Mask and used the Refine Brush to go over the horse hairs.
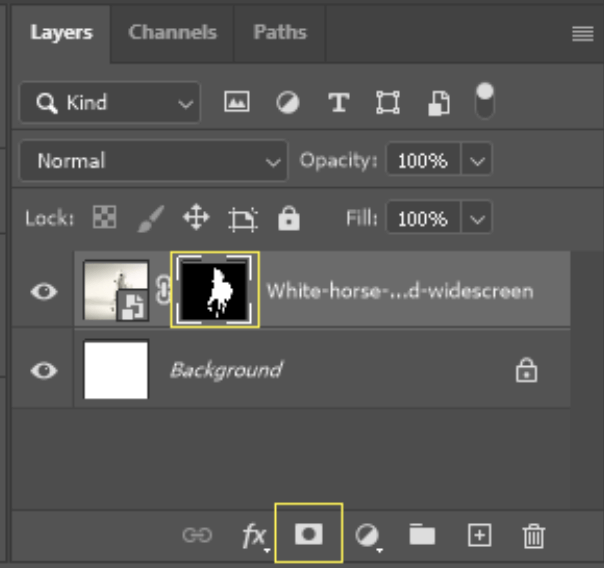
Step 4: Create a layer Mask and delete the background layer by selecting it and pressing Delete on the keyboard.
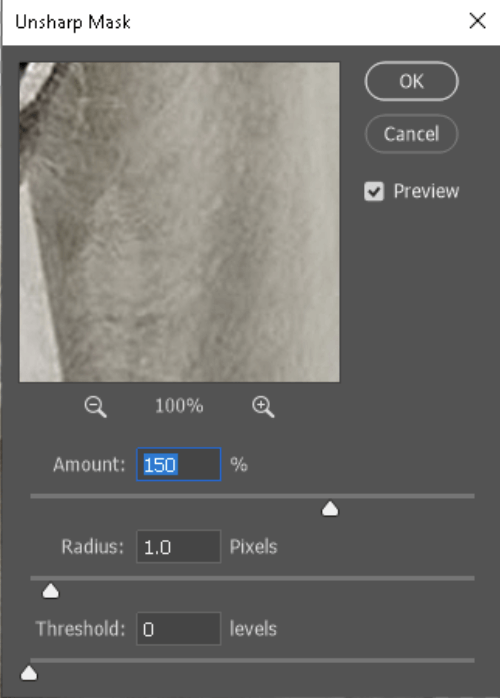
Step 5: Go to Filter > Sharpen > Unsharp Mask.
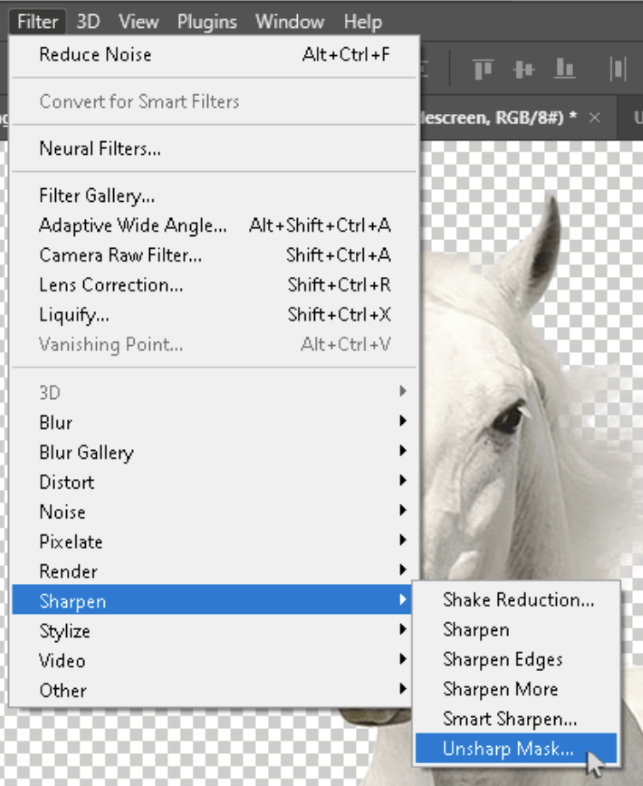
My Settings are seen here.
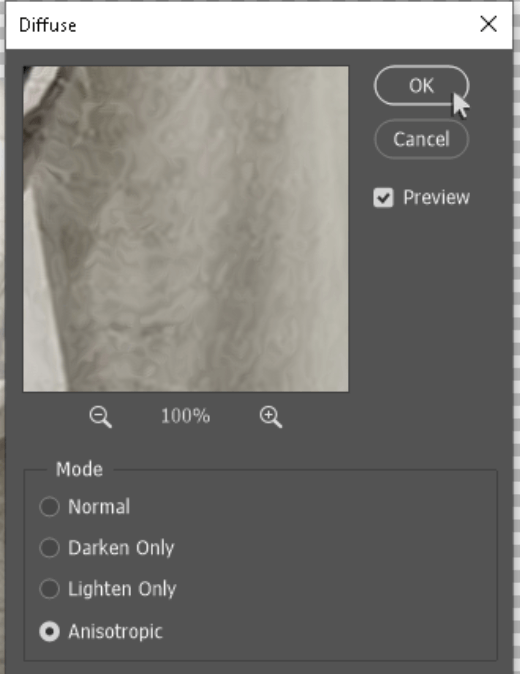
Step 6: Go to Filter > Stylize > Diffuse.
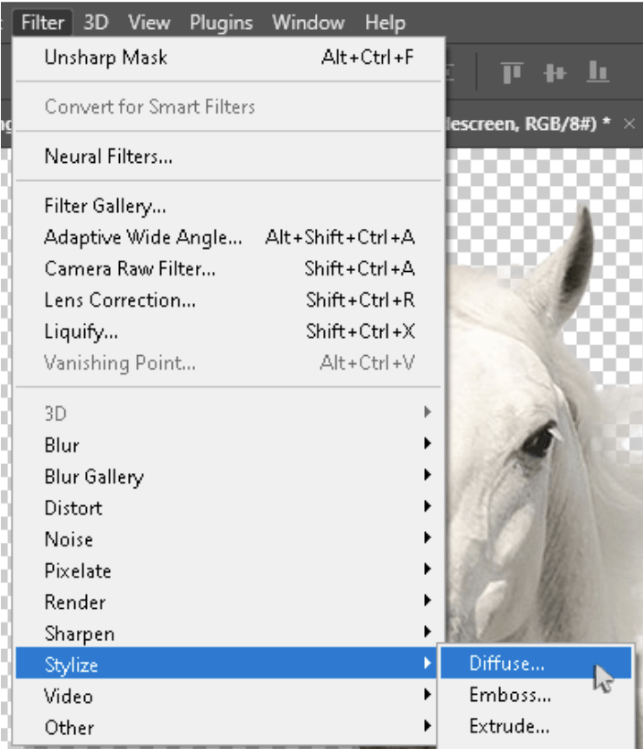
Choose Anisotropic. Repeat this step by going to Filter > Diffuse. It will be at the top, as a recent action.
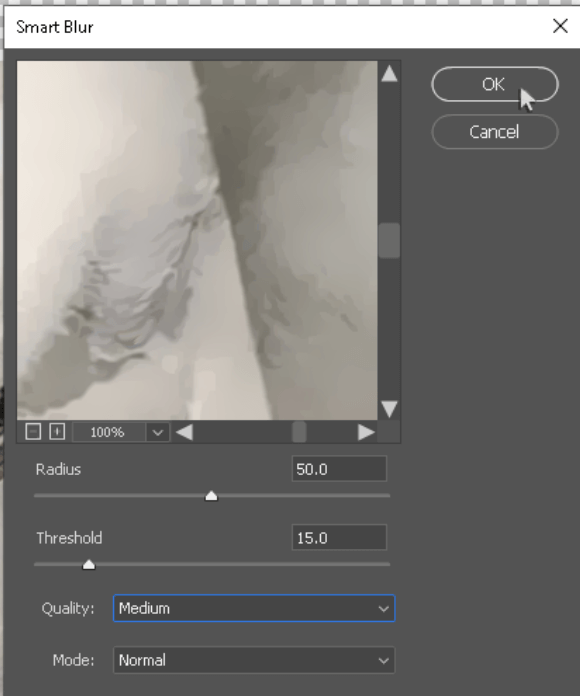
Step 7: Go to Filter > Blur > Smart Blur.
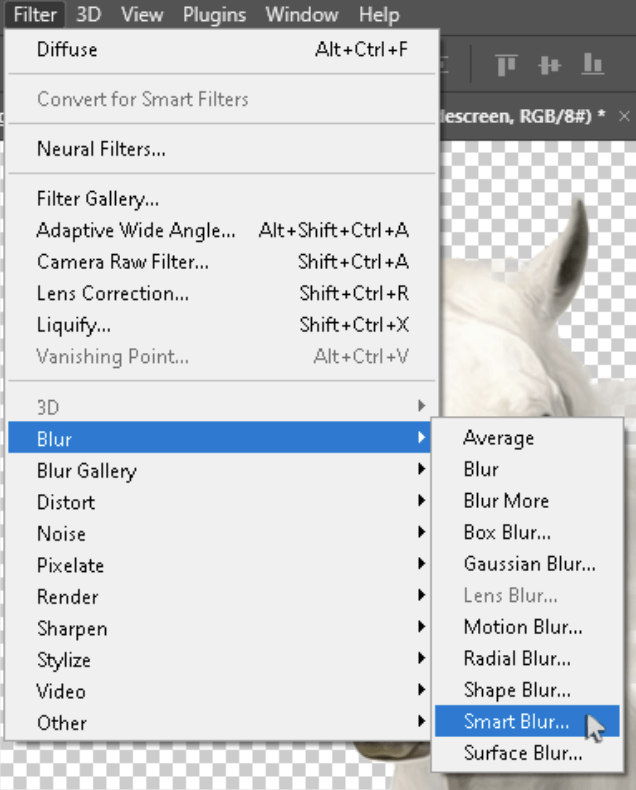
My settings are seen here.
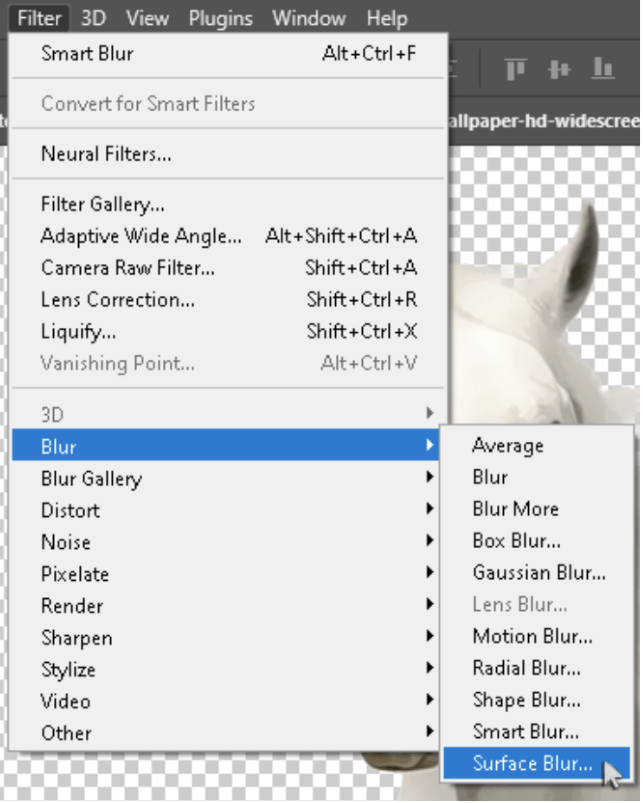
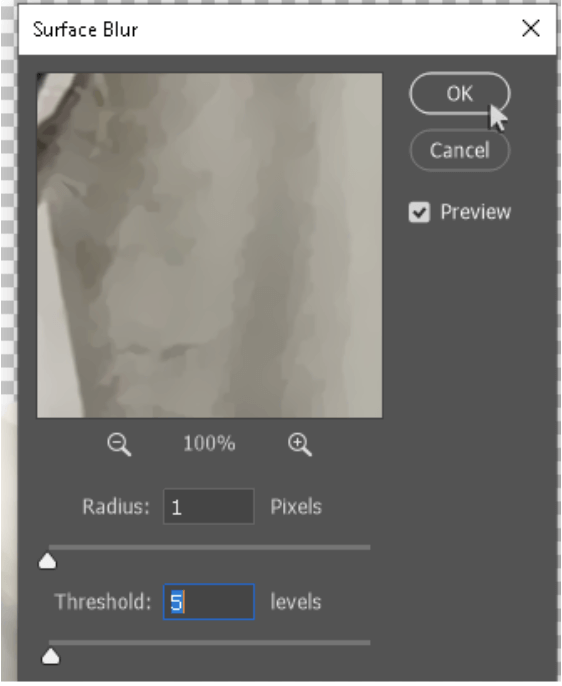
Step 8: Go to Filter > Blur > Surface Blur.
I set the radius to 1, and the threshold to 5.
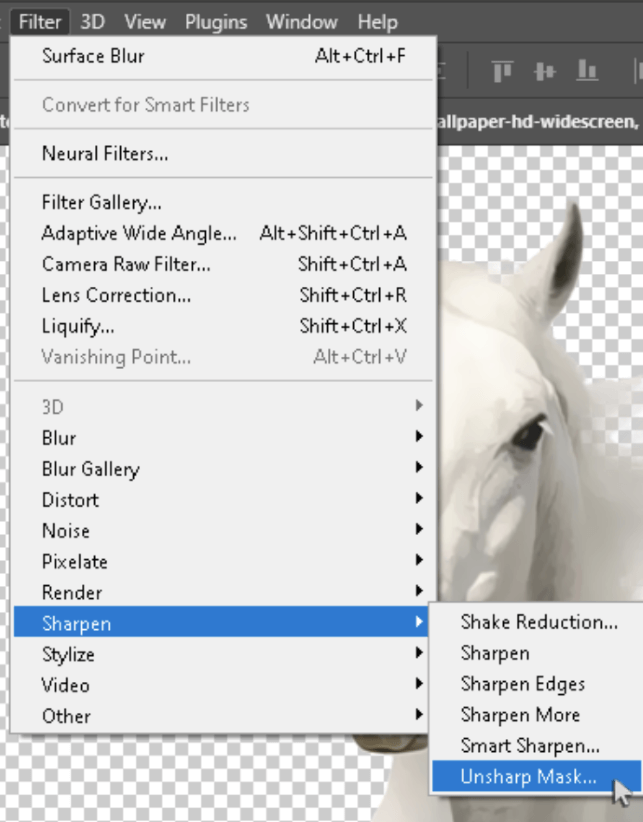
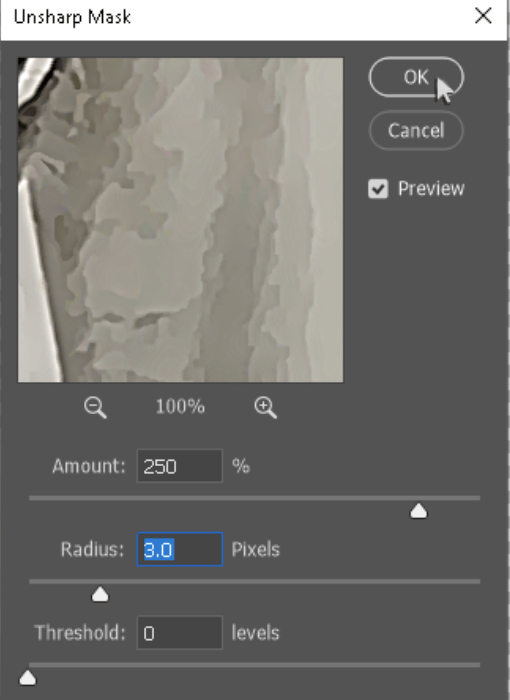
Step 9: Go to Filter > Sharpen > Unsharp Mask again.
Change the amount to 250 and the radius to 3.
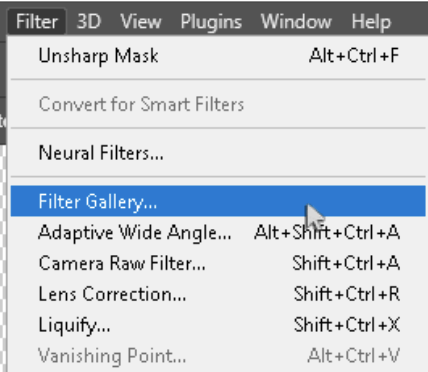
Step 10: Go to Filter > Filter Gallery.
In the Artistic folder, choose Cutout.
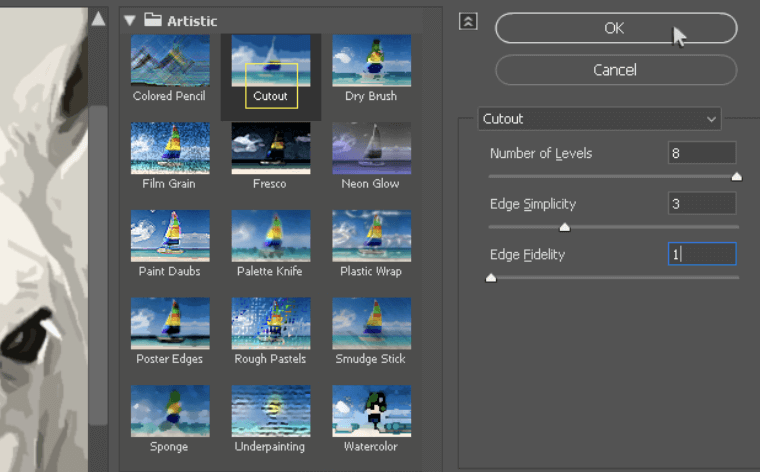
My settings are seen above.
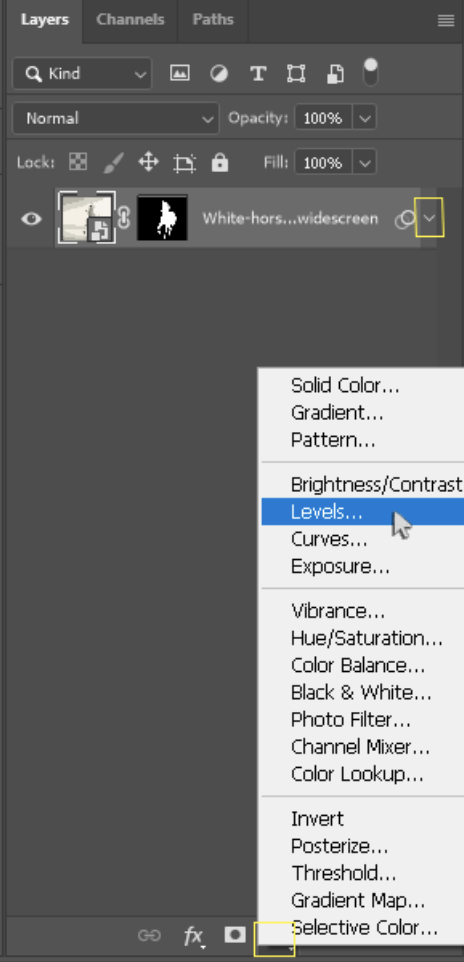
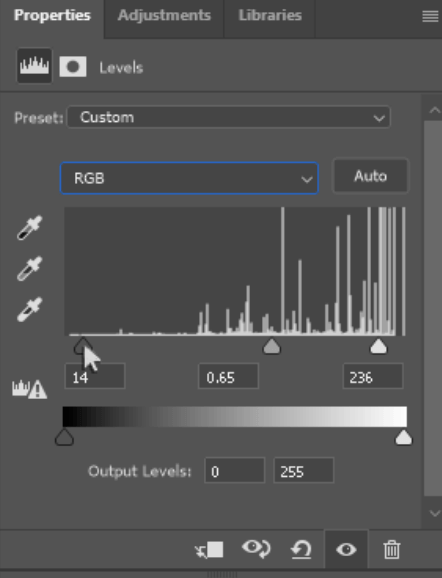
Step 11: Hide the list of filters and add an adjustment layer for Levels. Don’t change anything yet.
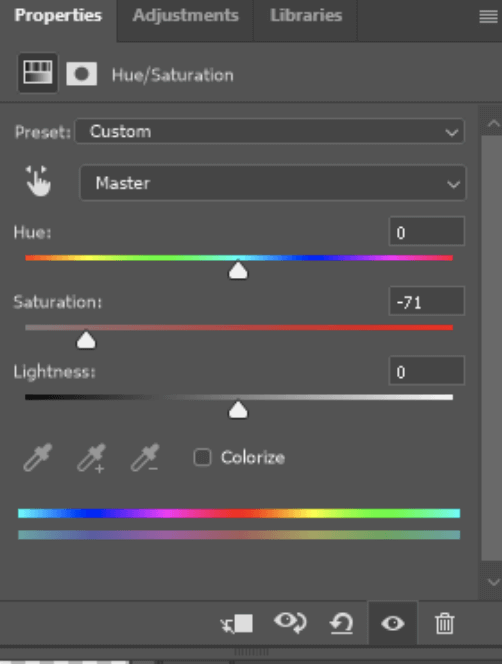
Step 12: Add an adjustment layer for Hue/Saturation and lower the saturation considerably.
Step 13: Add an adjustment layer for Posterize.
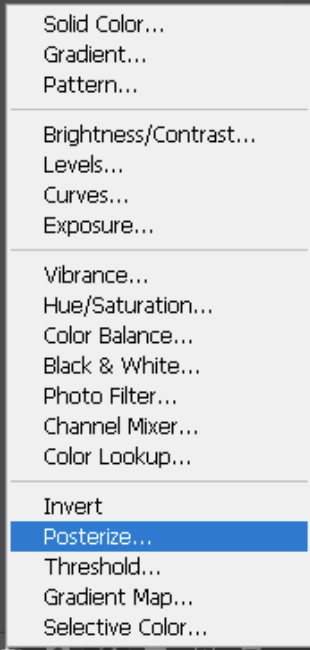
Choose the number of levels (colors) you want to see in your vector, then double-click on the Levels layer and adjust the sliders to your contentment.
Step 14: Create a new layer above your subject. Use black with the Brush tool at 5% flow and 60% smoothing to add dark lines/spots onto your subject.

Clip this layer to your subject with the shortcut Ctrl/Command + Alt/Option + G. You can also lighten areas in your subject with white.

Finalizing Your Vector Image in Photoshop
You’ve added a vectorized effect to the image, the next step is to save it as a vector and make it editable. Here’s how it works.
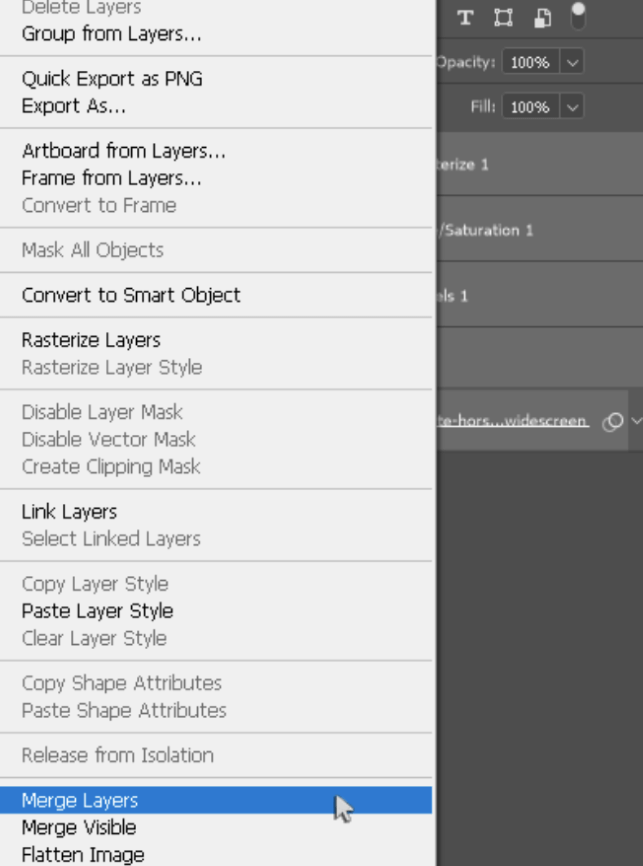
Step 1: Merge all the layers. Select the bottom layer, hold Shift, and click on the top layer. With the stack selected, right-click on them and click Merge Layers.
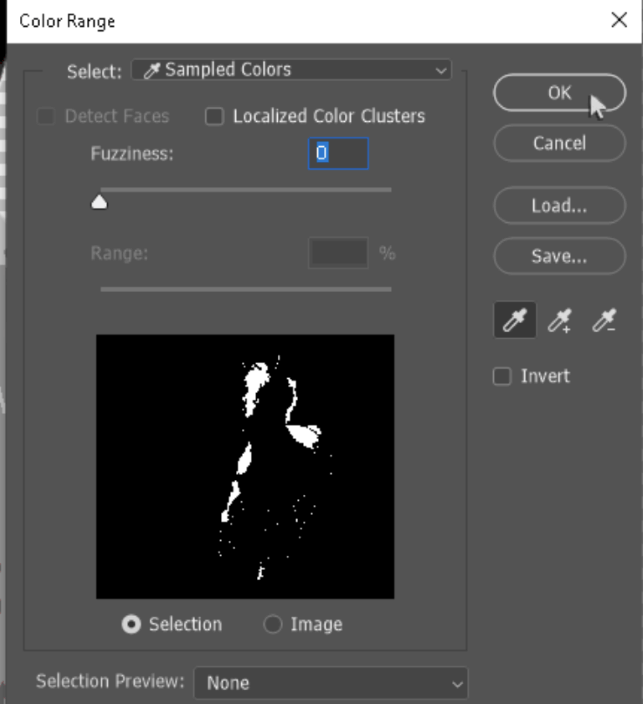
Step 2: Go to Select > Color Range.
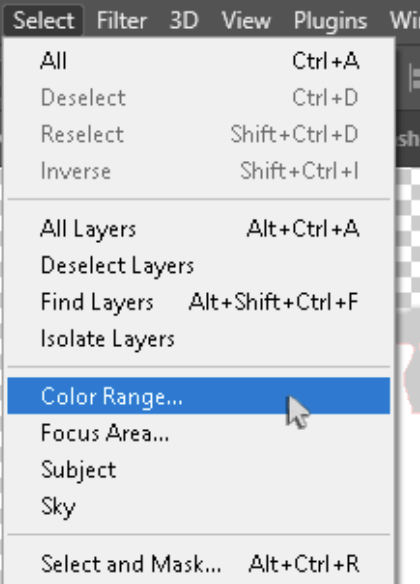
Click on any color in your picture, change the fuzziness to 0, and click OK.
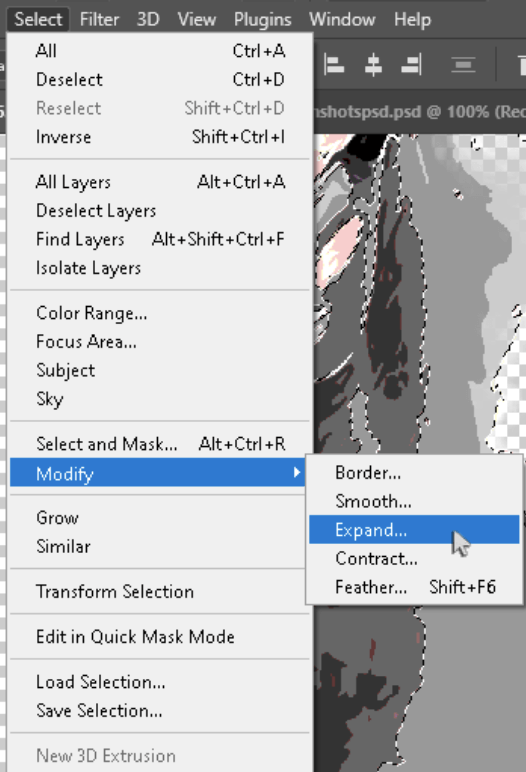
Step 3: To make sure the colored vectors fit well together, go to Select > Modify > Expand by 1px or so.
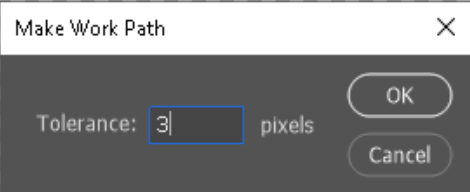
Step 4: With any selection tool, right-click inside your selection and click Make Work Path.
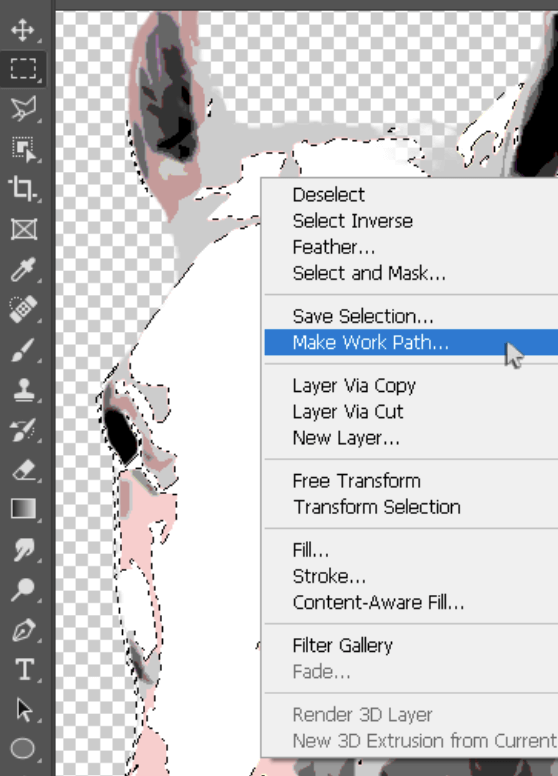
The higher the pixel tolerance, the less detailed the shape will be.
Step 5: With your new work path, create a Solid Color adjustment layer. You can make this any color, and it will create a vector layer of the work path shape.
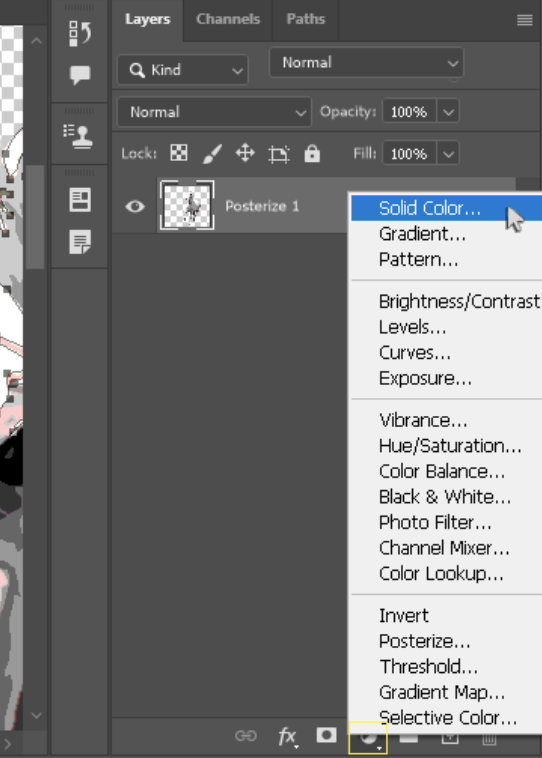
Repeat steps 4 – 5 for all of the colors in your subject.
Step 8: With the Pen or Path Selection tool, you can adjust any of these vector shape points.
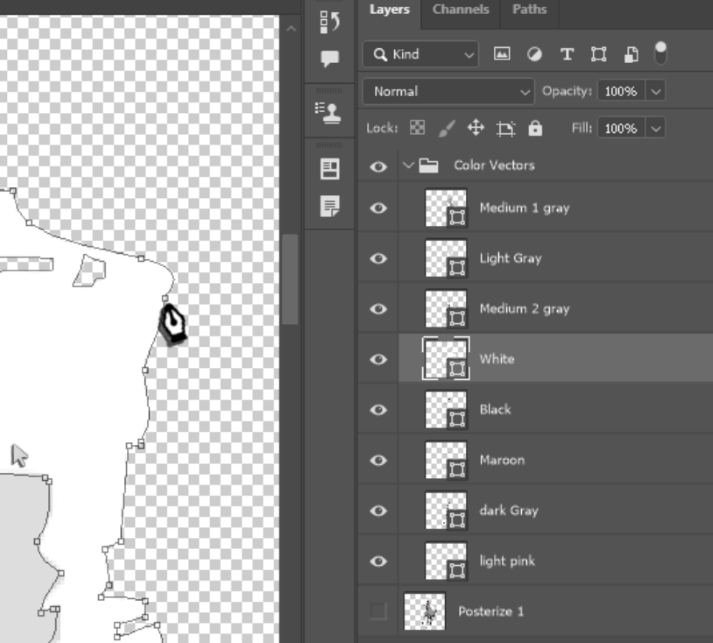
You can also change the color of any of these shapes.
Step 9: Go to File > Save a Copy and choose Photoshop EPS as the file format.
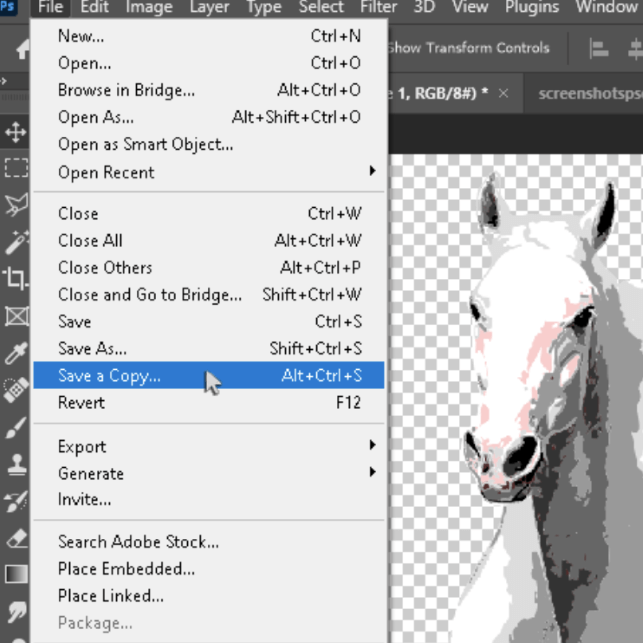
Make sure that Include Vector Data is unchecked.

Final Thoughts
We have successfully turned an image file into a vector that you can import into other design programs like Illustrator. By taking the time to learn how to vectorize an image, you can easily turn an image into a vector for your future project.
Did you find this tutorial helpful? Let me know in the comments below.