
Learning how to properly warp your images in Photoshop is an underutilized, but very useful skill to add to your creative toolbelt. I’m positive you’ll encounter many situations when working in Photoshop where you’ll wish your image could be more flexible, or malleable. Well, look no further!
My name is Skyler, and I currently work as a freelance sequential artist while attending my last year at the Savannah College of Art and Design. I’ll be showing you how to warp a butterfly from a series of photographs I took last fall.
This made them much more presentable in the long run, as I turned them into my very own photo cards for print!
So if you’re looking to further your understanding of Photoshop’s Warp Tool in order to gain more control over your images and edits – I’ve got exactly the help you need to accomplish this!
Table of Contents
Step 1: Making a Selection

In order to make my selection, I’ll be utilizing the Quick Selection Tool. That way, the Select Subject button will become available in the overhead panel.

Choose Select Subject and Photoshop will automatically identify the object or subject in the foreground of your photo for you.
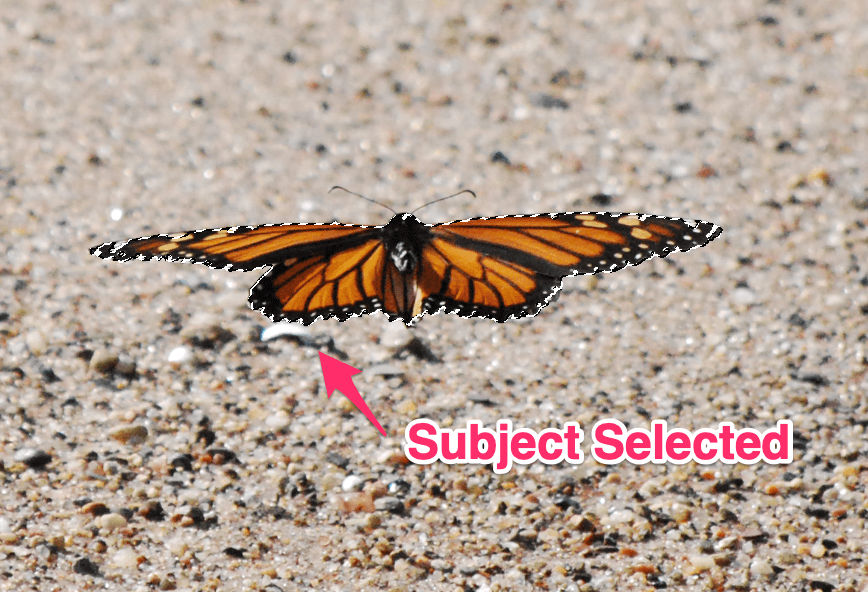
Once you’ve gotten your subject selected as shown above, you can copy and paste this selection into a new layer by pressing Command/Ctrl + C to copy and Command/ Ctrl + P to paste.
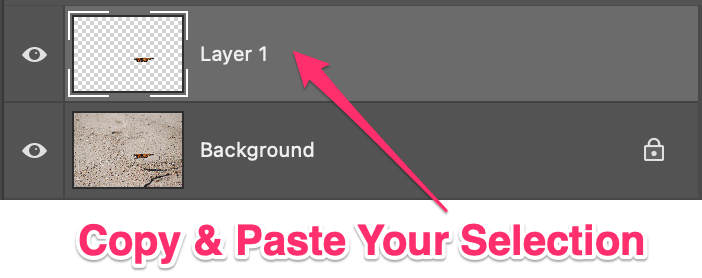
You should then see your selection appear in a new layer on your Layers panel.
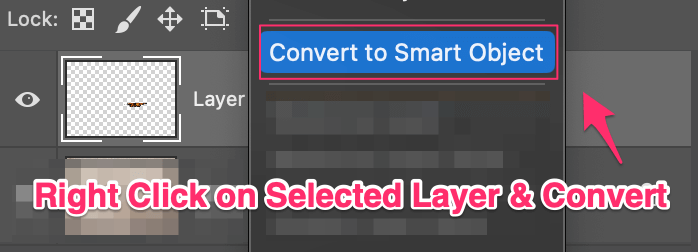
Now, in order to ensure that you don’t have any quality loss from transforming your newly pasted selection, you should make sure to convert it into a Smart Object. All you have to do is Right Click on the appropriate layer and select Convert to Smart Object.
Great! Now we can move on to using the Warp Tool.
Step 2: Warping Your Selection
In order to warp your selection, you’ll first have to navigate to the Edit Menu and find Transform > Warp.
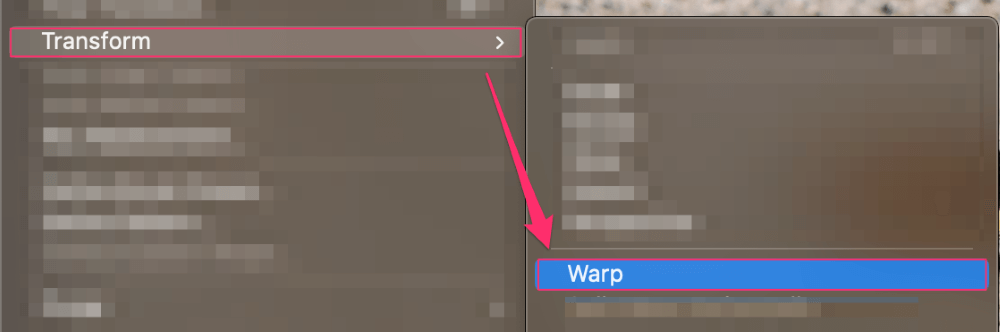
Then you should see a Warp Grid appear, with Transformation Points or nodules you can then use to grab and warp your selection.
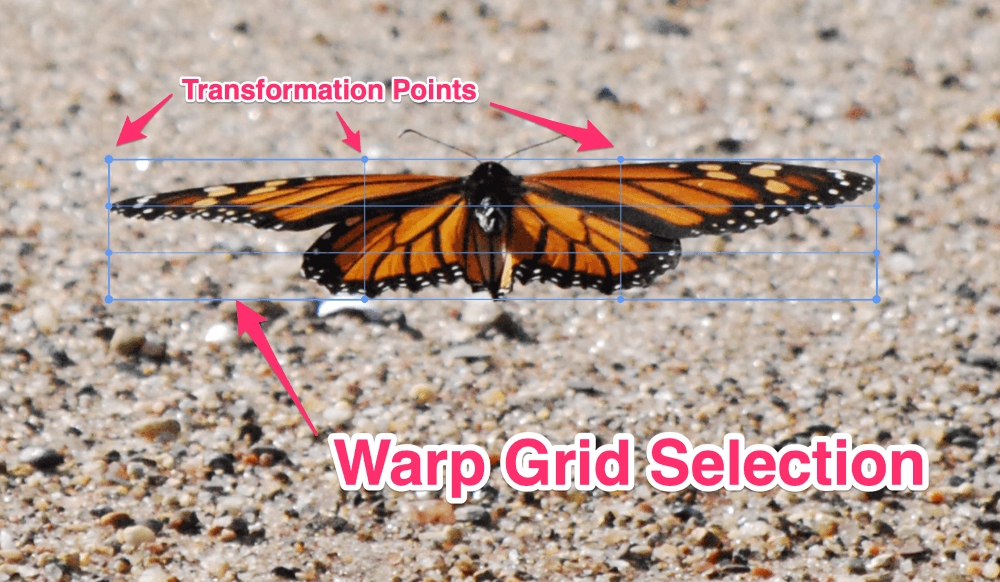
Now we have a few options as to how we can edit the warp grid prior to transforming it in any way.

As you can see, in the overhead panel we can now change the Grid Split and Type. The Grid Split has three options for customizing your grid. The first option allows us to change the center point of four quadrants, creating a horizontal and vertical line.
The following two allow us to split the grid by placing either a vertical or horizontal line individually. All of these options allow us to warp the image in dramatically different ways depending on your chosen grid style.
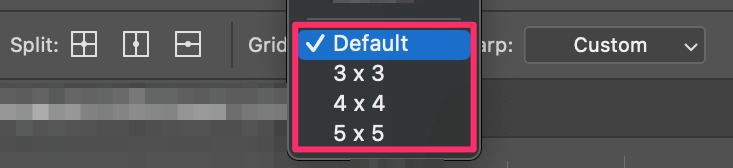
Following the Grid Split we also have the Grid Type to the right. This drop-down menu provides us with basic presets for 3 x 3, 4 x 4, or 5 x 5 grid measurements that Photoshop will place upon your selection for you.
For my selection warp, I wanted my butterfly to appear as though it was flying upwards, and not flat to the ground. This allows us to see more of the colors and patterns on the butterfly’s back without totally changing the image.
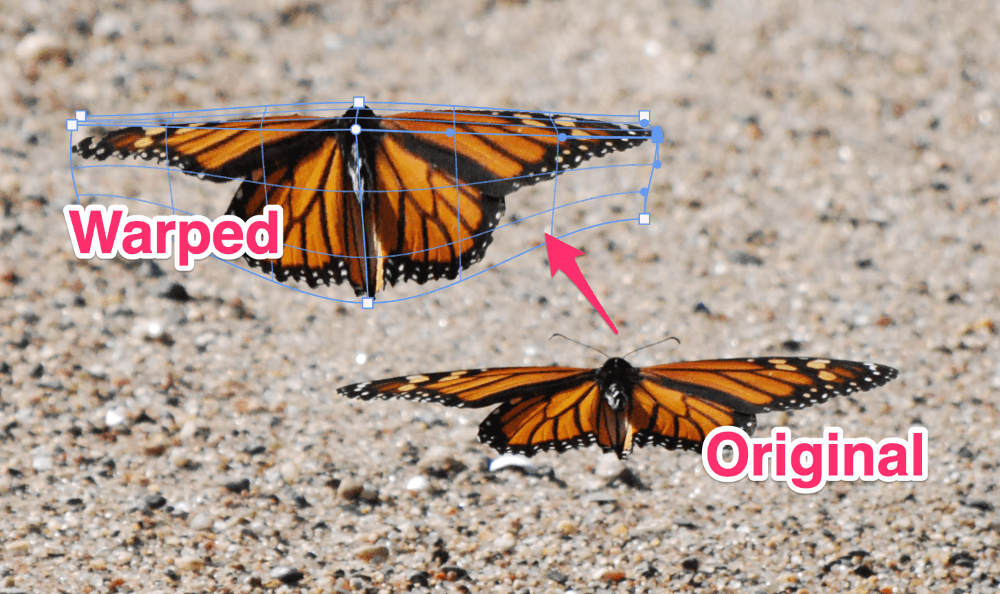
For example, I put the original and the warped versions of my butterfly side by side for you to see – plus the warp grid is still enabled, so we can understand how I moved the transformation points to create this version.
Great! Once you’re satisfied with your warp, you can press OK or Enter, and voila! You’ve accomplished your warp.
Beyond Warping: Cylinder, Split, and Puppet Tools
Now, I’ve only just scratched the surface of the amount of tools and tricks Photoshop has updated its Warp feature with. There’s Cylinder Warp, Split Warp, and Puppet Warp as well. If you’ve understood this material and feel strongly about learning more, try checking out this tutorial for examples of all the neat features available to you as a Photoshop user with the Warp Toolset.
Conclusion
So now you’ve gained a good understanding of Photoshop’s Warp Tool, and you have that much more control over your images and edits! This is a great step to take in understanding a very expansive, and ever-improving tool. So don’t forget to keep brushing up on those skills and checking for new updates.
Happy creating!