
You can easily whiten teeth in Photoshop by adding a Hue Adjustment layer to target and lessen yellow shades. To avoid affecting the whole photo, simply use the shortcut Ctrl/Command + I to fill the mask in with black, which conceals. Use the Brush with white, which reveals, paint over the teeth within the mask.
In this article, I’ll show you how to whiten teeth in Photoshop and I’ll be using a layer mask to target a specific area within the photo where I don’t want to see any yellow tones.
Table of Contents
Key Takeaways
- Target specific colors and areas of a photo with the Hue Adjustment layer. Change the master dropdown to Yellows.
- After creating the Hue Adjustment layer, use the shortcut Ctrl/Command + I (invert) to fill the mask in with black. When it comes to masks, Black conceals and White reveals.
- Use the Brush tool with white to paint over the teeth with the adjustment layer mask selected. That way, only the teeth have yellow tones removed.
- Alternative to a mask, you can use the Lasso tool (or any selection tool of your choice) to trace around the teeth before adding the Hue Adjustment layer.
Without further ado, let’s get started on this tutorial.
Note: All screenshots from this tutorial are taken from the Adobe Photoshop CC Windows version. Other versions can look different.
Step 1: Create an Adjustment Layer
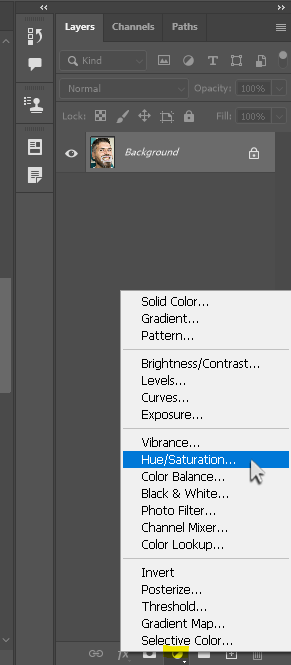
Create an adjustment layer for Hue/Saturation.
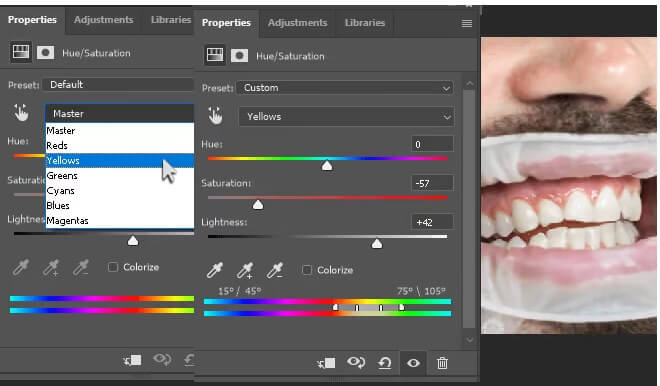
Change the master dropdown to Yellows and lower the Saturation. As you can see, the teeth are white now. The only problem is that this has affected the whole photo, not just the teeth.
Step 2: Create a Layer Mask
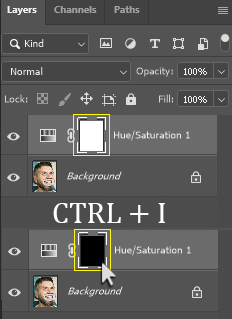
With the layer mask selected, use the shortcut Ctrl/Command + I (invert) to fill the mask in with black. You may recall from the key takeaways and my previous tutorials the rule for layer masks: Black conceals and White reveals.
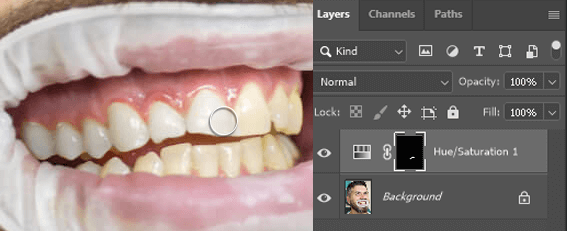
With the mask selected, use the Brush tool with white to paint over the teeth. It should be okay if you include some of the gums in the mask. Gums close to the teeth may include unwanted yellow tones that the mask can help filter out.
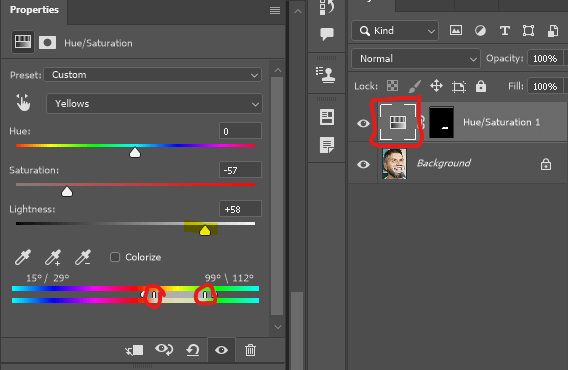
If necessary, double-click on the adjustment layer thumbnail (red square) to change the mask settings. I expanded the range of yellow color affected by this adjustment and increased the Lightness.
Note: If you find that the adjustments you’ve made are affecting the gums or other areas of the photo, check the layer mask. You can use the Brush tool to paint with black, which conceals areas meant to be unaffected by the adjustments.
You can also lower the opacity of this adjustment layer if you find that it looks too unnatural.
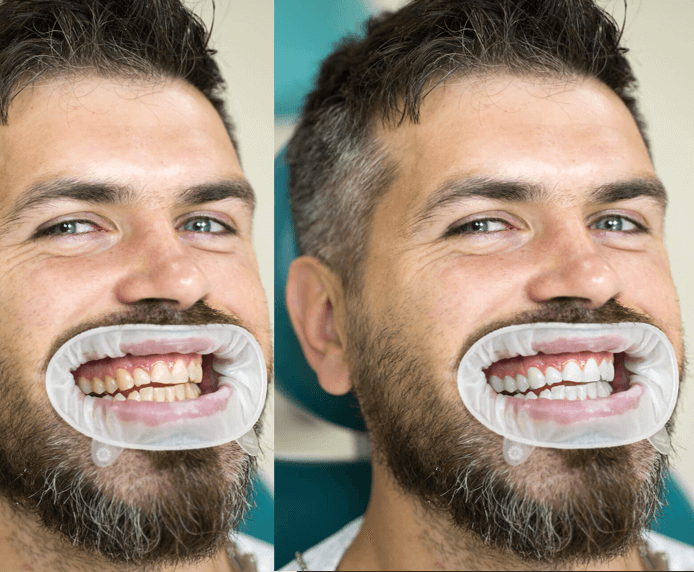
Here is our final comparison:
Final Thoughts
I hope you enjoyed this tutorial and are as impressed with Photoshop’s capabilities as I am. Adobe makes it incredibly easy to whiten teeth or change any element of a photo without affecting other areas. If only it was this easy to whiten teeth in real life!
How else might you go about whitening teeth? Have you had a color-change project of your own? Do you have any tips for other artists or graphic designers? Let me know in the comments below.