
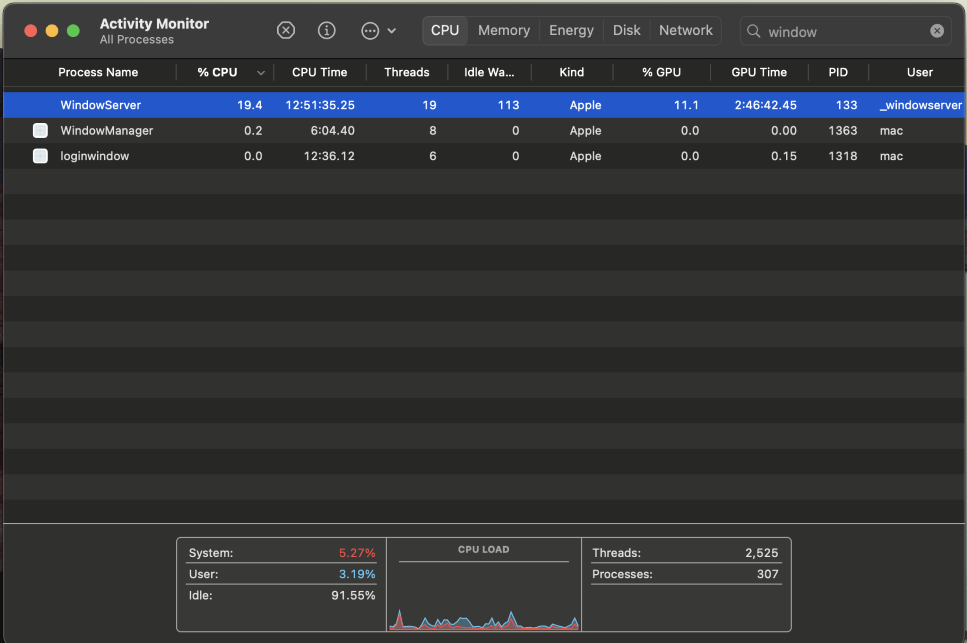
You might be wondering why your WindowServer process is taking up so much CPU resources. Even though this is a critical system process, it can slow your Mac down if it begins to malfunction. So, how can you fix it?
As a computer technician, I often see issues related to high CPU usage, and many processes can cause it. If you notice the WindowServer process consuming a lot of resources, there are a few quick fixes you can try.
Let’s get started!
Table of Contents
- Key Takeaways
- What is WindowServer on Mac?
- Option #1: Close Unneeded Applications and Desktops
- Option #2: Restart Your Mac
- Option #3: Update macOS
- Option #4: Remove any Unwanted Applications from your Mac
- Option #5: Update Applications
- Option #6: Remove Files and Widgets on the Desktop
- Option #7: Reduce Transparency and Motion
- Option #8: Turn off Night Shift
- Option #9: Disable ProMotion and Reduce Refresh Rate
- Option #10: Turn off Separate Spaces for Multiple Displays
- Option #11: Disallow Misson Control to Rearrange Spaces
- Final Thoughts
Key Takeaways
- Since WindowServer is a process responsible for graphics and effects, start by closing applications and desktops not in use. This will reduce screen changes and resource demand.
- If the issue persists, restarting your Mac can halt any processes that may be causing WindowServer to malfunction. Keep your Mac up-to-date, in case it is caused by old software.
- Remove unnecessary files and widgets from your desktop, as WindowServer works harder to display these items.
- Adjust your Mac’s visual effects by enabling settings such as ‘Reduce Transparency‘ and ‘Reduce Motion‘ in Accessibility to lower WindowServer’s load.
- Turn off Night Shift, and ProMotion, or try reducing your screen’s refresh rate, as these features can impact CPU usage.
- If you have multiple displays, disabling Separate Spaces may help, as well as preventing Mission Control from automatically rearranging Spaces.
What is WindowServer on Mac?
WindowServer is the process on your Mac responsible for drawing the graphical interface on your screen and window management. When this process begins to run a high CPU, you will likely be able to feel how slowly your Mac is running.
The more screens you have open at the same time, moving application screens around on your screen, editing images or videos, or making any changes to what you are viewing on your Mac requires more CPU resources.
Option #1: Close Unneeded Applications and Desktops
For Applications
First, assuming that all applications are working properly, close any applications you are not currently using. Reducing the number of open applications will reduce the changes made on your screen and hopefully will make an impact on your CPU usage.
To simply quit applications, use the red X at the top left corner of the window. You can also Force Quit applications by pressing Command-Option-Escape on your keyboard.
For Desktops
Your Mac also supports running multiple desktops simultaneously. While this can be extremely helpful for multitasking, if it is overused, it can severely increase the CPU usage for WindowServer.
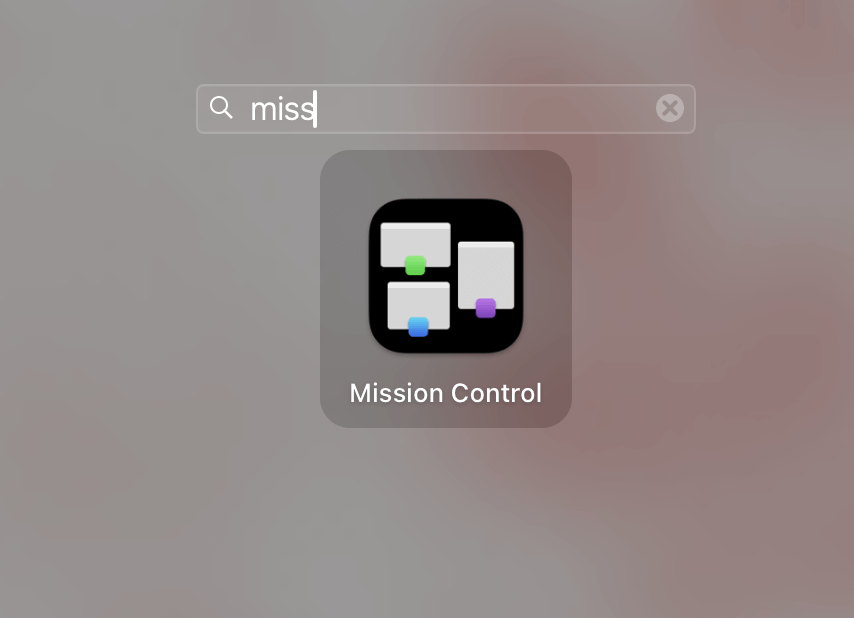
Using Launchpad, Open Misson Control (or swipe up on your trackpad using 3 fingers)
You can see all of your open desktops when you move your mouse to the top of your screen.

To close a desktop, hover over the top left corner. When the X appears, click it. When you close a desktop, the open windows will automatically merge with your primary screen.
Option #2: Restart Your Mac
Restarting a computer can be helpful because it brings any running processes to a halt. It is possible that the high CPU for WindowServer is being caused by an application or other process that is malfunctioning on your Mac. If this is the case, a quick reset should help.
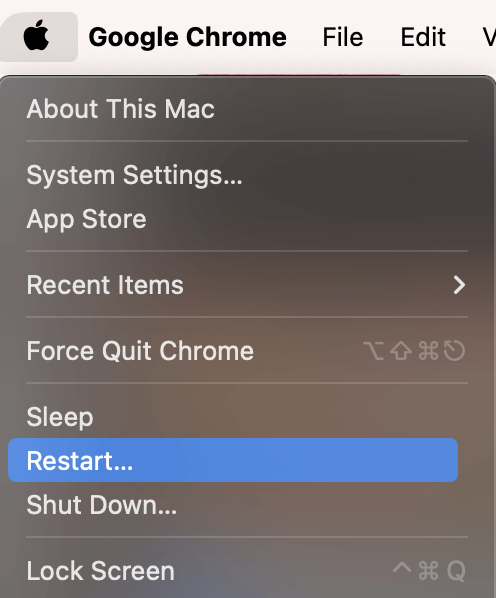
Save any unfinished work and click the Apple Menu. Choose Restart.
Option #3: Update macOS
It is also possible that there could be a problem with your macOS software that needs to be fixed or patched through built-in updates.
If you have a pending macOS update, installing it could potentially help your WindowServer High CPU.
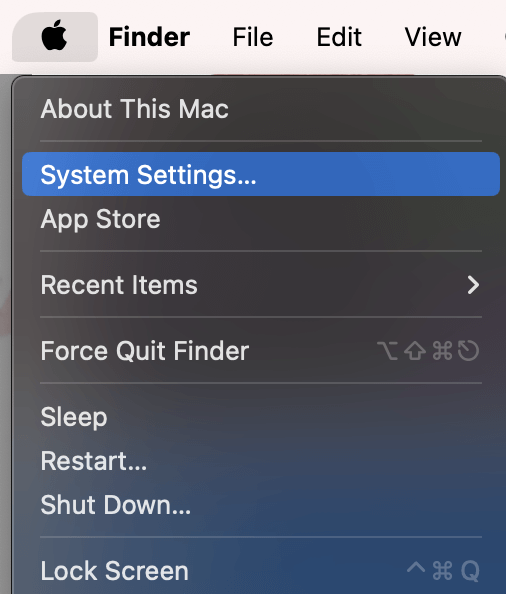
In the Apple Menu, choose System Settings.
On the left, navigate to General. Then, click Software Update.
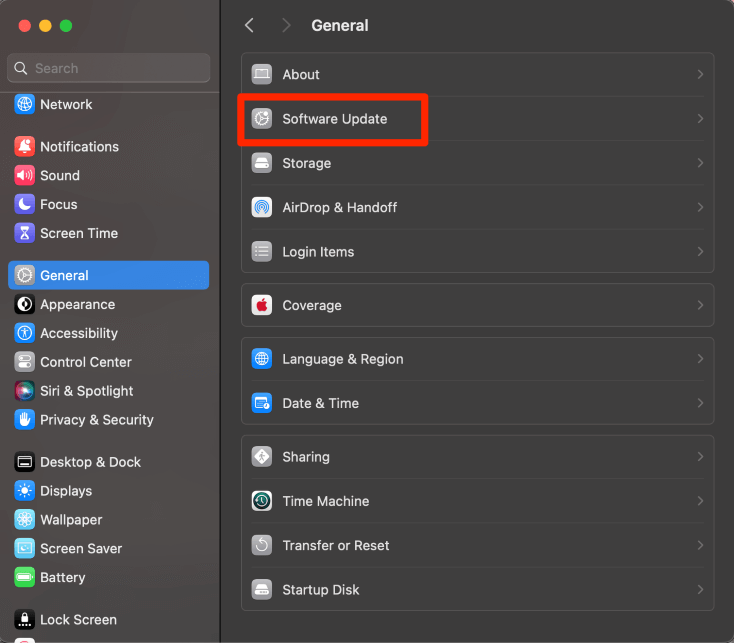
This page will tell you if you have an available software update. If you do, follow all onscreen instructions to complete your macOS update.
Option #4: Remove any Unwanted Applications from your Mac
If you find that you have many applications on your Mac that could be running in the background, then this is the time to verify that all applications are legitimate and necessary.
Look through your Applications folder on Finder and remove any applications that you do not recognize (as these could be malware) or any applications that you do not regularly use.

To delete applications, simply drag them from Finder to the trash bin on your dock. If prompted, enter your password to confirm.
Also Read: How to Delete Apps on Mac That Won’t Delete
Option #5: Update Applications
Now that we have removed any applications that we no longer use or that may have been malware, we can make sure all the applications that we do use are up to date.
For non-Apple supported applications (i.e., you downloaded them on the web) you will need to go to the website for the application to find the latest version.
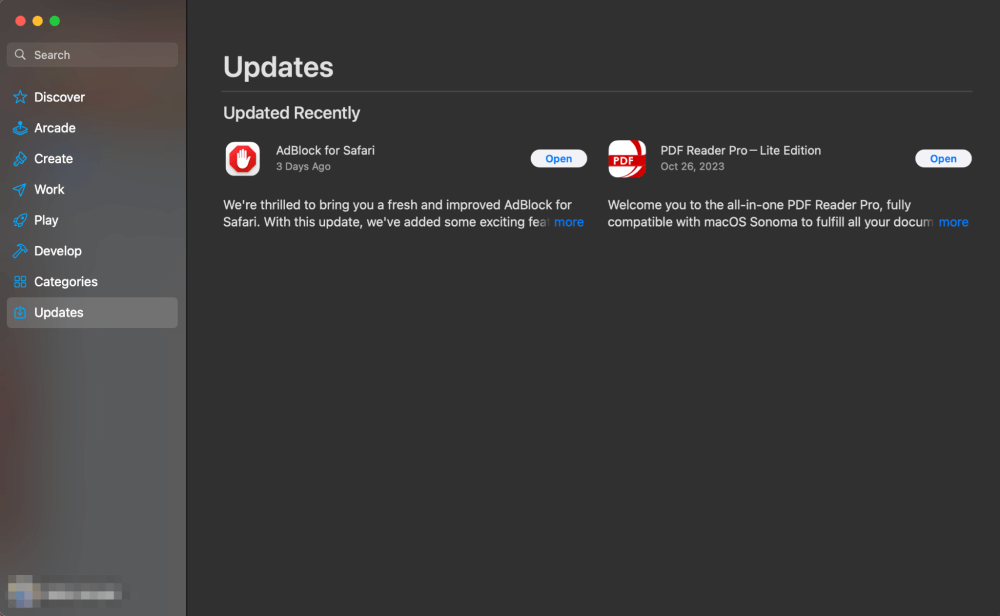
For Apple-supported applications, open the App Store from your dock or Launchpad.

On the list, open Updates. Follow the onscreen instructions to update any applications that need it.
Note: I keep automatic updates on, which is why my list is of items that were recently updated. To avoid potential problems, I highly recommend turning this on. However, still, be sure to check periodically to make sure the updates are being completed (sometimes internet connectivity, sleep mode, etc. may prevent this).
Option #6: Remove Files and Widgets on the Desktop
While keeping files and widgets directly on your desktop can be very convenient (and fun!), if you are someone who keeps a plethora of these items on your desktop, then this may be the problem you are seeing with WindowServer having a High CPU.
WindowServer needs to work to load these items to your desktop regularly and will end up using more CPU resources as a result.
While you do not need to remove all of your files and widgets, I would suggest removing the majority until you notice your CPU usage decreasing.
Option #7: Reduce Transparency and Motion
Reduce Transparency and Reduce Motion are two of the settings provided by Apple in our accessibility settings. Reduce Transparency makes each window more opaque, while Reduce Motion stops from showing the motion directly on your Mac screen. Both of these items can help to improve the CPU usage for WindowServer.
To check these settings, take the following steps:
Click the Apple Menu and System Settings.

On the left, navigate to Accessibility. Turn on Reduce Motion and Reduce Transparency.

Option #8: Turn off Night Shift
Night Shift is another setting provided by Apple that impacts WindowServer. Night Shift changes the colors of your Mac to be easier on your eyes at night. By turning off Night Shift, we could lower the CPU usage for WindowServer.
Take the following steps to turn off Night Shift:
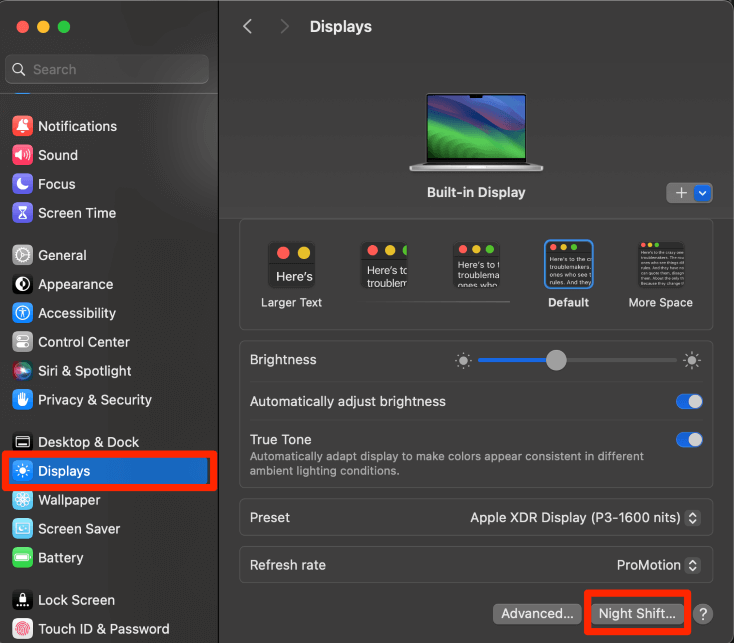
Again in System Settings, navigate to Displays on the left and click Night Shift.
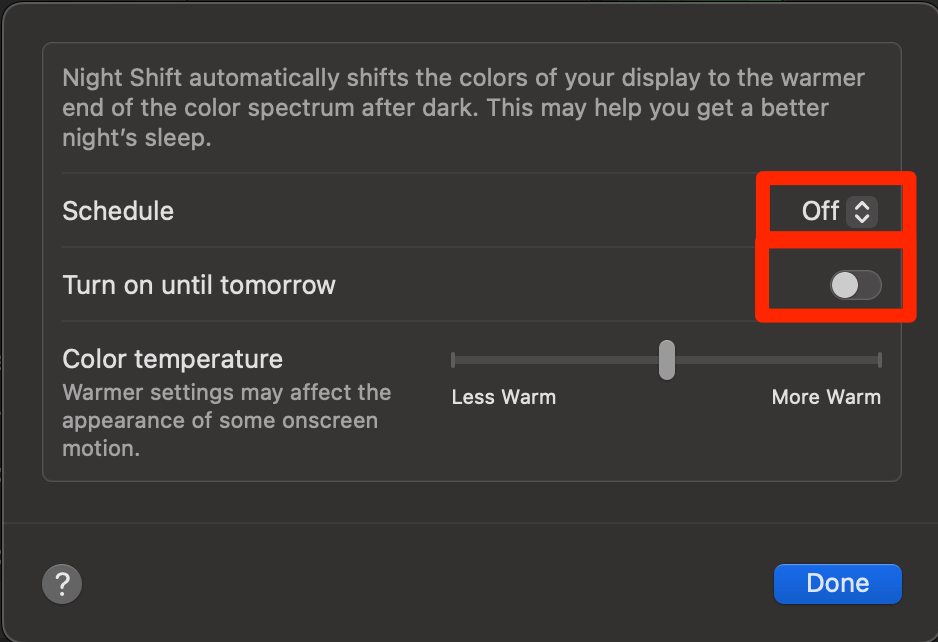
Turn off the Night Shift schedule and turn off Night Shift if you have it turned on manually.
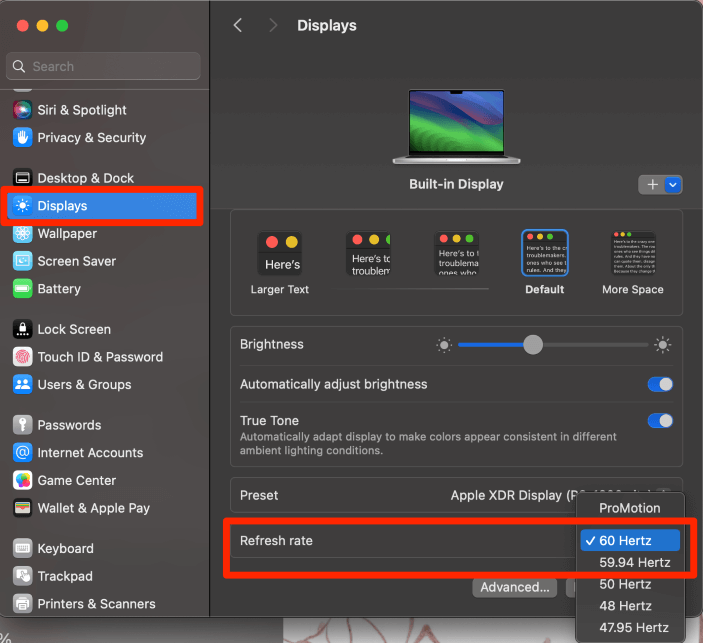
Option #9: Disable ProMotion and Reduce Refresh Rate
ProMotion is Apple’s version of a high refresh rate for the screen. It also reduces the refresh rate if you are not doing anything that could impact how fast your screen is refreshing.
That being said, this setting can highly impact your WindowServer CPU usage. If we turn off ProMotion and reduce our refresh rate, this could improve the WindowServer CPU.
Back in System Settings and Display Menu on the left, use the drop-down menu for Refresh Rate to choose a rate other than ProMotion.
Option #10: Turn off Separate Spaces for Multiple Displays
Spaces are Apple’s version of separate desktops. So, if you have multiple displays set up, you can have multiple of each. This can cause a lot of work for WindowServer and cause the CPU to go up. To improve this, turn off Separate Spaces for Multiple Displays.
In System Settings, navigate to Desktop & Dock on the left. On the bottom of the screen, turn off Displays have Separate Spaces.
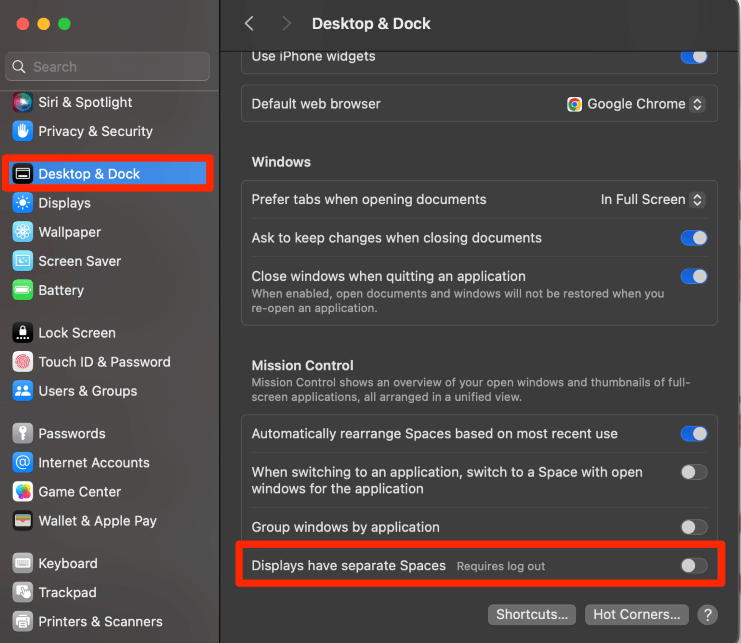
Log out or restart your Mac to allow this change to take effect. If this doesn’t work, try the next option.
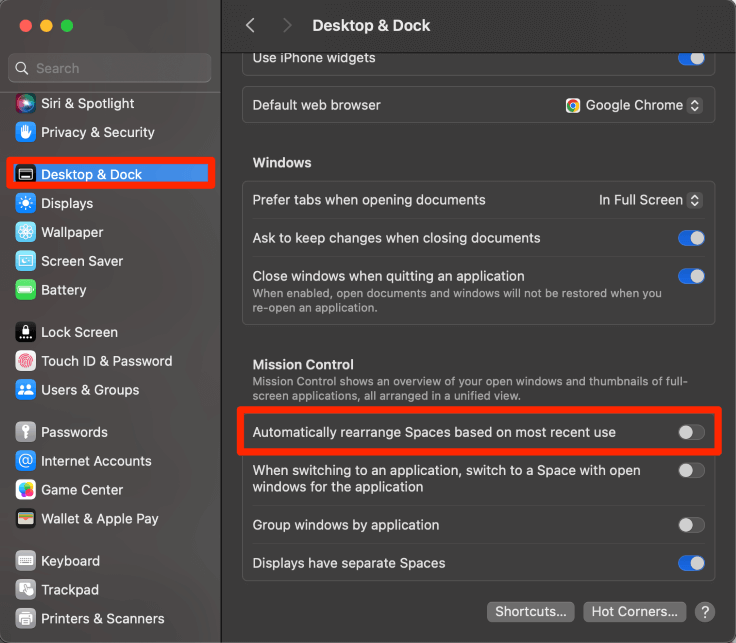
Option #11: Disallow Misson Control to Rearrange Spaces
Mission Control is what we use to manage our multiple desktops. When Misson Control is automatically rearranging Spaces, this means that the images and windows will consistently be reloading. This can cause a higher CPU for WindowServer. Turn this setting off to improve CPU.
In System Settings, choose Desktop & Dock on the left. Turn off Automatically rearrange Spaces based on most recent use.
Final Thoughts
We learned that WindowServer is the process that is responsible for creating and drawing the graphics on each window and your screen. Like any process, it can malfunction and cause runaway CPU usage on your Mac, making your computer feel sluggish.
Start with simple fixes like closing unnecessary apps and windows, or restarting your computer. If that doesn’t work, you can try tweaking your graphics settings, whether by reducing transparency, turning off Night Shift, Disabling Pro Motion, or modifying the Mission Control settings.
What worked for you? Did you get your WindowServer CPU usage down? Let us know in the comments!